What Causes A Salty Taste In Wine?

Salty Homemade Wine
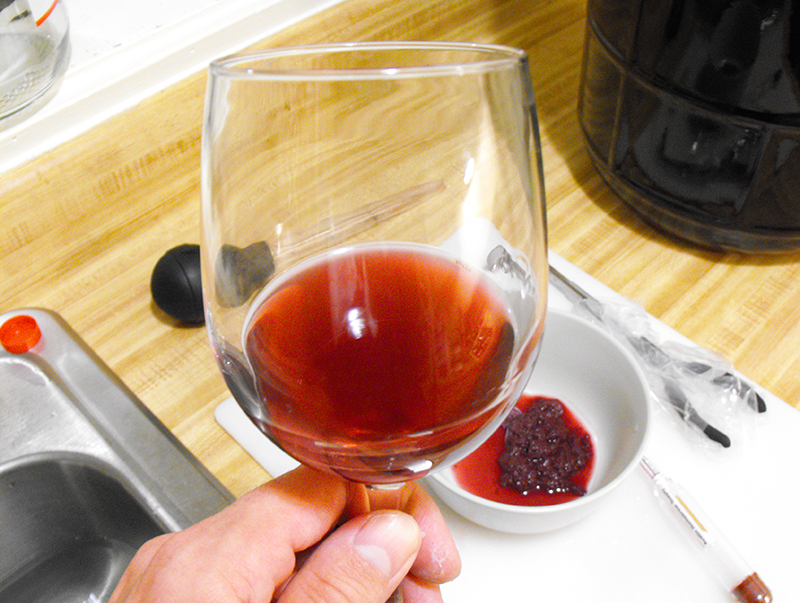
I have been aging my last years batch of wine since late September of last year. I tasted it and there seems to be a salty taste in the wine. I have never ran into this problem before. Do you have any suggestions, or will I have to call this a loss?
Name: Scott
State: CA
—–
Hello Scott,
Having a salty taste in a wine is a very unusual fault to have, but I am going to think out-loud a bit and see what I can come up with.

  1. My first thought would be that if you are aging in a wooden barrel, the remnant salts from the sodium metabisulfite may have built up over the years through insufficient rinsing or no rinsing at all. But this is very unlikely. If you make any kind of conscious effort to rinse a barrel you would be able to keep up with the trace amount of salts that are left behind with each wine batch.
  1. My second thought is that a mistake was made in a dosage added to a wine/must. For instance, yeast nutrient (diammonium phosphate) would add what some would call a salty taste to the wine if too much were added, but this would take many times the normal recommend dosage.
  1. Third would be saltiness from the grapes themselves. This could add a salty taste in wine. This could apply if you made the wine from fresh grapes from a vineyard. The mineral content of the soil is always reflected in the grape’s flavor to some degree. This is one of the reasons a grape’s origin is always noted. If you are making wine for the first time from a particular soil or terroir, then this is what could be going on.
  1. The fourth thing that comes to mind is a mold infection. The only reason I left this for last is because it is the least likely of the four. This is because by the time the wine has a salty taste from mold, it is already blatantly obvious from a visual inspection that mold as set in. So if you don’t see any patches of dried crust on the surface anywhere, or a rainbow-ed, oil-slick look on the wine’s surface, the salty taste in the wine is not being caused by a mold.Shop Wine Ingredient Kits

Beyond these things the only thing that comes to mind is accidentally putting salt in the wine. But this is obviously a pretty ridiculous thought considering I can’t even imagine how that could happen – short of a twisted friend playing cruel joke.
One thing I would suggest trying is cold stabilization. Take a sample of the wine, say a gallon, and chill it down in a refrigerator for 1 or 2 weeks. What you are looking for is excess elements in the wine to precipitate out. If you do see something drop out and it improves the flavor of the wine, then you can treat the rest of the batch in the same way.
Besides cold stabilization I doubt there is much you can do to remove the salty taste from the wine. You could try a fining agent such as bentonite, but I do not feel that this is like to help.
Best Wishes,
Ed Kraus
———————————–
Ed Kraus is a 3rd generation home brewer/winemaker and has been an owner of E. C. Kraus since 1999. He has been helping individuals make better wine and beer for over 25 years.

Top 10 Homebrewing Blog Posts Of All Time!

20162016 is here and I thought it would be a good time to reflect a little. I am having a lot of fun exploring a wide range of topics involving making beer at home. From bottling your homebrew and organizing your gear, to recipes, techniques, and tips, the E. C. Kraus Homebrewing Blog is a wealth of information. And as a way to brewing in the new year, here are ten of the most read homebrewing posts of all time.

  1. 10 Home Brewing Tips For The Beginner – Just getting started? Here’s some practical advice that will help you to avoid the pitfalls and make you a better brewer, faster!
  1. 6 Tips for Improving Mash Efficiency – Not only does improving mash efficiency get you more sugars from the same amount of ingredients, it also helps you to become a more consistent brewer.
  1. 7 Skills That Make You a Better Homebrewer – Focus on developing these skills, and brewing great beer will become second-nature. Become a talented brewer.
  1. So You Wanna Go Pro? Tips for Entering the Craft Beer Biz – Here are a few tips to help you on your journey of becoming a professional homebrewer.
  1. How Do I Increase the Alcohol Content of Homebrew? – Need your beers to knock you in the head a little harder? Here’s a simple guide that will show you how to ramp up the alcohol.
  1. Base Malt Explained: Profiles & Comparisons – Base malt is the foundation of any all-grain beer recipe. Here’s a quick overview that will help you to understand when to using one over the other.
  1. A Quick Guide To Home Brewing Water Chemistry – Water makes up over 98% of most beers, yet it’s one of the most neglected ingredients. Here’s some basics that will go far in helping you shape your water profiles.
  1. Using a Brew-in-a-Bag (BIAB) System to Make Your Beersshop_home_brew_starter_kit Brew in a Bag (BIAB) is a great way to transition into all-grain brewing without a significant investment in equipment. Check out the post for step-by-step instructions for brew in a bag!
  1. Whole Leaf Hops vs. Pellet Hops – Which is Better? – Learn when to use whole leaf hops over pellets and vice-versa. There is a difference. Find our what it is…
  1. Why It’s Fun to Experiment with Beer Brewing – Part of the appeal of brewing your own beer is you can get creative. For many this is the only way they’ll brew… be damned any recipes. Here some insights on how to get a little creative without risking the entire batch.

Thank you for visiting the E. C. Kraus Beer Making Blog. We hope you follow us through 2016 for more!
———————————–
David Ackley is a beer writer, brewer, and self-described “craft beer crusader.” He holds a General Certificate in Brewing from the Institute of Brewing and Distilling and is founder and editor of the Local Beer Blog.

What Is Beer Yeast?

Beer YeastTo answer the question: what is beer yeast? We must first back up and discuss what yeast is, in general. Yeast is the single-celled micro-organism responsible for turning sugar into alcohol. Yeast can be found almost anywhere, in the air, hanging out on fruit, even in this guy’s beard. Without yeast, there would be no beer! Even though yeast’s role in fermentation wasn’t discovered until the 1800s, brewers have been unknowingly using it to make beer for thousands of years.
There are hundreds of different kinds of yeasts, but when it comes to brewing beer, we’re interested in one in particular: Saccharomyces cerevisiae. Strains of Saccharomyces cerevisiae, commonly referred to as brewer’s yeast or beer yeast, are further divided into two broad categories:

  • Ale yeast – a top fermenting beer yeast, performing best between 55°-70°F, ferments fairly quickly
  • Lager yeast – a bottom fermenting beer yeast, performs best around 45°-50°F, takes longer to ferment

(Top vs. bottom fermenting refers to where in the fermentation vessel the beer yeast is most active.)
Within each of these two categories are many beer yeast strains that produce flavor characteristics that define a particular style of beer. One of the strongest examples of this is in Bavarian wheat beers. The banana and clove character in hefeweizens comes from the yeast!Shop Homebrew Starter Kit

The Role of Beer Yeast in Fermentation
In brewing, there are four stages in the fermentation process:
            Pitching > Respiration (lag phase) > Fermentation > Settling
In the first step, healthy, viable yeast cells are added to the wort. Next, in the respiration phase, yeast consumes dissolved oxygen in order to grow and multiply. The goal is to have a large colony of yeast cells so that they can quickly and effectively ferment your beer. (This is why you aerate your beer prior to pitching yeast.) Next comes the fermentation step. At this point, the yeast cells consume sugar and produce alcohol and carbon dioxide. Finally, when the fermentation is complete, the yeast cells settle out to the bottom of the fermentation vessel.

Liquid vs. Dry Yeast
Homebrewers have a few choices to make when selecting a beer yeast strain for their brew. Beer yeasts are available in both liquid and dry form. Dry beer yeast packets are easy to use, easy to store, relatively inexpensive and contain lots of viable cells. Many homebrewers recommend that dry yeasts be rehydrated prior to pitching; some don’t think this is necessary. Popular dry yeast producers include:

Liquid beer yeast have their own benefits. For one, they don’t need to be rehydrated, saving some time on brew day. The other benefit is that there is a greater variety of liquid yeasts than dry. The main drawback is that liquid beer yeasts tend to cost a little more than dry yeasts, but many homebrewers swear that liquid yeast cultures make better beer.
When picking a beer yeast, consider the following: First, are you brewing an ale or a lager? What style of beer are you brewing, and what strain is best for that style? Finally, would you rather use liquid or dry yeast?
In the future we’ll try to come up with a clearer answer to the question: what is beer yeast? But for now, happy brewing!
What’s your favorite homebrewing yeast strain? Share in the comments!
———————————–
David Ackley is a beer writer, brewer, and self-described “craft beer crusader.” He holds a General Certificate in Brewing from the Institute of Brewing and Distilling and is founder of the Local Beer Blog.

Leigh Erwin: Starting A Black Current Wine Ingredient Kit

Hey everybody!
Now that the Cellar Craft Sterling California Chardonnay has been bottled and put to bed (well, those few bottles that manage to escape my husbands’ clutches), I can finally move onto another wine ingredient kit! I’m going for a red this time, and actually to be a little more specific, I’m going for a red dessert wine. I ended up purchasing the Cellar Craft Specialty Black Current Dessert wine ingredient kit from E. C. Kraus.
Right off the bat, I thought “whoa, this is going to be really different”. The only wines I’ve made so far have been table wines, so making a dessert wine is new to me for the simple fact that it’s a sweeter wine with higher alcohol, and also for the fact that the instructions that came with the wine ingredient kit are a bit different than they have been for the table wines I’ve made so far.
First big difference I noticed for this Black Currant dessert wine is the preparation of the wine yeasts. For all the other wine kits, I could just sprinkle the dry yeast right on top of the juice/must and that was it. For this dessert wine, I had to take a little bit of the juice plus some hot water and create a sort of “fermentation juice solution” with those liquids and the yeasts prior to adding to the wine. I did as instructed and mixed the hot water and juice, then added the yeasts on top and left to sit for 20 minutes.
The instructions did not say to stir the yeasts or anything, so I just let it sit there. Turns out that the 20 minutes was a perfect amount of time for the yeasts to fall into the solution on their own and get cracking on making that alcohol!
Shop Wine Ingredient KitsOne thing I already did “wrong” at least as far as this wine ingredient kit goes is that I added the juice to the fermenter before I added the bentonite. I was supposed to prepare the bentonite in the bottom of the fermenter first, but since I had already opened the bag of juice for the yeast preparation I just went ahead and poured it all in before the bentonite step. The bag is very heavy (at least by my standards) and I was concerned I’d spill the juice if I left it opened while I tended to the bentonite, so in the carboy it went.
What I did instead was I prepared the bentonite with the hot water exactly as the instructions for this wine ingredient kit said except I did it all in a clean, sterilized bowl and then added it to the juice that was in the carboy after it was well mixed. I’m hoping that this will still work out OK. There was no bentonite left in the bowl when I was done, so it still got in there!
Once the bentonite was added and mixed into the juice, I checked the starting specific gravity with my wine hydrometer, then added the oak chips packet and mixed. Finally, the prepared yeast fermentation juice solution was added and mixed into the juice, covered, and fingers crossed for fermentation to actually get started! So far, everything is going great with this wine ingredient kit.
———————————–
leigh_erwin_bioMy name is Leigh Erwin, and I am a brand-spankin’ new home winemaker! E. C. Kraus has asked me to share with you my journey from a first-time dabbler to an accomplished home winemaker. From time to time I’ll be checking in with this blog and reporting my experience with you: the good, bad – and the ugly.

A Little Known Way To Sanitize Your Carboys

sanitizing_carboyI’ve heard that Pot Met [potassium metabisulfite] does not need to touch the carboy or bottles to sanitize, but the fumes are what actually does the sanitizing. Can you tell me which is correct?
Name: Bob
State: NY
—–
Hello Bob,
What you have stated above is correct. The SO2 gas that releases from a solution of water and potassium metabisulfite will sanitize the inside of your secondary carboys and primary fermenter buckets. It’s very effective, simple to do, and cost efficient.
Put about 2 or 3 inches of water in the bottom of your carboy, then add 1 teaspoon of potassium metabisulfite. It is also very important that you add 1/2 teaspoon of citric acid along with it. Without the citric acid, the SO2 will not release readily enough to do the sanitizing. If you are doing this in a bucket-style primary fermenter you will want to put the lid loosely on the fermenter to cause the gas to linger longer. Do not seal the fermenter or carboy air-tight. Allow the fumes to vent.
You only need to let the sulfite/water solution fume for about 30 minutes, and the fermenter will be sanitized. No need to rinse anything off. Just dump the solution out of the fermenter then add your wine.Shop Sodium Metabisulfite
To take this method of sanitizing a fermenter even further, you can also put your smaller pieces of wine making equipment in a primary fermenter while sanitizing it. You can put in: hydrometers, siphon hose, rubber stoppers, air-locks. Anything that will fit in fermenter, and all will be sanitized at the same time.
This method works whether you use the potassium metabisulfite, sodium metabisulfite or Campden tablets. All can be added to water with citric acid to make this fuming sanitizing solutions. To read more about these sulfites you may want to take a look at another blog post: “A Simple Guide To Metabisulfites“.
This using sulfite fumes to sanitize can also be applied to wine bottles just as well. Mix up the solution and add an inch or two to each wine bottle. Let sit for 30 minutes; drain then use.shop_wine_bottles
Using a sulfite solution is an easy and effective way to sanitize your carboy and other fermenters and equipment. Hope this information helps you out.
Happy Winemaking,
Ed Kraus
———————————–
Ed Kraus is a 3rd generation home brewer/winemaker and has been an owner of E. C. Kraus since 1999. He has been helping individuals make better wine and beer for over 25 years.

The Top 10 "Real" Reasons Why You Should Brew Your Own Beer

Someone Who Brews Their Own BeerWhen homebrewers are asked the reason why they brew their own beer, many will mention that it’s a great way to save money. This may be true, but very few will say it’s the real reason to homebrew. Besides, homebrewers often make a sizable investment in new equipment and enjoy expanding their home brewery arsenal with new gadgets and gizmos.
So why do homebrewers brew their own beer? Why go through several hours in the kitchen or garage standing over a boiling brew kettle, followed by several weeks waiting for the beer to be ready to drink? The short answer is because they love it. More extensively, here are the 10 reasons why you should brew your own beer:

  1. To exercise creativity – Many describe brewing as an art form. In fact, we often refer to it as a “craft” because of the highly demanding, constantly changing nature of the brewing process. The average homebrewer is bound to experience many ups and downs as he modifies past beer recipes and stumbles upon new ones. It is the creativity of the brewing process that provides immense satisfaction.
  1. To have fun with friends – Home brewing is an extremely social hobby. What better reason to get together with friends, share your passion with them, exchange ideas, and enjoy some cold brews?!
  1. To get geeky on science – If we’d known chemistry would help us make beer, we would have paid more attention in high school! Homebrewers get to assume the role of mad scientist as they master using complex instruments like hydrometers. You’ll certainly feel like a lab student at times, such as you find yourself calculating IBUs or adjusting brewing water. Homebrewing doesn’t have to be very science intensive, but some people really that part of it!
  1. To challenge yourself/learn something new – Homebrewing doesn’t have to be difficult, but many brewers enjoy challenging themselves to make better beer as they experiment with new homebrewing equipment, new ideas, and new recipes. There is an endless amount of knowledge to be gained about beer and brewing, and there are countless homebrewing books and online resources on the subject. The best part of it is that you can grab a homebrew and call it “research”!Shop Home Brew Starter Kit
  1. To drink beers that can’t be found elsewhere – This is my favorite reason for brewing my own beer. Can’t find a gruit, cranberry lager, or ale infused with papaya? When you’re craving a beer you just read about but can’t seem to get your hands on it, simply brew your own!
  1. To enjoy a hands-on hobby – Homebrewers are big advocates of DIY projects like building a mash tun or sparge arm. You can really lose yourself in your work, and many homebrewers have described the process as meditative and cathartic.
  1. To take pride in something you made yourself – “Look mom, I did it!”…We all like to flex our egos from time to time, so why not bask in the glory of your work for a change? Especially when you can drink your work!
  1. Homebrew makes AWESOME gifts – There’s just nothing better than a homemade, consumable gift. Now you can stop worrying about holiday gifts for friends and family…your beer will make great stocking-stuffers!
  1. To participate in a timeless tradition – Man has been making beer since before recorded history. In other words, homebrewing has always been fashionable and is certainly not going out of style any time soon…so what are you waiting for?!
  1. To prepare for armageddon – If !#*! hits the fan, you should know how to make alcohol, plain and simple. Your services will be in high demand!

So, what’s your favorite reason for brewing your own beer?
———————————–
David Ackley is a beer writer, brewer, and self-described “craft beer crusader.” He holds a General Certificate in Brewing from the Institute of Brewing and Distilling and is founder of the Local Beer Blog.

Leigh Erwin: Bottling My Homemade Chardonnay Wine

Cellar Craft SterlingHi everyone!
So, I finally finished my Cellar Craft Sterling California Chardonnay! I’m very happy it’s done, especially since it’s my second time attempting to make it, but I’m still not 100% convinced it’s going to turn out the best it can be. The specific gravity on my wine hydrometer never got exactly to where it was supposed to—it was very close though.
By the end, the specific gravity was supposed to be 0.998 or less, but as luck would have it, it ended up at 1.000. It’s strange because when I started the clearing stage it was at 0.998, but when I went to bottle the wine, it was back up to 1.000. I suppose maybe the temperatures weren’t exactly the same on those two days, but I foolishly did not check.
Anyway, bottling this homemade wine went very smoothly. I steamed the corks before putting them into the wine bottles as I have been doing, and cleaned and sterilized more bottles that I probably needed. I ended up only needing 23 wine bottles in the end, so I must have lost a little bit of wine at some point. I do remember that every time I racked the wine there was a little left over in the bottom of the carboy, so that’s probably where most of my losses occurred. I suppose the only other losses would be during evaporation over time, but that’s pretty much out of my control (other than topping off, but I didn’t do that).
One thing I should note is that I did deviate from the instructions a little bit in terms of when I did the actual bottling of the wine. Life kind of got in the way, and I did get a little lazy for a while there, so I ended up delaying the bottling process for a couple of weeks longer than usual. I figured since it was completely closed off from oxygen, I didn’t really have anything to worry about. Hopefully it sitting there in the carboy for longer only makes it better!Shop Wine Corks
Since I am currently pregnant, I haven’t actually tasted the wine so I have no idea how it turned out! My husband sampled it and said he thinks it reminds him of the Gewurztraminer I made previously, but with less floral character. He also guessed that the alcohol content was on the relatively high side for a Chardonnay (as it was with my Gewurzt), though when I crunched the numbers, it turned out to be 13.13%. It’s not as high as the Gewurzt, so maybe it was the fact that he was tasting the wine pretty much immediately after bottling the wine that made it seem a little unbalanced.
I lovingly reminded my husband to save me at least half a case so that after the baby is born I can actually enjoy some of the wine myself!
All and all, bottling this homemade wine at home went pretty smooth. No surprises—and that’s a good thing. Now all we have to do is let the wine sit for a while and see how things turn out.
———————————–
leigh_erwin_bioMy name is Leigh Erwin, and I am a brand-spankin’ new home winemaker! E. C. Kraus has asked me to share with you my journey from a first-time dabbler to an accomplished home winemaker. From time to time I’ll be checking in with this blog and reporting my experience with you: the good, bad – and the ugly.

Leigh Erwin: Cold Stabilizing Your Wine

Thermometer In Wine MustHi all!
I’m still just waiting for my Cellar Craft Sterling California Chardonnay Reserve to finish clearing so I can move onto the next stage, but for now I wanted to talk a little bit about a specific stage in the winemaking process that I’ve noticed is never present in any of the winemaking kits I’ve made so far…
Cold stabilization.
Cold stabilization in wine making is a common practice, so why is it not done in any of the home wine making kits I’ve made?
Cold stabilization is basically the process of keeping tartaric acid crystals from forming in the wine after it has been bottled. If a wine has not gone through cold stabilization before bottling, sticking the wine in the refrigerator, cellar, or otherwise very cold room may cause tartaric acid crystals, or “wine diamonds” to form. These crystals aren’t bad for you (it’s just cream of tartar!) and won’t hurt the wine, but some think it’s better for aesthetic purposes.
Tartaric acid is naturally present in grapes, so theoretically any wine is at risk of developing tartaric acid crystals or “wine diamonds” when at the right temperature or if the wine just jostled around or bumped just right. There has to be a concentration of tartaric acid higher than what can be handled by the wine in order for these crystals to be created under those circumstances, but for consistency, winemakers usually perform a cold stabilization prior to bottling regardless.
Actually performing a cold stabilization is actually pretty simple according to what I’ve read online.
All you have to do is before bottling, reduce the temperature of your wine to 30°F or lower for at least 36 hours. Doing this might be a little difficult if you don’t have a space refrigerator or if you’re not making your wine in the middle of winter in a cold locale, but if you have the ability, it wouldn’t hurt to just do it.shop_temperature_controller
I also read that it is recommended you add potassium bitartrate powder to the wine right before you drop the temperature, as the presence of the potassium bitartrate (cream of tarter) will help pull any tartrate crystals out of the wine faster than if you were simply relying on the temperature drop.
The amount of alcohol present in your wine could affect the ideal cold stabilization temperature, so a simple mathematical equation is all you need to figure that out. All you have to do is take the alcohol level of your wine, divide that by 2, and then subtract 1. This will get you the ideal cold stabilization temperature for your wine in Celsius.
Now that I’ve read about how to do a cold stabilization in wine making, I have a feeling I know why it’s not listed on the instructions for any home winemaking kit I’ve ever made. It’s probably related to the fact that you need an entire separate refrigerator or need to be living in a place where it’s very cold outside when you’re making that wine in order to successfully cold stabilize your wine. Of course, they sell cooling jackets for stainless steel tanks, but that’s not something the home winemaker has.
———————————–
leigh_erwin_bioMy name is Leigh Erwin, and I am a brand-spankin’ new home winemaker! E. C. Kraus has asked me to share with you my journey from a first-time dabbler to an accomplished home winemaker. From time to time I’ll be checking in with this blog and reporting my experience with you: the good, bad – and the ugly.

Leigh Erwin: What's The Best Temperature For Wine Yeast?

Yeast Fermentation TemperatureHi all!
I just wanted to follow up a little bit more on the fermentation temperature “issue” I had noted in my last post. If you recall, the instructions for primary fermentation for my Chardonnay wine had a recommended maximum of 75oF, however, the heating pad I was using (that’s built specifically for winemaking) kept the wine at around 78oF. I was basically wondering if 3oF would really make that big a difference, and if it’s still feasible to ferment my wine at that temperature without any problems. Is staying below 75°F the best temperature for wine yeast?
Reading around the message boards and other sites, it appears as though there are a lot of people who have no trouble fermenting their wines at 78oF. The big thing to note here, however, is that it all depends on which specific wine yeast you are using. Some wine yeasts only function in certain temperature ranges, while others function at different temperature ranges. If I’m using yeast that’s still good through 78oF, regardless of what the range the kit instructions recommended it should still be fine.
So, what is the best temperature for the wine yeast I was using? I threw out the yeast packaging right after I used it and couldn’t find that information anywhere on the instructions or online, so I’ll have to just make a guess. I know I have used the yeast strain EC-1118 in the past, so I’m going to assume that’s the same one I used for this particular wine and go from there. Doing a quick online search, it turns out that the appropriate temperature range for EC-1118 is 50oF to 86oF. That leaves me plenty of wiggle room and my 78oF seems like it should work just fine for this particular wine and temperature combination.
For fun, I decided to look up the yeast profile chart on the Adventures in Homebrewing website to see what the temperature ranges for the other yeast types available are. Some wine yeasts are better for making dry white wines than others, and if I’m reading this chart correctly, it appears as though these are the yeast strains listed best to worst for making dry white wines: ICV D-47, EC-1118, K1V-1116, 71B-1122, and RC212. After a quick search for appropriate temperature ranges for each of these five yeasts, this is what I came up with:

According to what I found, most of the wine yeasts available from the yeast profile chart on the Adventures in Homebrewing website have incredibly wide ranges of temperatures at which they can survive. As long as I wasn’t using the ICV D-47 yeast, the temperature that my heating pad made my wine (78oF) should be just fine.
It kind of makes me wonder though, why do the kit instructions say to ferment no higher than 75oF? Could they be assuming the winemaker might be using any number of wine yeasts and this is just the average high temperature that is appropriate? I suppose perhaps at the higher (or lower) temperatures you can still make the wine just fine, though the specific dates for each step will change depending upon that bit of information. Keeping it no higher than 75oF probably maximizes the likelihood that the wine will progress in the time frame specified by the instructions.
Does anyone else have any insights for the best temperature for wine yeast?
———————————–
leigh_erwin_bioMy name is Leigh Erwin, and I am a brand-spankin’ new home winemaker! E. C. Kraus has asked me to share with you my journey from a first-time dabbler to an accomplished home winemaker. From time to time I’ll be checking in with this blog and reporting my experience with you: the good, bad – and the ugly.

3 Tasty Snacks Made with Beer

Sauteed Onions Made With BeerMost of us think of beer as an end product, but did you know that it can be used as an ingredient, too?
Beer is a key ingredient in all kinds of food recipes, from sauces and marinades to cocktails and desserts. Check out these three delectable foods made with beer!

Beer-Charged Caramelized Onions (via The Homebrew Academy)
I would put caramelized onions on just about anything – steak, eggs, casserole, pizza, tacos. Though caramelized onions can be relatively simple, this recipe uses a dash of beer and a little brown sugar to make them irresistible. Try it with this Newcastle Brown Ale clone.
Ingredients

  • 4 yellow onions
  • 1 tbsp beer (amber or brown ale work great!)
  • 1 tbsp olive oil
  • 1 tbsp unsalted butter
  • 1 tsp kosher salt
  • 1 tsp brown sugar

Directions

  1. Cut the onions into 1/4” slices.
  2. Melt the butter and oil in a skillet. Add the salt and brown sugar. Next, add the onions to the skillet and sauté for about five minutes, stirring often to avoid burning.
  3. Turn down the heat and cook for about 40 minutes, turning periodically until the onions are caramelized through.
  4. When the onions are thoroughly caramelized, add the tablespoon of beer and scrape up all the yummy brown bits.
  5. Serve over grilled meat, pasta, fajitas, or just about anything else and enjoy!

Pilsner-Battered Asparagus with Lemon-Chive Aioli (via Draft Mag)
If you have to eat your veggies, you might as well eat them battered, fried, and dipped in mayonnaise, right? Even better, add beer! This recipe works great with bright, effervescent beers like Bohemian-Style Pilsner.
Ingredients
For the asparagus:

  • 3⁄4 cup all-purpose flour
  • 1⁄2 cup cornstarch
  • 1 1⁄2 teaspoons kosher salt
  • 1⁄2 teaspoon baking powder
  • 1/4 teaspoon cayenne pepper
  • freshly ground black pepper
  • 1 cup pilsner
  • 4 cups peanut oil
  • 1 pound medium asparagus, ends trimmed

For the aioli:Shop Accurate Scales

  • 1⁄2 cup mayonnaise
  • 1 teaspoon finely grated lemon zest
  • 2 teaspoons fresh lemon juice
  • 1 small garlic clove, mashed with a pinch of salt
  • 1 tablespoon minced fresh chives

Directions

  1. Combine the dry ingredients from the asparagus portion of the recipe in a bowl. Mix in the pilsner to combine. Set aside for 30 minutes.
  2. Combine the ingredients for the aioli and season to taste. Place in the refrigerator until ready to serve.
  3. Preheat oven to 200˚F. Heat the peanut oil in a pan and heat to about 360˚F. Dip the asparagus spears in the batter, then gently place them in the hot oil and cook until lightly browned. (Do these in batches so as not to overcrowd the pan.)
  4. When golden brown, transfer asparagus to a baking pan lined with paper towels. Keep them in the oven until the whole batch is ready to serve.
  5. Serve with the lemon aioli and enjoy!

 
Homebrewed Beer Dip (via Taste of Home)

Need something quick and easy for the big game? Look no further! This ranch-style dip takes all of about five minutes to whip together and can be made with a wide range of beer styles. Try it with an aromatic tripel or a saison.
Ingredients

  • 16 oz. of cream cheese
  • 1/3 cup of beer
  • 1 envelope ranch salad dressing mix
  • 8 oz. shredded cheddar cheese
  • pretzels, crackers, or chips for dipping

Directions

  1. Beat together the cream cheese, beer, and ranch dressing mix.
  2. Stir in the cheddar until smooth.
  3. If desired, zap in the microwave to serve warm.
  4. Serve with pretzel, chips or crackers and enjoy!

Looking for more foods made with beer? Check out these Chocolate Stout Cupcakes!

———————————–
David Ackley is a writer, brewer, and craft beer marketing consultant. He holds a General Certificate in Brewing from the Institute of Brewing and Distilling and is founder of the Local Beer Blog.