Best Home Wine Making Books For Beginners

Wine Making BooksIf you’ve been thinking about making your own wine but not sure where to start, my suggestion to you is to get a good wine making book. There are many excellent wine making books that cover everything from making good ole country-style wines to making wines from fresh grapes.
Which of these books is best for you really depends on the kind of wine you are interested in making and whether you want to make it from fresh fruits or from wine making concentrates. With that in mind, here a breakdown of books on wine making at home, based on the kind of wine you want to make:

I’M INTERESTED IN FRUIT WINES. . .
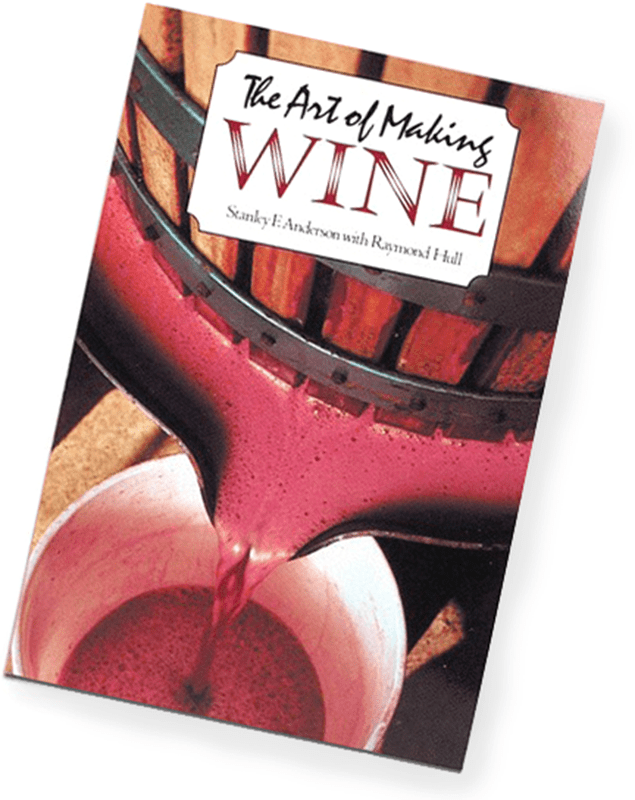
One of my all-time favorite wine making books for making fruit wines is, The Art Of Making Wine. It has a lot of good recipes for making wines from fresh blackberries, raspberries, apricots, apples and more. It also goes through the wine making process in fine detail.
Guidelines To Practical Winemaking

I’M INTERESTED IN GRAPE WINES. . .
A great book the covers the basic aspects of making wine from fresh grapes is Guidelines To Practical Winemaking. It details all the procedures required to make your own wine from any type of wine grape.
From Vines To WinesIf you think you would like to grow your own grapes as well as ferment them, then the book From Vines To Wines is an ideal wine making book. The first half covers the establishment and maintenance of your own backyard vineyard, everything form planting to picking. The second half of the book details the process of making wine from those grapes.

I’M INTERESTED IN USING WINE CONCENTRATES. . .
All the wine making juices we offer come with very specific directions on how to make them. In all sincerity, a book is not necessary. However, to really be on top of your game, go ahead and grab one of our wine making books.

OTHER WINE MAKING BOOKS…
We have many other wine making books on various aspects of wine making at home. From mead making to wood working projects for making wine equipment. Also don’t forget, a book makes a wonderful gift for Christmas.
———————————–
Ed Kraus is a 3rd generation home brewer/winemaker and has been an owner of E. C. Kraus since 1999. He has been helping individuals make better wine and beer for over 25 years.

10 Home Brewing Gift Ideas For The Holidays!

Santa Bringing Home Brewing Gift IdeasIt’s that time of year to start thinking about home brewing gift ideas for your favorite homebrewer. With so much equipment and ingredients to choose from, where do you start?
The best way to figure out what to get a homebrewer is to simply ask them. Chances are, they already know exactly what they need to expand their home brewery. Maybe it’s time for a bigger brew kettle. Maybe what they really want is a keg. If you want to make sure they get what they really want, just ask discreetly – or not so discreetly!

If you’re still having trouble coming up with some home brewing gift ideas, here’s a home brewing gift guide. Consider one of these ten options!

  1. Homebrewing Equipment KitHome Brewing Kit 140 
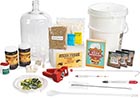
– Maybe your special someone has been talking about homebrewing, but hasn’t quite made the jump. Help them get started with a 1 Gallon or 5 Gallon Brew, Share, Enjoy Kit! Many of our homebrew starter kits come with a beer recipe kit, so they will have everything they need to make beer!
  1. Homebrew Recipe KitBeer Recipe Kit 140 If your homebrewer already has all the gear, help them get a new batch going with a recipe kit. We have dozens of kits to choose from, from stouts, to IPAs, to wheat beers, and more. (Maybe you can get them to brew your favorite style this time!)
  1. Brewing Classic StylesDesigning Great Beers 140 – For the brewer that wants to explore brewing different styles of beer!  There are over 80 winning recipes that anyone can brew.
  1. Adventures in Homebrewing Gift CardIf you still short on home brewing gift ideas, let them choose for themselves.  A gift card is one of the best gifts a home brewer can get, since there are many bits and bobs needed to brew great beer. A gift card guarantees that they’ll get something they want – and they’re easy to wrap, too!
  1. New Carboy/FermenterFermenter 140 – Once they get started, many brewers want to make as much beer as they can. One of the ways to do that is with additional fermentation space. A new homebrew fermenter will help them make more beer more often!
  1. Temperature ControllerTemperature Controller 140 – Speaking of fermentation, temperature control is one of the key elements of a successful fermentation. This temperature controller from Johnson Controls will help regulate the temperature of a dedicated fermentation fridge. Its “plug and play” design is easy to install.
  1. RefractometerRefractometer 140 – A refractometer measures the specific gravity of unfermented beer, making it easy to calculate the potential alcohol content of the beer. It’s a nice upgrade over a hydrometer because it requires only a few drops to take a reading – that means more beer for drinking!
  1. Keg & Carboy WasherMarks Keg Washer 140 – One of the more tedious tasks involved with homebrewing is clean-up. Help your homebrewer save some time and energy with a keg and carboy washer! It’s one of the better time-saving home brewing gift ideas.
  1. Stir PlateStir Plate 140 – A stir plate is one of those upgrade that can make a significant improvement in beer quality. It stirs the yeast prior to pitching, making sure the yeast is healthy and ready to go. It’s great for making yeast starters.
  1. A New Brew KettleBrew Kettle 140 – If your homebrewer has been brewing on the same equipment for a while, chances are they’ve thought about upgrading to a larger system. Brew kettles can be a big investment, so maybe you can help them out on their journey to bigger and better beer.

Are you a homebrewer? What do you really want this holiday season? Make life easier for others and pass along some home brewing gift ideas… at least give a hint!

Fixing A Leaky Keg: A Simple Guide

Fixing A Leaky KegWhile kegging your homebrew may be less time consuming than bottling, it offers its own set of challenges. In particular, it’s important to know how to go about fixing a leaky keg: how to locate and detect where it’s leaking gas: pressure relief valve, etc. Otherwise, you’ll have a very hard time carbonating your homebrew, and may well waste a good deal of money filling your CO2 tank.

The first step in fixing a leaky keg is to determine where the leak is. Follow the steps below to test your homebrew keg system for leaks:

  1. Assemble your home brew keg. Pull the lid into place by pulling up on the bail (clasp), but allow the CO2 pressure from step 2 to help you get a good seal.
  1. Connect your CO2 regulator to the CO2 tank and attach the gas-in hose to the gas-in post on the keg.
  1. Apply 10-20 psi of pressure to your keg. Seal the lid by pushing the bail into place.
  1. Listen for any sounds of gas escaping.
  1. Shop SanitizersUse a spray bottle filled with soapy water or a Star San solution to spray around some of the common leak points: the lid, the posts, the poppets, the pressure release valve, the quick disconnects, and the hose connection points. If you see bubbles, you have a leak.

If you can’t find any leaks in your homebrew keg system, congrats! You’re in good shape for the time being. If you do find a leak, it’s time to take action and fix it. Here some common steps for fixing a leaky keg.

  1. Turn off the gas at the regulator.
  1. Vent pressure from the keg by pulling up on the pressure release valve. Don’t skip this step!
  1. Take apart the keg or fitting at the source of the leak and inspect for damage or wear. Keep in mind that the posts and pressure relief valve can unscrew from their positions.
  1. Sometimes a part may just need to be cleaned. Clean the fitting and reassemble the keg, making sure all fittings are tight.Shop Faucet Tower

Repeat the test for leaks as described above.

  1. If you still have a leak, apply a thin layer of keg lube around the problem fitting to see if it fixes the leak.
  1. Reassemble the keg and repeat the test as described above.
  1. If you still have a leak, you probably need to replace the part, whether it be the o-rings, the post, the pressure relief valve, or the tubing. Replace the part and repeat the leak test to make sure your keg holds pressure.

Shop Keg SystemKeeping your homebrew keg system free of gas leaks is important, but it’s not difficult. Consider keeping a selection of spare keg parts on hand for fixing a leaky keg. You’ll be glad you did when an emergency arises.
Have you ever had trouble with a leaky keg? Share how you fixed leaks in your homebrew keg system in the comments below!
———————————–
David Ackley is a beer writer, brewer, and self-described “craft beer crusader.” He holds a General Certificate in Brewing from the Institute of Brewing and Distilling and is founder of the Local Beer Blog.

Quick Guide To Dry Hopping In A Keg

What You Need For Dry Hopping In A KegThough you can certainly dry hop during secondary fermentation, some homebrewers prefer dry hopping in a keg. This is similar to what British brewers do when they dry hop in the cask. Dry hopping can enhance the hop aromas in your beer, but how do you do it without clogging the keg? What is the most sanitary procedure for dry hopping in a keg of homebrew?
It’s really quite easy. First, gather the following:

  • Hops – Low alpha acid hops are popular for dry hopping, though some high alpha hops are suitable as well. You might consider matching whatever flavor and/or aroma hop addition you used in the beer. If you’ve never dry hopped before, an ounce of hops is a good place to start.
  • A small straining bag – This is to hold the hop material and keep it from spreading all throughout your keg of beer.
  • A small stainless steel or glass item to be used as a weight – A few marbles are perfect; a shot glass can work too.
  • Optional: A length of string or non-flavored dental floss – Some homebrewers like to keep the hops from sinking all the way to the bottom of the keg or like to remove them after a certain number of days.

Then just follow the steps below!

Steps For Dry Hopping In A Keg

  1. Sanitize everything (except the hops). I prefer to boil the bag, the weight, and the string for about twenty minutes. At this point, I’d rather get sterileShop Hop Bags water in the beer than sanitizer solution. Whether or not you should sanitize the hops is debatable. I choose not to because 1) Most hops you get will be nitrogen flushed and frozen, 2) hops have antimicrobial properties, and 3) beer has alcohol in it. If you feel your hops are suspect or you’re dry hopping a very low alcohol beer, you might consider gently steaming the hops for a few minutes before using them to dry hop your keg.
  1. Put the hops and the weight in the bag and tie it closed. Make sure to tie the bag well so the hops don’t come out and get everywhere.
  1. Optional: Tie the string to the bag and secure it to the keg. If you’d like, you can suspend the hop bag about halfway down the keg, tying the other end to the handle of the keg. The idea is that you can limit the amount of time the hops are in your beer. As you drink the beer and the level in the keg goes down, the hops will eventually be suspended from the string. Using something as thin as dental floss will allow you to seal the keg without any leaks.
  1. Drop the bags of hops in the keg. Turn off the CO2 at the regulator and fully vent the keg to release pressure. Open the lid and gently drop the bag in the beer.
  1. Shop Draft SystemApply pressure to the keg and proceed as normal! You may wish to vent the keg a couple times to eliminate any air that got in.

That’s it! That’s all there is to dry hopping in a keg. Now enjoy the delectable hop aromas in your homebrew!
————————————
David Ackley is a beer writer, brewer, and self-described “craft beer crusader.” He holds a General Certificate in Brewing from the Institute of Brewing and Distilling and is founder of the Local Beer Blog.

Home Brewing Made Easy With Kits!

Home Brewing Made EasyAre you overwhelmed by the idea of home brewing beer? Have you looked at all the tips and advice on the E. C. Kraus Home Brewing Blog and wondered whether brewing beer at home is something you can handle? You need home brewing made easy!
Though there is quite a bit of science behind brewing, making beer at home does not have to be complicated. Home brewing can be simple. In fact, simple home brewing is a goal for many homebrewers. Some find the hobby more enjoyable without all of the scientific measurements and calculations. Besides, if you think about the way people brewed hundreds of years ago, they didn’t have thermometers and hydrometers or even very specific volume measurements. But you better believe they still made beer!
In its simplest form, home brewing can be done in very few steps. I’ve gotten them down to four. Here are the 4 steps of home brewing made easy:

  1. Mix pre-hopped malt extract and water to make wort
  2. Add yeast
  3. Ferment in a fermenting bucket or carboy for about two weeks
  4. Bottle or keg the beer, and enjoy once it’s carbonated in about two weeks!

Here are five simple home brew kits that are very easy to brew. They’re called extract kits, because all you have to do is mix the malt extract with water. The hops are already in the malt and a packet of yeast is provided along with easy directions. These types of kits are perfect for simple beer brewing. They are easy and follow the basic 4 steps listed above.

  • Munton’s Nut Brown AleShop Malt Extract KitsThe Munton’s kit makes a malt-forward, exceptionally drinkable brown ale, full of caramel and nutty malt flavors. Makes 6 gallons.
  • Mountmellick Export – This pre-hopped extract kit makes an Irish-style amber ale. Each kit makes up to 5 gallons of beer. Optionally, add an ounce of hops (try Fuggles or Kent Goldings) during the last 10-15 minutes of the boil for more hop flavor and aroma.
  • Black Rock Whispering Wheat – Creates a crisp, dry beer with a slightly fruity, wheat flavor. Makes 6 gallons. All you need is 2.2 lbs. of corn sugar.
  • Mountmellick Famous Irish Stout – This kit makes a rich, full-bodied stout in the tradition of Guinness. It has a rich, malty flavor with  a touch of coffee. All you’ll need to do is mix the extract with water and corn sugar, then pitch the included yeast. Makes 5 gallons.

Once you master the basics of home brewing made easy, there are several easy steps you can add to the process, but they are entirely optional:

  • Use a hydrometer to measure the alcohol content of your beer
  • Steep specialty grains in hot water to add color or flavor
  • Add extra hops at different points in the brewing processShop Home Brew Starter Kit
  • Increase or decrease the amount of water in the beer to control alcohol content

Eventually, you may get to the point when you brew partial mash or all-grain. But for now, realize that simple beer brewing is possible. Home brewing doesn’t have to be complicated!
Still don’t know where to start? Another great resource that will give you a basic overview of home brewing is the New To Brewing Section of our website. It will help to point you in the right direction.
———————————–
David Ackley is a beer writer, brewer, and self-described “craft beer crusader.” He holds a General Certificate in Brewing from the Institute of Brewing and Distilling and is founder of the Local Beer Blog.

Wine of the Month: Apple Wine

Apple wine, also commonly referred to hard cider, is one of the oldest fermented beverages in the United States. This crisp, sweet wine can be made from fresh apples, apple concentrate, or even apple cider. Even better, October is the perfect time to pick apples from your local orchard. Fall is a great time to make this wine. Read on to find out more about apple wine, along with our exclusive recipe and wine pairing tips.
Continue reading

3 Methods For Carbonating A Homebrew Keg

Equipment For Carbonating A Homebrew KegOne of the best parts of kegging your homebrew is that you don’t have to bother with beer bottles and priming sugar. You can force carbonate the beer by pushing CO2 gas directly into it. This blog post will cover three methods for carbonating a homebrew keg.
Assuming that you’ve already cleaned, sanitized, and filled your homebrew keg, you are now ready to carbonate. Check out these carbonation methods that show you how to carbonate through both force carbonation, including shaking the keg, and through natural carbonation. Pick out the best way to carbonate for you and your situation.

Method #1: Steady as She Goes
This method of force carbonating a homebrew keg is the most hands-off. Expect your beer to be ready in about five days.

  1. Determine how much carbonation you want in your beer (refer to this carb calculator). When in doubt, aim for about 2.3-2.5 volumes of CO2.
  2. Figure out how much CO2 pressure is needed to reach your desired carbonation. This will depend on the temperature of your homebrew while it is carbonating. Refer to this carb calculator.
  3. With all valves closed, connect the CO2 tank to the regulator, and the regulator to the gas-in post on the keg.
  4. Open valves and set the regulator to the desired psi level.
  5. After four or five days, take a sample of beer. If the beer needs more carbonation, give it an extra day or two. If the beer is over carbonated, you can “bleed off” pressure by pulling on the pressure relief valve.
  6. Your beer is ready to drink! Reduce pressure to about 10 psi to serve.

Method #2: Shake and Bake
Shop Temperature ControllerThis is the accelerated way of force carbonate a homebrew keg. While faster, the results are more unpredictable.

  1. Determine how much carbonation you want in your beer (refer to carb calculator). When in doubt, aim for about 2.3-2.5 vols CO2.
  2. Figure out how much CO2 pressure is needed to reach your desired carbonation. This will depend on the temperature of your beer. Refer to this carb calculator.
  3. With all valves closed, connect the CO2 tank to the regulator, and the regulator to the beer-out post on the keg.
  4. Open valves and set regulator to 20-30 psi. You should hear CO2 bubble through the beer.
  5. Shake the keg for about five minutes.
  6. Remove the CO2 quick disconnect and vent the keg. Repeat this process several times over the course of a day.
  7. Reset the regulator to the psi level you found in step 2 and reconnect the CO2 quick disconnect to the gas-in post.
  8. Take a sample of the homebrew. If the beer needs more carbonation, continue to shake and bake. If the homebrew is over carbonated, you can “bleed off” pressure by pulling on the pressure relief valve.
  9. Your beer is ready to drink! Set the pressure to about 10 psi for serving. Depress fully on the tap to avoid foaming.

Method #3: The Old Fashioned
Man Working On Homebrew Keg
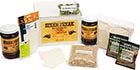
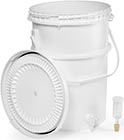
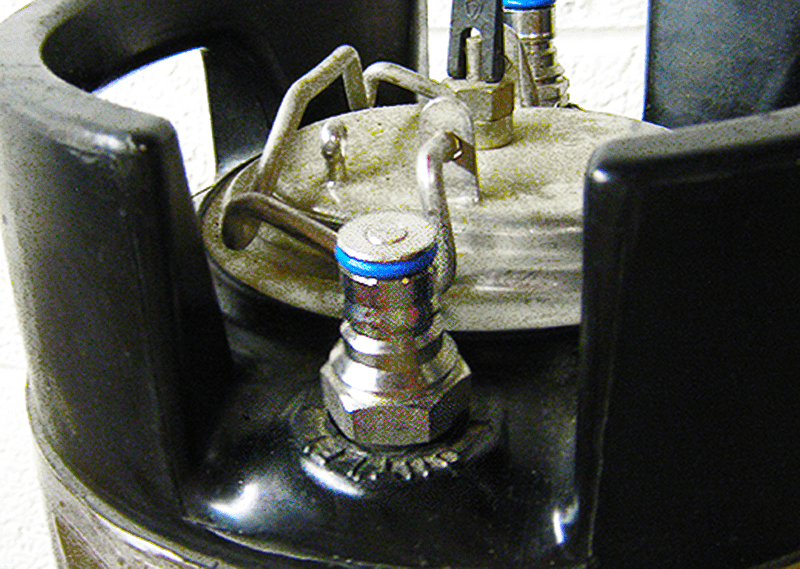
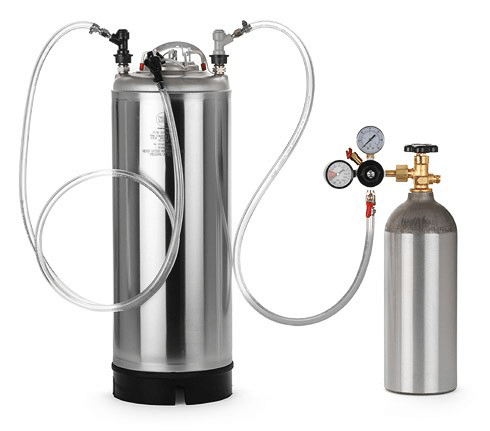
If you’re short on gas or you want your beer to be “cask style”, you can also carbonate your keg using priming sugar. When you are carbonating a homebrew keg with sugar, this is known as natural carbonation. It will take longer than force carbonation, but it’s relatively straightforward and predictable. In this case, you can mix in the priming sugar when you fill your homebrew keg with beer.

  1. Determine how much carbonation you want in your beer (refer to carb calculator). When in doubt, aim for about 2.3-2.5 vols CO2.
  2. Shop Faucet TowerUse a priming sugar calculator to determine how much corn sugar or DME you need.
  3. Heat about a pint of water in a saucepan and dissolve your priming sugar. Mix in your priming sugar and bring to a boil. Set aside to cool.
  4. Once cooled to room temperature, pour into your clean and sanitized homebrew keg.
  5. Rack your homebrew from the fermenter to the keg.
  6. Seal the keg. Take extra care to get a good seal on the lid and posts. Keg lube can help.
  7. Leave the keg in a room temperature environment at about 70˚F. After about two weeks, your beer will be ready to drink!
  8. You’ll still need CO2 to serve your beer. Set the regulator pressure to about 10 psi for serving.

What method do you use for carbonating a homebrew kegs? Which of the methods above do you think is the best way to carbonate.
———————————–
David Ackley is a beer writer, brewer, and self-described “craft beer crusader.” He holds a General Certificate in Brewing from the Institute of Brewing and Distilling and is founder and editor of the Local Beer Blog.

There's Too Much Sugar In The Primary Fermentation!

Sugar For Wine MakingI have 6 gallons of red wine must which failed to start fermenting even after 3 days since I added Lalvin 71B-1122 yeast. I may have added too much sugar to the primary fermentation. The Brix No. was 27 and Sp Gr 1.110. What can I do to get the wine must fermenting before it gets spoiled? Thank you for your help. Ulysses A.
Name: Ulysses A.
State: TN
—–
Hello Ulysses,
It may very well be that you have too much sugar in the primary fermentation, and that is what’s causing you to have a stuck fermentation. But I would also suggest going over the Top 10 Reasons For Fermentation Failure to make sure that it is not something else.
Putting too much sugar for the yeast to ferment is one of the 10 reasons listed, but by making sure the other 9 couldn’t possibly be the reason, your can then comfortably narrow your focus on the cause.
What I would do if I were in your shoes is take a quart jar – like a Mason jar – fill it half way with the wine. Then add water until the jar is 2/3 full. Mix in a quarter teaspoon of either Yeast Nutrient or Yeast Energizer. Then sprinkle directly into the jar another packet of wine yeast. This is simply to create a yeast starter for the wine yeast by using a diluted wine must. Do not rehydrate the wine yeast in warm water first. Add the packet directly to the yeast starter.
The yeast starter should start fermenting within hours. Once you see the level of foaming peak, that will be the optimal time to pitch the yeast starter in with the rest of the wine must. This is typically at around 18 hours, but can vary from 6 hours to 3 days.Shop Yeast Nutrients
I am fairly confident that this will overcome your stuck fermentation and get your wine fermenting. A specific gravity of 1.110 is not all that ridiculous, it’s just high enough to cause some difficulties. With future batches you will want to use your wine hydrometer to make sure that you do not add too much sugar for the primary fermentation.
Other things you can do to help the yeast starter be successful is add an additional half dose of Yeast Nutrient to the entire batch. And as mentioned before, use the other 9 reasons for fermentation failure as a guide to improve your fermentation’s situation.
If the yeast starter fails to get things going then there are two other things you can do:

  1. Dilute the wine with water until the sugar level is brought down to a more suitable level. The fermentation should start on it’s own after doing this.
  2. Switch to a wine yeast that has a better tolerance of higher sugar levels. I would suggest Red Star: Pasteur Champagne for this purpose.Shop Wine Yeast

Putting too much sugar in the primary fermentation is something that can happen from time to time. Just realize that there are things you can do to resolve the issue without any sacrifice to the wine, whatsoever.
Happy Winemaking,
Ed Kraus
———————————–
Ed Kraus is a 3rd generation home brewer/winemaker and has been an owner of E. C. Kraus since 1999. He has been helping individuals make better wine and beer for over 25 years.

Wine of the Month: Pear Wine

Our wine of the month is pear wine. This lightly colored, sweet wine packs in the nutrients given the healthful properties of its main ingredient: pears. In addition to a delicious recipe, we’ve got some useful tips so you get the most flavor out of your wine.
Why should I make pear wine?
Pears are a member of the rose family of plants and are chockfull of antioxidants, dietary fiber, and flavonoids. In fact, about half of the fiber found in the pear can be found in its skin. The phylonutrients contained in this delicious fruit not only contain antioxidants and anti-inflammatory flavonoids, but also contain cinnamic acids that can help prevent cancer and decrease the risk for Type 2 Diabetes. Pears, along with apples, are known to have the second highest number of flavonols among all fruits and veggies.
Now let’s get to the wine part. Due to the fact that pear wine is a fruit wine rather than a grape wine, it has a higher ORAC content. In short, this means that it’s winning the antioxidant game. We’ll cheers to that!
Recipe:
Makes about 5 gallons
20lbs of Pears
10 lbs. of Sugar
1 tbsp. of Yeast Energizer
1/2 tsp. of Pectic Enzyme
3 tbsp. of Acid Blend
1/2 tsp. Wine Tannin
Yeast EC-1118
There are a few things to keep in mind while you’re making your pear wine. For the best results, you should slightly over ripen the pears. This is key, because they aren’t an extremely flavorful fruit by nature. If you don’t let them ripen, the wine will have more of an apple flavor. Let them get extremely soft (without rotting) and you’ll set yourself up for success. Also ensure that you rinse your pears before you crush them.
Where and how can I find pears?
The state of Washington is the largest grower of pears in the United States. It accounts for half of all of the pears distributed in the country, followed by California and Oregon. Most of the pears found in US grocery stores fall into the European Pear category. They can be found in green, yellow, red, gold, and brown. Once you find them at the grocery store, you’ll need to give them a few days to ripen. Just make sure you watch them carefully, because once they ripen, they tend to perish quickly. It can be hard to determine ripeness because many pears do not change color as they ripen.
What foods does pear wine pair best with?
Given pear wine’s light and refreshing taste, it pairs well with bold and flavorful cheeses like blue cheese and goat cheese. Spread some cheese on a cracker and sip some pear wine in between for the perfect pre-dinner snack. As for main courses, pear wine tastes great with white meats, either baked or roasted. Finish off the meal with a fruit or nut-based dessert and you’ve successfully and deliciously paired your pear wine!

Can I Make Pear Wine With An Electric Power Juicer?

Bushell of PearsI have a mature Kieffer pear tree that is producing quite a bit of fruit this year. I can’t can all of the pears, so I have been contemplating making wine with the left-over fruit. I have an electric power juicer and was wondering if it would be appropriate for me to use that to juice the fruit rather than boil and press it out by hand in a strainer bag. If so, is it alright to leave the seeds and skins on the pear? I just want to do this right and not waste the fruit.
Matt — PA
—–
Hello Matt,
In general, it’s not a good idea to make wine with a power juicer. I certainly wouldn’t buy a power juicer for the soul purpose of making wine. There are two very important reasons for this:

Continue reading