The Pros And Cons Of Small Batch Brewing

Small Batch BrewingFor many homebrewers small batch brewing is a reasonable option for them. It doesn’t always make sense to brew a five or ten gallon batch of beer every time. Many of us are confined to small apartment kitchens, taking over what space we have to craft our home made beers. Others among us are like mad scientists, always brewing with some strange ingredient found in an international market or picked from the garden. You may not want to end up with five gallons of an experiment gone wrong.
Enter: small batch brewing. Commercial craft breweries are often renowned for their small batch beers, brewed seasonally and released in limited quantities. Whether you’re brewing small batch beers at home for logistic, experimental, or economical reasons, there are some benefits – and drawbacks – that should be considered:

The Pros of Small Batch Brewing

  • Easy to scale – Scaling homebrew recipes is easy. To turn a five-gallon recipe into a 2.5-gallon batch, just divide all of the ingredients by half. All the brewing procedures should be more or less the same. The only ingredient that doesn’t need to be cut is the beer yeast. Any batch less than 5 gallons, still use 5 gallons worth of yeast. (Consider purchasing a small digital scale for dividing hops and grains.)
  • Practice techniques and procedures – First-time brewers and those practicing a new technique may have an easier time with a smaller batch. For example, a mini-mash, or partial-mash, is a great way for extract brewers to learn about mash procedures. Maybe use small batch brewing to step up to a 2.5-gallon all-grain batch before doing five or ten gallons.Shop Accurate Scales
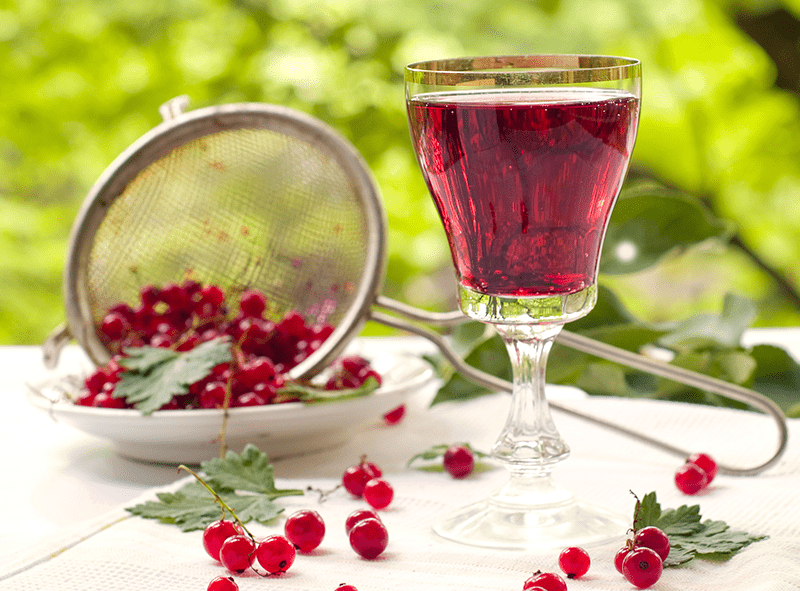
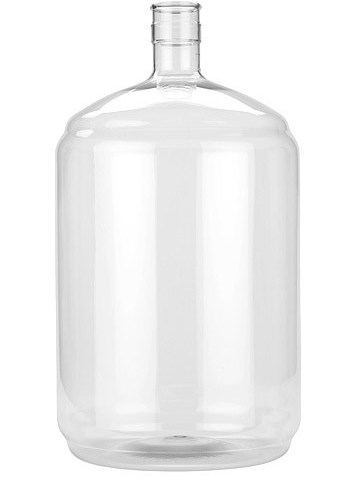
  • Experiment with less risk – Brewing with an unusual herb, spice, or fruit? Before you know how the beer will turn out, it may make sense to brew a 1-2 gallon batch for starters. Or, if you want to experiment with different flavorings in the fermenter, you could brew one batch of the base beer, then divide it among several smaller fermenters, with varying quantities of the experimental ingredient in each one. (One-gallon glass jugs are perfect for this.)
  • Smaller investment – If funds are tight, small batch brewing can let you brew for less money. Not only is the upfront cost for homebrewing ingredients lower, but you can still make some beer and put off the brew kettle upgrade for a later date.

The Cons of Small Batch Brewing
There’s really just one main drawback to small batch brewing: For roughly the same time commitment, you end up with less beer. Things like bottling and heating up water may be a bit faster, but the overall process will take about the same amount of time as brewing a larger batch. But we all love to brew, so who really minds brewing more often?Shop Beer Flavorings
In my home brewery (i.e., kitchen), I like to alternate between small and big batches. When experimenting, I’ll brew a two or three gallon batch, but I’ll still brew enough five-gallon batches to keep my favorite beers on hand.
Do you know of any other pros and cons to small batch brewing? Have you ever tried small batch brewing? Do you have an idea that might need a test batch of beer first?
—–
David Ackley is a beer writer, brewer, and self-described “craft beer crusader.” He is a graduate of the Oskar Blues Brew School in Brevard, NC and founder of the Local Beer Blog.

Tips For Bottling Homebrew Beer

Homebrew Beer In Beer BottlesBottling homebrew beer isn’t always an easy process. If you’ve already bottled a few batches, then you already know what I’m talking about. Filling some 50 bottles of beer can be time-consuming and frustrating for the average homebrewer. But it doesn’t have to be!
One of the great things about homebrewing is that it is a totally modifiable hobby. There’s no single “right” way to do it. All it takes is a little creativity to make things work for you.
Here’s some tips for bottling homebrew beer that will save time and effort on bottling day:

Challenge #1: Cleaning & Sanitizing
No one enjoys scrubbing 50 beer bottles by hand. Luckily, this is a part of the bottling process that can be largely automated.
Advice for cleaning and sanitizing beer bottles:

  • Rinse first. After drinking a beer, rinse out the bottle with a few quick bursts from the kitchen faucet. This will make sure there isn’t any nasty gunk inside the bottle that has to be scrubbed out on beer bottling day. Stubborn deposits inside the bottle? The Bottle and Carboy Washer will blast them away. Consider draining your beer bottles on a Bottle Tree so you don’t have to worry about standing water inside the bottle.
  • Sanitize in dishwasher. This is one of the beer bottling tips that will save you a lot of time. It isn’t a good way to clean beer bottles, but if you’ve already rinsed them, it makes sanitizing pretty easy. The dishwasher jets won’t likely reach into the bottom of every bottle, but the steam and the heat will kill most of the wild yeast and bacteria that may be lurking inside the bottles. Just plan ahead and place your clean bottles in the dishwasher and get the sanitizing cycle going an hour or so ahead of bottling time.

Challenge #2: Removing LabelsShop Bottle Cappers
Probably the most annoying part of bottling homebrew beer is removing the labels, so much so that some homebrewers don’t even bother. But if you submit your beer bottles for competition or want to make sure you don’t look like a total amateur, the labels gotta go.
Tips for removing beer bottle labels:

  • Buy some plain bottles. If you’re willing to spend the money, just get a case of beer bottles from your homebrew shop. For some, the time savings will be worth the expense.
  • Choose your bottles wisely. If you’ve removing labels before, you may have noticed that certain breweries’ labels come off more easily than others. I’ve found that it’s usually the larger craft breweries whose labels come off the easiest. If you need to stock up on bottles for homebrewing, get a case from New Belgium or Sam Adams. Once you’ve made your way through the case (remember to rinse!), just soak the bottles in a solution of Basic A No-Rinse Cleanser and warm water – the labels will come right off.

Challenge #3: Tilting the Bottling Bucket
This is a beer bottling tips that will save you a couple of bottles every batch when bottling your homebrew beer. A lot of bottling buckets have the spout a full inch or so above the bottom of the bucket. This helps leave behind sediment that may be in the bucket, but there’s at least a few bottles worth of beer below the spout. This leaves us having to tilt the bucket to get the last several pints. An extra set of hands will make this easier, but it seems to me like an unnecessary waste of energy.Shop Basic A
Solution?

  • Build your own dip tube. I found this tip on Homebrew Talk. Take a rubber stopper that fits into the inside of your bottling spigot and construct a dip tube from a short piece of plastic, stainless steel, or copper. For my setup, a Drilled #2 Rubber Stopper did the trick, and now I don’t have to tip the bucket!

Do you have any tips for bottling homebrew beer you’d like to share? I’m sure that others would love to hear them. Comment below and let us know!
—–
David Ackley is a beer writer, brewer, and self-described “craft beer crusader.” He holds a General Certificate in Brewing from the Institute of Brewing and Distilling and is founder of the Local Beer Blog.

Yeast Starter For Your Beers: Recipe & Instructions

Clean healthy beer made with a yeast starterUsing a yeast starter when making your beer is simple way to improve your fermentations. Here you will find a yeast starter recipe and instructions for using one to have a healthier, more-thorough homebrew fermentation.

What is a beer yeast starter?
A beer yeast starter is a volume of yeast that’s pitched into wort, usually prepared a day or more in advance of brew day. Homebrewers and commercial brewers alike use yeast starters to ensure that there are plenty of healthy yeasts cells to quickly, cleanly, and completely ferment a batch of beer. In other words, a yeast starter provides an opportunity for yeast cells to grow and multiply prior to being pitched into a batch of beer.
Preparing a yeast starter for your beer has several benefits:

  • Improved attenuation, i.e., a more complete fermentation and lower final gravity
  • Shorter lag time, i.e., fermentation starts more quickly
  • Cleaner tasting beer
  • More effectively ferment high gravity beers
  • Proof the yeast, making sure that it is active and viable

Yeast starters are typically only made from liquid yeast cultures. Dry yeast packets, assuming they have been stored properly, should contain enough cells to ferment an average homebrew, but even making a yeast starter with dried yeast will result in some remarkable improved fermentation
Experienced homebrewers recommend a starter containing about 200 billion yeast cells to ferment the typical 5 gallon batch of homebrewed ale, and 400 billion yeast cells to ferment a lager. Since most liquid yeasts contain about 100 billion cells, we need to grow these cultures in order to achieve an optimal fermentation. (Explore this link for more advanced pitching rate calculations.)

Beer Yeast Starter Recipe

Yeast starters require very little equipment, most of which you probably already have on hand:

Yeast Starter Instructions

Making a yeast starter for beer is an easy way to improve the quality of your homebrew. While lagers and high-gravity beers will require more advanced pitching calculations, these steps will guide you through the basic process of preparing a yeast starter for the typical 5 gallon batch of homebrewed ale:

  1. At least 24 hours prior to brew day, fetch a large glass jug or flask and clean and sanitize thoroughly. Sanitation is extremely important, otherwise your yeast starter may become contaminated!
  1. For an average homebrewed ale, boil 2 liters water to 200 grams (roughly 1.5 cups) light dry malt extract. This is will provide the environment for yeast to feed and multiply.
  1. After a boil of 10-15 minutes, this starter is sterile. Cover with a sanitized lid or bung and chill to pitching temperature.
  1. Pour the cooled wort into a sanitized container through a sanitized funnel.
  1. Shop SanitizersPitch yeast into the starter container. Make sure that both wort and yeast are at an appropriate pitching temperature (and within 10°-15°F of each other), so as not to shock the yeast.
  1. Attach a drilled stopper and air-lock. The yeast starter should begin bubbling within 6-12 hours.
  1. On brew day, pitch the starter directly into your batch of wort.

Making a yeast start for your beer is an easy way to improve on your brewing process. Follow the recipe and instructions above see if you can tell a difference.
—–
David Ackley is a beer writer, brewer, and self-described “craft beer crusader.” He holds a General Certificate in Brewing from the Institute of Brewing and Distilling and is founder of the Local Beer Blog.

How To Brew Witbier

Belgian WitbierWitbier, or bière blanche, in French, is a style of wheat beer native to Belgium. Belgian “white” beer is characterized by its light color and cloudy appearance, usually from the use of unmalted wheat or oats. Moderately hopped, Belgians wits are commonly flavored with coriander, bitter orange peel, and possibly other spices as well. Given its light, fragrant, and refreshing qualities, belgian witbiers are perfect for brewing and drinking in warmer weather. (Can you tell I’m excited for summer?!) So, here’s some insights on how to brew Witbier.
Though once popular throughout Belgium, wits were nearly made extinct until Pierre Celis revived the style in the 1960s. Today, almost every beer drinker knows of Hoegaarden, named for the town where witbiers were made popular, and Blue Moon, the interpretation of the style made by Coors.
In doing some research for this post, I found an interesting tidbit from Michael Jackson, which explains how the Curaçao orange peel and other spices may have found their way into witbiers. In his Beer Companion, he points out that “Belgium was a part of the Netherlands when many spice islands, including the orange-growing territory of Curaçao, were colonized.” It stands to reason that the spice trade influenced what was used in the brewing of witbiers.
Modern interpretations of the style may include some interesting flavoring ingredients. Westbrook Brewing in South Carolina makes a wit called White Thai, which uses lemongrass and ginger root instead of orange peel and coriander.
How To Brew WitbierShop Steam Freak Kits
Witbiers are a fun style to brew and one that you and your non-beer geek friends will likely enjoy throughout the summer. Our Brewcraft Belgian Wit recipe kit includes everything you need to brew a Belgian white. You can also brew your own Blue Moon with Stream Freaks Blue Noon recipe kit. Both of these recipe kits are from extract. If you prefer to formulate your own witbier recipe, read on.

  • Grains – Extract brewers will want to use the lightest malt extract available, probably using a fair amount of wheat malt extract syrup, an extract made from both wheat and barley malt (65/35 wheat to barley malt). All-grain brewers should start with a light pilsner malt for the base of their grain bill. Both might consider using unmalted wheat or oats for added body and the notorious witbier cloudiness.
  • Hops – Traditional European varieties of hops should be used in an authentic Belgian witbier, but feel free to use some American hops if you’d like. According to Michael Jackson, the original Hoegaarden used East Kent Goldings and Saaz, though I’m not sure that’s still the case now that Hoegaarden is owned by AB-InBev. In any event, shoot for 10-20 IBUs.Shop Beer Flavorings
  • Herbs & spices – Coriander and bitter orange peel are the common additions in Belgian whites. Hoegaarden’s “secret” spice is believed to be grains of paradise. This is a good style though for thinking outside the box, so you may wish to throw in some lemon peel, lemongrass, ginger, or chamomile into your witbier depending on your tastes.
  • Yeast – Use a wit beer yeast or other Belgian yeast strain for your witbier.

That’s my take on how to brew Witbier. Are you a fan of Belgian wits? How do you like to brew your own Belgian white?
—–
David Ackley is a beer writer, brewer, and self-described “craft beer crusader.” He holds a General Certificate in Brewing from the Institute of Brewing and Distilling and is founder of the Local Beer Blog.

How Many Cans Of Fruit Wine Base Should I Use In My Wine Recipe?

Fruit Wine Base For Wine MakingI would like to buy a kit, but would prefer to make a fruit wine.  So I’m planning on buying the Your Fruit! Wine Making Kit and then buying the County Fair Fruit Wine Base.  I’m confused about the number of cans (46 oz) I need or want… the catalog suggests using 2-4 cans.  So I guess my question is:  What changes when you add more fruit wine base?
Thank you very much for your time. I’m really exited to start making wine!
– Holly
—–
Hello Holly,
Thank you for this much needed blog question about fruit wine bases.
The primary difference you will notice between using two cans of County Fair Fruit Wine Base in your wine recipes and four cans is the body. The more cans you use, the more body the wine will have. If you don’t know what body means, it can best be described as the mouth-feel of the wine – the viscosity of the wine. Another way to look at it is to think of the difference between whole milk and skim milk.
There are other secondary differences as well. When using less cans in your wine recipes you get a more crisp, refreshing wine. When you use more cans you get a more robust, assertive wine. A crisp wine is more refreshing or thirst quenching. Some might call it a summer wine. A robust wine might be something you would drink with dinner. With a robust wine the flavors tend to linger on the palate longer, competing very well with the flavors of the meal.
Shop Fruit Wine BasesSomething else that should be pointed out is that wines made with two cans of fruit wine base will age out more quickly than wines made with four cans of the fruit wine base. A two can wine recipe might peak in 4 or 5 months, whereas a four can wine recipe might peak around a year. This is all very subjective, so each persons impression of these wines might vary, but on average this is true.
I hope this answers your questions. It’s a matter of style and the type of wine you like to drink. Many people assume that four cans of the County Fair fruit wine base will taste twice as good as two in their wine recipes, but this is not necessarily true. It will have the characters described earlier, but whether or not it makes it better is a matter of personal tastes.
Happy Wine Making,
Ed Kraus
—–
Ed Kraus is a 3rd generation home brewer/winemaker and has been an owner of E. C. Kraus since 1999. He has been helping individuals make better wine and beer for over 25 years.

Storing Hops: What's The Best Way?

Homebrewer Storing HopsThe question often comes up: “I’ve had this bag of hops in the refrigerator for over a year…can I still use them?”
In short, yes! However, just storing hops in the refrigerator does not preserve their alpha acids very well, which makes it difficult to predict how they will affect a beer’s bitterness. Hops lose their potency and freshness over time, and only in the case of Lambics are aged hops considered desirable. Further, if not stored properly, hops can absorb some unpleasant odors wafting around your fridge, so it’s important to understand the proper method of storing hops in order to brew the freshest, best beer possible.

So, what’s the best way to store hops?
Learning how to store hops is a piece of cake:

  • Good – At a minimum, keep your hops in the refrigerator in an airtight container—like in a mason jar—and use them as soon as possible after purchasing.
  • Better – Even better, store hops in a vacuum-sealed package in the refrigerator. A consumer grade vacuum sealer can come in handy for this purpose.
  • Best – The best method for storing hops is to keep them in an air-flushed, vacuum-sealed package in the freezer. Most homebrewing hops these days are packaged  and stored this way. If it will be more than a few days before brewing with the hops, just toss them in the freezer until brew day.shop_hops

The same goes for storing hops after opening the package. If you have an unused portion of hops, storing the hops in the freezer in an airtight container is the best way to go. Try to use the hops as soon as possible.

What if my hops are old? Can I still use them? How does this affect IBUs?
If your have been storing hops in the freezer in an airtight container for less than a year, you should be able to use them without their age having a negative affect on your beer.
If the hops have been stored for longer than a year or just kept in a refrigerator, it might be a good idea to calculate the actual alpha acid content of the hops in order to accurately predict IBUs in the finished beer. All hops should be packaged with an alpha acid content expressed as a percentage. From there, it’s a simple matter of using an aged hop calculator to adjust the alpha acid content and the weight needed to achieve a desired bitterness level.Shop Accurate Scales
Keep in mind that there are many factors affecting bitterness in beer, so calculated IBUs are just an approximation. At the end of the day, it may be worth just buying some fresh hops from the homebrew shop so you can be sure you get the best qualities from your hops as possible.
—–
David Ackley is a beer writer, brewer, and self-described “craft beer crusader.” He holds a General Certificate in Brewing from the Institute of Brewing and Distilling and is founder and editor of the Local Beer Blog.

5 Tips for Clearing Beer (No Filter Required!)

Results of Clearing BeerA wise man once said that, beauty is in the glass of the beer holder. Cliché aside, wouldn’t your beer be even more beautiful if it was crystal clear? Clearing beer is not all that difficult. In fact, clearing beer is a matter of some simple steps.
While it is true that most haze-causing compounds have little effect on the flavor of our beers, the psychological effect of seeing a pristine, clear beer helps make for a more-enjoyable beer drinking experience. Additionally, clear beer tends to aid in product stability, giving your beer better shelf-life. With a little planning and patience, it is easy to get clear beer. With that said, here are some easy tips on clearing beer.

  1. Kettle Finings: Whirlfloc or Irish Moss
    Whirlfloc is a refined version Irish Moss, a carrageen seaweed. These products help protein coagulate in your kettle during the boil and eventually settle out of your beer. Adding a tablet of Whirlfloc or a tablespoon of Irish Moss 15 minutes before the end of boil can greatly reduce haze-causing proteins in your final beer. Using any of these is a great start to clarifying your beer.
  1. Proper Calcium Levels 
    Calcium aids in yeast health and their eventual flocculation of the yeast out of your beer. If you find your beers having significant yeast haze, it is worth checking your water report to ensure you have over 100 ppm of calcium in your brewing water. If you’re water is calcium deficient, adding small shop_gypsumamounts of calcium chloride, calcium carbonate, or gypsum to your beer can help the yeast flocculate out once fermentation is complete.
  1. Cold-Side Finings
    If you’re still having trouble with clearing your beer, adding fining products like gelatin or Polyclar to your beer while in secondary can aid in clarification. Different finings work on different types of haze, so be sure to read the manufacturer’s instructions and follow their directions.
  1. Cold Crash & Careful Racking 
    After putting your beer in secondary and before bottling, chilling the fermenter to near freezing temperatures will help the yeast and other particulate settle out. This allows you to carefully rack clear, bright beer off any trub cake and into your bottles or kegs.
  1. Cold Storage Shop Water Treatment
    Patience can go a long way when clearing beer. Once you beer is bottled and carbonated, storing it cold for a week or two will help chill-haze proteins form and settle out of solution, leaving you with bright beer. This is traditionally done with lager beers, but most ales can also benefit from cold storage.

Creating bright, clear beer is not rocket science. With solid brewing procedures and a few select ingredients such as clearing and fining agents, clearing beer is a very easy thing to accomplish.
—–
Nick Ladd is a homebrewer, beer enthusiast, and BJCP certified beer judge. He has won numerous beer competitions, has collaborated on multiple commercial beer projects, and writes frequently at his blog, ThePourReport.com.

Tips For Home Brewing A Saison Beer

Home Brewed Saison BeerThe Belgian Saison is a beer for warmer weather. Traditionally, brewers in southern Belgium would brew Saisons in the spring for consumption throughout the summer. Want to try home brewing a Saison beer for this summer? Then read on and you’ll be able to create your own extract or all-grain saison beer recipe!
Saisons, as with many Belgian beers, are difficult to place into strict style guidelines. They’re farmhouse ales, often made with adjunct grains, such as spelt, oats, and wheat, and a mix of herbs and spices — basically whatever can be found around the farmhouse. They’re a great beer for exercising creativity, and one of the few styles that lends itself to an “anything goes” approach.
Still, there are some general guidelines to keep in mind when brewing a Saison beer. According to Michael Jackson’s Beer Companion, Saisons range from “child strength” all the way up to “royal” strength, with the strongest version, la saison de mars, having an original gravity as high as 1.060. According to the BJCP Style Guidelines, a Saison should be “a refreshing, medium to strong fruity/spicy ale, with a distinctive yellow-orange color, highly carbonated, well hopped, and dry with a quenching acidity.” Further, according to the BJCP, Saisons should fit more or less within these guidelines:

  • IBUs: 20 – 35
  • Color (SRM): 5 – 14
  • OG: 1.048 – 1.065
  • FG: 1.002 – 1.012
  • ABV: 5 – 7%

Here are some suggestions for ingredients to use when brewing a Saison. Just keep in mind there are probably at least as many saison recipes as there are brewers, so don’t let this list restrain your creativity.

Water

  • Beer enthusiast author, Michael Jackson states that “local hard water may have helped provide the body, mouth-feel and extraction of flavors from the grains…” Consider using relatively hard water for increased body and flavor. Using Burton water salts may be appropriate. This is particularly important wine brewing a saison all-grain recipe

Grain BillShop Burton Water Salts

  • All-Grain: Start with a very light 2-Row Malt, such as Maris Otter or Belgian Pilsner malt. You may want to use a little Belgian Aromatic malt (20L) for color. Consider throwing in some Munich, Vienna, or Belgian Biscuit malt for added complexity. Small amounts of raw oats, spelt, or wheat can contribute additional complexity and body.

Sugar

  • Belgians are notorious for adding sugars to their beers. In the case of the saison, adding some light candi sugar or corn sugar can help achieve a dry finish.

Hops

  • Saisons are typically brewed with Belgian or UK hop varieties, with an emphasis on the early hop additions. Other European hops are sometimes used as well. When brewing a Saison beer consider using UK Kent Goldings, Fuggles, and Styrian Golding. Sometimes saisons are dry-hopped.

Herbs and SpicesShop Steam Freak Kits

  • Just about anything goes here. You might try orange peel, star anise, peppercorns, chamomile, but try not to go overboard: herbs and spices should enhance the characteristics of the yeast and hops, rather than dominate them. Herbs and spices may be added early in the boil for bittering or late in the boil for flavoring and aroma. Herbs and spices added during secondary fermentation will contribute to aroma. Usually an ounce or so is plenty for a 5 gallon batch, but it depends on the herb or spice in question. When in doubt, use a small amount, and if you want to use more in a future batch you can do that.

Yeast

  • Use a Belgian ale yeast, such as Wyeast’s #1388. To get a dry finish, we need a yeast that achieves a low FG.
  • Advanced: Some Saisons are made with a blend of yeasts. If you feel comfortable with it, you could try using a couple different Belgian yeasts. If you really want to go crazy, you could try an open fermentation, but chances of a contamination with this method are very high, and therefore not usually recommended.

What ingredients and techniques do you use when home brewing a Saison beer? Do you have a Saison beer recipe you’d like to share. Share in the comments below!
Til next time…Cheers!
—–
David Ackley is a beer writer, brewer, and self-described “craft beer crusader.” He holds a General Certificate in Brewing from the Institute of Brewing and Distilling and is founder of the Local Beer Blog.

Harvesting And Reusing Beer Yeast

Homebrewer Reusing Beer YeastLearning how to harvest, wash, and reuse your beer yeast is a neat skill that gets you one step closer to making beer the way the pros do. Besides, washing and reusing beer yeast can help you save a few bucks so you can get those homebrewing gadgets you’ve always wanted.

A few important things to consider before reusing your beer yeast:

  • When harvesting beer yeast, sanitation is very important! When you practice good sanitation, you can reuse yeast for ten generations or more!
  • Yeast should be harvested from a clean and healthy fermentation. Take notes on how your batch turns out. If the beer didn’t come out well, you probably don’t want to reuse the beer yeast.
  • Consider the color of the beer you’re harvesting yeast from. Yeast harvested from a dark beer and pitched into a lighter beer will likely affect the color of your beer, so try to pitch yeast from light beer to a dark one.
  • Just like with color, think about the hoppiness of the beer you’re harvesting yeast from. A yeast slurry from a very hoppy beer may affect the bitterness of your beer.

Now, here’s an easy step-by-step guide to harvesting and washing beer yeast. Follow these steps when reusing beer yeast and you’ll have not problems, whatsoever:shop_liquid_beer_yeast

  1. The night before transferring your beer from primary to secondary fermentation, boil a half gallon of water for 20 minutes to sterilize it. Carefully pour the water into a sanitized jar or growler, seal it with a sanitized lid, and place the growler in the refrigerator to cool overnight.
  1. The day of the transfer, clean and sanitize several (four or more) glass jars and lids. Remove the growler of cool water from the fridge.
  1. After transferring to secondary, pour half of the water from the growler onto the yeast cake left behind in the primary fermenter. Swirl the water around to stir up the beer yeast and let sit for several minutes. The slurry will stratify into three layers: watery beer mixture on top, dead yeast and trub on the bottom, and healthy yeast in the middle.
  1. Pour off and discard the watery top layer. Then pour the healthy beer yeast slurry into half of your glass jars, taking care to leave the darker yeast slurry at the bottom of the fermenter. Allow these jars to sit for several minutes.
  1. Shop Stir PlateIn ten minutes or so, the slurry will separate. Just like before, pour off and discard the watery stuff on top, then pour the white yeast slurry into the remaining jars, leaving behind the darkest part of the slurry.
  1. Place the lids on the jars of washed yeast and place in the refrigerator. Don’t forget to label the jars!
  1. Use the harvested beer yeast within a few months, the sooner the better, and prepare a yeast starter to ensure optimal viability for your next batch.

Have you ever tried reusing beer yeast from a slurry or cake? Did you end up with more beer yeast than you can use? Yes, you can make bread with it!
—–
David Ackley is a beer writer, brewer, and self-described “craft beer crusader.” He holds a General Certificate in Brewing from the Institute of Brewing and Distilling and is founder of the Local Beer Blog.

Which Plastic Wine Fermenter Is Right For You?

Plastic Wine FermenterThere are pros and cons to using either plastic wine fermenters or glass wine fermenters in home winemaking.  Glass can be easier to clean and unlikely to scratch, while plastic is easier to manage due to its light weight and doesn’t cost as much.  It’s important to consider the pros and cons of both and then make the purchase decision that is right for you and your situation.  If you end up choosing plastic, which style do you choose?  There are a lot of different plastic wine fermenters out there, so here’s a quick breakdown of what’s out there.

Plastic Carboys:
The plastic carboy is a type of plastic wine fermenter that is ideal for secondary fermentations.  You can find these carboys in many different sizes, including 3 gallon, 5 gallon, and 6 gallon.  Depending upon how much wine you plan on making will determine the size of plastic carboy you need to purchase.  One major benefit of this fermenter is that if it gets knocked to the ground, it won’t smash to bits like a glass fermenter, saving you a lot of money and time.

Plastic Carboys with Barbed Faucets:
Carboy FaucetTaking the plastic carboy one step further, this plastic wine fermenter comes complete with a faucet that allows you to remove samples of wine from the carboy just as you would if you were sampling from the faucet of stainless steel tanks or oak barrels. The faucet can be more convenient than using a wine thief, with less potential risk of contamination.  Just as with standard plastic carboys, this fermenter comes in different sizes.

Plastic Collapsible Fermenting Jug:
Collabsible Fermenation JugThis plastic wine fermenter is fantastic for those odd sized or partial batches of wine.  All you have to do is put all the wine you wish to ferment in the jug, then collapse it down to get rid of the excess head-space left over.  This collapsible fermenter also comes in a couple different sizes, though remember, you can collapse the jug to any size you need for the small amount of wine that you nee to ferment.

Plastic Bucket Fermenter:
Plastic Primary FermenterThis final plastic wine fermenter is great for both primary and secondary fermentations.  It’s made of a heavy food grade high impact polyethylene material and has a air tight seal that allows you to ferment with or without the lid.  Similar to the plastic carboy with barbed faucet, this poly-fermenter also has a faucet that allows you to transfer or sample wine without a mess and without disturbing the sediment.

Tuff-Tank Plastic Wine Fermenter:
Tuff Tank 22 GallonFor those larger jobs you can get a 22 gallon Tuff-Tank. This plastic wine fermenter unique square design makes it perfect for handling those larger jobs in a small space. It’s footprint is 14″ by 14″. Its construction if very rigid and has a screw-on lid that seals air-tight.

There are a lot of options for plastic wine fermenters out there, so understanding which is best for your home winemaking practice will save you a lot of time, money, and headaches!
—–
Ed Kraus is a 3rd generation home brewer/winemaker and has been an owner of E. C. Kraus since 1999. He has been helping individuals make better wine and beer for over 25 years.