Tips For Clearing Wine With Clearing Problems!

Clearing WinePlease give me any advise on clearing wine. I have a Red wine not clearing?

Name: Bruce K.
State: CA
—–
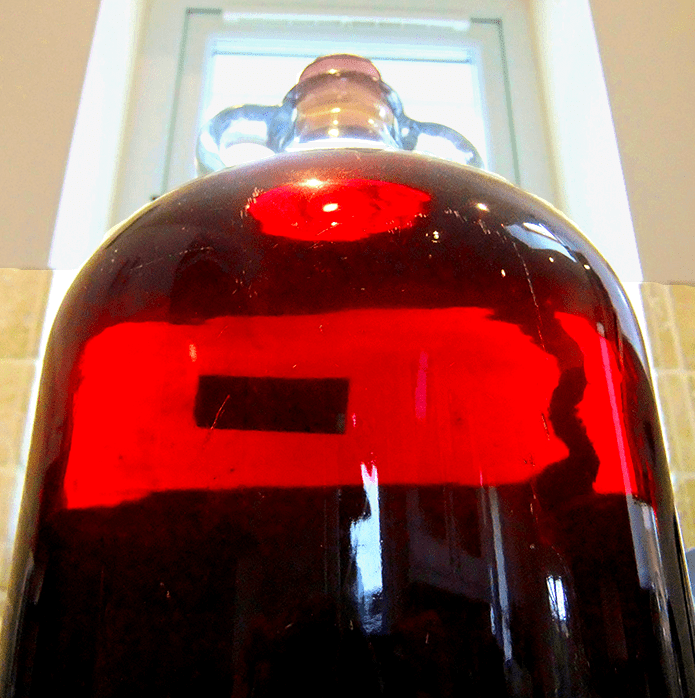
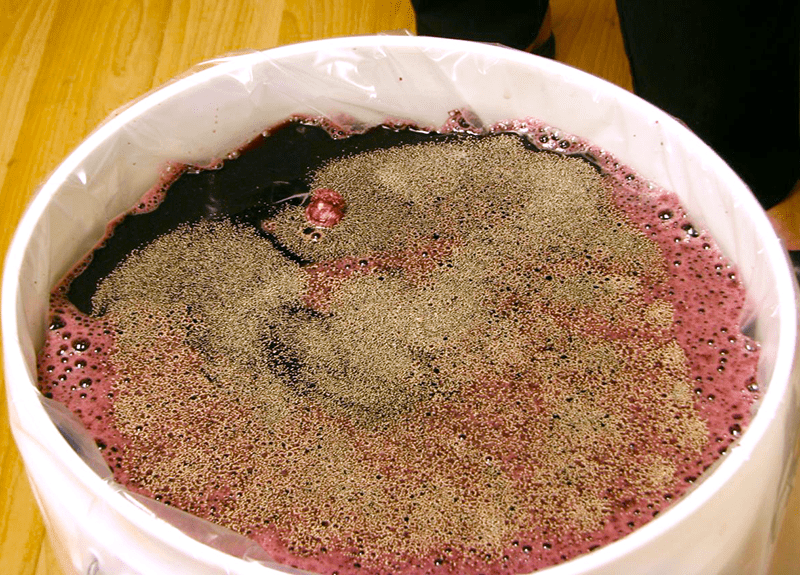
We get asked this quite often: how do you clear a cloudy homemade wine? Clearing wine can be a big concern for the first-time winemaker, especially after they see just how cloudy a homemade wine gets right after fermentation – not to worry, though.

If given enough time, it is most likely that the cloudy wine will clear up and stabilize completely on its own. Gravity will take over and eventually everything will settle to the bottom as a deposit. But there are still some things you can do to speed things along and make sure it happens and to avoid any wine clearing problems.

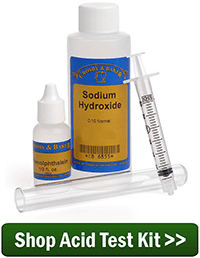
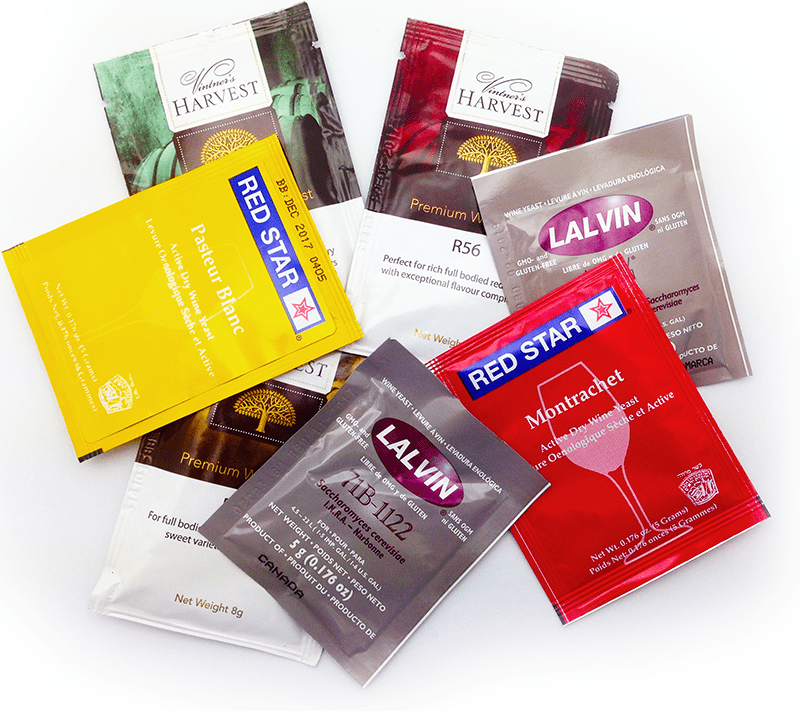
If the wine has just completed its fermentation, it is typical to add a dose of bentonite. This is a wine clearing agent, also referred to as a fining agent. Adding bentonite to a wine will help the proteins in the wine (including yeast) to clump together and drop to the bottom more readily. After a few days you can then rack the wine off all the sediment.

Most winemakers would stop at clearing wine with bentonite, but if you wished you could also add Sparkolloid. This is another wine clearing agent. It was designed to compliment the bentonite. While bentonite will collect and drop negatively charged particles, Sparkolloid will collect and drop out positively charged particles. Again, you would wait until the sediment stops accumulating and stabilize, then rack the wine off of it.

One could then follow up by treating the wine with a polish fining agent before bottling. This could be something like isinglass, Kitosol 40 or gelatin. Either of these will add a brilliant clarity to the wine. Just like the others, it works by dropping sediment out of the wine, so racking will be necessary before bottling the wine.Shop Bentonite

Beyond these things you could use filtration for clearing wine. There are filtration systems specifically designed for filtering the finest of particles from a wine. So fine, that you can not see them with the naked eye.

These wine filters are not at all effective in clearing a cloudy-looking wine. They work so good that the filters would clog very quickly. The wine needs to look clear before filtering it. That’s what you can use the bentonite or other wine clearing agent for.

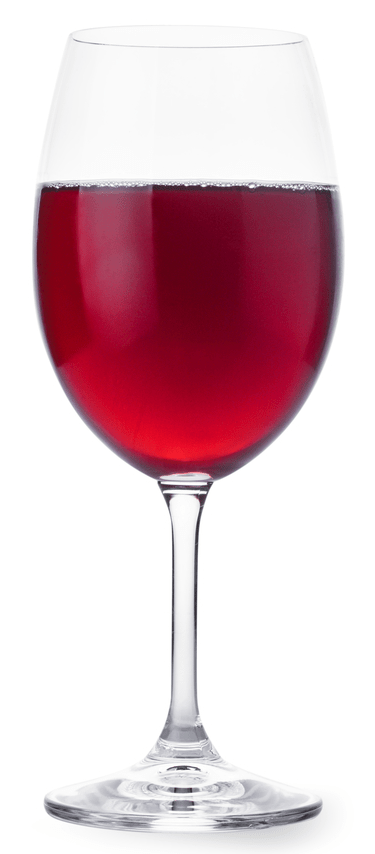
What wine filters are good at is adding a luster to the wine that can at times bring astonishing beauty to the wine. A wine filter can take a perfectly clear looking wine and make it look like a solid hunk of glass in the wine bottle.

Now that you know all these ways you can clear a cloudy homemade wine, here’s the bad news: it is possible to over-treat a wine. In fact, if you did all the things mention above to the same wine, the wine would suffer. It would lose more body and color than necessary. The character of the wine would be diminished, leaving you with a flatter, more uneventful wine.

So, how do you clear a cloudy homemade wine without ruining it? Treatment for clear wine must be used in moderation and with a plan.

  1. Shop SparkolloidAs mentioned earlier, you could do nothing. Just wait and see if the wine will clear up sufficiently on its own. Most of the time it will clear to some successful degree and stabilize.
  1. You could do everything possible to make sure you have the clearest, most beautiful wine possible, but nothing you can really enjoy.
  1. Or you could do what most winemakers do and hit a happy-medium. Many wine makers are happy with clear their wine with bentonite and be done with it. Another typical course of action would be something like clearing the wine with bentonite after fermentation. Then clearing the wine with gelatin before bottling. Or one might: bentonite after fermentation; then filtration, then bottle. Or, bentonite, Sparkolloid, bottle.

As you might be starting to see there are many possible answers to the question: how do you clear a cloudy homemade wine? Any of the courses of action in number 3 above, will get you a wine that is not cloudy, but what is the best way for you is something you’ll need to figure out. There is some art to clearing wine. You need to be able to know when to hold back, and you need to be able to choose with method is right for you situation at hand.Shop Mini Jet Wine Filter

Bruce, to answer you question more directly, since you are indicating that the wine is having problems clearing, I would start by treating the wine with bentonite. If the wine does not clear, then I would try Sparkolloid. At minimum, one of these two wine clearing agents should show improvement. After that you will need to decide if you want to stop there, or possibly treat the wine with gelatin before bottling or maybe even filter the wine. The choice is yours.

Happy Winemaking!

Controlling Wine Sweetness With Wine Yeast Attenuation

Observing Wine Yeast AttenuationI want to make a sweeter wine without adding wine conditioner. Can I use a “Montrachet” ( red /white) yeast and increase the sugar per gallon to get a controlled “stuck ” fermentation with predictable results? How would I go about that to accomplish my goal?

Name: Bob B.
State: NY
—–
Hello Bob,

It is true that different wine yeast will ferment a wine down to varying levels of residual sweetness. The ability of a wine yeast to ferment all the sugars is referred to as wine yeast attenuation. Wine yeast that can ferment a wine to complete dryness is said to be a high attenuation yeast. Wine yeast that leave the wine with some sweetness are said to be a low attenuation yeast.

While attenuation has to do with a wine yeast’s ability to ferment that last bit of sugar, there is also alcohol tolerance. This is the ability of a wine yeast to ferment to higher levels of alcohol. Both attenuation and tolerance are closely correlated in the sense that as the target alcohol level of a fermentation goes up by adding more sugar, the ability of a wine yeast to attenuate becomes less. But, depending on the wine yeast’s alcohol tolerance the attenuation may be affect a lot or just a little.

You can see the differences between wine yeast in this wine yeast chart we have on our website which list alcohol tolerance and attenuation (described as “Secondary Fermentation”) listed for each wine yeast.

My reason for explaining this is that while the wine yeast you select will play a major role in how dry or off-dry your wine ends up being, there are many other factors that come into play as well. Not only is their the alcohol level you are shooting for affecting the wine’s outcome, there is also:

  • The amount of nutrients available to the yeast
  • The temperature of the fermentation
  • The amount of saturated oxygen in the water you added
  • The acidity level of the wine must
  • The amount of residual sulfite in the wine must.

This list goes on and on with each factor effecting the wine yeast’s ability to ferment — or not ferment — to some marginal degree.

Shop Wine YeastWith all this taken into consideration, it starts to become clear that controlling the ending sweetness of a wine can be very difficult, if not impossible. No two fermentation ever go exactly the same. While you could have some level of consistency if you fermented the same type of wine over and over and were careful to replicate identical conditions with each fermentation, for the average home winemaker who likes to ferment different wines, using different fruits and different concentrates, this is not a very realistic goal.

Something else that needs to be pointed out is that while different wine yeast ferment differently, the amount they vary is not all that great. While a wine yeast with high attenuation can produce a wine that is puckering dry, wine yeasts with the lowest attenuation will not make a wine seem sweet — just less dry — under typical fermenting conditions.

You can try driving up the sugar level in the wine must with the hopes of the yeast stopping because of high level of alcohol being produced, but this is a very imprecise method that could just a easily result in a wine that is disgustingly sweet.

You can try stopping the fermentation when the sweetness is to your liking, but there are a couple of difficulties with this:

  • The first difficulty is that it is hard to judge the sweetness you will like when the wine is still fermenting. It taste completely different during a fermentation then it will after it clears and ages a little. The level of sweetness you like may be compensating for a bitterness in the wine that will not be there later on.
  • The second difficulty is that it is not easy to stop a fermentation with any consistency. You can try adding sulfites such a Campden tablets or potassium metabisulfite, however either of these are just as likely not work as they are to work. They are not dependable in a fermenting situation. As a side note, potassium sorbate will have little to no effect on a active fermentation.

Buy Wine ConditionerThis leaves you with using the method most wineries would use to stop a fermentation. That is to chill the wine down, then filter. Chilling the wine down will make the wine yeast dormant. It needs to be held at 30° to 40°F. for about 3 days. Then the wine is siphoned (racked) of the settled yeast and filter with sterile filter pads in a wine filter. These filters are so fine that they will take out over 99% of any of the wine yeast that still remains.

Having said all of this, if you are actually wanting a sweet wine, the easiest and most controllable way for the home winemaker to make a sweet wine is to back-sweeten it. If you are just looking to take the dry edge off of a wine you can do this by choosing a wine yeast that has low attenuation. Good candidates for this would be: Red Star Cotes de Blanc for whites and Lalvin RC 212 for reds.

—–
Ed Kraus is a 3rd generation home brewer/winemaker and has been an owner of E. C. Kraus since 1999. He has been helping individuals make better wine and beer for over 25 years.

In Plain English: The Difference Between pH and Titratable Acidity In Wine

Explaining Difference Between pH AndTitratable AcidityWe are using pH 4662 test strips to find the acid in our fruit wines. We got the test strips from a wine making shop, The salesman said they were for acid but they say pH is this what we are supposed to have or is there a conversion to find the correct acid levels?

Name: Gene P.
State: PA
—–
Hello Gene,

I would like to thank you for such a great question. Wine acidity and pH is a subject that confuses many home winemakers. And to make matters worse, it becomes even more head-spinning when you start throwing in terms like titration or titratable acidity. Let me see if I can break this down into language that is easier to understand.

Glass of Red WineFirst Of All, What Is Acid?

In the context of wine making, it is the stuff that makes your wine more tart or sharp tasting. Not enough of it, and your wine will be flat, lifeless, and in extreme cases, insipid. It’s also the stuff that helps your wine to be more stable. This means: less likely to be overcome by mold, bacteria, or oxidation. It even contributes to how brilliant your wine’s color will be. To sum it up, acid is an integral part of any wine.

pH Readings vs. Titratable Acids

Gene, to speak to your suspicions directly, there are two ways by which you can measure acidity in a wine: by pH and by titration.

pH READINGS:
pH Strips For Testing Acidity in WineA pH reading will be numbers like 3.9 or 4.4. There are two things to know about these numbers. First, they run backwards. That is to say that 3.0 is higher in acid then a 4.0. Secondly, the scale is not an even one. It is logarithmic by a factor of -10, which is a fancy way of saying that a wine that has a pH of 3.0 has 10 times as much acid as a wine with a pH reading of 4.0. Remember it goes backwards. For most wines you are looking for a pH reading of 3.4 to 4.0, with the sweet-spot being around 3.6.

A pH reading can be taken with pH strip, such as the ones you have purchased, or with a digital pH meter. In either case the readings are almost instant. Just put a drop of wine on the end of a pH strip and allow it to dry. You then match the color change of the pH strip to a color chart to determine the wine’s pH. With the digital pH meter it’s just a matter of putting the meter’s probe directly into the wine and wait for a reading. Not much harder than taking a temperature.

Acid Test Kit For Taking Titration ReadingsTITRATION READINGS:
A titration reading is a little more straight forward. It gives you a reading as a percentage of the wine. Optimal readings can very from one style of wine to the next, but essentially you want to be somewhere around. .55% and .75%.

Titratable acidity is measured with an acid test kit (titration kit). In simple terms, when using an acid test kit you are adding a solution to a wine sample until it changes color. You get your acid percentage reading by measuring how much of the solution it took to change the wine’s color.

The Different Between pH And Titratable Acidity In Wine

While both methods measure acid, each are measuring it in a very different way, so much so, that one scale can not be converted or correlated to the other. This is where much of the confusion lies between pH and titratable acidity.

As an example, if you have a pH reading of 3.6, it can not be correlated to any corresponding titration reading and vice versa. To carry this further, you can even have two wines with the same exact pH reading but with different titration readings. That’s how loosely correlated they are.

Confussed Person Trying to Figure Out Difference Between pH and Titratable AcidCONFUSED YET?
I’ll try to explain the difference as simply and plainly as possible. That’s my promise. But in order to do that I may take one or two technical liberties as a way to keep things simple. I only say this because I know there will be some people out there that will want to correct me on some of these explanations.

NOT ALL ACIDS ARE THE SAME
There are many different kinds of acids that can be found naturally in a wine. Each are made up just a little differently. The common ones are: tartaric, citric, malic, lactic, ascorbic and succinic, along with many others in smaller amounts. The important thing to understand is that each one of these acids has a different strength of tartness on the tongue. Some acids are very sharp, while others, not so much at all.

Adding Acid To Two Jugs Of WineAs an example, you can take two one gallon jugs of wine that are identical and add to one of them a 1/4 ounce of ascorbic acid and to the other, 1/4 ounce of malic acid and get two completely different levels of tartness in each case. While the amount of acid added to each gallon was the same, the resulting level of tartness was different. This is because different acids have different strengths.

TO THE HEART OF THE MATTER
Now that you understand that not all acids are the same, I can explain to you the difference between pH and titratable acid.

pH represents how much acid is in a wine
regardless of how strong it tastes,
whereas a titration measures
how strong that acid tastes.

In other words, pH doesn’t concern itself with how taste-able the acid is. It only cares that it is in the wine. Whereas, a titration reading does not care about how much acid is in the wine. It only cares about how tart it is making the wine.

WHY DON’T WE FORGET ABOUT THE pH?
After reading this you may be wondering why we are even interested in a pH reading at all. I mean, if you have a way of measuring the acidic taste or tartness of the wine by way of performing a titration, why would you even care about a pH reading? What’s more important than taste? This is a very good question, but there is also a very good answer!Shop Digital pH Meter

While acids do bring a tartness to the wine that is necessary for a wine to taste proper, acid also does the other things mentioned earlier for the wine. It helps to protect the wine from spoilage and oxidation, and it keeps the wine’s color fresh and brilliant.

This is where pH becomes important. pH is more directly related to how well the wine is being protected. While some acids do not do so much for tartness, they may be going a long way toward protecting the wine. This is why it is always important to make sure the pH is in the correct range.

IN REALITY…
A wine that has a proper range of pH will usually result in a wine that also has an acceptable level of tartness. The opposite usually holds true as well. A wine that has a proper level of tartness will likely have an acceptable pH reading. But, this is not a given! You can’t always assume this will be the case. For some wines getting the acidity levels correct can be a challenge.

So, Where Does This Leave Us

To make sure your wine is in good balance, you will want to adjust the wine’s acidity according to both pH and titratable acid. This may seem like a process that is destined to end in conflict, but what you will usually find is that both readings will be telling you to do the same thing — to either raise the acid or lower the acid. Then when you get both readings to an acceptable range, a little compromise may need to take place.

As A Final Note…Shop Wine Making Kits

All the information above about the difference between pH and titratable acidity in wine and adjusting the acid only applies when making wine from fresh fruit, whether it be strawberries or grapes. If you are using wine concentrates or wine ingredient kits to make wine, you do not need to worry about any of this. Everything has been balanced and tested ahead of time for you.

Gene, best wishes and happy wine making,
Ed Kraus
—–
Ed Kraus is a 3rd generation home brewer/winemaker and has been an owner of E. C. Kraus since 1999. He has been helping individuals make better wine and beer for over 25 years.

How Are Different Wines Made From Grape Juice?

Melot Grape For Making WineI am interested in making Merlot wine. I have found all your wine kits for this, but don’t quite understand how theyare used. Can you turn any fruit juice into a merlot with these kits? Do you mix the contents of the kit with the particular type of merlot you wish to make, like blackberry juice.

Thank you,
Nancy
_____
Hello Nancy,

I see there is a little bit of confusion about how different wine’s can be made from grape juice. Let me see if I can clear things up a bit.

The Merlot wine you mentioned is made from Merlot grapes. The same holds true for many other wines you may see on the store shelf: Cabernet Sauvignon, Chardonnay, Zinfandel. These wines are made primarily from the grape after which they are named. Cabernet Sauvignon is a grape; Chardonnay is a grape; and so on. These wines are known as varietals.

However, this is not true for all wines. For example, a wine labeled Burgundy indicates that grapes primarily used to make it where grown in the Burgundy region of France. It does not make mention of the specific grape varieties used, even though a Merlot grape could have been used in part since it is a grape that is grown extensively in Burgundy, France. These wines are known as appellation wines. The emphasis is on the where not the what.Shop Wine Kits

So when you ask: how are different wines made from grape juice? The real answer is different wines are made from different grape juices.

Many people are surprised to find that there are so many different grape varieties used to make wine. They just assumed that a hand-full of types were used to make a lot of different variations of wine, but that isn’t so. In reality, there are hundreds, if not thousands, of different grape varieties from which wine can be made.

The wine ingredient kits you are referring to are basically concentrated grape juice packaged along with a few small packets of other ingredients such as wine yeast, clarifiers, stabilizers, etc.. You just add water and ferment the mix as called for by the directions that are included. Currently, we offer Merlot in seven different brands along with some Merlot blends.

They vary in price in accordance to their quality and how specific the region they are from is indicated. Lower priced wine ingredient kits might only specify which continent the grapes came from. These concentrates would be appropriate for making everyday drinking wines. Higher priced wine ingredient kits can be as specific as the particular growing region within a country. For example, Napa valley as opposed to Sonoma valley. These concentrates make fabulous wines with characters representative of that growing region. This is known as a wine’s terroir.Shop Wine Making Kits

So that’s how different types of wines are made from grape juice. It’s all about the grape and where it was grown. I hope this information helps you out.

Happy Winemaking,
Ed Kraus
—–
Ed Kraus is a 3rd generation home brewer/winemaker and has been an owner of E. C. Kraus since 1999. He has been helping individuals make better wine and beer for over 25 years.

7 Tips: How To Use A Wine Bottle Corker Like A Pro!

Winemaker Showing How To Use A Wine CorkerWant to learn how to use a wine bottle corker? Then here’s some information that you will definitely want to take a look at…

Just as the name sounds, a wine bottle corker is a tool that is used to insert a cork into a wine bottle. It compresses and plunges the wine cork. Below are some tips on how to use a wine bottle corker and how to get the cork into the bottle with minimal effort.

  • Use The Right Corks:
    First and foremost you want to use the right corks when bottling your wine. Without the right cork your bottling efforts will be doomed from the start. This means using either a size #8 or size #9 straight cork. Anything smaller and you can expect some seepage when the wine bottles are laid on their side. Anything larger and the wine bottle corker will have too hard of a time corking the bottle. As a side note, you’ll also have an incredible time getting the cork out.
  • Prepare the Corks:
    The wine bottle corks can be prepared in one of two ways:
    1. You can steep or steam the corks in hot water for a short period of time. Bring a pan of water to a boil; turn the burner off; put the corks on the water; and place a lid over them. About three minutes is all the time recommended. Never go over five. Get the corks off the heat. Heating the corks for too long will cause the them to become brittle and crumble while in the bottle.
    2. The second method is to submerge the corks in a sulfite solution for a few hours or overnight. You will need to use a container with a lid to keep the floating corks submerged. I use an old plastic jar. The sulfite solutions consists of either 1/4 teaspoon of potassium metabisulfite or 4 Campden tablets in a quart of water.Regardless of which method you use, you will want to drain the excessive water from the corks by placing them in a colander, strainer or something similar.
  • Loading The Cork:
    Now we’re getting down to how you actually use the wine bottle corker. This step is very straight-forward. Each corker is a little different, but essentially all you are doing is dropping the cork into the corker’s chamber.
  • Compressing The Cork:
    What this is doing is taking the cork that is almost an inch in diameter, and squeezing it down to  about the diameter of a dime. Depending on the corker, this action requires that you pull down or squeeze some kind of lever.Shop Wine Bottle Corkers
  • Inserting The Cork:
    This is where the actual corking takes place. Once the cork is compressed, a plunger is used to slide the cork into the wine bottle.  Some style of corkers compress and plunge all with one lever action. This is normally the case with floor-standing wine bottle corkers. Other corkers may require two steps as described above. First you compress. Then you plunge. This is sometimes the case with hand-held corkers.
  • Adjusting The Depth Setting:
    Once you cork your first wine bottle you will want to take a look and see how far the cork was inserted into the bottle’s opening. The goal is for the cork to be flush with the top lip of the wine bottle opening. A little lower is okay, but you never want the cork sticking out of the wine bottle. Most wine bottle corkers will have a depth setting adjustment that will allow you to control how far you corker plunges. Play with this adjustment until the corks are being inserted at the proper depth.
  • Seating The Corks:
    All wine bottles that are sealed with a cork in this way will eventually need to be stored on their side. This helps to keep the cork swelled so that it can continue to maintain a tight seal. But before laying the bottles down you need to give the corks time to set. After the corks are compressed by the wine bottle corker, it takes a little time for them to expand all the way back and apply full pressure on the inner side walls of the wine bottle opening. If the wine bottle are laid on their side too soon some could leak. For this reason you need to let the wine bottle sit upright for a day or two before stowing away in the cellar.Shop Wine Corks

So there you have it, the essentials of how to use a wine bottle corker. All-in-all you’ll be surprised at how simple it is to cork a bottle of wine. It’s a fun part of the wine making process and one that’s just perfect for getting the whole family involved.

Happy Wine Making,
Ed Kraus
—–
Ed Kraus is a 3rd generation home brewer/winemaker and has been an owner of E. C. Kraus since 1999. He has been helping individuals make better wine and beer for over 25 years.

Removing The Bitterness From A Homemade Fruit Wine

Testing If Wine Is Still BitterI have tried to make a strawberry wine… I had started the process back on 1/26/20. On 2/28/20 I racked off the wine after it quit working and it had a SG of less than 1. But it tasted really bitter. Is there something that I can do to give it a better strawberry taste or add another fruit. I am open to suggestions, so I don’t have to dump 6 gal of what should be a good flavored wine.

Kevin S. — IL
—–
Hello Kevin,

I’m sure this wine is far from being dumped. You are in the same boat that many other fruit winemakers have been in — that is the fruit wine has no sweetness, therefor it taste nothing like fruit.

Some of the bitterness you are referring to could be from microscopic yeast still floating around. Some of it could be because the wine simply needs some time to maturate and age off its rough edges. Then there’s the fact that the wine is dry. All three of these things will need to be considered when removing the bitterness from any homemade fruit wine.

I would strongly suggest that you age the wine in bulk for a while before trying to make any adjustment or take any corrective action. The reason for this is to make sure all the yeast has had plenty of time to drop out, and also to allow the wine time to take advantage of the benefits of aging. At this stage every 30 days of maturation should add some noticeable improvements.

During this bulk aging it is important that the head-space be eliminated as much as possible. You want the wine exposed to very little oxygen. Not doing so can cause the wine to oxidize. You will also want to add another dose of Campden tablets at this time. This will help drive out any free oxygen that may be saturated in your strawberry wine. It will also destroy any wild microbes that may have floated onto the wine. Campden tablets will make sure these little nasties don’t have a chance to grow and spoil the wine.Shop Campden Tablets

Kevin, you want the wine to improve as much as possible before you take steps toward removing the bitterness. The reason for this is twofold: 1) Hopefully, the actions needed after aging will not need to be as drastic if aging has improved it enough. 2) If you try to remove the bitterness now, you may be trying to fix or coverup things in the fruit wine that won’t be there later once it does age in the bottle or wherever. In other words, you might end up over-compensating with too much of a corrective action.

Now that we have that out of the way. The most common thing for removing the bitterness from a homemade fruit wine is sweetening it. One of the fundamental characters of any fruit is sweetness – including strawberry. When you take out all the sweetness through fermentation, it no longer tastes like that fruit.

In my experience, a little bit of back-sweetening can bring out a lot of fruitiness. You don’t necessarily have to add so much sugar as to make the wine sweet, just enough to take the try edge off. It is important that potassium sorbate be added at the same time. This is a wine stabilizer that is added so that a re-fermentation does not occur from the newly added sugars. You can find more information on this process in the article, Making Sweet Wines.Shop Potassium Sorbate

Normally regular, store-bought cane sugar will do just fine for sweetening. It also provides the most predictable results, however there is some room for experimentation by sweetening with honey, corn sugar, fruit concentrates, etc.

By far, aging and sweetening with cane sugar is the most common remedy for a bitter homemade wine. It is all that needs to happen most of the time, but there are situation where it just isn’t enough. The fruitiness still isn’t there or what have you. In these instances experimentation may be necessary.

You can try flavorings to intensify the wine’s flavors. You might also want to experiment with blending the wine with another. Wines that are too high in alcohol tend to have less flavor. The tongue is numbed by the alcohol giving the impression that the wine has no flavor. Dilution with a low alcohol wine could be appropriate.

Regardless of the experimental path you choose, it will be important to test the results on a sample of the wine. Do a bench-test before committing the entire batch. Step cautiously when experimenting with your wine.

My hope is that aging is all that is needed for removing the bitterness from your wine. But just this same I have laid out these additional, more-extensive options, just in case more radical measures are needed.

Best Wishes,
Ed Kraus
—–
Ed Kraus is a 3rd generation home brewer/winemaker and has been an owner of E. C. Kraus since 1999. He has been helping individuals make better wine and beer for over 25 years.

Unlocking the Pearson’s Square To Calculate Adjustments To A Wine

Pearsons Square WineCan’t quite figure out how to calculate the amount of distilled water to add to 5&1/2 gal of raspberry wine with an acid of 1.3 to reduce it to .7 or .8, can you help me? Some place I thought you mentioned to use the pearson’s square.
Thanks Knute
—–
Hello Knute,

I want to thank you for this question, and here’s why. The Pearson’s square is something that I’ve been meaning to write about for some time. It seems like every time I turn around I am referencing it in a blog post, but I have never done a blog post specifically on using the Pearson’s square to calculate adjustments to a wine.

And that’s a shame, because in my mind the Pearson’s square is one of the most underutilized calculating tools a winemaker has at their disposal. It can turn, what seems like, a very difficult math problem, and reduce it down to something visual that can be figured out in seconds. The Pearson’s square is the perfect tool for any wine blending scenario you can think of, including fortifying wines. It’s also ideal for calculating wholesale adjustments to the acidity or sugar content of a wine must.

What the Pearson square does is very simple.
It allows you to calculate how much of two liquids you will need to blend together (the ratio) to reach a specific target reading. In the case of wine making, how much of each of the two wines to blend together to reach a target reading of either acidity, specific gravity, alcohol… Anything that can be measured in the wine that has a linear or even scale can be targeted. The only requirements are that you know the reading of each of the two liquids to be blended and the target reading.

Basic layout of the Pearson's squareHere is the Pearson’s square. I am going to keep this as simple as possible:

  • A & B represent the reading of the two liquids to be blended.
  • C is the target reading. The reading you wish to have.
  • D & E represent how many parts of each liquid you need to blend (the ratio).

Knute, now lets take your situation as an example. You have a wine with a titratable acidity of 1.30%. By the way, this is a very high acid reading. I don’t imagine it taste very good. You want to know how much distilled water you need to add to the wine to bring it down to around .70% or .80%.

Pearson's Square With Knute's Problem Set Up
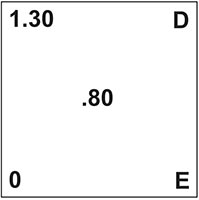
Here’s how this problem would set up on the Pearson’s square:

  • A is the acidity level of your wine.
  • B is the titratable acidity of water.
  • C is the acidity level you would like to have.
  • D & E is what we need to know. How much of each liquid to blend.

Pearson's square with answer for blending wineTo solve for D & E you want to calculate the difference between A-C and the difference between B-C. In your case Knute, this would be the difference between 1.30 and .80 which comes out to .50. And, the difference between 0 and .80, which is .80. Here’s how this would play out on the Pearson’s square.

So what does this mean for your 5.5 gallons of raspberry wine?
It means that for every 8 parts of raspberry wine, you need to add 5 parts water. Or to put another way, to every 8 quarts of wine, you need to add 5 quarts of water.Shop Wine Making Kits

You can also figure this down to ounces. There are 128 ounces in a gallon. You have 5.5 gallons of wine. That would be a total of 704 ounces. For every 8 ounces, you need to add 5 ounces of water.

If you take 704 ounce and divide it by 8, you will know how many 8 ounce portions of wine you have. It turns out you have 88 – 8 oz. portions in 5.5 gallons of wine. Now take the 88 portions and times it by the 5 ozs. of water you need for each portion. That’s how many ounce of water you need to add (5 x 88 = 440). This breaks down to:

  • 3 Gallons (384 ozs.)
  • 1 Quart (32 ozs.)
  • 1 Pint (16 ozs.)
  • 1 Cup (8 ozs.)

All of these add up to the 440 ounces. Add this much distilled water to the wine and it will have an acidity level of .80%.

Shop Acid Testing KitIf you haven’t been able to tell yet, I like the Pearson’s square a lot. I find myself using it all the time. Not to take large swipes at a wine like Knute needed to, but to make minor adjustments. The Pearson’s square is almost a necessity when blending wines or when wanting to fortify a wine with distilled alcohol or brandy.

Happy Winemaking,
Ed Kraus
—–
Ed Kraus is a 3rd generation home brewer/winemaker and has been an owner of E. C. Kraus since 1999. He has been helping individuals make better wine and beer for over 25 years.

My Wine Hydrometer Reading Is Too High!

Hydrometer Reading Thats Too HighI am using a concentrate that calls for 12 lbs of sugar. I read my hydrometer at 1.140 or 18.5% potential alcohol. Would this be correct or am I ready it wrong? Thanks again, you have a GREAT web site…..

Name: William R.
State: MO
—–
Hello William,

The wine hydrometer reading you provided is too high for a wine. Most wine yeast will have trouble fermenting that much sugar. As a fermentation continues, each additional percentage of alcohol gets harder and harder for the wine yeast to ferment.

A specific gravity reading of 1.140 on a hydrometer does coincide with a potential alcohol of 18.5%, so I do believe that the hydrometer showed this reading, but is it the correct reading? That’s the big question here!

Here’s what I know. If this is a 5 gallon batch and you added 12 pounds of sugar to it. This sugar, by itself, will create a potential alcohol of about 12%. I’m assuming that the directions with the concentrate said this was how much sugar to add. In addition to this, the concentrate will raise the potential alcohol reading even further. Any concentrate is mostly fruit sugars that will contribute to the potential alcohol. I can not tell you exactly how much the concentrate contributes without knowing more about the specific concentrate you are using.

There is also the distinct possibility that you got an incorrect reading, and that’s why the wine hydrometer reading is too high. There are three common ways we see home winemakers get incorrect hydrometer readings:

  1. Not Enough Wine Sample Was Used
    Shop HydrometersOne requirement for getting an accurate hydrometer readings is the hydrometer has to be floating. That’s what it’s all about, reading how high or low the hydrometer floats. If there is not enough wine to float the hydrometer you will get a reading that is meaningless. The hydrometer has to be off of the bottom.
  1. The Sugars Did Not Get Evenly Dissolved
    The sugar in the wine must is what actually causes the hydrometer to float. The more sugar there is in the wine must, the higher the hydrometer will float. The more sugar there is, the more alcohol that can potentially be made. Sugar is what ferments into alcohol. This is the whole basis of a wine hydrometer. But if the sugar you add is not evenly blended throughout the wine, you will get an incorrect reading. The un-blended sugars drift to the bottom causing samples taken off the bottom through a spigot to be completely different than a reading taken off the top.
  1. The Calibration Of The Hydrometer Is Off
    This doesn’t happen very often, but I have seen it happen once or twice over the years. The scales in a glass hydrometer are on one a piece of paper that is carefully tacked into place with a spot of wax from the inside. If the paper comes loose and the hydrometer is jarred around enough, the paper could slip. An easy way to check your hydrometer’s calibration is to float it in water. You should expect a specific gravity reading of 1.000 at a temperature of 60°F.

Shop Fermentation SamplerAfter reviewing the above, if you still determine that your wine hydrometer reading is too high. I would take some measures to lower it. This means diluting the wine must with more water. Shoot for a potential alcohol around 13% or 14%. Use a Champagne type yeast. This wine yeast is able to handle higher amounts of sugar than most.

WARNING: If the concentrate was packaged specifically for making wine, I doubt that you have an accurate reading, and one of the 3 above reasons are applying. It would be very unusual for a wine concentrate to be off. Not even a little bit. The wine concentrate producers know how to get you exactly to the reading you need simply by following the provided wine recipe. If this is specifically a wine concentrate I would be very hesitant to add any additional water or sugar to the wine must without making sure I got to the bottom of things.

Happy Wine Making,
Ed Kraus
—–
Ed Kraus is a 3rd generation home brewer/winemaker and has been an owner of E. C. Kraus since 1999. He has been helping individuals make better wine and beer for over 25 years.

I Have Too Much Headspace In The Secondary Fermenter

Headspace in Secondary FermenterI am very new to wine making and have questions about the secondary fermenter and handling the headspace in the fermenter… I am sure it’s never good to let get oxygen in there with the wine but it never seems to work out for me. Can you please shed more light on this process and what’s the best way to deal with too much headspace in secondary fermenter. Use water? etc? And after racking secondary from 5 gal. and get lets say 4 1/4 gal? What you would use?

Name: Eric
State: La.
—–
Hello Eric,

First of all, thanks for the great question. I’m sure there are others that have the same question about what to do when they have too much headspace in their secondary fermenter, so hopefully by sharing this we can help other home winemakers as well.

First we have to ask, why is having headspace even an issue? The reason is because oxygen is one of wine’s biggest enemies. Not only does it promote the oxidation of the wine, it promotes spoilage of the wine. Mold spores and bacteria thrive on oxygen. Either of these manifestations can be disastrous to a wine.

I am going to assume that the wine is in a carboy at this point. Topping up a wine that is in a bucket fermenter is not very practical since the ultimate goal is to reduce the surface contact area, not necessarily eliminate headspace. Regardless of how much you top up a bucket fermenter, the surface contact area essentially remains the same. If the wine is in a carboy, topping up will eventually get you into the neck of the carboy where there is little surface contact with the air.

I am also going to assume that the fermentation has completed. This is because during a fermentation having too much head-space is not an issue. While there is a fermentation occurring, the headspace is not filled with damaging air, but rather, CO2 gas from the fermentation. In other words, the headspace is harmless in this situation – as long as you keep the airlock in place.

Shop Wine Ingredient KitsThe last assumption I am going to make is that the wine is going to be in the secondary carboy for more than a week or two. If you are using a wine ingredient kit that can be bottled in 4 or 6 weeks from start to finish, then topping up is not something you need to be worried about. The wine is not still for a long enough period to be affected by oxidation.

Okay, so your fermentation has completed and you have it in a secondary fermenter, such as a carboy. You are waiting for it to clear, and you plan on this taking a few weeks if not longer.

Fortunately, there are several things you can do when you have too much headspace in a secondary fermenter. Which method you choose depends on the severity of the situation. Here is a list of what you can do to eliminate headspace in a secondary fermenter, starting with eliminating a minor headspace and ending with eliminating a major headspace:

  • Add Water: If the secondary fermenter is only short a cup or two, then adding water is perfectly okay. This small amount is not enough to alter the flavor or character of the wine to any noticeable degree. You will want to use distilled water for two reasons. First, all the free oxygen as been removed. This is a good thing. You do not want to add oxygen to the wine at this stage. Secondly, distilled water is free of chlorine and other chemicals you might find in tap water.
  • Buy CarboysAdd Water/Vodka Mix: If the headspace in your secondary fermenter is closer to a quart, you have to start considering the dilution of the alcohol when adding a water. For this reason you may want to use a distilled water/vodka mix. Choose a cheap vodka. It will be more flavorless than a brand name vodka. Grain alcohol can also be used for this purpose if it is available in your area. Assuming the vodka is 80 proof, use 1 cup (8 fl. oz.) for every half gallon of distilled water.
  • Add Similar Wine: If the headspace in the secondary fermenter is over a quart, then not only is the dilution of the alcohol an issue, but also acidity, body and flavor. For this reason you may want to top up the headspace with a similar wine. This could be a commercially made wine, but more economically, you could use some homemade wine that you have already bottled.
  • Add Glass Marbles: If the headspace is more like a half gallon, then displacement of the head-space with glass marbles my be the most practical solution. The marbles will need to be sanitized before putting them into the wine. Add them slowly to the carboy 2 or 3 at a time. Pouring them in rapidly could actually crack the bottom of the carboy. You would prefer smaller size marbles for this reason. Also, make sure they are player marbles and not decorative or aquarium marbles. These tend to chip easily.
  • Move Wine To Gallon Jugs: For situations where you have way too much headspace in the secondary fermenter, the only sensible way to handle it my be to move the wine into gallon jugs. You normally don’t like to be in such a position, but sometimes it can’t be avoided. The biggest problem with this is that the remainder to the gallons will be lost.
  • A Combination Of The Above: You may want to try more than one method for topping up the same wine. For example, if your wine is 4-1/4 gallons in a 5 gallon carboy. You could add some water/vodka mix, some wine and some glass marbles to make up the difference. This would be an option as opposed to breaking up the batch into gallon jugs.Shop Wine Making Kits

Having too much headspace in the secondary fermenter can be a problem. Fortunately, there are solutions. Doing any of these would be a better option than letting the wine sit still for weeks and months.

Happy Winemaking,
Ed Kraus
—–
Ed Kraus is a 3rd generation home brewer/winemaker and has been an owner of E. C. Kraus since 1999. He has been helping individuals make better wine and beer for over 25 years.

A Simple Guide On How To Choose Wine Yeast

Winemaker Choosing Wine YeastI have been making wine from fresh must purchased in 6 gallon pails I can not seem to get it as dry as commercial wines. It appears all sugars have fermented, SG.end up around 0.992-0.994. Is there a certain method or specific yeast to use? I have been using lavlin RC-212 for reds. Should I be choosing a different wine yeast?

Name: Chuck H.
State: PA
—–
Hello Chuck,

This is a great question and one that has perplexed many winemakers. Choosing wine yeast is part of the art of wine making. What wine yeast you choose makes a difference.

When you ask the question: what type of wine yeast should I use? there is a lot to think about before answering. In fact, there is more to think about than most people realize, and this is where some home winemakers can fall just a little short in their wine making. Many are under the impression that wine yeast is just wine yeast and making a selection is not that big of deal. Sometimes the result can be pitching whatever yeast happens to be on hand. Some even contemplate adding bread yeast, but the wine yeast vs bread yeast thing is a whole other story.

In reality, there are many different wine yeast strains, each bringing its own to the wine. Some will ferment to higher levels of alcohol than others. This is called alcohol tolerance. Other wine yeast strains may not ferment to higher alcohol levels but are effective at fermenting down the residual sugars. This is referred to as wine yeast attenuation.

Different wine yeast types also have different flavor profiles. Some produce wines that are more rich and earthy while others produce wines that are more fresh and crisp. So it is important to understand that the wine yeast you select does make a difference and should be considered as one of the central ingredients of any wine recipe.

Buy Red Star Wine YeastIn an effort to help the home winemaker that is faced with choosing wine yeast, we have developed a couple of wine yeast charts. One is for the Lalvin wine yeast chart. There are 5 different wine yeast strains listed on the Lalvin yeast chart. The other comparison chart is for the Vintner’s Harvest wine yeast chart. There are 9 different wine yeast strains listed on Vintner’s Harvest wine yeast chart.

Chuck, when looking at the profile chart for the Lalvin wine yeast you can see that the RC 212 wine yeast that you used has a moderate fermentation speed and a good alcohol tolerance, but yet it is not producing a wine that is dry enough for your tastes. For this reason I would suggest trying the Lalvin EC 1118 next time. Generally, it is a harder fermenter than the RC 212 and should get you closer to what you are looking for.

If you are interested you can also take a look at the Vintner’s Harvest wine yeast chart and see if anything there is of interest to you. This comparison chart has a little more detail in terms of yeast flavor profiles.

As a side note: while the wine yeast strain you select will make a difference in the outcome of your wine, the fermentation environment plays a role as well. The temperature of the fermentation; the amount of nutrients and the amount of oxygen all effect how complete the wine will ferment. In other words, the yeast need to be happy. Everything mentioned in this blog post about choosing wine yeast is based on the premise that things are in place to produce a normal, healthy fermentation.shop_wine_making_kits

So as you can see there is are differences in wine yeasts. I urge you to use this to your advantage and take control of the flavors the wine yeast are adding to your wines by always knowing what type of wine yeast you should be using to achieve the character and flavors you are looking for. Make choosing wine yeast a conscious decision.