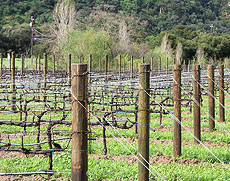
 Now is the time to get ready for the next wine growing season. Vines are coming to life and it won’t be long you’ll need to have your act together.
One of the most useful tools you can have as a wine grower is a refractometer. Refractometers can tell you the sugar level (brix) of your grapes with just a few drops of juice as a sample. By tracking this sugar level of your grapes throughout your vineyard, you’ll be able to know the optimum time to pick.
To lean more about refractometers and how they can help you in the vineyard, you may want to go over some of the past posts on this blog that cover various aspects of refractometers.
Refractometers Let You Know When To Pick!
How Refractometers Work?
Get A Refractometer With The “ATC”
You can also learn more about refractometers by visiting our website. There you’ll see the refractometers we have to offer as well as detail descriptions.
———————————————————————————————————
Ed Kraus is a 3rd generation home brewer/winemaker and has been an owner of E. C. Kraus since 1999. He has been helping individuals make better wine and beer for over 25 years.
Category Archives: Wine
The Perfect Faucet For A Fermenter
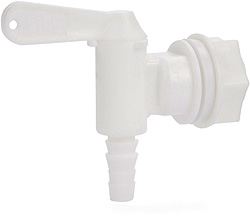 Great news! We have just made a significant improvement to all of our plastic fermenters including the 6 Gallon Screw-Top Fermenter and all of the Tuff-Tanks…. Now they all come with our newly designed Barbed Fermenter Faucet.
This faucet was designed specifically for the home winemaker. We put all our thoughts, experiences, as well as customer ideas together to answer the question, what would be the perfect faucet for the home winemaker? And, this is the answer we came up with.
Removable For Easy Cleaning
First an foremost, this faucet can be easily removed from the plastic fermenter for cleaning and sanitizing. Just remove the plastic nut and rubber washer from the backside, and it comes right out, making it convenient to clean.
Narrow Spout For Bottling
Its spout is narrow so it will easily fit into wine bottle openings. This makes it handy at bottling time for filling your wine bottles straight from the plastic fermenter.
Spout Is Barbed For Attaching Hose
The spout is barbed so you can attach our Vinyl Hose to it without worrying about it slipping off and making a mess. This makes transferring your wine from one plastic fermenter to the next easy and painless.
Spout Is Stationary And Does Not Turn
Here’s a feature that really sets it apart. The Barbed Fermenter Faucet has a shut off lever like many other faucets on the market. One ways on. One ways off. But unlike any other fermenter faucet, the barbed spout does not turn with the shut-off lever. It stays stationary.
Some of you may be saying, why is this so important, others who’ve already done some wine brewing already know. When transferring your wine from one plastic fermenter to another, the last thing you want is a hose flipping around every time you turn the lever on or off. It’s annoying. It’s distracting. And it has potential for making a mess.
Easy To Install On Any Plastic Fermenter
The Barbed Fermenter Faucet can be installed on any fermenter. All you need is a 1 inch hole cut were you want the faucet to be, place the faucet in the hole, and then attach it by placing the nut and rubber washer on the backside.
———————————————————————————————————
Ed Kraus is a 3rd generation home brewer/winemaker and has been an owner of E. C. Kraus since 1999. He has been helping individuals make better wine and beer for over 25 years.
What Do I Need Along With The Gallon Glass Jugs?
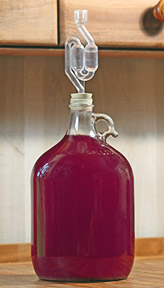 Please remember when you are ordering our gallon glass jugs, that you will need to order closures such as any screw caps or rubber stoppers that may be needed separately. These items are not included with these gallon jugs simply because we do not know what you intend to do with the jugs. Whether your bottling, fermenting or storing wine with them will determine what else you will need.
For Bottling:
Bottling your wine in gallon glass carboys is a great idea so long as you can consume a gallon of wine in a couple or three days. If you bottle your wine this way you will want to order 38mm screw caps to seal these jugs. For more information on this subject see another post on this blog, Using Glass Gallon Jugs When Bottling Homemade Wine.
For Fermenting:
You can also use the gallon glass carboys for fermenting your wine. For this you will need to attach an air lock to them. This can be done by buying a rubber stopper with a hole in it, and then fit the air lock into that hole. Rubber stoppers come in all sizes, but the ones you will need for these gallon size jugs is a size #6 rubber stoppers.
Alternately, you can use a rubber cap in place of a rubber stopper for attaching an air lock. If you decide to go this route you will want a size #3 rubber cap. Some winemakers prefer the rubber cap over the rubber stopper because it is more difficult for it to accidentally come loose- handy with you have kids or nosy pets.
For Storing:
If you intend to use the jugs for storage or aging, and then bottle the wine later own in regular size wine bottles, then you can use screw caps just as well, but you can also use tapered corks in these jugs for this purpose. A size #14 tapered cork is the size you would want.
The main difference is that the tapered corks will allow some oxygen to permeate through to the wine at a very slow rate. This will facilitate the aging of your wine, causing it to become more mellow sooner. Screw caps do not allow oxygen to pass through.
———————————————————————————————————
Ed Kraus is a 3rd generation home brewer/winemaker and has been an owner of E. C. Kraus since 1999. He has been helping individuals make better wine and beer for over 25 years.
How Are Synthetic Corks Made? (Part I)
 This is part I of a two part series. Look for part II later this month.
With each passing year synthetic corks are becoming an increasingly popular way to seal wine bottles. They have proven themselves to be a worthy replacement of the natural cork stopper, whose production costs and shortages have continuously driven their prices up and their quality down.
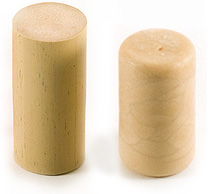
Synthetic corks are made of high-grade polymer plastics. The inside is filled with a thermoplastic that has elastic qualities. This allow the synthetic cork to give but still retain its shape, much like a natural cork. The outer shell is made of a solid plastic that bends easily, much like rubber would.
The whole idea is to have the synthetic cork act as much like a natural wine bottle cork as possible, in terms of how it is goes into the bottle, how it ages the wine, and even how it goes “pop” when removed from the bottle.
There are two ways to make a synthetic cork. The first way may seem obvious to some, which is to mold them with an injection molding process. This is the same production method used to make everything from plastic lawn furniture to little army men.
The significant issue with this method is that it allows the cork to have an outer shell on all sides making the inner foamy plastic completely encapsulated.
The second way to produce them is by extrusion. This is how everything form vinyl hose to rubber wiper blades are made. The synthetic cork is continually molded as a never-ending long piece. As it is pushed or extruded from the mold it is cut into the appropriate length.
This production method allows the synthetic corks to have a harder plastic outer shell, but only on the sides, not the top and bottom as the injection molded ones due. This means that the foam is exposed to the wine.
Watch for part II of this post, where we will go over the significance of these two production methods.
———————————————————————————————————
Ed Kraus is a 3rd generation home brewer/winemaker and has been an owner of E. C. Kraus since 1999. He has been helping individuals make better wine and beer for over 25 years.
Keep Your Wines Protected From Those Little "Nasties"!
 One of the best things you can do for all your homemade wines is to protect them from the ravages of wild molds, bacteria and other unwanted microorganisms. These nasty, little marauders can turn your lush wines into spoiled garbage.
Fortunately, protecting your wine is very easy to do. By adding an ingredient called sodium metabisulfite to your wine 24 hour before adding the wine yeast and again right before bottling, your wine will be safe and sound.
Sodium metabisulfite is available in a crystallized granular form. It takes a very small amount to protect your wine and it dissolves easily with just a bit of mindful stirring.
When add to a wine it releases a sulfur compounds that destroy these deservedly hated bugs. The sulfur then slowly releases from the wine and dissipates into the air as a gas known as sulfur dioxide, and then goes away. This is the reason why you need to wait 24 hours before adding your yeast. So that the sulfur compounds have time to leave.
When adding sodium metabisulfite at bottling time, you are bottling the wine right away, so as to trap the sulfur compounds still in the wine. This will not only make sure that the wine does not spoil, but it will also keep the wine fresh and its color stable.
———————————————————————————————————
Ed Kraus is a 3rd generation home brewer/winemaker and has been an owner of E. C. Kraus since 1999. He has been helping individuals make better wine and beer for over 25 years.
Does The Destemmer Remove The Grape Hulls?
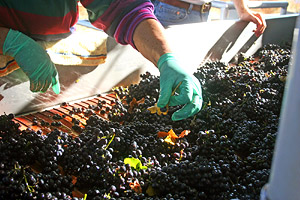 Here’s a question from one our customers about a grape destemmer that is listed on our website:
We want to keep grape hulls and juice together for fermentation, does this grape destemmer allow the hulls to pass through and not the stems?
This is a great questions! Particularly when you are making red wine, you want to keep the grape juice and the pulp together during the first few days of fermentation. This is how a wine develops a significant portion of it’s body and color.
To answer your question, yes, the grape destemmer you are referring to does allow all the pulp to pass through it. Only the stems are taken away, nothing else.
Once a cluster of grapes goes past the rollers and are crushed, they then fall into a cradle that has fast rotating paddles which beat the stems. This knocks all the skin and pulp loose.
The stems get slowly pushed out to the side of the grape destemmer by the beating paddles. Everything else: the pulp, the juice, the skins go out the bottom of the cradle through a series holes, then out the bottom of the destemmer to be collected by a fermenter or bucket of some sort.
You may want to take a look at the destemmer he is referring to: item number FP170, Marchisio Crusher & Destemmer listed on our website.
———————————————————————————————————
Ed Kraus is a 3rd generation home brewer/winemaker and has been an owner of E. C. Kraus since 1999. He has been helping individuals make better wine and beer for over 25 years.
Don't Hunt For Grapes, Grow The Grapes.
 If you need grape juice for wine making one way to solve your problem is to plant your own grape vines. You’ll never have to worry about hunting for grapes again and you won’t have to travel to far to pick them.
The book, From Vines To Wines will not only help you get it all going, but it will show you how to make wine from these grapes as well. It’s kind of a all-in-one, type book.
The first half of the book covers how to select the grape varieties, how to select the optimum planting location on your property, how to cultivate and harvest your grapes and other valuable bits, like trellising and pruning the vines.
The second half of From Vines To Wines is on how to make the wine: how to make white wine, how to make red wine, how to use homemade wine equipment, how to manage the fermentation and how to treat the wine after the fermentation has finished.
It’s a book that we’ve been proud to offer for many years. Jeff Cox is a solid writer and presenter of the wine making hobby. And this book is just one more piece of proof. It has received rave revues and warm accolades from many players in the wine making industry.
The book’s forward is written by Tim Mondavi of Robert Mondavi Winery who writes, “From Vines To Wines” helps provide you with the knowledge you need to become a wine grower in the best sense of the word”.
———————————————————————————————————
Ed Kraus is a 3rd generation home brewer/winemaker and has been an owner of E. C. Kraus since 1999. He has been helping individuals make better wine and beer for over 25 years.
You'll Want This Thief To Take Your Wine
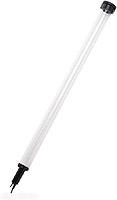 One of the challenges of fermenting your wine in a carboy is taking readings with a hydrometer. If you were using a pale or bucket to ferment in, then taking a reading would not be an issue. All you would have to do is put the gravity hydrometer in the wine and see how high or low it is floating.
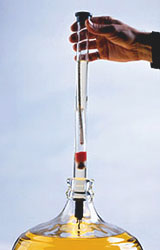 But when the wine is in a wine carboy, you can put the hydrometer in the carboy, but you’ll have a hard time getting it back out. Your only other option is to siphon some of the wine out of the carboy, enough to get a reading, and then put the wine back in the carboy, but this is just as much as a hassle as it sounds.
That’s why we offer what’s called The Fermentation Sampler. It acts like a wine thief, allowing you to pull a sample out of the wine out and then put it back in with no siphoning and no mess. While the wine is in The Fermentation Sampler’s barrel you can put your gravity hydrometer it along with it to get accurate, eye-level readings.
When your done The Fermentation Sampler has a little release valve at the bottom end. Just touch it against the inside of the wine carboy and your wine sample will flow back into the carboy without wasting a drop of your precious wine.
———————————————————————————————————
Ed Kraus is a 3rd generation home brewer/winemaker and has been an owner of E. C. Kraus since 1999. He has been helping individuals make better wine and beer for over 25 years.
Avoid The Potholes Of Home Wine Making
 Over the years we have helped thousands upon thousands of home winemakers to make a better wine. We’ve answered many wine making questions. We’ve provided many wine making tips and insights. We’ve even helped save a wine or two in our day–usually a victim of bad advice from a Friend or relative.
What we have discovered out of all of this (because we learn from each experience just as you) is that 95% of the issues that we see arise with a batch of homemade wine can be distilled down to 10 distinct reasons.
Once we realized this we put together the, “Top 10 Reasons For Fermentation Failure” which you can currently find on our website. It goes over these 10 different reasons, or potholes as I like to call them.
One example is Reason #3 which explains how you can accidentally kill your wine yeast if you use too hot of water to rehydrate it.
You can also think of them as wine making tips. The reason I say this is because if you go over them before you make a batch a wine, they will help you to avoid the potholes. And where there are no pothole, there’s only smooth sailing.
———————————————————————————————————
Ed Kraus is a 3rd generation home brewer/winemaker and has been an owner of E. C. Kraus since 1999. He has been helping individuals make better wine and beer for over 25 years.
How Fast Is The Steam Juicer.
 One of the impressions that many people have about the steam juicer is that it is slow. I know, because I was one of them. Then I had the pleasant opportunity of actually working with one at great length over at a friend’s house recently, and here’s what I learned.
One of the reasons the steam juicer ‘seems’ so slow is that you need to bring the water in the base water pan to a slow boil before any of the real progress begins. This is a little time consuming, particularly if your just doing a single load of fruit. But once you get the stove heated-up, the water boiling and the ambient temperature of the steam juicer up to full-steam, it really does a pretty fast job.
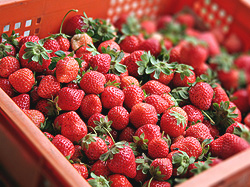
We were doing strawberries. We had about 40 pounds and was able to completely juice them in a little over three hours. Now mind you there was two of us, so we were able to keep things moving along, but I could see a person by themselves doing 40 pounds in less than 4 hours, anyway.
One of the little tricks we came up with was to keep a second pan of steaming water ready at all times that way when the steam juicer’s water pan started to go dry we’d have steaming water to fill it up again. This allowed the steam juicer to keep rolling right along with little downtime.
All in all we had a lot of fun using the steam juicer and not only did I help my friend make some strawberry jelly (which I hope to get some if your reading), but I also was able to get some perfectly clear strawberry juice out of the deal for making some strawberry wine.
———————————————————————————————————
Ed Kraus is a 3rd generation home brewer/winemaker and has been an owner of E. C. Kraus since 1999. He has been helping individuals make better wine and beer for over 25 years.
