Is Oxygen Good Or Bad For Wine?

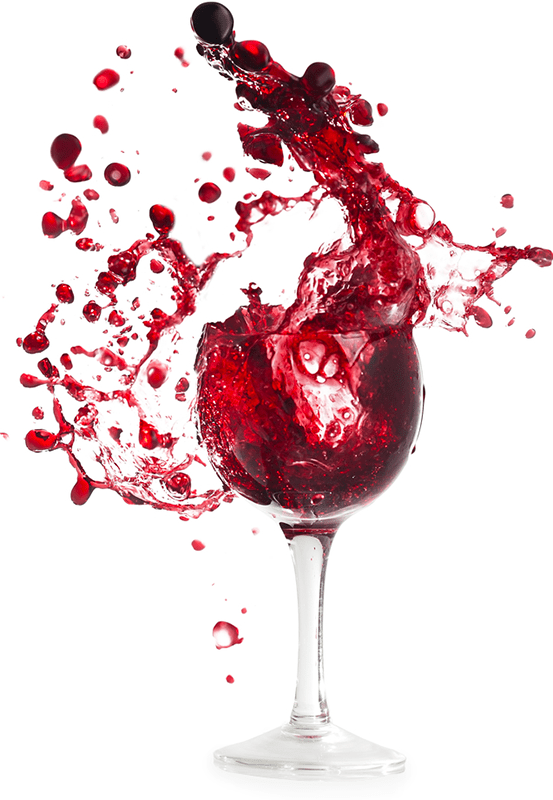
Wine being exposed to too much oxygen.Hello Kraus,

I just started to look into making wine. I read some articles on your website and others. One thing confusing me is it seems like oxygen in the wine is good when it is being made but bad after it is made. How can oxygen be both good and bad? Thanking you in advance,
Greg
—–
Hello Greg,

Oxygen plays a role in wine making in two distinctly different ways at two different stages: Early on it’s what allows the wine yeast to grow successfully, insuring a vigorous fermentation. Later on, it’s what allows the wine to develop and maturate during the aging process. The main difference between these two stages is how much oxygen is involved in each.

While the Wine is Being Made:

Lot’s of air exposure is good for the primary fermentation – the first 3 to 5 days. This is when the wine yeast is trying to multiply itself into a colony that is about 100 to 200 times the little packet of wine yeast you originally put in the wine must. The yeast need this oxygen to multiply successfully.

A lot of CO2 gas from the fermentation is infused within the wine must at this point. CO2 is also coming off the fermentation as a gas. This makes it very hard for excessive oxygen to saturate into the wine and cause oxidation. This is why fermenting the wine with no air-lock is not an issue at this point.

But the rules change after the fermentation begins to slow down. This is usually around the fifth day. At this point, oxygen exposure should be kept to a minimum. Too much oxygen exposure can be bad for a wine after this point. The wine yeast have colonized into large enough numbers and no longer need to grow; the CO2 gas from the fermentation is starting to taper-off dramatically and is no longer able to protect the wine from the ill effects of excessive air and oxidation.Shop Fermenters
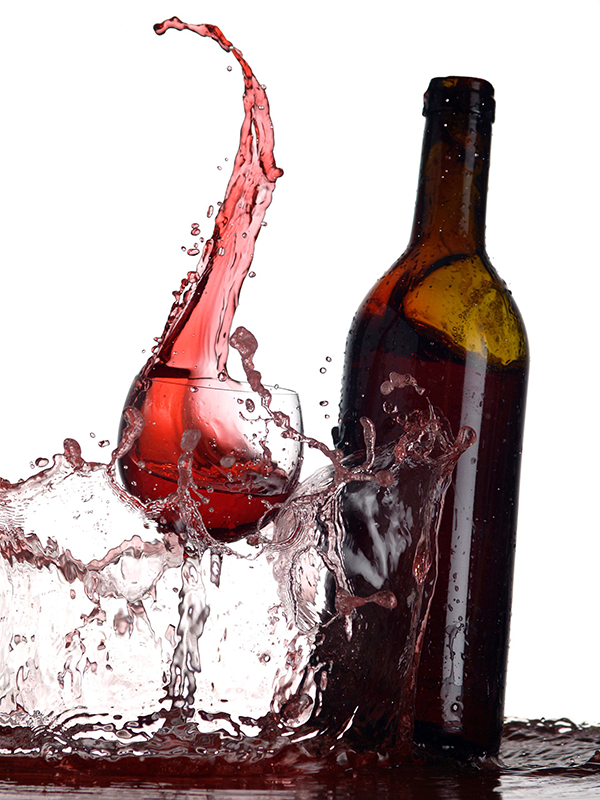
When transferring the wine off the sediment to another container (racking), any splashing should be eliminated as much as possible. The same holds true when bottling the wine. Splashing allows air to saturate into the wine very quickly. This is because the surface area of the wine is greatly multiplied when splashing occurs, increasing the level of contact with the air, exponentially.

While the Wine is Being Aged:

Once the wine has been bottled, oxygen begins its second distinctive role by facilitating the aging process. While air exposure should be kept to an absolute minimum, a very tiny amount is needed for proper aging. This is much, much less than the air needed to help the fermentation.

So tiny in fact that natural cork stoppers are perfect for this purpose. Cork stoppers allow very small amounts of oxygen to pass through over very long periods of time. This limited amount of oxygen is the catalyst that fuels the steady, even maturing of a wine.

The density and length of the cork stopper can actually determine the rate of aging. Synthetic corks, that are commonly found in wine bottle today, are even tested for their rate of air permeation (the rate at which air goes pass the cork).Buy Wine Corks
So this is how oxygen can be both bad and good for wine. It’s a matter of how much and when. Learn to use oxygen as a tool in your wine making arsenal and you will become a better winemaker.

Happy Wine Making,
Ed Kraus
—–
Ed Kraus is a 3rd generation home brewer/winemaker and has been an owner of E. C. Kraus since 1999. He has been helping individuals make better wine and beer for over 25 years.

What Happened! There Is No Alcohol In My Wine!

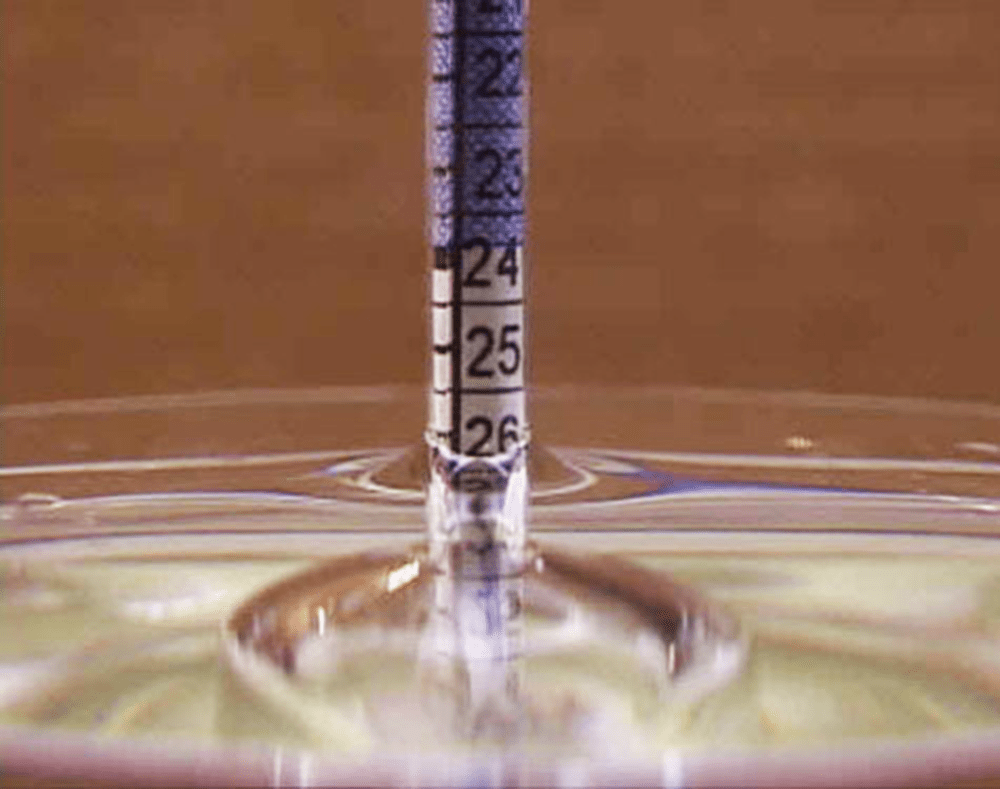
Hydrometer Giving ReadingOk I need a wine making for dummies book! I am attempting to make my first batch of wine. I followed my recipe as directed. I just racked it for the first time. I checked my alcohol content and it is zero!! And it is bitter, as if I did not even put sugar. It is a 2 gallon batch. What can I do to fix this???

Name: Kathaleen W.
State: LA
—–
Hello Kathaleen,

Everything you stated above indicates that your wine is doing fine. The zero reading you got — with what I am assuming was a wine hydrometerdoes not mean your wine has zero alcohol. It means that there is no more alcohol that can be made from the sugar you added. Let me explain.

A fermentation is all about turning sugar into alcohol. The wine yeast consumes the sugar and metabolizes it into alcohol, along with CO2 gas. As the wine ferments, the sugar level goes down and the alcohol level goes up. If a fermentation is completely successful, the sugars will be completely gone.

Your hydrometer is not reading how much alcohol is in your wine. It is reading how much more alcohol can be made with the sugars that are currently in the wine. That is why the scale you are reading is Buy Hydrometerscalled “potential” alcohol. It is telling you that the fermentation has the potential to make 0% more alcohol with the sugar that is currently in the wine — which is none.

You already stated that your wine taste bitter, “as if I did not put in sugar“. This makes perfect sense and matches up to the fact that you have a potential alcohol reading of zero — zero potential, zero sugar.

To know how much alcohol is in the wine, now, you have to have a potential alcohol reading from the beginning of fermentation — on that was taken at the same time you mixed all the ingredients together and added the wine yeast. As an example, if you had a beginning potential alcohol reading of 12% and you now have a potential alcohol reading of 0%, that tells us that your wine has a alcohol level of 12%. It’s the beginning reading minus the current reading.

Obviously, you are not happy with your wine, and I understand, completely. I doubt if I would like it either, based on what your described. You do not want your wine bitter and bone-dry. You’ll be happy to know that both of these characteristics are completely normal, and expected, at this point in the wine making process.

The main reason your wine is bitter is because it has not yet had time to clear and age. The wine will change remarkably between now and the time you bottle your wine. And the best part is you don’t have to do a thing except wait and be patient. What you are tasting now is mostly wine yeast, and Buy Potassium Sorbateproteins from the fruit such as tannin. All of these things will make the wine taste bitter. Once they have had time to drop out you will notice an unbelievable improvement.

If you do not want your wine to be dry but sweet, that’s okay, but now’s not the time to be concerned with this either. You will want to back-sweeten the wine just before bottling it. Just sweeten it with a sugar syrup to taste and then add a wine stabilizer at the same time to keep it from fermenting the new sugars while in the wine bottle. That would be a bad thing.

Happy Wine Making,
Ed Kraus
—–
Ed Kraus is a 3rd generation home brewer/winemaker and has been an owner of E. C. Kraus since 1999. He has been helping individuals make better wine and beer for over 25 years.
A Quick Tip For Racking Wine

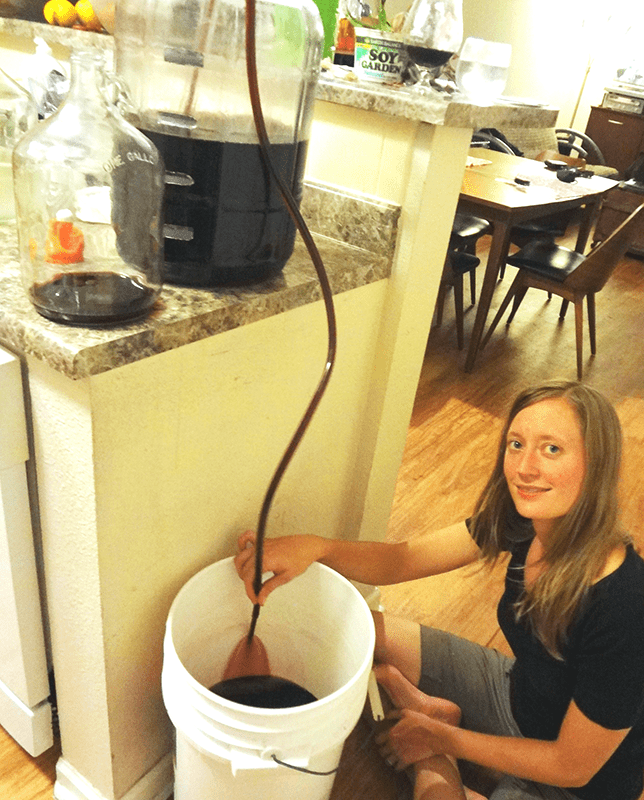
Girl Racking WineFirst off, many of you may be wondering, “what does racking wine mean”? So let’s get that out of the way first. In terms of making wine, the definition of racking wine is the process of transferring a wine or must from one fermenter to the next so as to leave the sediment behind.

Racking wine is necessary because you do not want the wine to sit on excessive amounts of sediment over extended periods of time. Doing so, can cause your wine to develop off-flavors.

Many beginning winemakers will often lose too much wine during the racking process. This happens because they try to eliminate all the sediment with each racking at the expense of losing some wine. In other words, they leave behind too much wine because they feel it has too much sediment with it.

Shop Auto SiphonLosses can total up to 3 or 4 bottles in a 5 or 6 gallon batch when using this type of methodology. Losing wine is something I’m not particularly to fond of, and I doubt you are either.

Here’s the tip for racking wine: to minimize losses when racking wine, always try to get as much liquid as possible each time you rack, even if some sediment comes with it. It’s not about leaving all the sediment behind. It’s about leaving the bulk of the sediment behind. Get as much wine as you can. It’s not until you get to your very last racking – usually the racking right before bottling – that you will want to eliminate all of the sediment at the expense of a little wine.

By the time you get to this point in the wine making process, there is usually only a little dusting of sediment to deal with, anyway. So your wine loss will be very minimal – usually it will be less than half a bottle of wine.
—–
Ed Kraus is a 3rd generation home brewer/winemaker and has been an owner of E. C. Kraus since 1999. He has been helping individuals make better wine and beer for over 25 years.
Is Splenda Splendid For Sweetening Wine?

Splenda for sweetening wine.My question is in regards to Splenda as a sweetener.  I belong to two wine making groups from Yahoo Groups and on occasion Splenda comes up as the subject.  There are both pros and cons regarding Splenda as a sweetener.  Would very much appreciate hearing your opinion on using Splenda to sweeten wines.

Thank you.
Melinda
_____
Hello Melinda,

This is definitely an area of home wine making that has yet to be covered in any wine making books or other instructional materials that cover how to make your own wine at home.

Splenda can be used to sweeten a wine just like any other sugar, just as long as you are happy with the flavor results, however there is some caution that needs to be taken…

Splenda is actually made from sugar that has had its molecular structure changed. This is done so that it can not be broken down and assimilated by the human body. It simply passes through the body, providing no nutritive value.

The same holds true with respect to Splenda in a fermentation. The yeast are unable to metabolize the Splenda and turn it into alcohol because of its molecular structure.

Where an issue comes in for winemakers is when time is brought into the equation. While Splenda does not break down over the course of a few days, if given more time, the leftover enzymes from a fermentation will eventually break down a portion of the Splenda into a fermentable carbohydrate.

shop_potassium_sorbateThis is exactly the situation you run across when you bottle your wine with Splenda. While the wine bottles sit on the shelf month-after-month, the natural enzymes in the wine will slowly start breaking down the Splenda. This in turn will allow any residual yeast to start nibbling on it and fermenting it. The result is CO2 gas slowly building up in the bottle until the wine cork stoppers eventually pushes out. The slightest amount of fermentation activity can cause quite a bit of gas or pressure in the wine bottle.

The take-away from this is that, yes, you can use Splenda to sweeten your wines just like you would with regular sugar, but you should also use a wine stabilizer such as potassium sorbate to eliminate any chance of re-fermentation within the wine bottle. Treat the Splenda as if it were real sugar.

Happy Wine Making,
Ed Kraus
—–
Ed Kraus is a 3rd generation home brewer/winemaker and has been an owner of E. C. Kraus since 1999. He has been helping individuals make better wine and beer for over 25 years.
To Use, Or Not To Use An Air Lock On A Wine Fermentation?

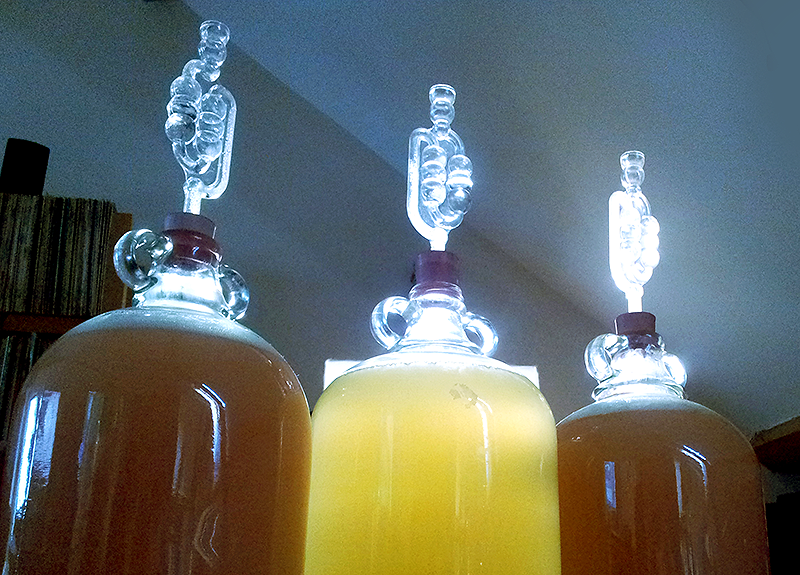
3 Airlocks In SilhouetteOn many occasions we have been asked this simple question, “Should a wine making fermenter be sealed with an air-lock during the first few days of fermentation — the primary fermentation — or should it be left open, exposed to the air?”

The Conflict
This question arises because there is so much conflicting information floating around in wine making books, on the internet and in other places as to which method is correct. In fact, even our own wine making website recommends just covering the primary fermentation with a thin towel, while the instructions that come with the wine ingredient kits we sell recommend using an air-lock.

Even commercial wineries are not consistent in this area. While most wineries will put white wines under an air-lock and expose red wines to air, there are many, many wineries that will do the very opposite.

My Recommendation
The reason I recommend leaving the wine must exposed to air during the primary fermentation is because this method leads a more vigorous fermentation, one that is able to complete more thoroughly and quickly. Wine making kit producers recommend sealing up the primary fermentation with an air-lock because they are more concerned about eliminating any risk of spoilage than providing the fastest fermentation possible.

Spoilage can be of concern on those rare occasions when the fermentation does not start in a timely manner, but if the fermentation takes off quickly, spoilage is of no issue. The activity of the yeast will easily protect the must by impeding the growth of any unwanted organisms.

So, What Should You Do?
While I recommend using a thin, clean towel to cover the fermenter during the primary fermentation and nothing more, if you are concerned about your fermentation not starting there is a compromising method you could follow:

Buy AirlocksWhen you first pitch the wine yeast into the must, put an air-lock on the fermenter. After a few hours, once you see that the fermentation has begun–indicated by activity or foam on the surface–you can then take the air-lock off and safely allow air to get to the must. This is, in a sense, giving you the best of both worlds–the protection and an invigorated wine making fermentation.

As A Side Note:
It is important to note that an air-lock should always be used after the must has gone into its secondary fermentation. This is in agreement with most. This usually starts around the fifth or sixth day, or when the first racking is performed. It is about this time you will notice the fermentation’s activity level starting to taper off.
—————
Ed Kraus is a 3rd generation home brewer/winemaker and has been an owner of E. C. Kraus since 1999. He has been helping individuals make better wine and beer for over 25 years.
Christmas Punch Recipe With A Holiday Wish

Santa’s got his sleigh loaded! It’s a time of celebration and cheer.

As families come together, old stories will be retold once again. Presents will be passed among us, as we reflect about how the nieces, nephews and cousins have all grown since we’ve last seen them.

We sincerely wish that your Christmas holiday is full of joy and excitement, and that the New Year brings you the brightest of days and provides you with all for which you strive.

And with that, we would like to share with you a special recipe in the hopes that it may add even more cheer to your holidays…


Christmas Punch Recipe

  • 750 ml of dark rum
  • 750 ml of dry red wine (homemade of course)
  • 3 cups strongly brewed tea
  • 2 cups of sugar
  • 1/2 cup of orange juice
  • 1/2 cup of lemon juice

Directions:

  1. Mix all the ingredient in a large sauce pan.
  2. Bring to a simmer until all the sugar is completely dissolved. Do not boil.
  3. Serve in a heat resistant bowl, warm.
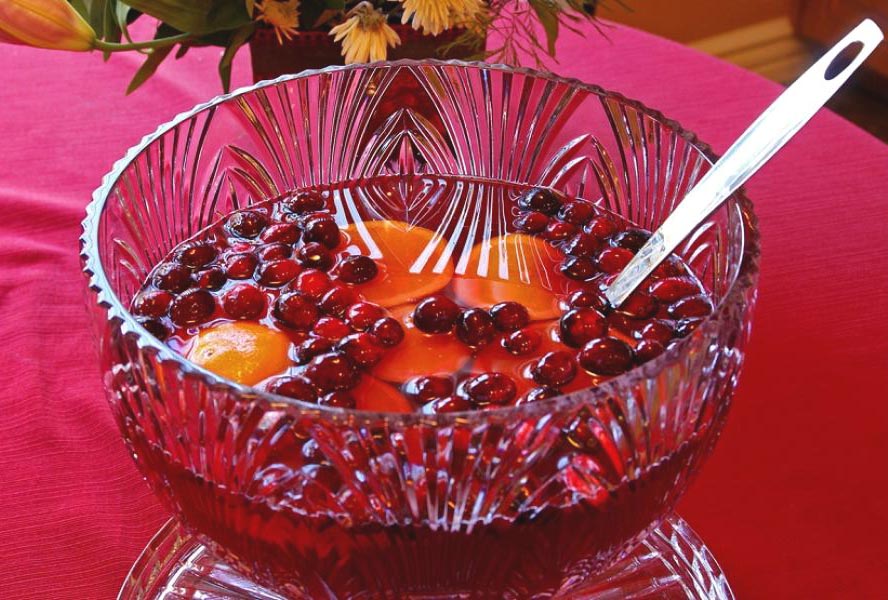
  4. Add fruit garnishment such as orange slices and cranberries.


From everyone at E. C. Kraus,
Merry Christmas and Happy New Year!

We sincerely hope that your Christmas holiday is full of joy and excitement, and that the New Year brings you the brightest of days and provides you with all for which you strive. – See more at: https://blog.homebrewing.org/wine-making-tricks-and-tips/a-simple-recipe-and-a-holiday-wish#sthash.yXRHFevz.dpuf

We sincerely hope that your Christmas holiday is full of joy and excitement, and that the New Year brings you the brightest of days and provides you with all for which you strive. – See more at: https://blog.homebrewing.org/wine-making-tricks-and-tips/a-simple-recipe-and-a-holiday-wish#sthash.yXRHFevz.dpuf

Your Wine Might Be Suffering From Bottle Shock!

Splashing WineWhen you think about a wine you normally don’t think of it in terms of being in a good mood, humorous or even under-the-weather, but there is a term used by the wine making industry that might make you think that such terms are appropriate – bottle shock.

What Is Bottle Shock?

Bottle shock or bottle sickness is often used to describe a wine that has taken a plunge in quality. The overall impression of a wine going through shock can be described as flat or flabby, or just plain lacking in fruitiness and character.

In home wine making bottle shock usually happens right after bottling the wine. It can also happen again if an aging wine bottle is put through the tortures of shipping or transport.

It is referred to as a bottle shock because the effects are temporary and with a little rest the wine will come back to its good-ole self once again.

So, What Causes Bottle Shock, Anyway?

Bottle shock occurs when the wine absorbs too much oxygen in too little time. This is something that is likely to happen during bottling. It can also happen during shipping. Constant temperature changes and the sloshing of the wine in the bottle allows more air to pass through the cork than what is natural.Shop Wine Bottle Corkers

Wines can handle the slow, gradual infusion of air that is naturally allowed by wine corks. In fact, most red wines will benefit from such a scenario, but when the oxygen comes too fast a build-up of an element called acetaldehyde starts to become prevalent in the wine.

Acetaldehyde is naturally found in any wine, at least in small, unnoticeable amounts, but in higher amounts its presence can be detected as an odor of rotting apples or nuts. This is what’s noticed in wines that are suffering from bottle shock. The normal chain of events that happens during aging is disrupted by the production of an abundance of acetaldehyde.

Don’t Worry! The Effects Of Bottle Shock Are Mostly Temporary.

Over the course of time the acetaldehyde will slowly convert to alcohol, bringing the wine back into line with something enjoyable to drink. How long this takes depends on the severity of the bottle sickness. It could be as little as a few days or as long as a few weeks.Shop Wine Corks

This is just one more reason why aging is so important in wine making. In theory, you could pick up a newly bottled wine from your cellar one week and wonder why it’s so lifeless or even bitter, then the next week be overwhelmed by its superb flavor. Bottle shock can come and go that quick.
—–
Ed Kraus is a 3rd generation home brewer/winemaker and has been an owner of E. C. Kraus since 1999. He has been helping individuals make better wine and beer for over 25 years.
5 Myths About Homemade Wine

Myth vs Reality About Homemade Wines.There are many misconceptions and misguided assumptions about making wine at home. Most all of them are perpetuated by individuals who never even tasted or made homemade wine. Others are simply born out of the mystique surrounding the commercial wine industry.

How can something so sophisticated be made at home?

Here are the ones that we run into the most. The ones that flat-out drive us silly every time we hear them.

  1. Homemade Wines Don’t Taste That Good.
    Without question, you can easily make wines that are just as good, if not better, than the wines you find on the store shelf. And not with practice, but with your very first batch. I can’t tell you how many times I’ve done side-by-side, blind tastings with a challenging friend or an acquaintance between a glass of wine made from one of our wine ingredient kits and a glass of store bought wine, only to have the homemade wine win – hands-down. I’m not going to name any names, but I’m not talking about doing a blind tasting against the $8 stuff. I’m talking about higher dollar stuff that you’d buy to take to a dinner party, etc. Wouldn’t it be nicer to take your own personalized wine gift, that you made, to the party instead.
  1. Homemade Wine Takes A Lot Of Time To Make.
    Learning how to make your own wine is much easier than most individuals can even begin to imagine. It’s deceptively easy. There are a lot of wine making products on the market today that make it as simple as following a few directions. And, it doesn’t take that long. You can be bottling your first batch of wine in as little as 28 days. And as far as the time it takes out of your day, I’d say it doesn’t get any worse than the time it takes to bottle the wine – an hour to get it start, another half-hour to siphon it to a second container, etc.
  1. Making Homemade Wine Requires A Lot Of Expensive Equipment.
    This may have been partially true 20 or 30 years ago. Back then, depending on what type of wine you were making, you might need a grape crusher to crush the fruit and a grape press to press the fruit. Today it’s different. You don’t need to crush and press the fruit if you don’t want to. You can buy it already done for you. Now there are hundreds of wine making juices packaged up and ready for use from all over the world. You can get Cabernet grape from France, Shiraz grape from Australia, Merlot grape from California…  The choices are endlessShop Wine Making Kits.
  1. Homemade Wine Spoils Easy.
    Absolutely not. Homemade wine keeps just as good as commercially made wine. There is no difference in the keeping abilities between the two. There is no reason for one to keep better than the other. They are both made the same way from the same basic wine making materials. One’s just on a smaller scale than the other. I currently have several bottles of homemade wine that have been in my cellar aging since 1998 and 2002 and I would not hesitate to drink them myself or serve them to my friends and family.
  1. Making Homemade Wine Is Illegal.
    Wrong! Ever since October 14, 1978 it has been perfectly legal for Americans to make their own wine and beer. This is when President Jimmy Carter signed into law legislation introduced by Senator Alan Cranston of California. You can make up to 100 gallons per year. If you live in a household with another adult, you can make up to 200 gallons per year. It can be for your own personal consumption or to hand out has wine making gifts to friend and relatives. Just make sure you don’t sell it. That would be illegal!

—–
Ed Kraus is a 3rd generation home brewer/winemaker and has been an owner of E. C. Kraus since 1999. He has been helping individuals make better wine and beer for over 25 years.
Why Does My Wine Taste Better The Next Day?

Wine Poured From A CarafI really enjoy the wine making information in your newsletters. I bottled my first wine, a California Merlot, last May. It aged in 6.5 L carboys and had 8 months of French oak chips. I racked it twice. It is still a bit young, but interestingly, if I decant the wine and drink it 24 hours later, it is a much better wine. Can you speculate as to why does my wine taste better the next day?

James — MI
—–
Hello James,

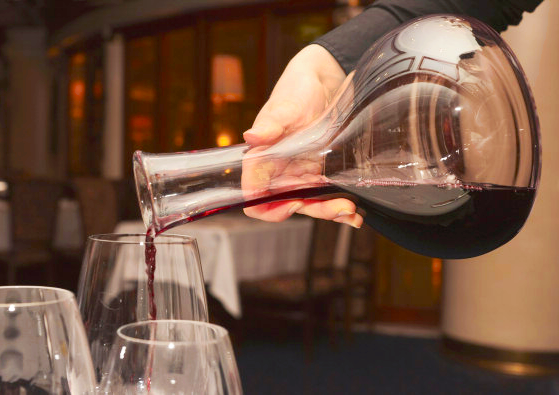
The wine taste better the next day because you are allowing time for it to breathe. What is really going on when a wine breathes is it is being introduced to fresh air again, something that it hasn’t had contact with for quite some time. By pulling the cork and simply letting the wine bottle stand or by pouring the wine into a carafe, the air will start a mild oxidative process that will soften the rough edges of the wine’s tannins.

It also allows time for any odd gasses to escape that may have developed during the aging or maturation process. Allowing a wine to breathe has also been known to intensify both the flavor and bouquet of a wine — something that can be a problem for wines that have not been fully aged, however this is not true in every case.

While allowing time for the wine to breathe can be a benefit for some, for many it will have no benefit at all, and for others it may even bring damage, particularly with older wines whose flavor structure has been known to collapse very shortly after decanting.

The wines that are most likely to benefit from breathing are younger, heavy reds that have not yet had time to take complete advantage of the aging process. And, it just so happens that young, red wines is what’s readily available to the home winemaker.

How long you should let the wine breath is another issue. Usually we are talking minutes not hours. More than likely 60 minutes would have been just as good as waiting for the next day to drink your homemade Merlot. As a general rule-of-thumb the younger the wine the more time it may need to take full advantage of breathing, but to say a wine needs until the next day to breathe is excessive from any perspective. Think in terms of a few minutes with a probability of improvement on up to an hour.

Shop Wine Making KitsWith all this being said, unless you have previous experience with decanting a specific wine, giving it time to breath can be a bit of a crap shoot. In the case of your Merlot, you have specific experience with it, so I would not hesitate to let it breathe for 30 minutes and see what you think.

In the case of an unfamiliar wine: if it is white, allowing time for it to breathe is pointless; if it has been aged more than 4 years, not recommended; and if it has been aged 8 or more years, it could be risky in the sense that the wine’s structure could collapse altogether giving the wine a flabby character. Stick with the red wines that are heavy in tannins and short on aging.

James, I hope this answers your question as to why your wine tastes better the next day. You are not the first to bring this up.

Happy Winemaking,
Ed Kraus
—–
Ed Kraus is a 3rd generation home brewer/winemaker and has been an owner of E. C. Kraus since 1999. He has been helping individuals make better wine and beer for over 25 years.
A Simple Guide to How Oak Chips Are Made

Stacked Staves Is Just Part Of How Oak Chips Are MadeA friend asked me what is the difference between wine oak chips and untreated oak fire logs. Can you explain
Arie E. — DE
—–
Hello Arie,

Thanks for such a great question. A lot of times home winemakers assume that the toasted oak chips they purchase are just any ole oak chips. This sometimes leads to the winemaker’s bold idea of making their own. While it is possible to make your own oak chips, it isn’t possible to do it successfully without some basic understanding of how oak chips are made. There are some important subtleties involved that will greatly influence how the oak chips will affect your wine.

The most basic of requirements is to use the right type of wood. Not any oak will do. It needs to be white oak, and even then only certain strains of white oak are sought after by barrel and oak chip producers. They use strains of white oak with an extremely tight grain. This keeps the tannin extraction into the wine under control while other flavor qualities are leached from the wood.

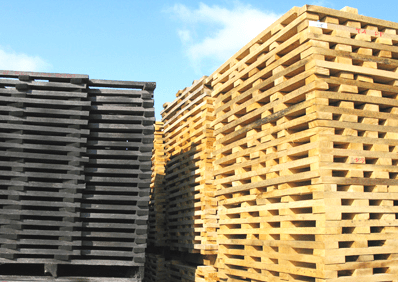
Once you have the right wood, it then needs to be aged. Normally, the wood is cut into strips called staves and cross stacked out in the weather for 1 to 3 years. This does two things: 1) it dries the wood out; 2) it leaches out the unwanted sap and other impurities. The cross stacks are re-stacked from time to time. This is to even out the effects of the weathering.

Shop Toasted Oak ChipsThis is the same process that is used to prepare wood for the production of oak wine barrels. In fact, many times toasted oak chips are made from the scraps of wood that barrel coopers cut off when making the barrel head, shaping staves, and such.

Now that you have the right type of wood that has been aged, it is now time to toast it. Toasting the wood is an import part of how oak chips are made. This is when the sweet flavors of the wood are risen to the surface through heat.

The heat turns the various carbohydrates that are in the wood into sugars. It also raises and concentrates flavor compounds such as vanillin to the surface so they can be easily extracted into the wine. These flavors compounds combined with wood sugars and tannin are what create the oak character in the wine.

The flavors that oak chips can add to a wine vary based on how the toasting is done. The temperatures and the length of time used are important in the creation of the oak chips’ flavor profile. As the temperature rises and time increases, different flavors are produced: sweet / vanilla / coconut / butterscotch / toast / clove / almond / burnt. The temperature range is typically from 320°F. to 420°F., but the length of time is just as important.

As you can see, there are a lot of specifics going on. It’s not like throwing a log on the fire or anything like that. It’s about controlling the specific. And, even then there is still a lot of room for variations.

Arie, this is the basics of how oak chips are made. Keep in mind this is just the basics. Over the decades a lot more science and precision has gone into the production of oak barrels and oak chips as well.

Happy Winemaking,
Ed Kraus
—–
Ed Kraus is a 3rd generation home brewer/winemaker and has been an owner of E. C. Kraus since 1999. He has been helping individuals make better wine and beer for over 25 years.