
 I am having some trouble getting some of my fruit wine to clear. The berry wines clear right away (black raspberry, elderberry, blueberry, raspberry, current) but some of the other fruit wines stay cloudy (apple, peach, pear, dogwood). Is there something different I should be doing with these wines to make them clear better?
Name: Charlene
State: New York
—–
Hello Charlene,
It might be a pectin haze that’s making your wine cloudy. Some fruits have more pectin in them than others. Pectin is the gel that holds the fruit’s fiber together. If the pectin is not completely broken down during the fermentation you can end up with what known as a pectin haze in your wine. This sounds like what is giving you a cloudy wine.
During the fermentation the yeast will produce pectic enzymes to breakdown the pectin cells. You may have also added pectic enzyme directly to the batch per your wine recipe. With most fruits this is sufficient, but even then you can sometimes end up with a pectin haze with the particular fruit wines you mentioned.
Apple, peach and pear all have significant levels of pectin, more so than most other fruits. The dogwood I’m not sure about. If you did not add pectic enzyme to your wine recipe, then most certainly a pectin haze is the issue at hand. But, even if you did add pectic enzyme, this is still what I suspect is going on because of the specific wines that are cloudy. Pectic enzyme is that important.
As for what you can do now…
Whether or not you have added pectic enzyme to your wine must, you can add more now, however it may take some time for the wine to clear… sometimes months. Of course, this is assuming you have not bottled the wine already. If you have, then that ship has already sailed, so to speak. You could decant the wine; treat the wine; and then re-bottle, however I would not do it if it were my wine, simply for the fact that this type of cloudiness dose not affect the flavor at all only appearance. Live-and-learn, and move on.
Even at that, one thing you could do for future reference is to take a bottle of the suspect wine; add it to a quart Mason jar, or similar; and treat it with a teaspoon of pectic enzyme. This would be an extremely strong dose, so if a pectin haze is the issue at hand, you should see it respond to the addition of pectic enzyme by clearing in a matter of days if not hours. This will let you know if you have found the problem in the form of a pectin haze for future reference and give you a little piece of mind.
As a home winemaker, pectin haze issues should always be in the back of one’s mind. It’s something that doesn’t happen all that often, but when it does, it can be very aggravating.  Keep a particularly close eye when fermenting fruits high in pectin and always use pectic enzyme when fermenting fresh fruits.
Happy Winemaking,
Ed Kraus
—–
Ed Kraus is a 3rd generation home brewer/winemaker and has been an owner of E. C. Kraus since 1999. He has been helping individuals make better wine and beer for over 25 years.
Category Archives: Wine
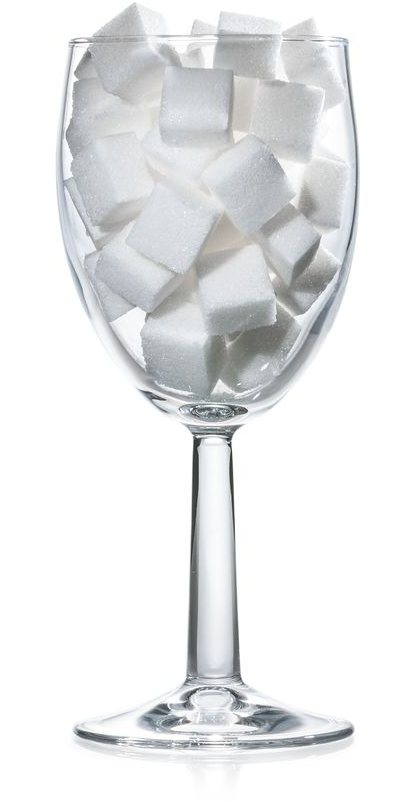
Sweetening Your Wine Kits To Make Them The Way YOU Want Them.
 I was looking at buying the European Select Riesling and wanted to know if it can be made sweet.
Thanx Parker
—–
Hello Parker,
The short answer to your question is: you can make any of the wine kits we sell as sweet or as dry as you would like. It’s just a simple matter of back sweetening the wine kit.
If you follow the directions that come with these wine kits your wine will come out dry. If you want the wine sweeter add sugar to taste before bottling. We recommend sweetening with cane sugar, but you can experiment with other sweeteners such as honey, grape concentrate, etc.
The cane sugar should be completely dissolved before sweetening the wine kit with it. The easiest way to do this is to put the cane sugar with one to two times the water in a sauce pan. Heat the mix until the liquid becomes clear. Once the mixture has completely cooled you can blend it into the wine.
If you are sweetening your wine kit you must also add potassium sorbate
to eliminate any chance of the wine re-fermenting.
Potassium sorbate is a wine stabilizer that hinders the yeast cells ability to regenerate itself. Without the potassium sorbate you can end up with bottles of wine that have an active fermentation in them. That would not be a good thing. Pressure will build up until it either pops the cork or explodes the bottle. So, be sure to add a dose of potassium sorbate at the same time. That would be 1/4 teaspoon per gallon of wine.
Another way to go about sweetening wine kits is to use wine conditioner. This is a wine sweetener that already has the wine stabilizer in it. They come in pint bottles. This is usually about the right amount for sweetening six gallons of wine. By using the wine conditioner you do not have to worry about your wine re-fermenting in the bottles.
When back sweetening your wine kits, how much sugar you add is completely up to you. One of the most enjoyable things about making your own wine is that you get to make it the way you want it.
—–
Ed Kraus is a 3rd generation home brewer/winemaker and has been an owner of E. C. Kraus since 1999. He has been helping individuals make better wine and beer for over 25 years.
2 Surefire Methods For Using An Airlock
 My wine is done fermenting and ready for bulk-aging for a few months in the carboy. Since the SO2 will dissipate from the sanitizing solution in the airlock after a period of time, should it be removed and replaced with fresh sanitizing solution periodically?
Name: Roger Collinge
State: CT
—–
Hello Roger,
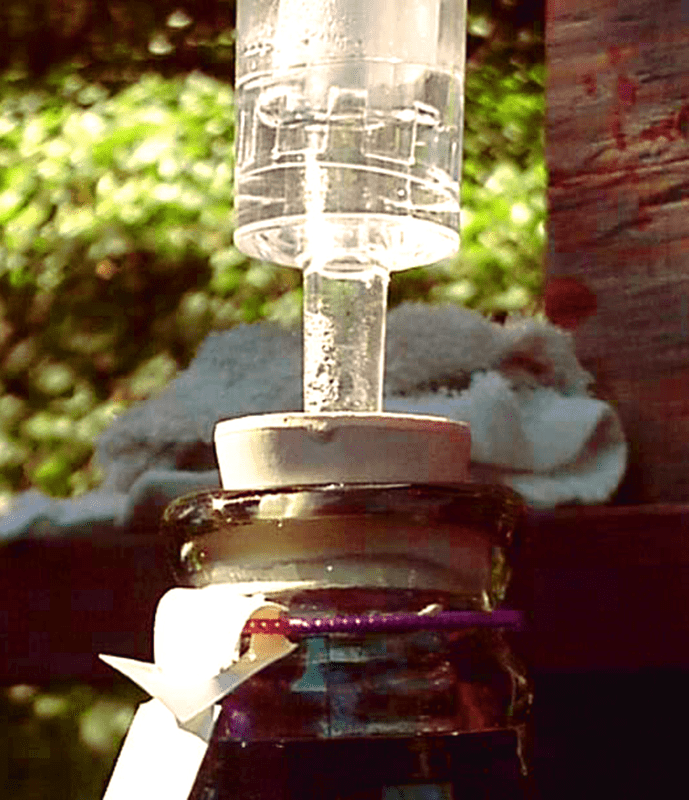
This is something that is not talked about very often but is somewhat important to winemaking: how to go about using and airlock.
During the fermentation it’s really not important whether you use a sulfite solution or just plain water in the airlock. There’s so much CO2 gas coming through the airlock at that point that adding sulfites would be futile. The fermentation is perfectly capable of taking care of itself. But once the fermentation settles down it would be beneficial to have sulfites in the airlock. This would keep any bacteria, mold, germs, etc. from growing.
The problem is the sulfite dissipates so readily that you would need to add more sodium metabisulfite or replace the sulfite solution every two or three days to keep the airlock sanitary. This is not too practical.
There are two other ways of using an airlock that will help solve this problem:
- Use Vodka or grain alcohol instead of water: This will keep the lock sanitary and will not need attention every few days. The downfall to this method is that alcohol evaporates with time. So you do need to keep an eye on the airlock to make sure that it does not dry out and compromise the wine. Once a week should be sufficient.
- Use glycerin instead of water: The obvious advantage to this is that glycerin does not evaporate. You don’t have to constantly refill or replace. But the second advantage is it does not promote contaminant growth like water does. It is a very stable product, resistant to mold and bacteria.
The second method of using an airlock is the one I prefer and have used successfully for many, many years. There are no disadvantages to it, and it is much safer than using plain water. But I do know a lot of home wine makers that use alcohol in their airlocks and are perfectly happy with it.
One last thing I wanted to bring up quickly is that you do not want to put anything in the lock that you couldn’t live with being in your wine. Do not use bleaches or other toxic chemicals in your airlock.
The reason for this is because it is possible for the liquid in the lock to flow backwards and into the wine. Read the blog post, “My Air-Lock Is Working Backwards” for more information on this.
In that case of using alcohol or glycerin in the airlock, it is not an issue. Both are products that are naturally in any wine and will not be a detriment in any way. But, get a foreign sanitizer in the wine and it’s ruined. Using an airlock with such solutions is risky business and not recommended.
Happy Winemaking,
Ed Kraus
—–
Ed Kraus is a 3rd generation home brewer/winemaker and has been an owner of E. C. Kraus since 1999. He has been helping individuals make better wine and beer for over 25 years.
How Many Cans Of Fruit Wine Base Should I Use In My Wine Recipe?
 I would like to buy a kit, but would prefer to make a fruit wine. So I’m planning on buying the Your Fruit! Wine Making Kit and then buying the County Fair Fruit Wine Base. I’m confused about the number of cans (46 oz) I need or want… the catalog suggests using 2-4 cans. So I guess my question is: What changes when you add more fruit wine base?
Thank you very much for your time. I’m really exited to start making wine!
– Holly
—–
Hello Holly,
Thank you for this much needed blog question about fruit wine bases.
The primary difference you will notice between using two cans of County Fair Fruit Wine Base in your wine recipes and four cans is the body. The more cans you use, the more body the wine will have. If you don’t know what body means, it can best be described as the mouth-feel of the wine – the viscosity of the wine. Another way to look at it is to think of the difference between whole milk and skim milk.
There are other secondary differences as well. When using less cans in your wine recipes you get a more crisp, refreshing wine. When you use more cans you get a more robust, assertive wine. A crisp wine is more refreshing or thirst quenching. Some might call it a summer wine. A robust wine might be something you would drink with dinner. With a robust wine the flavors tend to linger on the palate longer, competing very well with the flavors of the meal.
 Something else that should be pointed out is that wines made with two cans of fruit wine base will age out more quickly than wines made with four cans of the fruit wine base. A two can wine recipe might peak in 4 or 5 months, whereas a four can wine recipe might peak around a year. This is all very subjective, so each persons impression of these wines might vary, but on average this is true.
I hope this answers your questions. It’s a matter of style and the type of wine you like to drink. Many people assume that four cans of the County Fair fruit wine base will taste twice as good as two in their wine recipes, but this is not necessarily true. It will have the characters described earlier, but whether or not it makes it better is a matter of personal tastes.
Happy Wine Making,
Ed Kraus
—–
Ed Kraus is a 3rd generation home brewer/winemaker and has been an owner of E. C. Kraus since 1999. He has been helping individuals make better wine and beer for over 25 years.
Which Plastic Wine Fermenter Is Right For You?
 There are pros and cons to using either plastic wine fermenters or glass wine fermenters in home winemaking. Glass can be easier to clean and unlikely to scratch, while plastic is easier to manage due to its light weight and doesn’t cost as much. It’s important to consider the pros and cons of both and then make the purchase decision that is right for you and your situation. If you end up choosing plastic, which style do you choose? There are a lot of different plastic wine fermenters out there, so here’s a quick breakdown of what’s out there.
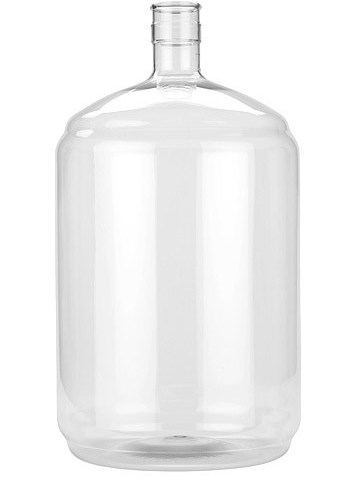
Plastic Carboys:
The plastic carboy is a type of plastic wine fermenter that is ideal for secondary fermentations. You can find these carboys in many different sizes, including 3 gallon, 5 gallon, and 6 gallon. Depending upon how much wine you plan on making will determine the size of plastic carboy you need to purchase. One major benefit of this fermenter is that if it gets knocked to the ground, it won’t smash to bits like a glass fermenter, saving you a lot of money and time.
Plastic Carboys with Barbed Faucets:
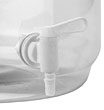 Taking the plastic carboy one step further, this plastic wine fermenter comes complete with a faucet that allows you to remove samples of wine from the carboy just as you would if you were sampling from the faucet of stainless steel tanks or oak barrels. The faucet can be more convenient than using a wine thief, with less potential risk of contamination. Just as with standard plastic carboys, this fermenter comes in different sizes.
Plastic Collapsible Fermenting Jug:
 This plastic wine fermenter is fantastic for those odd sized or partial batches of wine. All you have to do is put all the wine you wish to ferment in the jug, then collapse it down to get rid of the excess head-space left over. This collapsible fermenter also comes in a couple different sizes, though remember, you can collapse the jug to any size you need for the small amount of wine that you nee to ferment.
Plastic Bucket Fermenter:
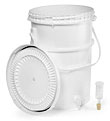 This final plastic wine fermenter is great for both primary and secondary fermentations. It’s made of a heavy food grade high impact polyethylene material and has a air tight seal that allows you to ferment with or without the lid. Similar to the plastic carboy with barbed faucet, this poly-fermenter also has a faucet that allows you to transfer or sample wine without a mess and without disturbing the sediment.
Tuff-Tank Plastic Wine Fermenter:
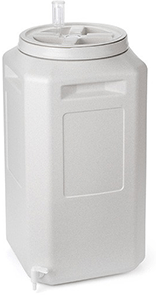 For those larger jobs you can get a 22 gallon Tuff-Tank. This plastic wine fermenter unique square design makes it perfect for handling those larger jobs in a small space. It’s footprint is 14″ by 14″. Its construction if very rigid and has a screw-on lid that seals air-tight.
There are a lot of options for plastic wine fermenters out there, so understanding which is best for your home winemaking practice will save you a lot of time, money, and headaches!
—–
Ed Kraus is a 3rd generation home brewer/winemaker and has been an owner of E. C. Kraus since 1999. He has been helping individuals make better wine and beer for over 25 years.
Back Sweetening Wine After Fermentation Or Before Bottling
 Is it ok to back sweeten a wine right after the fermentation or should I wait?
Thank,
Terry
—–
Hello Terry,
Before back sweetening a wine, it is important that you wait until the fermentation has completed. It is also just also important that the wine have plenty of time to settle out all the yeast. Most often, the yeast has not had time to do this by the time you do your second racking. So, normally you will not want to back sweeten your wine right after the fermentation.
In reality, the best time to back sweeten a wine is right before bottling. This gives plenty of time for the wine to clear up. There is no upside to sweetening the wine sooner than this, only a potential for problems.
The reason clearing the wine is so important is because the wine be in a stable state before sweetening, otherwise all the new sugars that are added will end up as fodder for a renewed fermentation.
Cloudiness in a wine usually indicates it still has excessive wine yeast. The wine yeast is as fine as flour and settles out the slowest, so it is that last thing to be suspended in the wine. It is very hard to stabilize a wine that has residual wine yeast still floating throughout the wine.
The wine stabilizer, potassium sorbate, is what has to be used to stabilize a wine when back sweetening a wine. While a sulfite such as sodium metabisulfite or Campden tablets should be used as well, all of this is still not enough to completely stabilize the wine if too much residual yeast is still in the wine.
 Potassium sorbate stabilizes a wine in an entirely different way than these two sulfites. It does so by putting a restrictive coating on the outside surface of each of the few remaining yeast cells. This does not kill or destroy the yeast. They will die on their own in hours or days. But it makes them unable to reproduce themselves. The ability to reproduce is the real threat that can manifest into a full-blown fermentation.
If the wine is still even slightly, visually cloudy, there may not be enough potassium sorbate to go around to do a complete coat all the yeast cells. This is the downside to back sweetening the wine sooner then necessary.
In a nutshell, don’t back sweeten your wine right after fermentation. Give it plenty of time to clear, then back sweeten. And if convenient, don’t even think about back sweeten you wine until right before bottling.
Happy Wine Making,
Ed Kraus
—–
Ed Kraus is a 3rd generation home brewer/winemaker and has been an owner of E. C. Kraus since 1999. He has been helping individuals make better wine and beer for over 25 years.
Adding More Grape Concentrate To Wine
 I am getting ready to make 10 gallons of wine from 2 cans of Sun Cal Johannisberg Riesling concentrate. My question is would an additional can of Sun Cal Riesling really improve the fullness of the wine or would not really be worth the investment of shipping another can of concentrate? I have made a batch of this wine several years ago and it turn out pretty good. Hope you can help…
Name: Vincent O.
State: IA
—–
Hello Vincent,
Thanks you for this interesting question.
[To catch up other readers, Sun Cal concentrated grape juices come in 46 fl. oz. cans. Each can makes 5 gallons of wine when you follow the directions. Along with the can, sugar, acid blend, tannin, yeast nutrient and yeast are added to make up the wine recipe. Vincent, wants to push the envelop a little by adding more grape concentrate to his wine. He’s making a double batch, 2 cans to 10 gallons. He’s thinking about adding a third can.]
Without question, adding a third can would bring up the body and flavor of the wine, but the perceived impression of the resulting wine would not be one with 50% more flavor and body. Adding more grape concentrate to the wine would only intensify the wine’s flavor only marginally.
This is because of the way us humans tend to perceive things. All of our senses do not react on an even scale. For example, two jet engines side-by-side are not twice as loud as one. If you double the wattage of a light bulb, it does not seem twice as bright. If you add 50% more concentrate to your wine recipe, it will not seem like 50% more flavor.
I’m not saying that adding more grape concentrate to the wine is not a good idea, I’m just letting you know what to expect if you do decide to add more. Whether you feel it would be worth it is completely up to you. You can expect more flavor and body, but it will not be 50% more.
We’ve had many customers over the years that have used 2, and even, 3 cans of Sun Cal concentrate to just 5 gallons and loved the resulting wine.
Another important aspect to this that needs to be addressed is that if you do decide to add more grape concentrate to your wine, you will need to compensate by adding less sugar and less acid blend to the wine recipe. This is because the additional can of grape concentrate is adding both more sugar and more fruit acid.
Regardless, of how much flavor you are trying to get, the sugar level and acid level should always remain the same. The beginning sugar level determines how much alcohol the resulting wine will have. The acid level of the wine controls how tart or sharp the wine will be.
Keeping both of these at their proper level is relatively easy. You will need to use a hydrometer to add the proper amount of sugar. Keep dissolving sugar into wine must until the hydrometer gives you a reading on the potential alcohol scale of 10% or 11%.
An acid test kit will be needed to know how much acid blend to add to the wine recipe for proper taste. An acid test kit is a valuable tool for controlling any wine’s acidity. After taking a reading the directions will show you how to determine how much acid blend to add.
Adding more grape concentrate to wine is something that is pretty simple to do. Plus, it’s away fun to experiment. That’s half the fun of making your own wine. You have the opportunity to make your own personal creations.
Happy Winemaking!
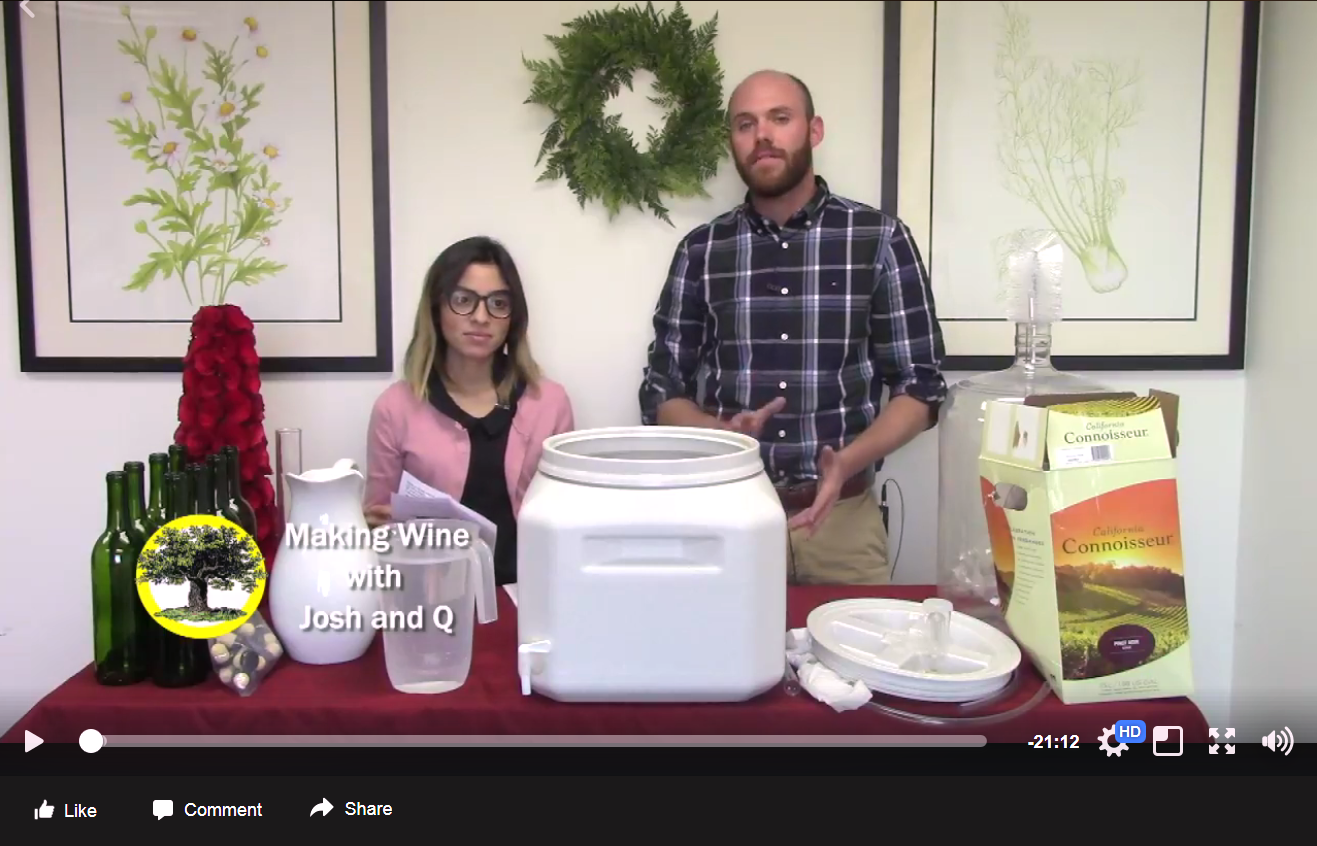
The Mother Earth News Wine Kit Challenge
We did something interesting! We sent one of our wine making kits to the folks at Mother Earth News, and we had them video themselves making the wine. None of them had ever made wine before, and we provided no information — just the kit and the directions that normally comes with it. Watch what happened.
Below are three videos they shot while making the wine. You can go to Mother Earth News’ website to view more videos on other self-sustaining projects. Click on the pictures to play the video:
Part I
Part II
Part III

These guys did an amazing job and plowed right through the steps with no trouble at all. Hopefully, these videos will help to show others just how easy it is to make your own wine.
For those of you who have never heard of Mother Earth News, it is one of the most popular and longest-running magazines for people wanting to live a self-sustainable lifestyle. It is filled with all kinds of ideas, information and projects. In addition to their magazine, their website is a pleasure to learn from, as well!
Do Your SunCal Concentrates Make Sweet Wines?
 I was looking at your homemade wine kits and was wondering about using the SunCal concentrates to make a Chianti. I saw in the directions that for all the SunCal kits call for 6.5 pounds of sugar. Does this mean that these wine recipes are going to make a sweet wine? I have made wines in the past from buckets of juice and other wine making materials from a local supplier and never had to add sugar.
Barry H.
———-
Hello Barry,
This is a great question about an area of wine making that seems to cause a lot of confusion for some winemakers.
Alcohol is made when yeast consume sugar and turn it into alcohol. If the fermentation is successful there be no more than a residual amount of sugar left in the resulting wine – nothing that would make the wine sweet. All the sugar you add in the beginning is meant to be turned into alcohol leaving the wine dry.
With most homemade wine kits all the original sugars that the grapes provide are still in the concentrate. You are simply adding water to bring the concentrate back to a juice so that you can make wine with it. With the buckets of juice you got locally, all the original sugars were in them, as well, so no additional sugar was needed to achieve a reasonable alcohol level.
But in the case of SunCal Concentrates, not only is water taken out during the concentration process but some of the sugar is removed as well. This is why you need to add the 6-1/2 pounds of sugar. Without doing so you will not get enough alcohol from the fermentation.
But what if you want a sweet wine, you say. This is something that is controlled after the fermentation has completed. It has nothing to do with the sugar added in the beginning; it as to do with the sugar added after the fermentation. If the fermentation goes as planned, you wine should always turn out dry.
If you want to sweeten your wine, the time to do it is right before you bottle. Just sweeten it to taste and then add a wine stabilizer (potassium sorbate) to eliminate any chance of re-fermentation, or you can use Wine Conditioner which has sweetener and wine stabilizer mixed together.
With this basic understanding of the role sugar plays in a wine you can make any of our wine recipes or homemade wine kits as sweet or as dry as you like. Make the wine the way you like!
Happy Wine Making,
Ed Kraus
—————
Ed Kraus is a 3rd generation home brewer/winemaker and has been an owner of E. C. Kraus since 1999. He has been helping individuals make better wine and beer for over 25 years.
How To Crush Grapes And Why It's Important!
 You say grapes must be crushed before pressing, what do you use to crush them with?
Thank you,
Tony
—–
Hello Tony,
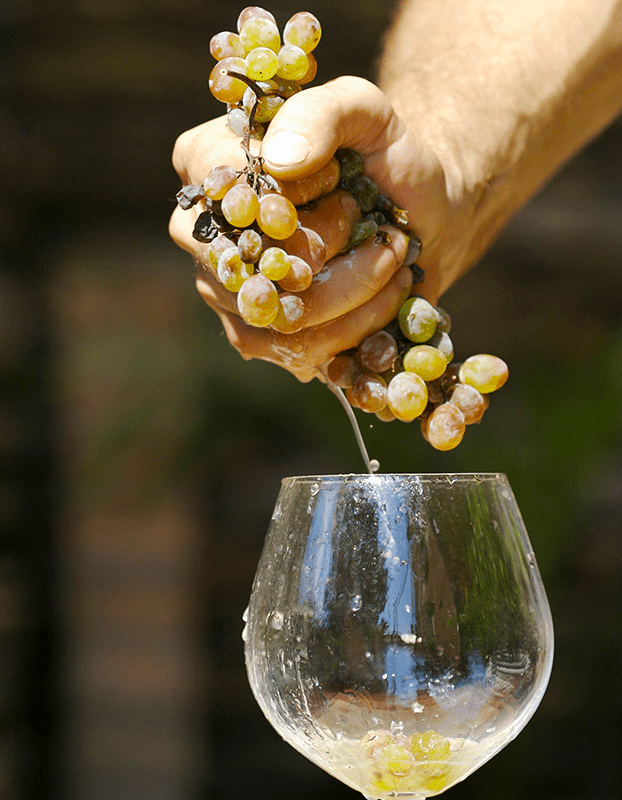
Crushing the wine grapes is a very straight forward process. All you want to do is burst the skin of each grape. This is necessary to release the juice from the grape. It also allows the yeast and enzymes into the grape to further break down the fiber and release even more juice along with flavor and body elements that will make up the character of the resulting wine.
If you do not crush the grapes, you will discover that a significant number of grapes will not release any juice at all. They will stay whole when being pressed. Other grapes may only give up a marginal amount of their juice while being squeezed. This is true regardless of the type of wine press you are using.
On the flip-side, you do not want to over-crush the wine grapes. Doing so may release too much tannin. This could lead to a wine that is out of pH balance and bitter tasting. You just want to solidly burst the skins. As an example, don’t pull out the food processor. That is not how to crush grapes and would definitely be overkill!
Another aspect to consider is that you need to remove the stems from the wine grapes at some point. A few stems are okay, but you do not want all of the stems in the fermentation. This too will cause the wine to become overly bitter with excessive tannin.
How you tackle the crushing of the grapes will depend on the amount of grapes you are dealing with. If you have just 10 or 20 pounds it wouldn’t be a bad idea to crush them by hand. With 100 pounds you might get away with crushing the grapes by beating them with the butt end of a 2×4 while in a bucket. But anything beyond this, and you are going to want to start considering an actual grape crusher.
We offer four different grape crushers. They all crush the wine grapes equally well. The biggest difference between these crushers is speed. Some have de-stemmers with them, or you can de-stem the grapes by hand. Regardless, if you have a large pile of grapes, using one of these units is how you will want to crush your grapes:
- Wooden Fruit Crusher: This is the smallest grape crusher we offer. It is hand-cranked and easily does about 80 to 100 pounds an hour. It is well designed and will crush small berries as will as larger fruit.
- Stainless Steel Fruit Crusher: This is a manual grape crusher as well. The main differences are that it is rated at 1850 pound per hour and it is stainless steel, very easy to clean up. It also has rotating knives within the hopper for handling other types of fruit.
- Motorized Crusher / De-stemmer: This is a motorize grape crusher. And as the name suggests, it is also a grape de-stemmer. The crushed grapes fall out the bottom and the stems will come out the side of the unit. It is rated at 2,200 pounds per hour.
I hope this information helps you out and gives you a better idea of how to crush your grapes. The bottom line is the wine grapes need to be crushed before they can be made into wine, and they need to be crushed by the right amount. Burst the skins thoroughly, but don’t do more than that.
Happy Wine Making,
Ed Kraus
—————
Ed Kraus is a 3rd generation home brewer/winemaker and has been an owner of E. C. Kraus since 1999. He has been helping individuals make better wine and beer for over 25 years.