
 I am filling up my shopping cart with everything I need to start making wine in one large order. I see there are several products for sanitizing wine making equipment. What’ the best sanitizer for wine making? Can you explain how to sanitize the wine making equipment? Should certain cleaners and sanitizers be used for certain materials (glass vs plastic vs stainless steel)? Are there also different recommendations for wine types? I have read on some forums that Campden tablets can add sodium to the wine is should never be used, and others say there is no difference. What are your thoughts?
Joe – CO
—–
Hello Joe,
Thanks for your great questions about sanitizing wine making equipment. And, thanks for the order you are sending our way. It is truly appreciated!
Before you use any sanitizers, the wine making equipment should be soapy-clean. None of these sanitizers have any detergent quality to them that will help you with the grime. The wine making equipment needs to be visibly clean, first. Once you have your equipment soapy-clean then any of these sanitizers will work equally well. Any of them will be adequate for sanitizing wine making equipment to the level needed to keep your wines from spoiling.
With that being said, some are easier to use than others; some work better in certain situations than others. There are some debates as to which product is the best sanitizer for wine making. In general, I try to stick with sanitizers that don’t require any rinsing when sanitizing my wine making equipment. This is simply for the mere fact that they require less work.
The two sanitizers I personally like are Basic A and One-Step. Either of these are great for large surface areas such as fermenters. Neither require rinsing, and in fact, work better if you don’t rinse them. They are oxygenating cleansers, which means that they do their sanitizing as they air-dry on the surface of the wine making equipment. You just wet the surface and allow to air-dry.
Either of these sanitizers will work for smaller items such as air-locks and rubber stoppers, but for these types of items I prefer to use sodium metabisulfite. It works a little differently than an oxygenating cleanser in that when the sodium metabisulfite is mixed with water, the vapor that comes off of the solution is what does the actual sanitizing of the wine making equipment.
One simple thing I like to do is put a few inches of this solution in the bottom of a bucket fermenter; put in all my hoses, utensils, air-locks an anything else the will fit; and then seal it up air-tight for 30 or 40 minutes. Afterword, all you need to do is dump the solution out. No rinsing is necessary.
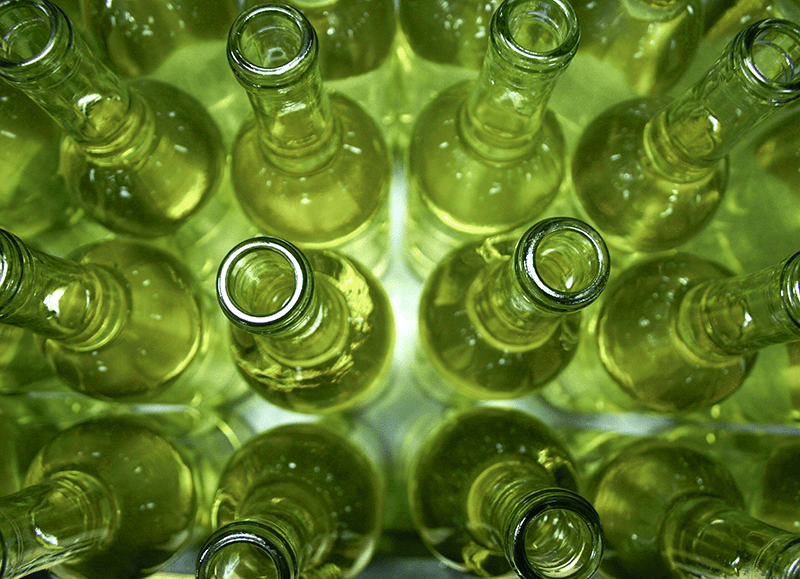
Sodium metabisulfite is also what I prefer to use for sanitizing wine bottles. All you need to do is put an inch of the solution in the bottom of each wine bottle for 30 minutes. Dump the solution out right before filling with the wine. No rinsing is necessary.
As for the using Campden tablets you mentioned, they could be used as well for sanitizing wine making equipment, but it is much easier to use sodium metabisulfite. They are essentially the same thing only the sodium metabisulfite is in powder form, not in tablets that need to be crushed up into a powder.
 You mentioned Campden tablets adding sodium to the wine. There is very little truth to this at all. Most Campden tablets are made from potassium metabisulfite, not sodium metabisulfite. From a sanitation standpoint they work the same way, only one leaves behind residual potassium, not sodium.
When sodium metabisulfite is used as a sanitizer, the amount of sodium left behind is so small as to be undetectable. When sodium metabisulfite is added directly to the wine throughout the normal course of the wine making process, the amount of sodium added to the wine is less than one slice of pickle to 2 cases of wine – no way noticeable of or any significance.
Joe, I hope this answers your questions. Sanitizing wine making equipment is an important process. It’s shouldn’t be taken lightly or glossed over.
Happy Winemaking,
Ed Kraus
—–
Ed Kraus is a 3rd generation home brewer/winemaker and has been an owner of E. C. Kraus since 1999. He has been helping individuals make better wine and beer for over 25 years.
Category Archives: Wine
Adding Wine Clarifiers Before The Fermentation
 I purchased three cans of Alexander’s Pinot Noir concentrate and the recipe on the label calls for 4 tsp. Bentonite and the other ingredients to be put in the fermenter before the wine yeast. The people at our local brewing store said to use Super Kleer instead and that it was better than Bentonite. I understood that both Bentonite and Super Kleer to be for clarifying before you bottle and not to be put in prior to the yeast? Am I confused?
Name: Debbie C.
State: Missouri
—–
Hello Debbie,
You are right to have some concern.
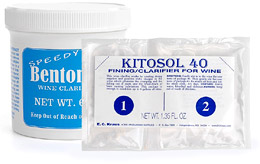
Bentonite is a fining agent (clarifier) that can either be added in moderate amounts before the fermentation or in larger amounts after the fermentation. It is a clay that is very unique because of the fact that it has a static charge that is stronger than usual. It is this property that makes Bentonite valuable as a fining agent.
Bentonite is able to collect dead yeast cells and drag them to the bottom of the fermentation vessel, leaving a clear wine. Being continually suspended throughout the wine is one of the key factors of how well the Bentonite will work. If it is added and just sits at the bottom of the fermenter, it will do very little in the way of clearing a wine.
When added before the fermentation, not as much Bentonite is needed because it is relying on the fermentation activity to keep it stirred up. It is constantly being churned up by the rise of CO2 gas bubbles that are being created by the wine yeast. This is why your wine recipe only calls for 4 teaspoons. If added after the fermentation, more is needed to be effective, and several periodic stirring sessions are required by the wine maker, as well.
Super Kleer is actually a combination of two different fining agents. Both are liquids: Chitosan and Kiesolsol. We sell something just like it called Kitosol 40. The Chitosan has a positive charge and the Kiesolsol has a negative charge. Each come in their own little pouch, and each are stirred into the wine separately.
I have never added Super Kleer or Kitosol 40 to a wine before the fermentation, so I can’t tell you what it will do to the fermentation with any certainty, but my best guess is that it would slow the fermentation down to a painful crawl. This is because the amounts that are prepared in these pouches are dosed for a finished wine — way more than you would ever want to add to a fermentation.
The presumed effect is that Super Kleer would interfere with the majority of the active wine yeast by continuously trying to collect them and drag them to the bottom in small clumps. This clumping would severely affect the wine yeasts’ ability to ferment.
Happy Winemaking,
Ed Kraus
—–
Ed Kraus is a 3rd generation home brewer/winemaker and has been an owner of E. C. Kraus since 1999. He has been helping individuals make better wine and beer for over 25 years.
So Tell Me, Why Is My Mead Still Cloudy?
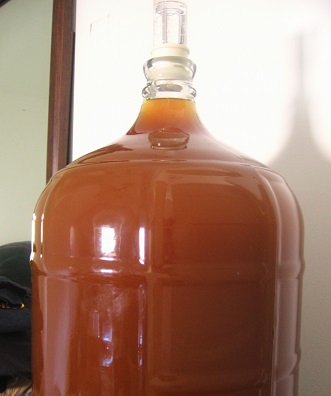 I started a batch of mead one year ago. It has stopped working but, it has not cleared. What can or should I do?
Name: Bruce T.
State: Iowa
—–
Hello Bruce,
Before you can know what to do you have to answer the question: why is the mead still cloudy? There are three things that instantly come to mind as a possibility.
Your Mead Could Still Be Cloudy Because It Is Still Fermenting:
Even though it has been a year, it is still possible for a fermentation to kick back up again. All it takes is some leftover sugar from the original fermentation. There is still yeast in the mead. It is just dormant. The slightest amount of fermentation could be the cause of your mead still being cloudy.
You can determine if the cloudiness is being caused by fermentation by taking a hydrometer reading. If you are getting a reading of .998 or higher on the Specific Gravity scale, then the mead is more than likely fermenting. You need to figure out how to get the fermentation to finish. Then the mead will clear on it’s own once the fermentation is done.
If this is the case, I would suggest going to the article on our website, Top 10 Reasons For Fermentation Failure and see if you can figure our why your are having the long, drawn-out fermentation.
Your Mead Could Still Be Cloudy Because It Has Spoiled:
Wine, mead and even beer can become spoiled from time to time. Bacteria is the main cause, but I have seen many cases where mold spores have taken over a batch. Both bacteria and mold can be airborne and land into a defenseless batch of mead. It can also come from being unsanitary with the equipment the mead comes in contact with. Either way, this could be why your mead is still cloudy.
If the spoilage is so progressed as to cause a cloudiness, you should be able to identify it simply by its odor. A sulfur odor is okay, but if you smell things like sauerkraut, rubber, fingernail polish, any of these would indicate that your mead is possibly infected and has been spoiled. There is nothing you can do to reverse this. It will simply need to be discarded.
Your Mead Could Still Be Cloudy Because It Has A Pectin Haze:
I saved this for last because it is the least likely. If you did not put any fruit in the mead, it is not likely at all, but if you did use fruit, there is a possibility that your mead could be experiencing a pectin haze from the pectin that was in the fruit.
 To determine if this is what’s going one, take a quart sample of the mead and add to it a teaspoon of pectic enzyme. Let the mead set for a few days. If the mead clears and creates no sediment in the process, this means you have a pectin haze was the reason your mead was still cloudy. If the mead does not clear at all, or clears, but creates sediment, then you do not have a pectin haze problem.
I do not know which one it is, but I’m fairly certain that one of the above is the answer as to the question: why is my mead still cloudy?
Hope this helps you out.
Best Wishes,
Ed Kraus
—–
Ed Kraus is a 3rd generation home brewer/winemaker and has been an owner of E. C. Kraus since 1999. He has been helping individuals make better wine and beer for over 25 years.
Essential! Learn About Wine Making Using A Hydrometer!
 One of the most important pieces of winemaking equipment is the wine hydrometer. Without this, you’re making wine blindly, and risk making a wine that’s not very palatable. If you don’t have one already, I recommend purchasing a wine hydrometer right now. It will be a piece of winemaking equipment that will pay for itself over and over again. Here’s some information on wine making using a hydrometer.
What is a wine hydrometer?
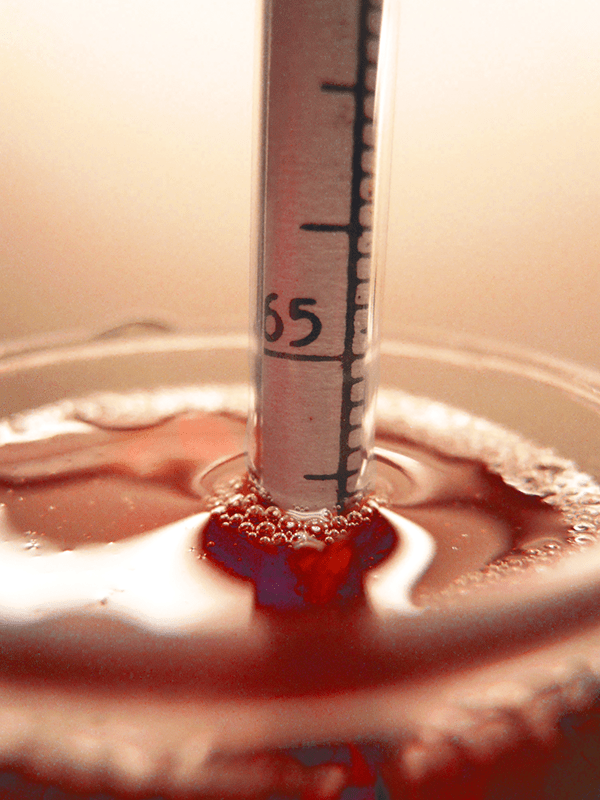
The quick and dirty description of what a wine hydrometer looks like is that it’s similar in structure to a thermometer. It’s often made of glass, and has a bulb-like bottom and a long stem. There are gradations marked on the side of the glass stem which when in use indicates to the user how much sugar is in a sample of wine.
How does a wine hydrometer work?
In scientific speak, a wine hydrometer measures the specific gravity of a fluid by displacing the liquid in which it is floating in proportion to the relative mass or “weight” of the solution. Yet another scientific way to define specific gravity is the ratio of the density of a solution compared with the density of a reference solution. In the case of liquid measurements, water is used as the reference solution to compare against wine.
How does this relate to sugar concentration? Well, water has no sugar in it, and has a specific gravity of 1.000. As sugar is added to water, the specific gravity increases. Thus, the amount that the specific gravity increases by is proportional to the concentration of sugar therein. The more sugar in the wine, the greater the specific gravity. As wine yeast consume sugar during fermentation, the specific gravity of your wine will drop. How much sugar is in your must or wine is proportional to the specific gravity of the solution. The amount of sugar will also help you determine what the alcohol level of your finished wine will be.
Why should I care about specific gravity?
Knowing the specific gravity that you determine with a wine hydrometer is important to the success of your fermentations and winemaking in general. Without a wine hydrometer, it’s much more difficult to determine the sugar level in your wine must or your wine, thus making it even more difficult to know how your fermentation is progressing and if there are any unexpected adjustments you need to make. Wine making using a hydrometer; monitoring the specific gravity of your must, you’ll be ready when an unexpected change occurs requiring your attention and adjustments, and you’ll be able to determine how much potential alcohol the wine you are creating will be and you can adjust accordingly if need be.
—–
Ed Kraus is a 3rd generation home brewer/winemaker and has been an owner of E. C. Kraus since 1999. He has been helping individuals make better wine and beer for over 25 years.
How Much Wine Conditioner To Add
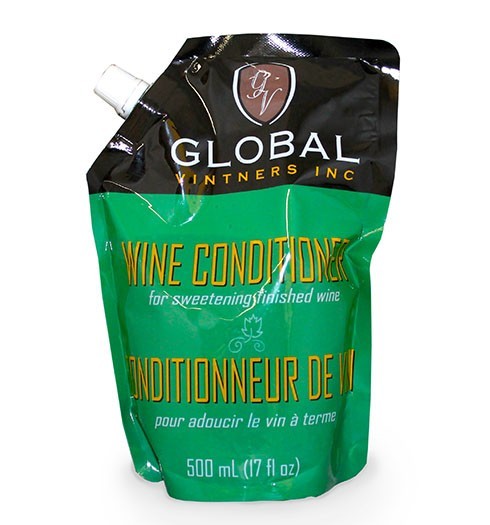 …I bought your wine conditioner for a light sweet taste. For a 3 gallon batch of red wine how much of the 16oz bottle would you use. I don’t want it as sweet as the store bought Manischewitz.
Byron J.— FL
—–
Hello Byron,
Thank you for your question. How much wine conditioner to add to a wine is a question that comes up often, so I’m glad to be able to clear things up.
There is no way anyone could answer this question with accuracy. This is because you can take two different dry wines and add the same amount of wine conditioner to each and come up with different intensities of sweetness.
This is because different wines handle sweetness differently. Some of it is due to the structure of the wine: body, tannin, acidity… Some of it has to do with how much residual sweetness is in the wine, already. So, it is almost impossible for anyone to tell you how much wine conditioner to add to your wine.
Tasting wine is a subjective venture, as well. This complicates matters even further. What one person might perceive as a sweet wine, another might perceive as not being sweet at all. This is why I think it is so important for the home winemaker to learn how to make any flavor adjustments based on their own taste. It is much more valuable and practical for you to add wine conditioner based on what you think is good, than me throwing some kind of number at you. How much wine conditioner to add should be dependent upon you, not anybody else.
For this reason, I never make recommendations on how much sweetening to add anyone’s wine. Instead, I recommend that you experiment a bit. You can do this by taking a one gallon sample of the wine and adding measured amounts of wine conditioner until you arrive at a sweetness you like best. This will establish a dosage that can then be use on your other two gallons. The best part is, if you accidentally add too much wine conditioner to the gallon sample, you can blend it with the other two, and start all over. This is by far the safest and best way to add wine conditioner to a wine. It also gives you a chance to discover the amount of sweetness you think is right, for you personally.
Just so you don’t think that I’m completely blowing-off you question, I will give you some general numbers. It’s not unusual for a winemaker to use the whole pint wine conditioner to 5 gallons. I’ve also seen winemakers use 2 pints to 5 gallons, and I’ve seen many winemakers only use 1/2 a pint to 5 gallons. As you can see, how much wine conditioner one adds can vary greatly.
Also, just as a reminder, if you add any wine conditioner at all, it needs to be at least 2 oz. per gallon. Potassium sorbate is blended into the wine conditioner as a stabilizer. This helps to eliminate a chance of a re-fermentation. If you use less than the 2 ozs. of wine conditioner per gallon there will not be enough potassium sorbate in the wine to guarantee that a re-fermentation does not occur with the newly added conditioner.
In your case with 3 gallons, that means you will need to add at least 6 ozs. or none at all. If you want to add less than 2 ounce per gallon, you can do so, but you will also need to add a separate dose of potassium sorbate along with it.
Hopefully, this has given you a little better idea of how much wine conditioner to add. I’d start out by adding 6 ounce of wine conditioner to the whole batch, then do same taste on a gallon of if from there.
Happy Winemaking,
Ed Kraus
—–
Ed Kraus is a 3rd generation home brewer/winemaker and has been an owner of E. C. Kraus since 1999. He has been helping individuals make better wine and beer for over 25 years.
3 Reasons Why You Should Be Making Wine!
 What motivates you to make your own homemade wine? Is it for that feeling of knowing you’re participating in an ancient art that has been practiced for thousands of years? Is it so you can control the aromas and flavors of your wine and not worry about whether or not you’ll like the wine when you pop that cork? Or maybe you’re just trying to save a little money by making it yourself? Whatever your motivation, making your own homemade wine is a time-honored hobby that is beneficial on so many levels!
Here’s three reasons why you should be making your own wine. These are the reasons that seem to stand out to most people.
- First, it’s cheaper to make your own wine than to continually have to restock your wine cellar through regular visits to the wine shop. You can find inexpensive bottles of wine in the store, but their quality is hit or miss, and by making your own wine, you’ll know it’s good once you’ve got your rhythm down. On average, actually good bottles of wine in the store are going to cost you between $15 and $30. Again, you can get good wine for less than that, but it’s not as common and you really have to know your brands at that point.
If you add up the cost of the wine making ingredients for your homemade wine and divide it up by the number of wine bottles it produces, you’re paying significantly less per bottle and per sip than you are the majority of the inexpensive good bottles of wine at the store. So, you should be making your own wine from a standpoint of cost, alone.
- The second reason as to why you should be making wine, you have total control over what the finished product becomes. You have carte blanche over what your finished wine will taste like and over the style of wine it will become.
And realize, commercial wines are not immune to possessing faults, so even if you make a mistake, be comforted in the fact that it is very possible you could have just as easily purchased a bad bottle from the store. Once you get your winemaking technique down and you have all the right wine making ingredients, you can create a wine that you know you’ll enjoy every time you pop that cork.
- Finally, making homemade wine can be really easy! Sure, it’s scary to think about it if you’ve never done it before, but there are many great resources available to you for free.
One great starting place is our How To Make Wine page. This page puts the whole wine making process in a nutshell. There’s also some great wine making recipes available to you. And, as if one couldn’t make it even easier, taking advantage of all the great winemaking kits out there will help making your own homemade wine a piece of cake! Currently, there are over 160 grape juice to choose from, collected from all over the world.
So as you can see there are many great reasons why you should be making wine. Not to mentions that your own homemade wine is a great thing to share with family and friends.
Do you make wine already? Share with others why you make wine in the comment section below!
—–
Ed Kraus is a 3rd generation home brewer/winemaker and has been an owner of E. C. Kraus since 1999. He has been helping individuals make better wine and beer for over 25 years.
5 Tips For Using A Wine Press
 Here are five tips for using a wine press. This are basic tips that will help you get the most out of your press. Learning how to make wine using a wine press is very straight-forward. Even so, this tips should help you avoid the pitfalls we see most often.
- You Can Press More Than Just Grapes With A Wine Press:
While wine presses are sold with the intent of being used for making grape wine, they work perfectly fine for pressing other fruits. Everything from tiny elderberries on up to apples can be pressed with a wine press.
- Before Using A Wine Press, All Fruits Must Be Crushed:
While you can press a variety of fruits with a wine press, it is important that the fruit be crushed beforehand. This is true whether you are pressing grapes, blueberries or pears. Depending on the amount of fruit you are dealing with: you can crush the fruit by hand; you can use a blunt object such as the butt end of a 2X4; or you can get an actual grape crusher to do the work for you.
- Before Using A Wine Press, The Stems Should Be Removed:
This primarily applies to pressing grapes. Some stems are alright, but excessive stems left in with the pulp can cause your resulting wine to have excessive tannin. This can give it an astringent flavor. The astringency can age-out over time, but the result of that would be a dark, dusty sediment forming in the bottom of your wine bottles. To remove the stems you can pick the grapes from them, but if you have a larger amount you may want to invest in a grape de-stemmer that does the process for you. A grape de-stemmer typically will crush the grapes as well, so you can handle both process with one piece of wine making equipment.
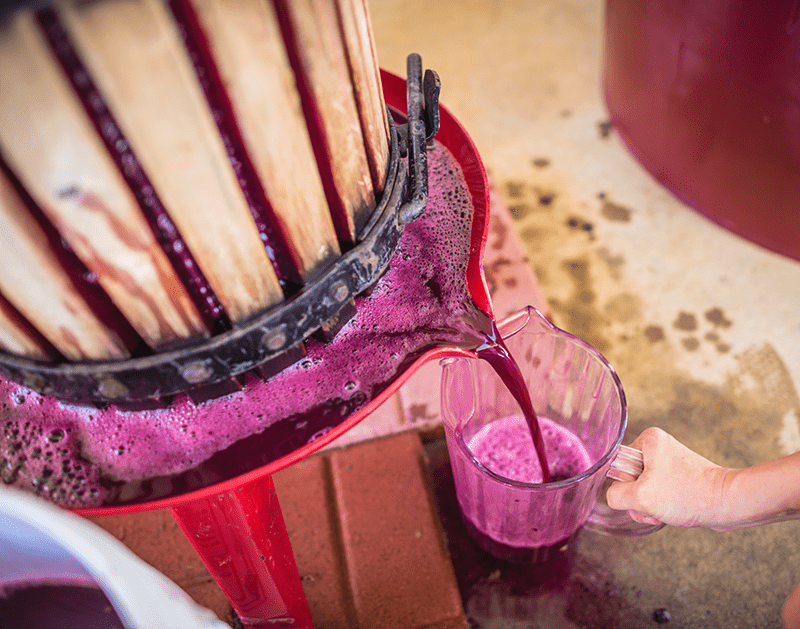
- Whites Are Pressed Before Fermentation, Reds After:
 This one often throws a lot of beginning winemakers off. Many assume that the grapes are always pressed before fermenting. In the case of making a white wine, they would be right. The grapes are de-stemmed, crushed, pressed and then fermented. However, when making a red wine, you want to de-stem, crush, ferment and then press. Having the pulp in during the fermentation is what gives a red wine its ‘red’. It is also what gives these wines more body than most whites. If the pulp were not in a fermentation you would end up with a blush wine.
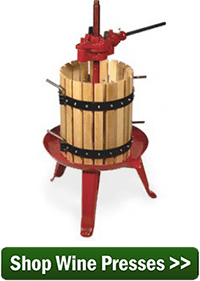
- Choose A Wine Press That’s The Right Size For You:
Wine presses come in all sizes. In general, they all press with the same amount of pressure and extract the juice with the same amount of efficiency. It is simply a matter of how much wine press do you need. Too much press and you won’t be able to fill the pressing basket all the time. Not enough press and you’ll be using a wine press all weekend. All the wine presses we list on our website also have listed how many pounds of fruit they will hold and the approximate number of gallons of juice you can expect with each pressing.
I am sure there are others, but these are the main tips for using a wine press. If you have a tip on how to make wine using a wine press, please leave it in the comments below. We’d love to hear your ideas.
—–
Ed Kraus is a 3rd generation home brewer/winemaker and has been an owner of E. C. Kraus since 1999. He has been helping individuals make better wine and beer for over 25 years.
How To Siphon Wine Without Disturbing The Sediment
 Can I add potassium sorbate to individual bottles as I fill the bottles with wine. I am making cyser and want to back sweeten with a little more honey and add the potassium sorbate to individual bottles. It is a 5 gallon recipe and was started in November. I want to bottle now, readings are telling me its safe. There is no residue of yeast at the bottom, but I really don’t want to siphon the wine into the carboy and stir anything that I cant see up. What say you.
Name: Suzanne K.
State: Virginia
—–
Hello Suzanne,
I understand your concerns about disturbing the sediment when siphoning, but what you are thinking of doing is not very is not very practical.
The amount of potassium sorbate required for each wine bottle is such a small amount that it would be very hard to measure it accurately enough for each single bottle. You would be much better off by siphoning into another fermenter, off any sediment (also referred to as “racking”), then mixing in the potassium sorbate to the entire batch along with any sweetening.
The fact that you are not seeing any sediment at the bottom of the fermenter is a very good sign, and makes me think that there isn’t any, since sediment is easy to spot in a lightly colored wine.
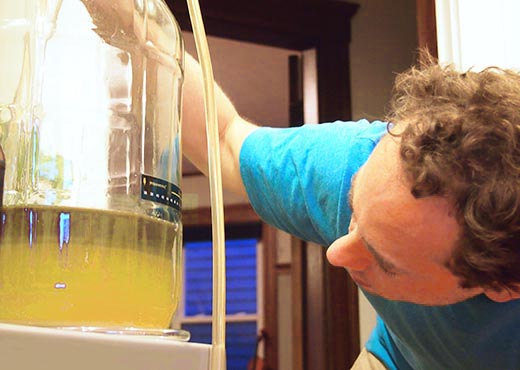
But if you are worried about disturbing the sediment when siphoning – seen, or not – the trick is to siphon gently. That’s how to siphon when without stirring up sediment. Have someone hold the siphon hose into the top half of the wine as someone else starts the siphon. Always draw your siphon from the upper part of the wine. As you get towards the end, you may want to tilt the container so as to corner the last bit of wine.
If you want to learn how to siphon wine without disturbing the sediment, the first thing you have to is understand that it’s not so much about a siphoning technique or experience as it is having the right pieces of equipment. There are several items on the market that will make racking the wine or wine much easier to do than just using a plain piece of hose. These handy little items are the key to siphoning the wine without stirring things up.
- Racking Canes:
One of them is called a racking cane. It is a rigid piece of tubing that allows you to point to where you are drawing from. It attaches to the end of your siphon hose like a wand. At the very bottom end of the tube is a diversion tip that makes sure that you do not draw from the very bottom of the container. On the top end is a hook or curve that points down toward the fermenter being racked into.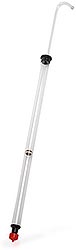
- Auto Siphon:
Quite often, starting the siphon is what causes a lot of the sediment to get stirred up. This is when most of the fumbling around happens, and consequently, the unintentional disruption of the sediment. One great invention for resolving this issue is The Auto Siphon. It allows you to start a siphon with virtually no movement at all. It’s like a racking cane and pump all in one. You just attach it to the siphon hose like a racking cane, and then slowly slide the inside tube up one time and then down one time to start the siphon.
- Racking Tube Clamps:
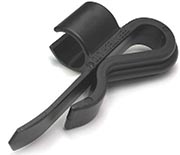 As an extra precaution, to make absolutely sure you do not disrupt any of the sediment when racking, you can use a racking tube clamps. These act as a third hand to keep things secured, in one position, and not moving around. You can get a Auto Siphon clamp or a racking cane clamp, depending on which you are using to draw the wine.
Suzanne, use these items and you’ll never have any problems with sediment getting stirred up.
How about anyone else. Do you have any tips or ideas on how to siphon a wine without disturbing the sediment?
Happy Winemaking,
Ed Kraus
—–
Ed Kraus is a 3rd generation home brewer/winemaker and has been an owner of E. C. Kraus since 1999. He has been helping individuals make better wine and beer for over 25 years.
How Many Cans Of Wine Making Fruit Bases Should I Use?
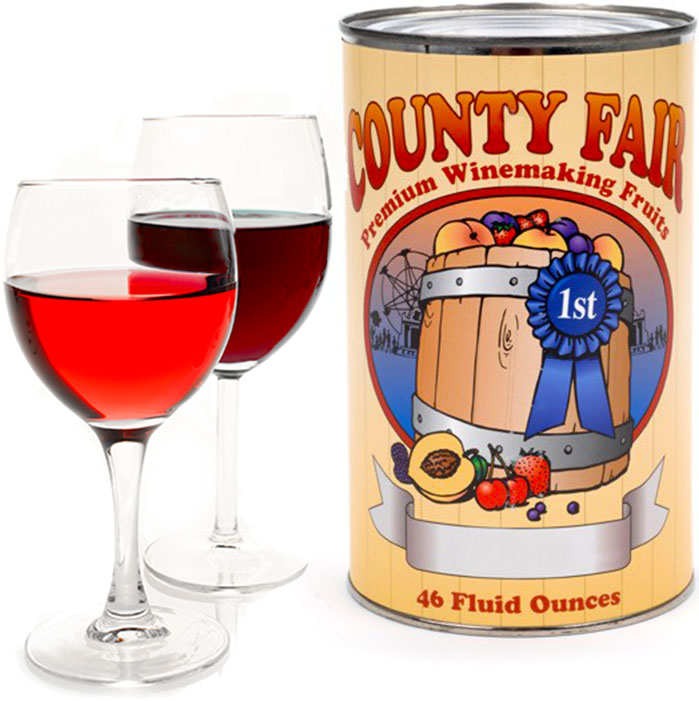 I’m having trouble understand how may cans of County Fair Fruit Bases to use. It says that you can use 1 to 4 cans to make 5 gallons of homemade wine. How many cans of the these wine making fruit bases should I use to make the best wine?
Thanks Wanda
—–
Wanda,
The number of cans of fruit base you use controls how light or heavy-bodied the wine will be. Using one particular number of cans is not necessarily better or worse than using another. It’s just different and subject to personal tastes and preferences.
If you like a crisp, refreshing wines, one that would goes great outdoors in the summer months, then you would use one or two cans of fruit base. These wines will be more thirst-quenching on the palette. If you prefer bold, full-bodied wines, one that might go well after dinner, than you would use three or four cans of the wine making fruit base. These wines will have a lot more body with a longer, more-layered finish. Regardless of the number of cans you use, the wine will turn out equally well in terms of quality. It’s more of a matter of personal taste.
On the side of each can of County Fair Fruit Base you are provided with the wine recipes and directions for each number of cans, from one to four. The wine making process is the same in each case, but the amounts of other wine making ingredients vary slightly. This is necessary to keep the wine’s flavor in balance.
So to answer your question more directly, you will need to decide how many cans of wine making fruit base are right for you. It’s a question of tastes, not whether it’s good or bad. Regardless of the number of cans of wine making fruit base you choose, follow the wine recipe on the side of the label and you will turn out a remarkable fruit wine… one you’ll be proud to share with family and friends.
Happy Winemaking,
Ed Kraus
—–
Ed Kraus is a 3rd generation home brewer/winemaker and has been an owner of E. C. Kraus since 1999. He has been helping individuals make better wine and beer for over 25 years.
Can I Add Sugar During Fermentation?
 When making wine should I add all the sugar all at once or can I add sugar to the wine during the fermentation?
Name: Mark
State: Ohio
——
Hello Mark,
In general, you do not want to add sugar during fermentation. You will want to add all the sugar to the wine before the fermentation – all at once, upfront. There is no real advantage to spreading the sugar throughout the primary fermentation, just as long as you are shooting for a reasonable level of alcohol (10% to 14%). Any wine yeast you choose to use will be able to readily ferment to this level of alcohol, even when all the sugar is added to the wine must before the fermentation.
The biggest reason you’ll want to add all the table sugar all at once, besides the fact it’s less work, is that it makes it easier to calculate your wine’s finished alcohol.
Sugar is what turns into alcohol during the fermentation. This is fermentation 101. To know how much alcohol the fermentation is making, you have to know how much sugar has been fermented. This requires you to know how much sugar the fermentation started with and how much sugar the fermentation ended with. The difference is what was fermented into alcohol. Both of these things can be easily determined with a hydrometer by taking a reading before and after the fermentation and comparing the two.
If you add sugar to the wine during the fermentation, additional hydrometer readings will need to be logged to eventually know how much alcohol is in the wine. These additional calculations can be annoying and even hard to remember to do. It requires you to pull out the hydrometer each time you want to add more sugar and take a specific gravity reading both before and after the addition of the additional sugar.
The only possible time you would want to add sugar fermentation is if you intend to make a high-alcohol wine. In this case you would want to start out the fermentation with enough sugar to reach 13% or 14% alcohol. Then as the fermentation runs out of sugar – which is determined with hydrometer readings – you will want to start feeding sugar to the fermentation in intervals.
The goal is to end up with a wine that is high in alcohol but not too sweet to drink. The fermentation will come to a point where the wine yeast can do no more. Exactly when that will be is not a certainty. It varies from one fermentation to the next, depending on a number of variables. When this happens you want little to no remaining sugar in the wine. This is the reason why you would feed the sugar to the fermentation as it progresses beyond 14%.
So in the end I guess the answer to the question: “can I add sugar during fermentation?”, is yes you can. With the only side note being “but it only makes sense if you are making a high alcohol wine”. For any normal wine making situation, it is only creating more work to do so.
Happy Winemaking,
Ed Kraus
—–
Ed Kraus is a 3rd generation home brewer/winemaker and has been an owner of E. C. Kraus since 1999. He has been helping individuals make better wine and beer for over 25 years.