I Need A Scuppernong Grape Wine Recipe

Scuppernong grapes for making wine.I have almost 4 gallons of Scuppernong grape juice that I’ve gotten with my steam juicer this year. I would like to know how to make Scuppernon grape wine with it. I was needing to know how much water to add to it. I would like to know what other wine making materials/ingredients I will need. I already have equipment. Can you help me with a Scuppernong grape wine recipe?
Thanks Fred
—–
Hello Fred,
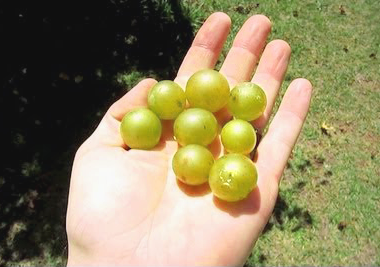
If you were making wine with actual wine grapes you would use 100% grape juice. This means if you have 5 gallons of juice, you make 5 gallons of wine. However, this is not the case with Scuppernong grapes. Their flavor is much stronger and more acidic. The Scuppernong juice needs to be diluted with water for these reasons.
Most Scuppernong grape wine recipes you run across will call for about 30 to 50 pounds of grapes to make a 5 gallon batch. This equates to about 2 or 3  gallons of juice. This is what I also suggest you use to make 5 gallons – 2 or 3 gallons of the Scuppernong juice.
If you want to get more accurate, you can purchase and acid testing kit and keep diluting the Scuppernong juice until the acidity drops to an acceptable level. This would be somewhere between .60% to .70% acidity. The directions that come along with the acid test kit will help you through the testing.
In an average growing season this should take about a ratio of 3 gallons water to 2 gallons of Scuppernong juice. Sometimes it can be equal part, 2.5 gallons water to 2.5 gallons of juice. Keep adding the water and testing the acidity until you reach at least the .70% acidity.
Because you have diluted the Scuppernong juice with water, you have also diluted the sugar concentration of the wine must. Sugar is what turns into alcohol during a fermentation. If there is not enough sugar in the wine must, there will not be enough alcohol in the wine when the fermentation is done. You will need to add sugar to keep the fermentation’s potential alcohol in a normal range. I would suggest adding 2-1/4 pounds of cane sugar for every gallon of water you use. This should get you a wine with about 12% to 14% alcohol.
Shop Wine Making KitsA more accurate way of controlling your wine’s alcohol content is to use a wine hydrometer. One of the scales on a wine hydrometer is called potential alcohol. This scale will tell you how much alcohol can be made with the sugar that is currently in the wine must. You just keep adding and dissolving sugar into the wine must until the potential alcohol scale reads the alcohol level you’d like to have. This is a limit to how much alcohol wine yeast can make. For this reason do not shoot for an alcohol level higher than 13%.
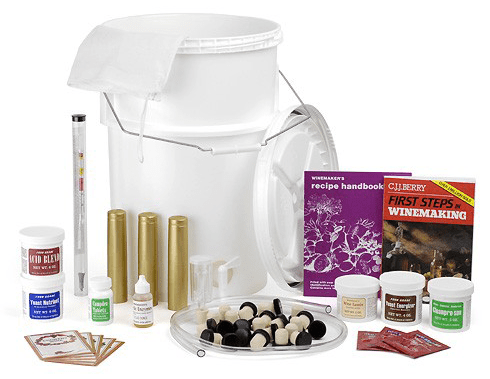
Other ingredients you will need to add for the Scuppernong grape wine recipe are as follows:

If you need more information about how to go about making the wine, you might want to take a look at How To Make Wine that is on our website. It will give you a good overall run-down of what you need to do to finish this Scuppernong grape wine recipe.
Happy Wine Making,
Ed Kraus
—–
Ed Kraus is a 3rd generation home brewer/winemaker and has been an owner of E. C. Kraus since 1999. He has been helping individuals make better wine and beer for over 25 years.

Is A Wine Refractometer A Good Alcohol Tester For Wine?

Refractometer With Grape Being SqueezedI have been told that a wine refractometer works real nice as an alcohol tester for my wine must and also at the end is this true?
Gary
—–
Hello Gary,
Thanks for the great question. Testing the alcohol level of a wine is a subject that always seems to have some confusion among home winemakers.
A refractometer can not be used as an alcohol tester for wine. It will not test the alcohol level. A refractometer will only test the sugar level of a wine must or finished wine. This is no different than what a wine hydrometer can actually do. They both measure the sugar in a wine, not the alcohol.
By comparing two sugar level readings, one taken before the fermentation and another after, you can determine how much alcohol was made. This is because wine yeast consume sugar and turn some of it into alcohol. If you know how much sugar was consumed by the wine yeast, you can then determine how much alcohol was made.
This principal is exactly the same for a refractometer as it is for a hydrometer. Neither are alcohol testers, but they will allow you to calculate the alcohol level of a wine must or finished wine by comparing a current sugar reading (brix) with a beginning reading.
What makes the refractometer extremely useful — and more handy than a hydrometer in some cases — is that you can take accurate sugar readings with very small liquid samples — just a couple of drops is all that is needed. This makes it ideal for checking the ripeness of the grapes while out in the vineyard. You only need to squeeze the juice from a single grape to see how sweet the grapes are becoming. This is very valuable when trying to determine when to pick your grapesShop Refractometers.
Alternately, the hydrometer needs enough sample for it to float. This could take as much as 4 or 5 ounces of wine or must. A hydrometer jar is also needed to hold the sample. So as you can see more time and effort is involved to take a reading with a hydrometer. This pretty much rules out taking a sugar reading on the fly as you might with a refractometer.
Gary, to answer your question more directly, a refractometer is a great tool for any winemaker to have. It is very handy, and it provides a quick way to get a sugar reading almost anytime, anywhere. But a wine refractometer is not an alcohol tester. It will not directly give you the alcohol level of your wine. This can only be done by comparing a beginning reading (before fermentation) with a current reading.
Happy Wine Making,
Ed Kraus
—–
Ed Kraus is a 3rd generation home brewer/winemaker and has been an owner of E. C. Kraus since 1999. He has been helping individuals make better wine and beer for over 25 years.

Getting Started With A Beginner Wine Making Kit

Wine Making Kit For BeginnerAlthough you do a good job of explaining the beginner wine making kits, I’m still not sure what I need to purchase.  I’d like to start making fruit wines and was looking at the Your Fruit Necessities Box.  I don’t have any wine making products at all so I would like to know what I need to buy in addition to this kit.  Let’s say I want to start with strawberry wine.  I have the beginner wine making kit in my shopping cart and now I need to add . . . bottles?  strawberry fruit mix (how many cans)? any sanitizing equipment for the bottles? Anything else?
Chris
—–
Dear Chris,
Using the Your Fruit! Necessities Box is a great way to start making wine. Regardless if you’re wanting to make strawberry wine from whole fruits or from your  County Fair canned strawberries, this will be the best way to start out. The wine making process will be the same as well, regardless if you choose to go with fresh or canned strawberries.
In the case of making strawberry wine you can go by the 5 gallon strawberry wine recipe in the center of our mailing catalog, or you can use the strawberry wine recipe listed on the wine recipe page of our website. The directions for making the wine can be found in both places as well. We call them The 7 Easy Steps To Making Wine. The wine making kit already has all the ingredients that are called for in the wine recipe.
As for any additional wine making products or wine making materials you might need, wine bottles is a fairly obvious one. The reason these are not included with the kit is because so many of our customers already have used bottles piling up from their commercial wine purchases.
The sanitizer you asked about is included in the beginner wine making kit. It’s called Basic A. It work great on all kinds of surfaces: glass, plastic, metal, etc.
If you think you’ll want your wines to be sweet, you may want to purchase a bottle of Wine Conditioner. You will add this to your strawberry wine to bring the sweetness up to the desire level. Just add to taste before bottling the wine.Shop Wine Conditioner
Some people do like to add a second plastic fermenter, but it certainly is not necessary. During the wine making process you will need to move the wine off the sediment a couple of times. This is a process called racking. Having a second fermenter makes the process a little easier. You can just go back-and-forth from one container and to the next as needed.
So as you can start to see the Your Fruit! beginner wine making kit is fairly inclusive, yet economical. While there may be an item or two you may want to add, for the most part this wine kit is complete.
Best Wishes,
Ed Kraus
—–
Ed Kraus is a 3rd generation home brewer/winemaker and has been an owner of E. C. Kraus since 1999. He has been helping individuals make better wine and beer for over 25 years.

What's The Difference Between Muscadine And Scuppernong Grapes?

Muscadine Scuppernong For Wine MakingI was wondering what the difference was between muscadine and scuppernong grapes? I hear people talk about both as if they were the same thing. Are they? Or are they different?
Thanks
Justin S.,
—–
Hello Justin,
Both Muscadine and Scuppernong grapes are indigenous to the Southeast region of the U.S. They grow both wild and domestically in backyards and on farms from Arkansas to the Carolina’s and everywhere South of there.
Muscadine and Scuppernong are a couple of names that are sometimes used loosely to mean the same grape, but in reality, a Scuppernong is a particular variety of Muscadine. So, technically you could call any Scuppernong grape a Muscadine, but you couldn’t call any Muscadine grape a Scuppernong.
Over the decades Muscadines have been domesticated and grafted into varying sizes and color. Today, there are an endless list of Muscadine varieties. While Scuppernong is a variety of Muscadine it is not considered a hybrid or cultivar. It has been know to be in existence since at least the 1600’s and has been domesticated in its own right. This is how some of the confusion comes about.

Today in spite of the facts, most people refer to the red varieties as Muscadines and to the white varieties as Scuppernongs.

I say, regardless of what you call them, these grapes make wonderful country wines. Using Scuppernongs is even a great way to learn how to make white wines for the first time.
Buy Wine CrusherPreparing these grapes my take some effort though. Because of their incredibly thick skins, running them through a grape crusher may be necessary as opposed to simply crushing them by hand.
An alternative to getting a grape crusher would be to use a steam juicer to extract the juice. The steam juicer bursts the skins with steamed heat. The juice then falls out the colander of steamed grapes and runs out into a collector. Once cooled, the juice is ready to go straight into the fermenter.
I hope this information helps you understand a little better about the difference between Muscadines and Scuppernongs.
Happy Wine Making,
Ed Kraus
—————
Ed Kraus is a 3rd generation home brewer/winemaker and has been an owner of E. C. Kraus since 1999. He has been helping individuals make better wine and beer for over 25 years.

When Should I Filter My Wine?

Wine FiltersWhen should I filter my wine? I have a wine that is about 4 months old and I’m wondering if it is to early to filter it.
Don
—–
Hello Don,
When first learning how to make your own wine it is important that you don’t become too impatient, however since the wine has been bulk-aging for 4 months, I would say you’ve been patient enough. It would be fine to filter your wine at this time.
One of the more common wine making tips I share with beginning winemakers is:
“Never filter a cloudy wine. The wine should be done fermenting and look clear before filtering”.
You can verify that the wine is done fermenting by testing it with a wine hydrometer. You should be getting a test reading of .998 or less. For more information about this you may want to take a look at the article, “Getting To Know Your Hydrometer” listed on our website.
A wine filter is not designed to remove visible particles from a wine. A wine filter is designed to take out very fine particles, smaller than the human eye can see. This gives the wine a beautiful, polished appearance. It brightens the wine.
With this in mind, it is important to make sure that all the sediment that can fall out of the wine on its own has done so, otherwise the extremely fine filter pads that are used in the wine filter will clog up very quickly.
Shop BentoniteIf you are making wine from wine concentrates, the sediment will fall out fairly easily on its own in a week or two, but if you are making wine from fresh grapes or some other fruit, getting all the sediment to drop out can sometimes be challenging. For this reason, it is suggest that you treat the wine with bentonite before filtering.
Speedy bentonite is a fining agent that will help speed up the natural falling-out of the sediment so you can filter your wine sooner and more efficiently. To learn more about fining agents you may want to reading the article, “Using Finings To Improve Your Wine“.
You will also want to rack the wine off the sediment before filtering the wine. This will eliminate the chance of drawing sediment into the wine filter.
There is another, more simple, way to answer the question: When should I filter my wine? Filter the wine when it is ready to be bottled. Make it the last step the wine goes through before it is put to rest in the bottle. There is no advantage to filter the wine before that time.
Happy Wine Making,
Ed Kraus
—–
Ed Kraus is a 3rd generation home brewer/winemaker and has been an owner of E. C. Kraus since 1999. He has been helping individuals make better wine and beer for over 25 years.

Can I Add Liqueurs To Homemade Wine?

Blueberry Liqueur To Be Added To Homemade WineCan I add liqueur to my wines? I have added brandy to some, blackberry, peach. Will it change the taste?
Tino — NY
—–
Hello Tino,
Absolutely, you can add liqueurs to your homemade wine. I always like to encourage experimentation. Without it, nothing moves forward.
Adding a brandy or liqueur to a homemade wine puts it in the category of a fortified wine. Brandy is added to wines to produce Ports, Sherrys, Maderas and others. They typically will run around 18% to 21% alcohol. This is not uncommon at all. On a commercial level, adding liqueurs is not commonly done, but certainly has some great potential. Why couldn’t you add peach schnapps or peach brandy to a peach wine? It would raise the alcohol and intensify the flavor.
Obviously, you have to use some common sense in your combinations. The flavors needs to be complimentary to one another. For example you wouldn’t want to use orange brandy with a blueberry wine. You want to stay within reason.
I would also suggest that you take baby-steps. Do a bench-testing, first. Add the chosen liqueur to a sample of the wine. This does two things: 1) it allows you to establish a dosage ahead of time that can later be applied to the entire batch; 2) it acts as a safety-net; it you accidentally add too much to the wine sample, you can put the sample back with the rest of the batch and start all over.
Shop Liqueur FlavoringsAs a side note, we sell liqueur flavorings for transforming vodka, brandy and the likes into various liqueurs. They come in tiny bottles for making a quart or two at a time. You just add them to the alcohol base, sometimes with sugar, to create an array of liqueurs.
Home winemakers will use liqueur flavorings to enhance the flavors of their wine. For example, you can use the pear brandy liqueur flavoring directly to a pear wine to increase the wine’s fruitiness. It will not raise the alcohol level of the, but it will add a noticeable amount of flavor.
Also realize, that it is possible to have too much alcohol in a wine. A wine can go out of flavor balance if it becomes too hot or alcoholic. When this happens the wine will start to taste more watery, less flavorful, less fruity. This is because of the numbing effects that alcohol can have on the senses, both taste and smell. This is one good reason to look at liqueur flavorings instead of liqueurs. You get the flavor without the heat.
Regardless, I think adding liqueurs to homemade wines is a fantastic way of playing around with the flavors in your wine. I can be valuable. Not only can you come up with something spectacular, you get to exercise your senses in a way that will only help you with future batches of homemade wine. Just remember to take careful steps, and do sample tests before moving forward with the whole batch of wine.
Happy Winemaking,
Ed Kraus
—–
Ed Kraus is a 3rd generation home brewer/winemaker and has been an owner of E. C. Kraus since 1999. He has been helping individuals make better wine and beer for over 25 years.

Champagne Celebration: Make your Next Party Sparkle

champagne2Making your own Champagne (*cough* sparkling wine for us home wine-makers) is not much different from the traditional home wine-making process. By simply substituting your yeast and adding more sugar, you can add bubbles to your favorite wine recipe or concoct a brand new favorite that is best suited as a sparkling wine. Champagnes and sparkling wines can be expensive and we want to help you get the best bubbles for your buck.
We know you’ve heard this 1,000 times before, but we are obligated to say it again – most Champagnes available are not truly champagne, but are actually sparkling wines. True Champagne must be produced in the legally identified northern region in France and have the fermentation process (giving the wine its bubbles) occur in the bottle. The Champagne Bureau in Washington, D.C. works to educate U.S. consumers about the uniqueness of the wines of the Champagne region in France and expand their understanding of the importance that location plays in the creation of all wines. You can find out more about the Bureau Du Champagne, USA on their website.
Now that formalities have been established and expectations are set, making your own Champagne (but actually sparkling wine) is an easy addition to the wine-making process and can be done so for a relatively inexpensive cost. Of course, this will be far from the authentic method for making Champagne, but you will get a similar desired effect. Adding a dry white/sparkling yeast will ferment crisp and dry, as well as low in foam, to make your favorite wine recipe bubbly!
Whether the occasion is New Year’s Eve, celebrating a birthday, or just relaxing after a long day, here are two recipes that will be sure to hitch your taste buds on the bubbly bandwagon.
Pro tip: You’re going to need a hydrometer for this champagne recipe.
Essential tools for the job:
Dry White/Sparkling Yeast
Bottles (need 6 per gallon)
YOU MUST USE CHAMPAGNE BOTTLES. Regular wine bottles will not even begin to hold the pressure that will be produced.
Wire Hoods
Champagne Stoppers
Champagne Foil Capsules (optional)
Directions:
Step One: Start with your favorite base wine, Follow the The 7 Easy Steps to Make Wine all the way through fermentation. Be sure to use your Dry White/Sparkling Yeast.
Step Two: Siphon the wine into an open bucket after fermentation. The wine should be a little cloudy at this point, add some yeast sediment to the bucket from the bottom of the fermentation bottles if it is not.
Step Three: Make and add simple sugar syrup (ratio: 100 grams of cane sugar per gallon of wine). Simply heat to boil a mixture of two parts sugar to one part water to make the syrup. Stir the syrup while adding to the wine and be gentle!
NOTE: You must confirm with a hydrometer that the original fermentation has completed before adding the sugar syrup. Otherwise, too much carbonization will occur in the bottle. This can be done by making sure the hydrometer reads .998 or less on the specific gravity scale.
Step Four: Immediately siphon the wine champagne bottles and add their caps. Again, you MUST use champagne bottles as regular wine bottles will NOT be able to handle the pressure.
Step Five: Store the bottles upright and in a cool place for at least three months. Let the wine stand until it is crystal clear (this may take an additional month or two). After this standing period, refrigerate and store the bottles at 32 °F
Step Six: Open, pour, and enjoy!!
For our ambitious wine-makers, you can also follow the full process as done in the Champagne region of France to make your home wine as authentic as possible. Though don’t despair about getting your homebrew exactly right, they’ve had centuries to perfect the recipe and process. Pressing, first fermentation, assemblage, second fermentation, remuage, aging (for a least 15 months), disgorgement, dosage, and the finishing touch of corking and consuming have all been dialed-in to a science for creating the perfect Champagne. You can read more on this traditional methode Champenoise or methode traditionelle process from Fine Wine Concierge.
You can also try adding fruit to your champagne or sparkling wine recipe to enhance the flavors and add a new layer of fun to your wine making process. Enjoy your bubbles!
Happy Wine Making,
Ed Kraus
—–
Ed Kraus is a 3rd generation home brewer/winemaker and has been an owner of E. C. Kraus since 1999. He has been helping individuals make better wine and beer for over 25 years.
Featured Product
[bigpres skus=”GL310″ overlay=”no” animation=”fade” direction=”top” show_img=”yes” show_name=”yes” show_price=”yes” show_arrow=”no” hide_button=”no” link_to=”product” per_row=”4″ size=”medium” type=”card” show_content=”no” drop_shadow=”yes” /]

Does Making Bentonite Additions To A Wine Have A Downside?

Man Drinking Wine OutsideI’ve been reading about bentonite fining in my wine and would like to know what is the downside of using this stuff? I understand what it does, but was thinking – if there is no downside then I should use it in every wine I make. What is your response to that, please!
Steven
_____
Hello Steven,
Commercial wineries routinely make bentonite fining additions to the wine right after the fermentation. It is used at this time because it is effective in taking out large amounts of solids fairly quickly. It speeds up the clearing process.
Bentonite additions to a wine will not only take the bulk of the yeast out, but it will also take out other protein based particles such as tannin, color pigmentation and other pulp-related materials. So much so, that one might say it is too good.
For this reason one must be careful not to use more bentonite fining than is necessary to get the job done. Using too much bentonite in the wineBuy Bentonite can result in a decrease in body, color and overall character of the wine. This is the potential downside.
Fortunately, bentonite fining is efficient enough that it will do the job before threatening dosages come into play. Follow recommended dosages and you will have not have a problem. And yes, we recommend using it on any fresh fruit wine.
The bentonite fining we sell comes with detailed directions and a recommended dosage that is considered conservative. If these directions are followed and the recommended dosage is adhered to, your wine will not be negatively affected in any way.
While bentonite is effective in removing a lot of particles quickly, there are times when it will not remove the last little bit that is required to bring a polish to your wine. If you discover that a single bentonite fining addition was unable to add a bright color to the wine, then I would suggest that you go to another fining agent for a second treatment.
Buy Wine ClarifiersWineries will turn towards fining agents that have more polishing qualities as a follow-up treatment. These would include fining agents such as Sparkolloid, isinglass and Kitosol 40.
So in short, yes it’s not a bad idea to automatically make bentonite addition to your wines right after fermentation. There is little to no downside in doing so. Just be aware that it is so effective that there are limitations to how much you’ll want to use. Stick to the recommended dosages and your wine will be fine.

Happy Wine Making!

Keeping Fruit Wines In Fruity Balance

Balancing Wine Making Fruit
Thank you for your wine making newsletter each month. It is very informative and helpful to me in my winemaking.  I have a question, “How do I keep the  fruit flavor in my wine? I end up with about 13 percent alcohol content but am losing the fruit flavor. Could you help?
Ed H.
—–
Hello Ed,
Thank you for all the kind words. We try very hard to bring useful, relevant information to the home winemaker.
What your question really involves is the basic balance of the wine. There are three primary elements in a wine’s basic balance profile: fruit flavor, alcohol and sweetness.
Obviously, the amount a fruit that you use in a wine recipe will affect the wine’s fruitiness. The more fruit in the wine recipe, the fruitier the wine will be, but there are limits to how far you can take this.
Using too much fruit in an attempt to increase the wine’s fruitiness can create a wine that is sharp or tart tasting. This is caused by excess fruit acid – the acid that is in the fruit. It can also create a wine that takes an incredible amount of time to completely age. So, there is only so much fruitiness to be had in a given wine recipe.
One way of maximizing the amount of fruit you use without making it too acidic is to using an acid testing kit. This will allow you to monitor how much acid is in the wine. The directions that come with it will tell you what range to shoot for.
Shop Acid Test KitWhile adding more fruit increases the fruitiness of the wine, alcohol decreases it. This happens simply because the alcohol is numbing the tongue making it less sensitive to fruit flavors. This is why you will typically find among wine recipes in various wine making books and on the web, that the higher the alcohol level, the more fruit the wine recipe will call for.
To keep a handle on your wine’s alcohol level, you will want to use a wine hydrometer. The scale on the hydrometer will tell you how much alcohol can be made with the beginning sugars that are in the wine must.
Sweetness also plays a role in balance. During a fermentation all the sugars are turned into alcohol, even the sugars that come from the fruit itself. Removing the sugars will lower the fruity impression of the wine, dramatically.
The good news is the sweetness of the wine can easily be corrected at bottling time. By adding a little sugar syrup solution you can bring back the fruitiness. Just a very slight amount of sweetness can bring out a lot of fruitiness in the wine. You don’t necessarily need to make the wine sweet. You just need to take the dry edge off the wine.
Add the sugar to taste and then also add potassium sorbate. This is a wine stabilizer that will keep the wine from fermenting the newly added sugars. This is what I recommend doing with your current batch.
Buy HydrometersAs for future batches, you will want to lower you target alcohol level a little… maybe 11% instead of 13%. This will make a noticeable difference in the fruitiness of your wine. It will seem more lively and less watery.
By working with these three basic elements of a wine: fruit flavor, alcohol, and sweetness, you can control how much fruity character your wine will, or will not, have. It is up to you to create a wine the way you like it, with the amount of fruitiness you prefer. It’s all part of learning how to make your own wine.
Happy Wine Making,
Ed Kraus
—–
Ed Kraus is a 3rd generation home brewer/winemaker and has been an owner of E. C. Kraus since 1999. He has been helping individuals make better wine and beer for over 25 years.

Sweet Idea! Adding Fruit To Wine Kits

Fruits In Wine GlassesWe did a Chardonnay wine kit recently. The results were very good, by all accounts. What is your position on mixing peach, apricot or even persimmon into a batch of that? Wondering. Thanks in advance for your time.
Jeff
—–
Hello Jeff,
Adding fruit to wine kits is a great way to enhance any attractive characteristics that a particular grape may possess. For example: raspberries with Merlot grapes, strawberries with Zinfandel, pears with Pinot Grigio… The options are endless and there is always room for experimentation. It’s a great way to have even more fun while making these wines.
Usually when a home winemaker wants to make a wine in this style, they will mix the wine kit and fruits together in the fermenter and proceed with the fermentation from there. After the primary fermentation has completed, the fruit is then removed as the wine goes into a secondary fermenter. However there is another – more professional – way for adding fruit to wine kits. One that will give you much better control over the end product. In other words, less chance of messing up.
Instead of mixing the grape concentrate and fruit together at the beginning of fermentation, make the chosen fruit into its own wine, separately.
In the case of your Chardonnay, you could make some peach wine – one or two gallons of it. When it is time to bottle, you can experiment with blending some or all of the peach wine with it. Buy Wine Ingredient Kits
How much peach flavor you add is a matter of personal taste. You can add a little or a lot. You could do sample taste-testings with varying ratios of the two wines. This is the real power of making the two wines separately. You have complete control over the outcome. If you had added some fruit like peaches at the beginning of fermentation, all you could do is guess as to how much peach to add and hope for the best.
By adding fruit to wine kits in this way, you will have total control over how much fruit flavor is in the wine. This method will also allow you to safely mix blending samples together without risking your entire batch.
We have more information about blending wines together in an article on our website that you may want to take a look at: Blending To Improve Homemade Wines. This article should give you some better insights as to what you are look for when putting two wines together.
As far as whether to try peach, apricot or persimmon, all I can say is that I have seen the most success using peach verses apricot and I have never tasted persimmon added to a Chardonnay. But having said this,Buy Fruit Wine Bases I would never tell you not to try any combination. There are no wrong answer when adding fruit to wine kits. Home wine making is about being creative, experimenting and seeing what you can come up.
Happy Wine Making,
Ed Kraus
—–
Ed Kraus is a 3rd generation home brewer/winemaker and has been an owner of E. C. Kraus since 1999. He has been helping individuals make better wine and beer for over 25 years.