 There are a number of “this vs. that” debates in homebrewing: dry vs. liquid yeast, single vs. two-stage fermentation, extract vs. all-grain brewing. On both sides of the argument you will hear supporters of their chosen method insist that theirs is better. But often times the answer depends on the brewer, their equipment, their skill level, their time availability, and a number of other factors. It all boils down to personal preference.
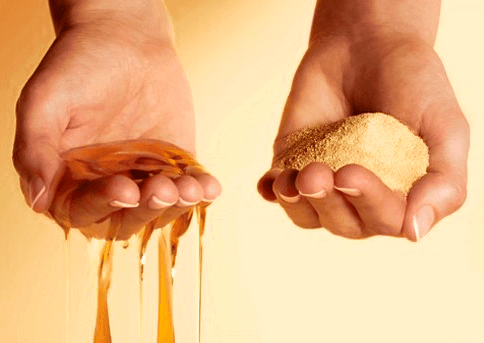
The same can be said for dried malt extract vs liquid malt extract. Neither is necessarily better than the other. Both forms of malt extract have their merit, and both have their drawbacks. Let’s break down the difference between both types of malts to determine when you might prefer dried malt extract or liquid syrup in your homebrew.
Continue reading
Category Archives: Beer Brewing Tips
Brooklyn Brewery Summer Ale Clone Recipe (Extract & All-Grain)
 A classic summer seasonal beer is the Brooklyn Brewery Summer Ale. At 4.8% ABV and 26 IBUs, it’s a lighter ale that will pair well with burgers, outdoor activities, warm sun, and good friends.
Grain Bill
Harkening back to its English heritage, this clone recipe uses Crisp’s Best Ale Malt as the base. A smaller amount of pilsner malt keeps the color and flavor light. A mid-range mash temperature of 152˚F results in a good balance of body and fermentability. If brewing the partial mash version of this recipe, add the LME at the end of the boil to increase hops utilization and reduce the likelihood of the LME contributing too much color to the beer.
Hopping
Cascade and Amarillo hops bring a signature American hop profile to this beer. Cascades contribute the classic citrus and spice, while Amarillo dry hops bring a pleasing tropical citrus aroma.
Yeast
For yeast, Nottingham dry yeast is recommended. It’s a classic English strain with a fairly neutral flavor profile. No yeast starter is necessary for this clone recipe, but you may wish to rehydrate the yeast before pitching.
Ready to give it a try? Here’s an all-grain Brooklyn Brewery Summer Ale recipe, with a partial mash recipe below! Happy brewing!
Brooklyn Brewery Summer Ale Clone Recipe (All-Grain)
(5-gallon batch, all-grain)
Specs
OG: 1.044
FG: 1.007
ABV: 4.8%
IBU: 26
SRM: 5
Ingredients
6 lb. 5 oz. Crip’s Best Ale Malt
2 lb. 11 oz. Pilsner malt
.75 oz. Cascade hops at 60 mins (3.8 AAUs)
.75 oz. Cascade hops at 30 mins (3.8 AAUs)
.75 oz. Cascade hops at flameout (3.8 AAUs)
.88 oz. Amarillo hops (dry hop)
1 pack Nottingham ale yeast
All-Grain Directions
 Mash crushed grains in about 2.8 gallons of water at 122˚F for 30 minutes. Raise temperature to 152˚F and mash for one hour. Lauter and sparge to collect about six gallons of wort in the boil kettle. Boil for an hour, adding hops according to schedule. Chill wort and transfer to a clean, sanitized fermenter. Pitch yeast and ferment at 68˚F. Dry hop with Amarillo hops in the secondary fermenter. Bottle or keg with a target carbonation of 2.6 vols CO2.
Brooklyn Brewery Summer Ale Clone Recipe (Extract)
(5-gallon batch)
Specs
OG: 1.044
FG: 1.007
ABV: 4.8%
IBU: 26
SRM: 5
Ingredients
1 lb. 5 oz. Crip’s Best Ale Malt
11 oz. Pilsner malt
1 lb. 10 oz. light dried malt extract
3 lbs. light liquid malt extract (late boil addition)
.75 oz. Cascade hops at 60 mins (3.8 AAUs)
.75 oz. Cascade hops at 30 mins (3.8 AAUs)
.75 oz. Cascade hops at flameout (3.8 AAUs)
.88 oz. Amarillo hops (dry hop)
1 pack Nottingham ale yeast
Extract Directions
Mash crushed grains in a small stockpot in about 3 quarts of water for 45 minutes. Strain wort through a colander or strainer into your brew kettle, then rinse grains with about 1.5 quarts of water at 170˚F. Add 2 gallons of water and start to heat. Once the wort is hot (but not boiling), remove the kettle from the heat to stir in your dried malt extract. Bring wort to a boil and boil for 60 minutes. Add hops according to schedule above. Five minutes before the end of the boil, stir in the liquid malt extract. Transfer wort to a clean, sanitized fermenter and top up with clean water to make five gallons. Aerate, pitch yeast, and ferment at 68˚F. Dry hop with Amarillo hops in the secondary fermenter. Bottle or keg with a target carbonation of 2.6 vols CO2.
—–
David Ackley is a beer writer, brewer, and self-described “craft beer crusader.” He holds a General Certificate in Brewing from the Institute of Brewing and Distilling and is founder and editor of the Local Beer Blog.
Get Sweet On Your Beers: Start Brewing Beer With Honey!
 We put it in tea, we mix it into our lip balm and of course it’s good for baking, but for many homebrewers, honey is also a pivotal ingredient for brewing.
From the “ealu” of Great Britain’s Anglo-Saxons to President Obama’s White House Honey Ale, brewing beer with honey has been an important part of the craft. What makes honey so great is its flexibility for brewers, whether they simply want to use it as a fermentable sugar in their boil, as a source of sweet flavor or even as a priming ingredient.
Honey is great as a medium to connect all the aspects of your homebrew, from the sweet taste of wort to herbal aromas of hops and even yeast esters.
So how can you start brewing beer with honey? Here are three different ways:
Brewing With Honey In The Boil
For many, the high fermentability of honey provides an easy way to add extra gravity to a beer, since the sugar found in honey is almost entirely fermentable. Unless you’re making mead or braggot, you’ll want to make sure honey isn’t more than about 30 percent of all your fermentable sugars in a brew, depending on the level of honey flavor you seek. For best results, the National Honey Board recommends that when brewing with honey, not using more than 2.5 pounds of honey per five gallons.
A key trick is to know when to add honey. If you want to use it in the boil, consider adding it as a late addition. Due to its high fermentability, using honey early on in the boil can dilute the body of a beer and cause a drier finish when drinking your homebrew. Many beer recipes will call for a honey addition at the very end of a boil (in the last five minutes) or at flameout, which is best for retaining the honey’s aromas and flavors.
Brewing With Honey In The Secondary
If you want to avoid using honey on brew day, adding it during secondary fermentation is a good option. It allows you to keep the characteristics of the honey you’ll want to show up in your beer. To eliminate any wild yeasts and bacteria that may be in the honey, it’s important to pasteurize your honey first:
- Preheat an oven to 176°F.
- Pour honey into a sanitized, oven-proof saucepan.
- As the oven preheats, heat the honey on the stove top to 176°F., stirring occasionally.
- Once the honey is 176°F., cover it and put it in the oven for 2.5 hours.
- Place the saucepan in an ice bath to lower the honey’s temperature to match that of your beer and pour it into the secondary.
The reason we heat the honey to 176°F. is that this temperature is hot enough to kill off microorganisms, but not so hot that it drives off the honey’s valuable aromas and flavors.
Brewing Beer With Honey: As A Priming Sugar
While substituting honey for your normal priming sugar may not add a lot of unique flavor, priming with honey does have the potential to add a small layer of complexity to your beer. Just be sure you only adding the honey for priming, as combining it with any other priming sugar can have explosive results.
If priming beer with honey, the honey will need to be diluted with water before adding to your homebrew. Different honeys have different densities, so there’s no uniform amount of water that may be ideal. You may need a small digital scale to weigh out the honey. Most formulas suggest four to five cups of water should be sufficient to mix with the honey.
As a precaution, you can bring the water-honey mix to a boil to kill any potential bacteria, the same as you would when mixing any other priming sugar.
Now that you’re ready to start brewing beer with honey, what to make? If you’re feeling experimental, check out the available beer kits from E. C. Kraus and see which beers you may enjoy with a touch of honey!
—–
Bryan Roth is a beer nerd and homebrewer living in Durham, North Carolina. You can read his thoughts on beer and the beer industry on his blog, This Is Why I’m Drunk, and send him suggestions on how to get his wife to drink craft beer via Twitter at @bryandroth.
How To Test For Diacetyl In Your Beer
 You’re brewing a beer and it tastes just fine after primary fermentation. You move it to secondary, bottle it, and when you go to taste it…butter bomb! This sounds like a problem with diacetyl.
What is Diacetyl?
Diacetyl is a natural byproduct of fermentation. A small amount of diacetyl is acceptable in certain beer styles, most notably in a variety of ales and a handful of lager styles, but most lagers should not present any diacetyl. Excessive diacetyl in any beer can be a defect.
Causes of Diacetyl in Beer
Diacetyl is produced when beer is fermented. Diacetyl can be produced in excess when yeast is stressed, such as when fermentation temperature is too high or wort isn’t sufficiently aerated. Diacetyl can also be caused by bacterial infection.
Determination of Diacetyl in Beer
Diacetyl is detected as a butter taste in the beer’s flavor and aroma.
The challenge is that there may be a diacetyl precursor in a sample of beer that you can’t taste or smell: acetolactate. So how do you test for diacetyl when it isn’t actually present in your beer? How do you catch the diacetyl before it’s too late?
How to Test for Diacetyl in Beer
- Using cleaned and sanitized equipment, pull two small (~2 oz.) samples of wort from the primary fermenter and cover them with aluminum foil.
- Place one in the refrigerator and the other in a hot water bath. The heated sample should rest at 140-160˚F for 20 minutes.
- Place the heated sample in the refrigerator with the other sample (or in an ice bath).
- When both samples are chilled, take them out for a taste. If you can taste diacetyl in the unheated sample, there is diacetyl in your beer. If you can taste diacetyl in the heated sample but not the unheated sample, your beer has acetolactate, which was converted into diacetyl by the high temperature. In either case, do a diacetyl rest. For an ale, this may just be a couple extra days in the primary fermenter. For a lager, you should increase the temperature of the beer to about 60˚F, which will help the yeast “clean up” the diacetyl in your beer.
Tips for Preventing Diacetyl in Beer
- Clean and sanitize equipment thoroughly to prevent infection.
- Shop for beer yeast depending on diacetyl production – check the manufacturer’s website.
- If brewing with a high amount of adjuncts, consider using supplemental yeast nutrient.
- Aerate wort well, using pure oxygen if possible.
- Pitch an adequate amount of healthy, viable yeast.
- Keep fermentation temperature within the yeast manufacturer’s specifications.
- Perform a diacetyl rest after primary fermentation. In the case of lagers, raise the temperature to 60-68˚F for 2-3 days before transferring to secondary and cold conditioning.
Have you ever had issues with diacetyl or a butter taste in your beer? What have you done to remedy the situation?
—–
David Ackley is a beer writer, brewer, and self-described “craft beer crusader.” He holds a General Certificate in Brewing from the Institute of Brewing and Distilling and is founder and editor of the Local Beer Blog.
Torpedo Extra IPA Clone Recipe (All-Grain & Extract)
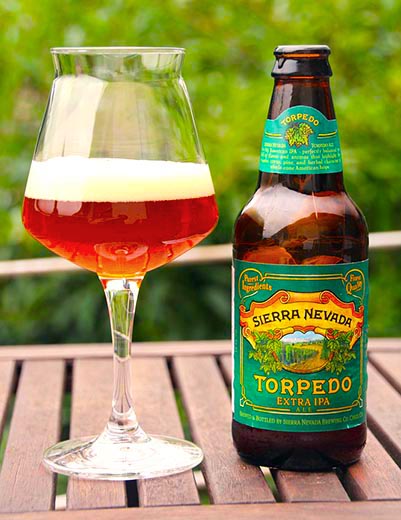 If you’re a fan of Indian Pale Ales, you’ve probably had Torpedo Extra IPA from Sierra Nevada. At 7.2% ABV and 65 IBUs, it’s a fairly aggressive IPA that showcases American ingredients.
When searching for a Torpedo Extra IPA clone recipe, I stumbled upon this thread on HomeBrewTalk.com. The original poster contacted Sierra Nevada and got some details on the beer recipe. (If there’s ever a beer you’d like to clone, many commercial brewers are willing to help you out!)
Grain Bill
The grain bill is straightforward with about 90% American two-row malt as the base. Caramel 60L malt provides some malty sweetness to support the hops and some color. A small amount of Carapils malt will contribute some body. The grains should be mashed around 155-156˚F, which will help make for a full-bodied brew. Err on the lower side for good fermentability.
Hopping
Sierra Nevada’s Torpedo features three types of American hops: Magnum, Citra, and Crystal. Magnum provides most of the bitterness, while Citra and Crystal join in for flavor and aroma additions.
The key to producing a Torpedo Extra IPA clone recipe is the dry hops. Torpedo is named for a dry-hopping technique developed by Sierra Nevada in which beer is circulated through a “Hop Torpedo,” sometimes called a hopback or Randall. There are many ways to build your own hop torpedo, but for best results you should have a pump to force the beer through the torpedo. If you want to forgo the hop torpedo, traditional dry hopping procedures will work fine.
Yeast
As for yeast, a standard American ale yeast will do the trick. In fact, Wyeast 1056 and Safale US-05 are often referred to as the “Chico” strain. They’re reportedly the same yeast used by Sierra Nevada in their American ales. If using liquid yeast, I recommend preparing a two-liter yeast starter from two packets of yeast to have enough yeast cells to do the job.
Ready to give it a try? Here’s an all-grain recipe, with an extract option below! Good luck!
Torpedo Extra IPA Clone Recipe (All-Grain)
(5.5-gallon batch)
**recipe assumes a mash efficiency of ~70%
Specs
OG: 1.073
FG: 1.018
ABV: 7.2%
IBUs: 65
SRM: 10
Ingredients
14 lbs. American two-row malt
1 lb. Caramel 60L malt
.5 lb. Carapils malt
.75 oz. Magnum hops at :75 (11 AAUs)
.5 oz. Magnum hops at :30 (7.3 AAUs)
.5 oz. Magnum hops at :5 (7.3 AAUs)
1 oz. Crystal hops at :5 (4.3 AAUs)
.5 oz. Crystal hops dry hopped for 7-10 days
.25 oz. Citra hops dry hopped for 7-10 days
.25 oz. Magnum hops dry hopped for 7-10 days
2 packets Wyeast 1056: American Ale Yeast or 1 packet Safale US-05
Directions:
Mash the crushed grains in about five gallons of clean water at 156˚F for 60 minutes. Sparge to collect 7.5 gallons of wort. Boil for 90 minutes, adding hops according to schedule above. Whirlpool, chill wort, and transfer to a clean, sanitized fermenter. Pitch yeast at 70˚F or below. Ferment at 65-70˚F. Add dry hops to the secondary fermenter and allow to sit for 7-10 days. Bottle or keg for ~2.3 vols CO2.
Extract Option: Replace the 14 lbs. of two-row malt with 8.4 lbs. light DME. Steep the specialty grains for 30 minutes in clean water at 156˚F. Add half the DME and enough water to make a three-gallon boil. Proceed with the recipe above, adding enough clean, chlorine-free water to the fermenter to make five gallons.
Do you have a Torpedo Extra IPA clone recipe you’d like to share? We’d love to see it. Just post it in the comments below.
—–
David Ackley is a beer writer, brewer, and self-described “craft beer crusader.” He holds a General Certificate in Brewing from the Institute of Brewing and Distilling and is founder and editor of the Local Beer Blog.
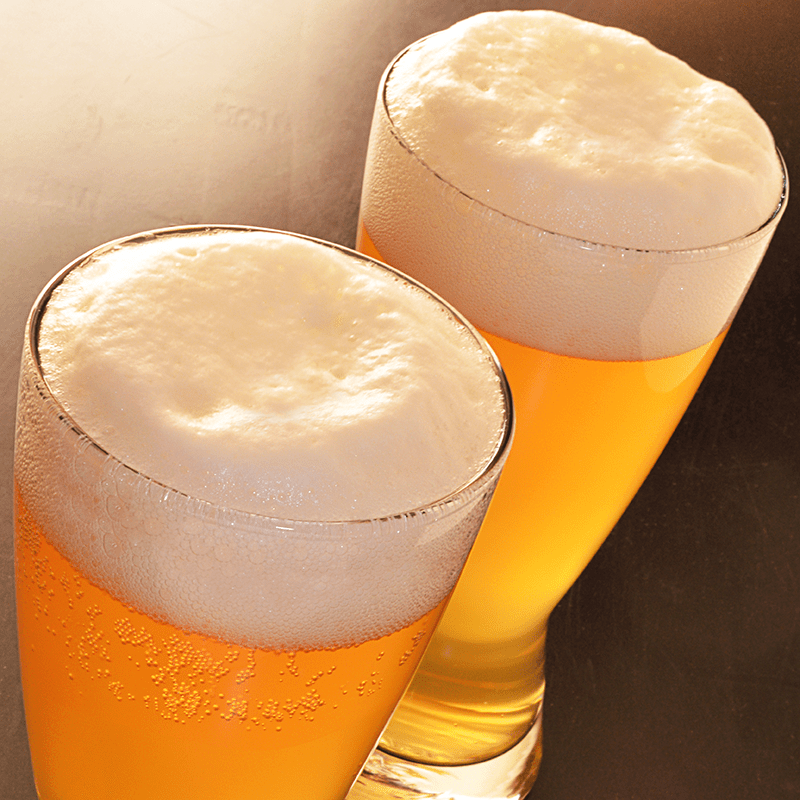
Choosing the Right Beer Glass Types for Your Homebrew
 Does it matter which type of beer glass you serve your beer in? Well, often times, no – no one wants to be a snob – but once in a while you want to get the full effect of your brew. This is where the different beer glass types come into play.
Proper beer glassware enhances the positive aspects of your homebrew, with different types of beer glasses highlighting different qualities.
Try this: take a very fragrant beer like an IPA or barrel-aged stout and pour some of it into a regular pint glass and some into a tulip or wine glass. Smell the two and compare the aromas – you’ll probably notice a significant difference. This experiment also works with wine and liquor.
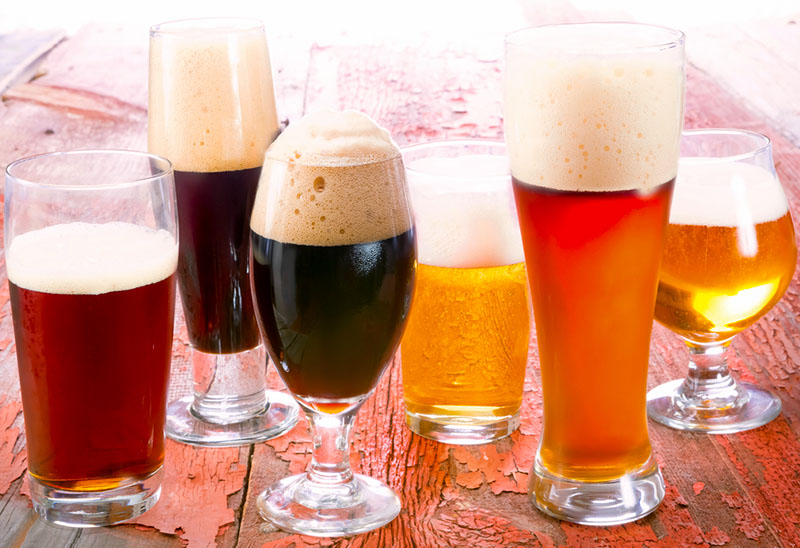
So what are some of the different beer glass types and their uses? Below we’ve put together a somewhat comprehensive list of the glasses you’ll run across when drinking your brews. This is a menagerie of glasses that you may want to consider having on hand when serving you your own homebrews.
 Goblet – Ideal for Belgian ales and Berliner weiss, the goblet features a wide mouth for easy access to the beer’s complex flavors and a structure that supports head retention.
 Flute – A flute is a narrow beer glass that tapers towards the bottom. The shape gives the viewer a good look at carbonation and helps release the pleasing aromas of gueze, lambic, swarzbier, and Vienna lager.
 Pilsner – The pilsner glass is similar to the flute, but it has a wider mouth. The change in shape showcases color, supports head, and encourages aromatics of – not surprisingly – pilsners, but also blonde ales, bocks, and witbier.
 Pint Glass – Of all the beer glass types, this is the all-around go-to glass. It is versatile as it is common and is ideal for many of your favorite beers, including amber ale, altbier, English bitter, brown ale, IPA, porter, and pumpkin beer.
 Snifter – The snifter, just like what you would use for brandy or cognac, is a smaller version of a goblet with a lip that turns inward, capturing desirable aromatics. Snifters are smaller than most other glasses, making them a good fit when drinking higher gravity beers. Use a snifter when enjoying barley wine, Belgian dark strong ale, double IPAs, imperial stouts, and tripels.
 Stange – A stange is a relatively narrow beer glass type with no taper. It concentrates aromas into a narrow channel and gives the drinker a good look at the beer. Stange glasses are appropriate for a number of styles, including altbier, bock, gose, lambic, and rye beer.
 Stein – In German, “stein” means stone. For years prior to the widespread use of glass, these large mugs were made of stone. Go to Germany today and ask for a “Mass stein” – they’ll give you a full liter of suds. Steins work great for Oktoberfestbier.
 Tulip – The tulip is on of the great all-around beer glass types for evaluating your homebrew, regardless of style. The glass’s shape gives a good sense of color, enhances aromas, and holds a big head. The tulip works especially well for saisons and other Belgian styles.
 Weizen Glass – The weizen glass is designed for wheat beers. Its size allows for a large serving of the refreshing beer and a big, wheaty head while also helping to enhance aromas. Use a Weizen glass for all types of wheat beer.
So there you have it, the different beer glass types and their uses! Don’t get too hung up on choosing the appropriate glassware – and definitely don’t shame other people for using the “incorrect” beer glass. The most important thing is to always appreciate the beer!
—–
David Ackley is a beer writer, brewer, and self-described “craft beer crusader.” He holds a General Certificate in Brewing from the Institute of Brewing and Distilling and is founder and editor of the Local Beer Blog.
7 Reasons For Boiling A Wort
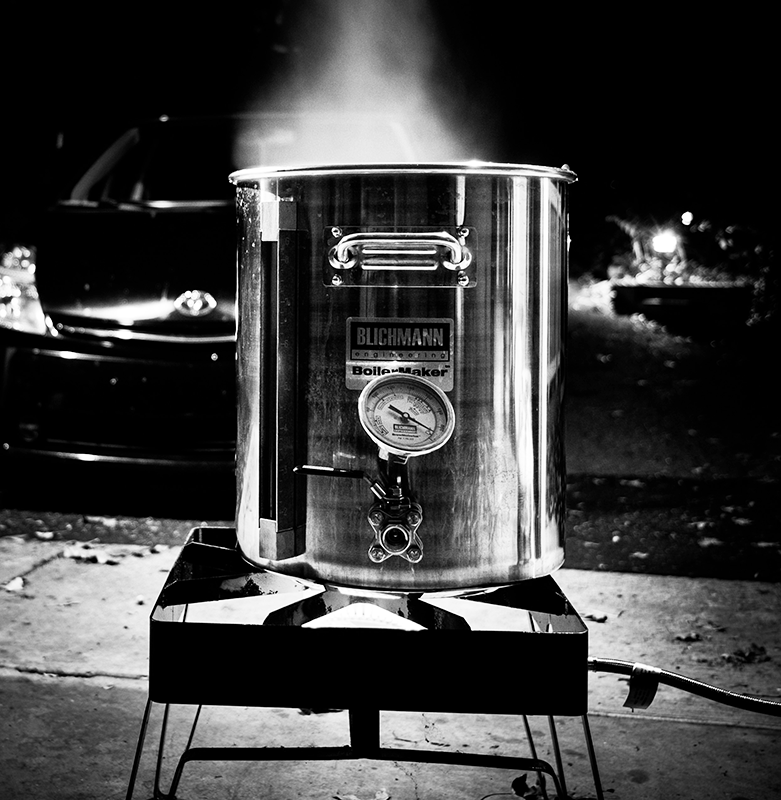 Have you ever wondered what was the reason for boiling a wort?
The boil is an aspect of homebrewing that can be taken for granted as a step simply for throwing in the hops, but there are actually several reason for boiling a wort:
- To sterilize the wort
- To stop the enzymatic activity of the mash
- To concentrate the wort
- To boil off unpleasant aroma compounds
- To coagulate proteins so they will drop out
- To extract bitterness from the hops
- To adjust wort color and flavor
All these reasons play a significant part in the final outcome of the beer. It’s color, bitterness, flavor, intensity, over all character are partially a factor of the boil. Let’s briefly cover each reason for boiling a wort.
- To sterilize the wort
As homebrewers, we want as much control over our beer as possible. Beer yeast is (usually) the only thing we want growing in our beer. Boiling the wort kills off any microorganisms that may be in the wort or other ingredients. Sterilization requires a minimum of about 20 minutes of boiling.
- To stop enzymatic activity
A brewer can control the ratio of fermentable and unfermentable sugars, mouthfeel, and other factors by their command over the mash. Changes in temperature and pH can make a big difference in the enzymatic activity during the mashing process. By heating the wort to a boil, the enzymes in the mash stop their activity and the mix of sugars in the mash is fixed.
- To concentrate the wort
 The wort collected after the mash is never the brewer’s intended original gravity. By boiling the wort and knowing one’s boil-off rate, a brewer can execute a precise original gravity for their beer. In many cases a 60-minute boil is sufficient for reaching a desired gravity, but sometimes a longer boil will be required.
- To boil off unpleasant aroma compounds
Dimethyl sulfides, commonly referred to as DMS, are compounds produced while boiling a wort and their presence in beer is considered a fault. You might recognize DMS as an aroma similar to cooked vegetables. One of the major reasons for boiling a wort is to get rid of these offensive compounds. A long, vigorous boil will vaporize the DMS. For this reason it’s important to boil the wort uncovered. Aldehydes can also be boiled off.
- To coagulate proteins
There are a number of materials in malt, particularly protein, that are suspended in wort. The boil helps these proteins coagulate into larger chunks, which form during the hot break and will settle out during the cold break. Irish moss can aid in this process.
- To extract bitterness from hops
The part of hops that are responsible for bitterness are called alpha acids. In order to contribute bitterness to beer, these alpha acids must be isomerized (a change in chemical structure), which only happens during boiling of the wort.
- To adjust wort color and flavor
In some cases, boiling wort can help achieve a darker color and a rich, caramel flavor in the wort. The chemical process responsible for these changes is called the Maillard reaction.
So there they are, 7 reasons for boiling a wort. Can you think of any other reasons we boil wort? Please share them with us!
—–
David Ackley is a beer writer, brewer, and self-described “craft beer crusader.” He holds a General Certificate in Brewing from the Institute of Brewing and Distilling and is founder and editor of the Local Beer Blog.
Using Torrified Wheat For Head Retention
 I’ve been home brewing for just over a year and I’ve heard that adding torrified wheat as an adjunct can improve the head retention in beer and lace work within the glass. However, not once in my circle of friends has any experience of quantity and outcome. I generally brew all grain pale ales using Maris Otter as the base. Is there a recommended amount of torrified wheat to use that will add a creamy head without causing any degradation in clarity?
Name: Kevin Holmes
State: Essex, United Kingdom
—–
Hi Kevin,
Thanks for your homebrewing question about using torrified wheat for head retention in brewing!
In the context of homebrewing, a good torrified wheat definition would be a type of brewing grain that has been heated in order to break down its cell walls. The idea is that this gives water and enzymes in the brewing mash fast, easy access to the wheat’s proteins and starches, resulting in a quick conversion and a higher yield of fermentable sugars. It’s worth noting however that torrified wheat does not have any diastatic power of its own.
You are correct in your understanding that using torrified wheat in your homebrews can improve head retention in a beer. The torrified wheat percentage needed in a grist is approximately 5-10%. This amount can make a big improvement in head formation  and retention. Briess recommends using up to 40% torrified wheat in a beer recipe, with the upper limit being for a weizen, Belgian witbier, or other wheat beer. If mashing with a significant proportion of wheat, rice hulls are recommended in order to avoid a stuck mash.
Please note that these same benefits can come from brewing with malted wheat, instead of torrified wheat. Both the red wheat and white wheat varieties are great alternatives for producing head retention. But unlike torrified wheat, malted wheat also has a significant amount of diastatic power (160-180 DP), worth considering if using a high proportion of wheat in a grain bill. Again, as little as 5-10% can improve head formation and retention. Personally, I have had good results using as little as half a pound of wheat malt in a 5 gallon pale ale recipe. The improvement in head retention was certainly noticeable.
If you’re looking for ways to improve head performance, other than using torrified  wheat or malted wheat, you may also want to look into using Carapils malt (sometimes called dextrin malt). If for some reason you want to avoid using wheat, this is the way to go. Briess recommends using 1-5% of Carapils in your grain bill for improved body and head retention, without significantly impacting your beer’s color or flavor.
Kevin, thanks again for your great question about using torrified wheat in brewing for head retention. Anyone else have suggestions for controlling head retention in their beers?
—–
David Ackley is a beer writer, brewer, and self-described “craft beer crusader.” He holds a General Certificate in Brewing from the Institute of Brewing and Distilling and is founder and editor of the Local Beer Blog.
Anchor Steam Clone Recipe (All-Grain & Extract)
 Here’s an Anchor Steam clone recipe for both all-grain and extract brewing. This is a fun one to make and will please the palates of most beer drinkers.
First brewed in 1896, San Francisco’s Anchor Steam defined the style known as California Common. It’s an interesting cross between a pale ale and an amber lager, offering the best of both worlds: toasty malt flavor with a touch of caramel malt, balanced by firm hop bitterness, flavor, and aroma. Probably the most unique characteristic of Anchor Steam: it’s fermented at ale temperatures using a lager yeast.
Because “steam” beer is trademarked by Anchor Brewing, everyone else calls the style California Common. However, you will still hear the style referred to as “steam beer”. Why steam beer?
“Anchor Steam Beer derives its unusual name from the 19th century
when “steam” was a nickname for beer brewed on the West Coast of
America under primitive conditions and without ice. While the origin
of the name remains shrouded in mystery, it likely relates to the
original practice of fermenting the beer on San Francisco’s rooftops
in a cool climate. In lieu of ice, the foggy night air naturally cooled the
fermenting beer, creating steam off the warm open pans.”
So, Anchor Steam is actually open fermented. I wouldn’t recommend trying open fermentation at home, but if you’re feeling adventurous, go for it! You might need to build your own open fermenter.
For the rest of us, our regular carboys and fermenters will work just fine. One last characteristic to keep in mind for an Anchor Steam clone recipe: this beer uses only Northern Brewer hops.
Ready to brew? Let’s do it! Check out the all-grain and extract recipes below.
Anchor Steam Clone Recipe (All-Grain)
(5 Gallon Batch)
Specs
OG: 1.050
FG: 1.012
IBUs: 33-36
ABV: 4.9%
SRM: 10-11
Ingredients
7.75 lbs. Briess 2 Row Brewer’s Malt
1 lb. Caramel 40L Malt
1 lb. Victory Malt
.4 oz. Northern Brewer hops at :60 (3.1 AAUs)
1 oz. Northern Brewer hops at :15 (7.8 AAUs)
.4 oz. Northern Brewer hops at :0 (3.1 AAUs)
1 tsp. Irish Moss at :15
Wyeast 2112: California Lager Yeast
5 oz. corn sugar for priming
Directions: Prepare a 4L yeast starter. Single infusion mash at 150F, using 1.5 qts water per pound of grain. Sparge to collect 7 gallons of wort. 60-minute boil. Chill wort, pitch yeast starter, and ferment at 60-65F for one week, then transfer to secondary for two weeks. Bottle with priming sugar and condition for two weeks.
Anchor Steam Clone Recipe (Extract)
(5 Gallon Batch)
Specs
OG: 1.050
FG: 1.012
IBUs: 33-36
ABV: 4.9%
SRM: 10-11
Ingredients
4 lbs. Light Dried Malt Extract
1.5 lb. Briess 2-Row Brewer’s Malt
1 lb. Victory Malt
1 lb. Caramel 40L Malt
.5 oz. Northern Brewer hops at :60 (4.7 AAUs)
1.25 oz. Northern Brewer hops at :15 (10.1 AAUs)
.5 oz. Northern Brewer hops at :0 (4.7 AAUs)
1 tsp. Irish Moss at :15
Wyeast 2112: California Lager Yeast
5 oz. corn sugar for priming
Directions: Prepare a 4L yeast starter. Mash the crushed grains in 5 quarts water. Hold temperature at 150F for one hour. Strain wort into brew kettle and sparge grains with one gallon of water at 170F. Add malt extract and bring boil volume to 3.5 gallons. 60-minute boil. Add hops according to schedule. Chill wort, pitch yeast starter, and ferment at 60-65F for one week, then transfer to secondary for two weeks. Bottle with priming sugar and condition for two weeks.
Have you ever brewed an Anchor Steam clone recipe? Did you use all-grain or extract? How did it go? Share in the comments below!
—–
David Ackley is a beer writer, brewer, and self-described “craft beer crusader.” He holds a General Certificate in Brewing from the Institute of Brewing and Distilling and is founder and editor of the Local Beer Blog.
Make More Beer in Less Space with High Gravity Brewing!
 Are you feeling restricted by the size of your brew kettle? Do you want to brew 10, 20, or 30 percent more beer without buying any new homebrewing equipment? Fortunately, there’s a way you can by using a process called high gravity brewing.
Many home brewers start out with a five-gallon brew kettle. It works great for brewing extract and partial mash beer recipe kits – and it’s easy on the budget. But if you’re trying to advance to all-grain brewing – whether with brew-in-a-bag or with a mash tun cooler – it can be hard to brew a full five-gallon batch of beer with the five-gallon kettle. Luckily, there’s a way to “cheat”: brew a higher gravity beer and dilute it down with water after the fermentation.
Just like we do with extract and partial mash brewing, it’s perfectly acceptable to dilute your wort or beer with water to make it go further. Alternatively, you can use this high gravity brewing process to take your five-gallon batch of beer (or any size batch for that matter) and dilute it to make more.
Here or some basic high gravity brewing tips:
- Water should be pre-boiled to sterilize and de-aerate it, and then chilled to match the temperature of the wort or beer.
- Keep your dilution rates to a reasonable level. Around 20% is okay, and up to 40% would be fine with certain beer styles, doubling the batch size is not realistic.
- Blending down your wort pre-fermentation may lead to higher ester production. Depending on your beer recipe, you may prefer to blend after fermentation.
- When diluting your beer after fermentation, avoid splashing. Splashing can introduce air back into your beer, which negatively impacts shelf life.
The high gravity brewing process couldn’t be easier. To amp up your five gallon recipe to a six gallon recipe, simply increase your ingredients by 20%. (If desired, use a brewing calculator to calculate hop changes to account for the change in hop utilization.) Depending on your beer recipe, you may need to tweak your yeast pitch rate, but in most situations you won’t need to worry about it. After fermentation, add your gallon of pre-boiled, pre-chilled water to either the secondary fermenter or the bottling bucket, taking care not to splash. Siphon the beer into the water to mix it together.
If you’d like to experiment, you can even bottle part of your batch at the original strength and the rest at the diluted rate. It takes a little extra time to figure out the blending ratios, but luckily there’s an easy formula!
Blending Formula For High Gravity Brewing
Use this formula to calculate how blending or diluting the wort or beer will change your gravity, IBUs, alcohol content – even beer color:
A1 * B1 = A2 * B2
A1 = gravity, IBUs, ABV, or color (SRM) of the first beer
B1 = volume of the first beer
A2 = gravity, IBUs, ABV, or color (SRM) of the second beer
B2 = volume of the second beer
It doesn’t matter which recipe is the “first” or “second” beer, as long as you don’t mix up your stats between the two.
So, for example, the beer you want to make has an expected ABV of 5% (A1). You want to end up with six gallons of the beer (B1). At what ABV (A2) should you brew your five-gallon batch (B2) in order to add one gallon of water and end up at 5% ABV?
5 * 6 = x * 5
x = 6% ABV
The calculation also works for gravity. You want your wort to have an OG of 1.040, but you have five gallons of wort at 1.050. How much water should you add to reach 1.040? (Use gravity points: 1.040 becomes 40.)
40 * B1 = 50 * 5
Answer? Your target volume of wort should be 6.25 gallons, so you should add 1.25 gallons of water.
The advantages of high gravity brewing are many: less equipment, less space, more variety… But beyond this, it’s easy to do and doesn’t require any significant, additional effort on your part. So I say, why not give the high gravity brewing process a shot and see what you come up with!
—–
David Ackley is a beer writer, brewer, and self-described “craft beer crusader.” He holds a General Certificate in Brewing from the Institute of Brewing and Distilling and is founder and editor of the Local Beer Blog.