10 Home Brewing Tips For Beginners

Home Brewing Tips For Beginners Like Him!
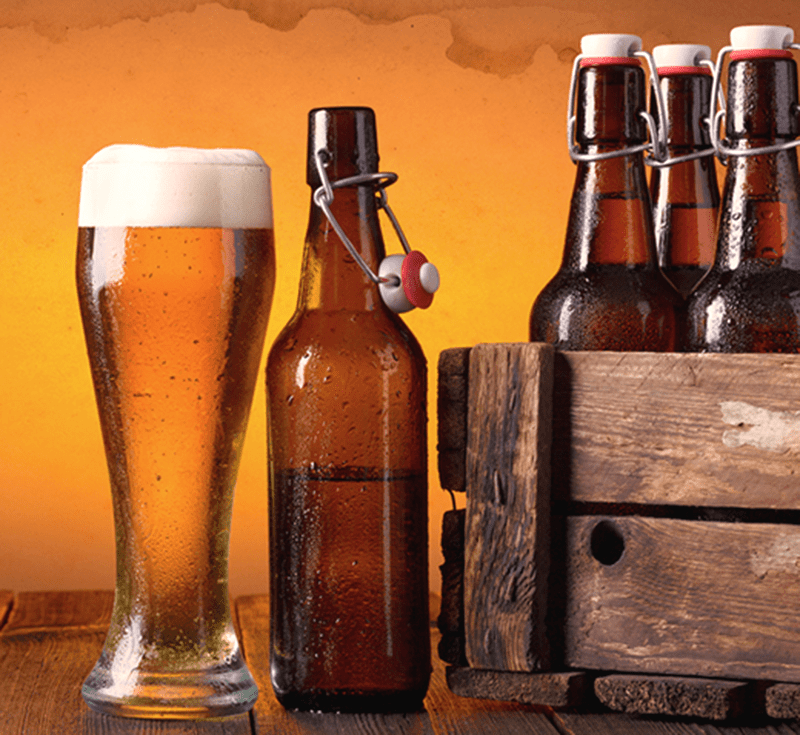
Are you getting ready to brew your first batch of beer? While the idea of home brewing may be intimidating, don’t let it keep you from making taking that first step. Here are 10 home brewing tips for beginners to help get you through that first brew:

  1. Relax, don’t worry have a homebrew – Charlie Papazian’s mantra is a good place to start. Always remember that you’re doing this for fun. Don’t let little mishaps get you down – they will happen – but it’s all part of the experience. Be prepared to laugh it off when things don’t go right and don’t let it throw you off your game.
  1. Focus on the cleanGood sanitation is critical to brewing good beer. If there’s anything you should put a little extra time and effort into, it’s making sure you have a clean, sanitary environment for your beer.
  1. Don’t cut corners – With the demands of modern life, sometimes it’s hard to find a block of time for home brewing. That said, don’t try to save a few minutes by cutting corners, especially on the cleaning and sanitation front. It’s worth repeating the importance of cleaning and sanitation – the last thing you want to do is dump a batch of infected beer. That will be a waste of time… and money!Buy Basic A
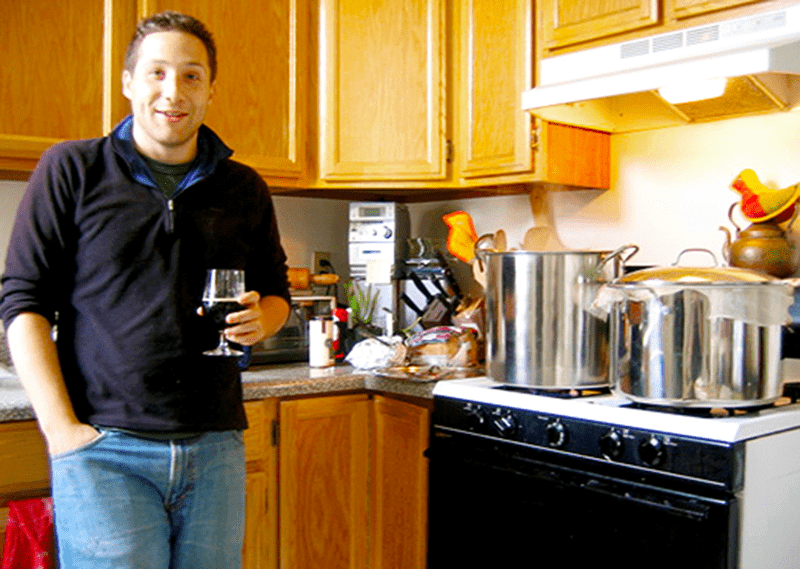
  1. Brew with a friend – Of all the home brewing tips for beginners I’ve seen, this one is my favorite. An extra pair of hands can make some tasks much easier, especially bottling. Plus it’s more fun! Crack open a beer with a friend or two and learn how to make beer together. That’s how the home brewing revolution began in the first place… one friend at a time.
  1. Avoid multitasking – Once you get a few brews under your belt, you might be able to handle multiple tasks at once. Of all the home brewing tips for beginners, this one is the most subtle, but focus on one task at a time. When you’re cleaning, just clean. This will help keep you from getting distracted and avoid potential mishaps like boil-overs.
  1. Begin with the basic styles – You’re welcome to brew whatever you want, but for your first batch, you might want to brew something straightforward. Unless you have a temperature controlled fermentation chamber, stick with ales. Stouts and porters make good starting points for a first homebrew.
  1. Shop Steam Freak KitsSave beer recipe formulation for later – While it’s tempting to build your own beer recipes early on, consider brewing a few established beer recipes first. There are plenty of homebrewing books out there with solid beer recipes. Once you get your process down, you can branch out and start to develop a sense of what different ingredients bring to different beer styles.
  1. Pay attention to fermentation temperature – Don’t stress out too much over fermentation temperature for your first batch, but do keep in mind that it can make a big difference in the flavor of your homebrew. Take a look at the recommended fermentation temperature for whatever yeast strain you’re using and aim for keeping your fermenter smack in the middle of the range for the duration of the fermentation process.
  1. Take good notes – In the long run this is probably the most valuable home brewing tip for a beginner. If you see yourself brewing long term, make a habit early on of taking good notes for each of your brews. This will make it much easier to remember good recipes and to identify possible problems that might occur in your process.
  1. Shop Home Brew Starter KitShare your beer with friends – One of the best ways to get feedback on your homebrew is to share it with friends, especially if they’re homebrewers or craft beer geeks. Take their advice with a grain of salt and don’t be offended if they don’t like what you brewed – everyone has different tastes!

There you have it, 10 home brewing tips for beginners. What other advice would you offer the first time homebrewer?
—–
David Ackley is a beer writer, brewer, and self-described “craft beer crusader.” He holds a General Certificate in Brewing from the Institute of Brewing and Distilling and is founder of the Local Beer Blog.

8 Reasons Your Homebrew Tastes Too Sweet!

Homebrew That Tastes Too SweetSugar is an essential component of beer. Without fermentable sugar in the wort, there would be no alcohol. Most of the sugar in a beer ferments out, with a little being left behind for body and flavor. But balance is critical, and there are several reasons that a beer might come across as being too sweet. If your homebrew tastes too sweet you may want to take a look at these tips so that you can avoid ending up with home brew beers that finishes too sweet.

  1. Use more hops. Hops provide bitterness, which helps balance out a beer’s sweetness. Maybe your homebrew recipe just needs a little more hops added early in the boil?
  1. Mash low. When brewing all-grain, starch conversion takes place between about 148° and 160° Fahrenheit. At the higher end of the scale, fewer fermentable sugars are produced than at the low end. If your homebrew tastes to sweet, try mashing in the 148-150˚F range to create a more fermentable wort and ultimately a drier beer.
  1. Use less crystal/caramel malt. Crystal and caramel malts contribute significant sweetness to your homebrew, including unfermentable dextrins that simply won’t convert into alcohol. A reduction in the percentage of crystal malts will help if your homebrew tastes too sweet.
  1. Shop Conical FermenterReplace pale malt with pilsner. Similar to crystal malts, pale malt has more sweetness than pilsner malt, so when selecting a base malt for all-grain brewing you may want to go with pilsner over pale. Certain styles of beer, such as dry lagers and Belgian ales, may benefit from using pilsner malt as the base malt.
  1. Use simple sugar. Adjunct sugars like corn sugar and cane sugar ferment out almost 100%. Though contrary to what your might expect, using sugar to reach your original gravity will increase the overall attenuation of your beer. If your homebrew tastes too sweet this will help. Exception: lactose sugar is unfermentable and will make your beer more sweet.
  1. Check your fermentation. Residual sweetness may be caused by an incomplete or stuck fermentation. Use your hydrometer to determine whether you have reached your target final gravity. If your gravity ends up too high, try using a yeast starter, yeast nutrient, or a different yeast strain.
  1. Check your yeast strain. Some strains of brewer’s yeast are more attenuative than others, meaning that they ferment a larger percentage of available sugars. If your homebrew tastes too sweet, maybe a different type of yeast is in order.Shop Barley Grains
  1. Reduce your boil time. An extended boil may result in reactions that increase sweetness in your brew. Similarly, an intense boil may cause caramelization or Maillard reactions. Take it down a notch to see if that reduces residual sweetness.

Have you ever made a home brew beer that finished too sweet? What did you do to correct the problem?
—–
David Ackley is a beer writer, brewer, and self-described “craft beer crusader.” He holds a General Certificate in Brewing from the Institute of Brewing and Distilling and is founder and editor of the Local Beer Blog.

How to Make Mead Like a Viking!

Viking Who's Learned How To Make MeadThough mead making has been covered on the E. C. Kraus Winemaking Blog, mead also falls into the homebrewing side of the equation. It is often judged in BJCP competitions and as it turns out, the mead making process is fairly simple and generally less time-consuming than making beer – at least on brew day itself.
I recently had the opportunity to attend a presentation called “How To Make Mead Like a Viking”, presented by Jereme Zimmerman. Keep reading to learn about what I gathered from the class about how to make mead from honey.
Mead is quite possibly the oldest alcoholic beverage known to man. It’s simply a fermented combination of honey and water. Though mead can be made using commercial wine or beer yeast, to make mead “like a Viking”, it should be spontaneously fermented… without yeast added. In other words, the yeast comes from the air or from fruits and/or spices.
The ancient Vikings would often use all parts of the bee hive in their mead, including the honeycomb, the raw honey, and even the bees. If you have access to raw honey or a honeycomb, by all means use them, but also feel free to just use plain honey. Jereme recommended sourwood honey, clover honey, and buckwheat honey.

Ingredients
The only ingredients you absolutely need starting out learning how to make mead is honey and water:

  • Shop FermentersDo your best to find raw unpasteurized honey for your mead recipe. Your local farmers market is a good place to look. Just try to avoid the store-bought stuff that’s made with corn syrup and artificial flavors. It will ferment, but the results will be less satisfying.
  • As for water, use distilled, spring, or purified water. If you must use tap water, either boil it or let it sit out overnight in order to evaporate any chlorine that may be in the water. Use about 1 gallon of water per quart of honey for a semi-sweet mead, less water if you like your mead sweeter, more water if you like it drier.

You may also wish to include flavoring ingredients, including fruit, herbs, spices, etc. Zimmerman recommends also throwing in 10 to 12 organic raisins, a bit of tree bark, such as oak, chestnut, or cherry, or black tea for flavor and nutrients for the yeast. Another optional ingredient when learning how to make mead is some sort of acid added to the mead recipe for flavor and mouthfeel.

Equipment
If you are a homebrewer or winemaker, you probably already have the basic idea of how to make mead. You probably already have everything you need equipment-wise, as well. This includes:

  • A ceramic, glass, or food-grade plastic fermenter
  • A stirring spoon – Vikings would use a totem, or “magic” stick. They didn’t understand the science of fermentation, however the yeast that would reside on their stirring stick would carry from batch to batch.
  • Cheesecloth or other cloth material to wrap around the mouth of the fermentation vessel, plus a string or rubber band to secure it in place.

How to Make Mead Like a VikingShop Beer Growlers
This is how to make mead using a spontaneous fermentation. Your mead brew day should take about an hour from start to finish.

  1. Clean and sanitize your equipment – Again if you’re a homebrewer or winemaker, you know how to do this.
  2. Mix the water and the honey – There’s no need to boil or even heat the mixture. However, you may wish to warm the honey just enough to make it easier to pour out of its bottle. Mix about 3/4 gallons of water per quart of honey.
  3. Add flavorings and yeast nutrient – Though flavorings aren’t required, they can add an interesting dimension to your mead. You might also consider adding yeast nutrient to support the fermentation (though that’s not how the Vikings did it!).
  4. Add yeast – Yeast naturally lives on many different fruits, so this may be just throwing in a few (10-12) organic raisins. Alternatively, add a commercial wine yeast such as Lalvin ICV D-47. Fix your cheesecloth over the top of the fermenter.
  5. Ferment – This is probably the most critical part of the mead making process. About an hour after pitching your yeast, give the mixture a vigorous stir to aerate. Repeat this a few times a day for the first three days or so. You’ll know when fermentation takes off by the froth that forms on the top of the mead. Once the froth settles down, get ready to rack.
  6. Rack to a secondary fermenter – Vikings typically drink their meads young, but modern tastes may appreciate some aging. Some of today’s meads are aged for a year or longer. Feel free to take a sample of the mead to see how it tastes. If you decide to age the mead go ahead and rack it into a carboy and seal with a bung and an airlock. Minimize headspace in the carboy by topping it off with enough water, fruit juice, or honey and water mixture to bring the level of the mead up to within an inch or so of the airlock’s bung.
  7. Shop Wine Bottle CorkersAge – Allow the mead to age for at least 3-4 months. It should continue to improve over the course of a year. This may be hard for someone just learning how to make mead, but it’s well worth the wait.
  8. Bottle – When the mead has completely finished fermenting and it tastes to your liking, bottle the mead. You can bottle with wine bottles and a corker or beer bottles and a capper. Either way is fine. Use a bit of honey or priming sugar if you want a carbonated mead, but only do this if putting in beer bottles. Wine bottles are not designed to hold any kind of pressure.
  9. Drink – You can continue to age your mead, or go ahead and drink it. Either way – skål!

And that’s how to make mead like a Viking. Now it’s your turn. Sounds easy enough, right? I’ll give the process a try and let you know how it goes!
—–
David Ackley is a beer writer, brewer, and self-described “craft beer crusader.” He holds a General Certificate in Brewing from the IBD and is founder of the Local Beer Blog.

How to Make a Full-Bodied Beer

Example Of How To Make A Full-Bodied BeerAnyone who’s had a Guinness knows the unique texture that beer provides – a creaminess that flows over your tongue thanks to the use of nitrogen and carbon dioxide. But how can you get a similar characteristic in your homebrew beer without going that extra gas-based step?
Here’s how to make a full-bodied beer. It’s easier than you think.
What making a full-bodied homebrew beer comes down to is mouthfeel. You can brew a stout black as midnight in the dead of winter, but sometimes it’s best to complement that with a little more heft in the body of the beer – and that doesn’t mean it has to be a high-ABV brew, either.
To achieve a full-bodied homebrew beer with a more substantial mouthfeel, all it takes is a little modification on brew day. Here’s how to make a full-bodied beer:

1. Use specialty malts
Once you dump your yeast into the cooled wort, they’ll start chewing up fermentable sugars that allows them to produce carbon dioxide and alcohol. But with unfermentable sugars in your wort, yeast will stay away from those and allow your beer to become thicker.
These unfermentable sugars are called dextrins and can be infused into your homebrew beer through the use of malt. “Cara” malts like Carapils are excellent for adding extra body with lots of unfermentable sugars during mashing. Dark and roasted malts like Crystal, Roasted Barley or Special B also offer high levels of unfermentable sugars. As a bonus, the use of specialty malts can also add color and flavor to your beer.Shop Barley Grains

2. Increase mash temperature  
While steeping malts like Carapils in an extract brew can help add some body, it’s more noticeable when doing a partial or all-grain mash. In this case, adjusting the temperature of your mash can greatly influence the body of your homebrew beer. By keeping your water temperature at a high level, say 158° to 165° degrees Fahrenheit, the reaction of malt with the water will produce more unfermentable sugars, giving your beer potential for lower ABV and a fuller body, thanks to sugars your yeast won’t eat up and convert to alcohol.

3. Add oats or wheat
One of the most popular ingredients used in stouts to add extra thickness are flaked oats. By using flaked oats as up to 10 percent of your malt bill, you can add greater viscosity.
Shop Steam Freak KitsFor ease of using oats, choose rolled or flaked oats. To convert starches from the oats into unfermentable sugars, you’ll need to mash the oats with barley malt, which allows for the chemical conversion necessary.
Usually a ratio of one pound oats to one pound barley will do the trick. All this makes the use of oats more ideal for partial or all-grain brewers, but not impossible for extract brewers who steep malt for their beer recipe. Extract brewers just may not get the same kind of body other brewers may find.

4. Use lactose sugar 
All is not lost for extract brewers, however. One easy way to add creaminess to mouthfeel and some extra body to a homebrew is with lactose sugar, which will also provide some sweetness to your beer. It’s a common ingredient in sweet stouts. Lactose isn’t fermentable and can be added during the boiling process – usually with 10 to 15 minutes to go.
Shop Home Brew Starter KitSome homebrewers also add it at bottling to increase its flavor. About a pound per five gallons will do just fine.

That’s the basics of how to make a full-bodied beer, but adding increased body to all your homebrews isn’t ideal – you wouldn’t want a thick, heavy Pilsner – but knowing how to make a full-bodied homebrew beer anytime you like is a great thing to have in your arsenal of homebrewing knowledge.
—–
Bryan Roth is a beer nerd and homebrewer living in Durham, North Carolina. You can read his thoughts on beer and the beer industry on his blog, This Is Why I’m Drunk, and send him suggestions on how to get his wife to drink craft beer via Twitter at @bryandroth.

Yummy Chocolate Milk Stout Recipe (All-Grain & Partial Mash)

Chocolate Milk Stout RecipeIf you’re searching for a thick, luscious dessert beer, then look no further.
Milk stout (a.k.a. sweet stout) is a sub-style of stout noted for its creamy texture and residual sweetness. It’s not actually made with milk. Instead, many brewers choose to use unfermentable lactose sugar in order to achieve that creamy, sweet character.
This chocolate milk stout recipe starts with a basic sweet stout recipe and adds a pound of unfermentable lactose sugar to increase sweetness and body. A generous dose of chocolate malt, plus four ounces of cacoa nibs make for a big chocolate flavor that will remind you (and all your friends) of chocolate milk.

Chocolate Milk Stout Recipe
(5 Gallon Recipe, All-Grain & Partial Mash)
Specs
OG: 1.060
FG: 1.022
ABV: 5%
IBUs: 27
SRM: 36
Ingredients
8 lbs. 2-Row Brewer’s Malt Shop Steam Freak Kits
1 lb. Caramel 80L Malt
1 lb. Chocolate Malt
.25 lb. Roasted Barley
1 lb. Lactose Sugar
1.5 oz. Willamette hops (First Wort Hops)
.5 oz. Willamette hops at :60
1 tsp. Irish Moss at :15
Wyeast 1084: Irish Ale Yeast
4 oz. Cacao nibs (added in secondary)
5 oz. priming sugar (if bottling)
Directions for All-Grain: Prepare a 2L yeast starter. Single infusion mash at 150°F for 60 minutes. Add first wort hops when sparging into the brew kettle. Collect seven gallons of wort. Bring to a boil. Add .5 oz. of Willamette hops at beginning of 60-minute boil. Add 1 tsp. of Irish moss with 15 minutes left in the boil. At the end of the boil, mix in the lactose sugar. Chill wort and transfer to a clean, sanitized fermenter. Ferment at 68°F for seven days, then transfer to a secondary fermenter holding the cacao nibs. Ferment for ten days at 68°F. Bottle or keg as normal.
Directions for Partial Mash: Prepare a 2L yeast starter. Replace the 6 of the 8 lbs. of 2-Row malt with 4 lbs. Light DME. Mash the crushed grains with 1.5 gallons of water at 150°F for 60 minutes. Strain wort into brew kettle and rinse grains with one gallon of water at 170°F. Mix in the DME and top off with enough water to make four gallons. Add the first wort hops and bring wort to a boil. Shop Home Brew Starter KitProceed with recipe as above, topping off with enough clean, sanitized water to make five gallons in the fermenter. Primary fermentation for seven days at 68°F. Rack beer onto cacao nibs in a secondary fermenter and ferment for ten days at 68°F. Bottle or keg as normal.

This is a very easy chocolate milk stout recipe that make a tremendous brew. And, I can’t think of a better time to brew it up then right now! It’s very tasty after big meals making it an excellent choice to serve during the Holidays.
—–
David Ackley is a beer writer, brewer, and self-described “craft beer crusader.” He holds a General Certificate in Brewing from the Institute of Brewing and Distilling and is founder and editor of the Local Beer Blog.

Cleaning Your New Brew Kettle

Clean Brew Kettle PassivationYou’ve just purchased a new brew kettle for homebrewing and can’t wait to fire it up. But brewing right away with that new brew kettle may cause some issues with your beer. Before you make the first batch with your new gear, consider this two-step cleaning regimen to prepare your kettle for brewing.

1. Cleaning A New Brew Kettle.
A new brew kettle that just arrived on your doorstep needs to be thoroughly cleaned. Who knows where it’s been before you received it. If it was recently fabricated, there may be some machine oil residue on the kettle. A regular brewing grade cleaner will work well in most cases, but in a rare situation with stubborn residue, your standard kitchen dish soap may be needed. (Note: This is the only time I’ll recommend using dish soap on your brewing gear. The soap can harm the head retention properties of your beer.)
Wash your new brew kettle well. Rinse your kettle very well. Boil some water in the kettle for several minutes, and do a smell/taste test or the water to make sure it comes out clean without any oily or metallic tastes or aromas. Cleaning a new brew kettle is important to having a great-tasting, maiden-batch of homebrew.

2. Passivating A New Brew Kettle.
What? Never heard of passivating a brew kettle? Unfortunately, I didn’t know either until I experienced some strange off-flavors in a couple beers I brewed with a new stainless steel brew kettle. Shop Brew KettlesPassivation is a chemical process that forms a protective layer around the inside of the brew kettle. Stainless steel is primarily made of iron, and passivation is what makes the metal stainless. Iron, interestingly enough, can cause off-flavors, as well as contribute to haze. Passivating a new brew kettle is very necessary for brewing good homebrew beer.
If when you boil water (or beer) in your brew kettle and allow it to dry it out, then see black spots or rainbows, your kettle needs to be passivated. Luckily, this is a fairly straightforward process.
Bottom of brew kettle that needs to be cleaned and passivated.First, you need an acid. Star San is an acid anionic cleaner that’s great for stainless steel. The acid reacts with the metal to form the protective layer inside the brew kettle. Simply sprinkle the Barkeeper’s Friend into the kettle with just enough water to make a thin paste. Spread it around the kettle with a washcloth. After several minutes, rinse the brew kettle very well, and wipe dry with a towel. If the towel comes out clean, you’re in good shape. Allow the new brew kettle to air dry for a few days. The combination of the acid treatment and the air will continue to passivate the kettle.
Just remember, cleaning your new brew kettle and then passivating it are key treatments. Do these two things, and your kettle will reward you with many fine batches of homebrew!
—–
David Ackley is a beer writer, brewer, and self-described “craft beer crusader.” He holds a General Certificate in Brewing from the Institute of Brewing and Distilling and is founder of the Local Beer Blog.

Maple Scotch Ale Recipe (Partial Mash & All-Grain)


Beer Made With This Maple Scotch Ale RecipeIf you like Scotch ales, then here’s a Scotch ale recipe that you will love! It’s a classic brew with an eclectic, maple twist that will have you reaching for another.
There are few flavors that are as unique and delicious as maple syrup. Whether it was pancakes, waffles, or French toast, you probably grew up with maple syrup along with your favorite Sunday breakfast. Lucky for you, maple syrup can also be used in your homebrew!
The high fermentability and unique flavor of maple syrup make it work well with a number of beer styles, especially those that feature malt flavors. A maple brown ale is a popular combination, but today’s beer recipe pairs it with a Scottish ale.
Scotch ales are known for being malt forward with notes of caramel. Generally, they have low IBUs, though a small amount of roasted barley may enhance the perception of bitterness. Rather than deriving caramel flavor from caramel malt, all-grain Scotch ale recipes often involve taking a portion of the first runnings from the mash and boiling them down to develop caramelization. As one might imagine, these caramel flavors work well with the maple syrup.
Some brewers recommend using grade-B maple syrup, which has a stronger maple flavor, but typical grade-A syrup you might use on your pancakes will work too. Just be sure to use all-natural, 100% maple syrup if you want to avoid putting artificial colorings, flavors, and preservatives in your brew. Due to the high sugar content of maple syrup, it will ferment out almost completely, leaving behind a hint of that sweet maple flavor. Enjoy!

Maple Scotch Ale Recipe
(5.5-gallon batch, partial mash)

Specs 
OG: 1.046
FG: 1.010
ABV: 4.7%
IBUs: 15.5Shop Steam Freak Kits
SRM: 12
Ingredients 
7 oz. German Munich malt
4 oz. Caramel 20L malt
2 oz. Roasted barley
3.3 lbs. light LME
2 lbs. amber DME
.5 oz. Magnum pellet hops at :60 (6.1 AAUs)
3 cups maple syrup
1 pack Mangrove Jack’s US West Coast Yeast
Partial Mash Directions: 
In a small stockpot, mash crushed grains at 156°F. in 1.25 qts. of clean, chlorine-free water for 60 minutes. Strain mash through a colander into boil kettle to remove grains, then rinse them with 1 qt. water at 170˚F, collecting runoff in the kettle. Add malt extract and enough water to make three gallons. Bring to a boil. Add Magnum hops and boil for 60 minutes. At end of boil, turn off the heat, mix in maple syrup, then whirlpool and chill wort to 60˚F or below. Pour wort into a clean, sanitized fermenter with enough cool, clean, chlorine-free water to make 5.5 gallons. Stir well to aerate. Pitch yeast and ferment at 58˚F for at least two weeks. Bottle or keg and carbonate for about 2.5 volumes CO2.
All-grain option:   Shop Home Brew Starter Kit
Replace the malt extract with 7.2 lbs. pale ale malt. Mash grains at 156˚F for one hour. Halfway through the mash, remove two gallons of wort and boil it to condense into one gallon. This will develop caramelization. Sparge to collect a total of 7 gallons of wort, including the one gallon of caramelized wort. Boil for 30 minutes, then add Magnum hops. Boil for 60 minutes and proceed with recipe above.
Do you have a favorite Scotch ale recipe you’d like to share with us. We love to see what other homebrewer’s got cookin’.
—–
David Ackley is a beer writer, brewer, and self-described “craft beer crusader.” He holds a General Certificate in Brewing from the Institute of Brewing and Distilling and is founder of the Local Beer Blog.

Avoiding The Green Beer Taste: Conditioning & Aging

Conditioned Homebrew With No Green Beer TastePatience. It’s one of a homebrewer’s many virtues, and a necessity for avoiding a green beer taste.
After bottling or kegging a batch of homebrew, it’s very difficult to resist sampling the beer before it’s ready. But your patience will be rewarded by giving the beer the time it needs to improve before you drink it. This waiting period – usually two or three weeks at a minimum – is referred to as conditioning or maturation. Beer that is too young is called green beer because of the way it tastes.

What is green beer? What is the green beer taste?
Green beer is beer that isn’t ready to drink yet. Though beer almost always gets better with time, tasting the beer early can be a good exercise to learn just how drastically time can change the beer. If you’ve ever tasted your original gravity wort sample, that’s pretty close to the green beer taste. The bitterness is very strong. The flavors just don’t blend together very well. What may be perceived as a fault or an infection may just be an indicator that the beer needs more time to condition. Aging will help to make the beer taste better!

What happens during conditioning?
Conditioning is really just a fancy word for aging. What we call green beer needs time before it’s ready to drink. Some conditioning takes place during secondary fermentation. Yeast consumes some byproducts of fermentation (like diacetyl), which removes some undesirable flavors from the homebrew, making the beer taste better. The yeast and other particles settle out of suspension, resulting in a clearer beer. Other flavors from the malt, hops, and yeast have time to meld together.
Conditioning also takes place in the bottle or keg. The beer carbonates and flavors continue to develop. If you’ve used priming sugar, the yeast will float around eating it up and producing carbon dioxide. This carbon dioxide not only create bubbles in the beer, it helps to drive off oxygen, which has the potential of making your beer go stale. The yeast will settle out in time.

At what temperature should I condition my homebrew?Shop Conical Fermenter
Many beers go through a warm conditioning period and cold conditioning period. “Warm” or “cold” is relative to the beer style being made. Secondary fermentation, what might be considered a warm conditioning period, usually happens at or near the normal fermentation temperature for the homebrew. For lagers, a diacetyl rest (a couple days at about 55-60˚F) can be used to reduce buttery diacetyl flavors in the beer. After bottling, beer should be held at room temperature for about two to three weeks to allow the yeast the carbonate the beer.
The green beer taste is often improved by a cold conditioning period. During cold conditioning, flavor and clarity continues to get better. Cold conditioning can happen at temperatures as low as freezing, though I find that giving bottles several days in the refrigerator can make a big difference. Sometimes it’s easier said than done!

How long should beer be conditioned and aged?
That depends on the beer style. Most ales of moderate gravity only require a couple weeks of conditioning to remove the green beer taste. Hoppy beers are generally best consumed fresh. High gravity beers on the other hand tend to get better with some age. Barley wine, imperial stouts, doppelbocks, and other beers with high alcohol content may continue to improve over the course of a year or longer. Try saving a few bottles of each batch to sample three, six, or twelve months down the road to learn what time can do you your homebrew.

What’s the best environment for conditioning?
Shop Home Brew Starter KitThe keys to reducing the green beer taste in your homebrew are a steady, moderate temperature during warm conditioning (so the yeast can carbonate the beer) and steady, cold temperature for cold conditioning. It’s also important that it’s dark during the conditioning phase, otherwise beer can become light-struck or skunked.

Conclusion
Proper conditioning makes all the difference between delicious homebrew and one with an icky green beer taste. The next time you break into your batch early, remember, it will likely get better with age.
How do you condition your homebrew?
—–
David Ackley is a beer writer, brewer, and self-described “craft beer crusader.” He holds a General Certificate in Brewing from the Institute of Brewing and Distilling and is founder of the Local Beer Blog.

Some Hot Info For Brewing Beer With Coffee

Coffee Beans For BrewingI used to drink coffee, but haven’t had the stuff in years. I loved the aroma and flavor, but hated depending on it to function in the morning.
These days, the only time I drink coffee is when it’s in my beer.
Coffee porter, coffee stout … I’ve even had a coffee IPA. For fans of both beer and the caffeinated drink, there are lots of great options. So how can you mix the two for homebrewing? It’s easier than you think.

Choose a Style
The first step for brewing a beer with coffee is determining what kind of base style you’d like to use. These days, brewers are all over the map with what kind of beer they’ll add coffee to, but classic examples include Founder’s Breakfast Stout, brewed with Sumatra and Kona coffee, and Kona’s Pipeline Porter, which uses Kona coffee as well.
You’ll often see coffee beers use a malt-forward base, as coffee flavors match the profile of roasted barley and chocolate malt very nicely. There are a lot of great stout and porter kits you can use as your base, but consider an imperial stout or robust porter for ideal pairings.
That said, experimentation is the beauty of homebrewing, so maybe an American pale ale with coffee is more up your alley. When it comes to brewing beer with coffee everything is open to one’s own interpretation.

Pick a Coffee
Once you know the style of homebrew you’d like to use, you’ll want to pick a coffee that matches nicely. Not all coffee beans are the same.
Coffee PorterTechnically speaking, any style of coffee will work, but you may have specific tastes or even strength you prefer. Espresso will be much stronger in perceived coffee flavor than a “cinnamon roast” coffee bean, which might offer more nut-like flavor. The National Coffee Association has a great list of roasts – from light to dark – that may help you find the kind you want.
One thing to be aware of when brewing beer with coffee is the oil content of beans, as it may impact head retention and mouthfeel of your homebrew. Depending on the beer style you’re using, that may or may not be an issue. An imperial stout, for example, isn’t as reliant on a big stack of foam as a pale ale.

Adding Coffee To Beer

Depending on the intensity of coffee flavor you seek, you may be interested in adding coffee to your boil, but the best way to get that roasted taste is in secondary fermentation. To maximize flavor without too much astringency, try cold brewing coffee.
Making a cold brew coffee is easy. Take a cup of ground beans and mix with four cups of cold or room temperature water. Let it sit for 12 to 24 hours, strain the coffee grounds from the water and you’re set. You’re left with less acidic, more flavorful coffee.
Shop FermentersKeep in mind the risk for infection is fairly low as long as you properly sanitize whatever the cold brewed coffee touches.
As an alternative, you could also place ground coffee beans into a muslin bag and steep them like a tea for up to seven days in your secondary. Just make sure to sample your beer as the ground beans steep to make sure you achieve the right amount of flavor you’re looking for.
Ready to start brewing beer with coffee? Check out the Captain Cogsworth Coffee Stout, which has all the ingredients prepared for you.

Bryan Roth is a beer nerd and homebrewer living in Durham, North Carolina. You can read his thoughts on beer and the beer industry on his blog, 
This Is Why I’m Drunk, and send him suggestions on how to get his wife to drink craft beer via Twitter at @bryandroth.

How to Make Hard Cider

Hard CiderCompared to homebrewing beer, making hard cider at home is a much easier process. Since there’s no mash and no boil, it can be less labor intensive as well. Plus, you’ll be able to use the equipment you have on hand already, so why not give making hard cider a try? Read more to learn how to make hard cider at home with this 5-gallon recipe.
Hard cider used to be quite a popular beverage in the US. Remember Johnny Appleseed? All those apples weren’t just for apple pie! Up until prohibitionists and temperance unions started demonizing the consumption of alcohol, hard cider was about as popular as beer, if not more so. Everybody knew how to make hard cider.
Today, craft cider is riding on the heels of the craft beer movement, taking up more and more shelf space every year. Craft cideries are popping up all over the country. You’ve probably seen, and maybe even tried, ciders from Woodchuck and Crispin.
The most basic hard cider recipe requires just two main ingredients: apple juice, and yeast. There are a limitless number of variations on cider, plus some additional items that might come in handy for achieving certain characteristics. For now, let’s go over the basics of making apple cider.

Apples, Juice, or Cider?
Fall means apple season! If you’re lucky enough to live near some apple orchards, you have a fresh local ingredient in abundance right now. Ask your local apple farmer what varieties will work best for making hard cider. Cider makers often use blends of different varieties to produce a cider. Get yourself a fruit press or find some fresh, unpasteurized apple cider at your local farmers market.

Even if you don’t live near an apple orchard, chances are that your local grocery store carries soft (non-alcoholic) cider this time of year. Choose a cider that has no added flavorings or preservatives.

If you can’t find either of the above options, pure, 100% apple juice will work, too.

Yeast
Many of the yeasts used in brewing beer or making wine will work for making hard cider at home, too. Wine and champagne yeast have a higher alcohol tolerance and tend to finish dry. For a sweeter, fruitier cider, use an ale yeast, such as Nottingham. Wyeast 4766: Cider and Red Star Pasteur Blanc are both suitable for higher gravity ciders. Fermentis SafCider AB-1 yeast creates a balanced cider, you can create a crisp and aromatic drink with the AC-4 yeast, or go for a sweeter cider with the AS-2 yeast.

How To Make Hard Cider
Unless you want to take chances with a spontaneous fermentation of your hard cider, it’s important to stabilize your juice before pitching yeast.
If using filtered apple juice from the store, you will first heat the juice to stabilize it. Hold the juice at 180°F for 10-20 minutes. Let it cool, then pitch your yeast as directed on the package. Proceed as you would normally for a regular batch of homebrew, being sure to do a secondary fermentation.

If using fresh cider from the farmer’s market, use a crushed Campden tablet to stabilize the must. This will ensure that there aren’t any wild yeasts or bacteria interfering with your fermentation. Pitch your yeast as directed and proceed as above. That’s how to make hard cider. It’s really that simple.

Hard Cider Recipe (5 Gallons)
from Homebrewing for Dummies
5 gallons preservative-free apple juice
1 packet Nottingham ale yeast
2 oz. yeast nutrient Shop Fermenters
Primary fermentation: 8 days at 70°F
Secondary fermentation: 21 days as 70°F
If desired, add priming sugar at bottling time for a sparkling cider, however if you do this make sure you bottle in beer bottles or Champagne bottles. Regular wine bottles will not hold the pressure.

Have you ever tried making hard cider before? How did it turn out? Do you have any information you’d like to share on how to make hard cider?

—–
David Ackley is a beer writer, brewer, and self-described “craft beer crusader.” He holds a General Certificate in Brewing from the Institute of Brewing and Distilling and is founder and editor of the Local Beer Blog.