A Simple Guide to Beer Brewing Additives

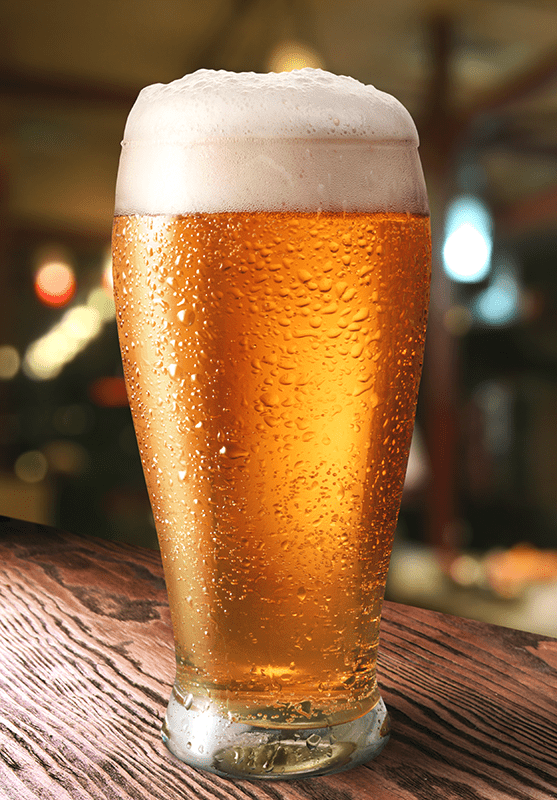
Homebrewer Adding Beer Brewing AdditivesUnless adhering to the strict rules of Reinheitsgebot, brewers will sometimes use ingredients that fall outside of the main categories of malt, hops, water, and yeast. The use of these beer brewing additives can greatly improve a beer’s clarity, fermentation performance, or flavor.

This is a guide to some of the most common beer brewing additives used in home beer making.

Beer Finings/Clarifiers

These additives, often called “fining agents,” help to improve the clarity of your homebrew:

  • Irish Moss – A coagulant added at the end of the boil, Irish Moss helps proteins form into clumps and settle out of suspension. For a five-gallon batch, add 1/2 tablespoon during the last 15 minutes of the boil. Made from seaweed, Irish Moss is sometimes referred to as “carrageenan.” Of these beer brewing additives, it’s the most commonly used.
  • Gelatin – Gelatin is a colorless and tasteless compound that attaches to negatively-charged particles in your beer, helping them settle out of suspension. For a five-gallon batch, dissolve 1 teaspoon of gelatin in 1 cup of hot, pre-boiled water. Once dissolved, let cool and pour into the secondary fermenter, racking your beer on top of it. Gelatin is derived from animal collagen, so don’t feed to your vegetarian friends!
  • Isinglass – Made from fish bladders, isinglass is a very common fining agent used in both winemaking and brewing. But don’t worry — used properly, it won’t affect the flavor of your beer. It’s added to the secondary fermenter in the same way as gelatin. One teaspoon is sufficient for a five-gallon batch of homebrew.Shop Irish Moss

Water Treatment

The minerals in your brewing water can have a profound effect on the flavor of your finished beer. Mineral beer brewing additives are typically used either to recreate a water profile from a certain part of the world or to adjust the mash pH. It’s generally recommended to get a water profile report of your city water, before adding minerals. Otherwise, start with reverse osmosis (RO) water, which has had all minerals removed, then add the ones you need.

  • Burton Water Salts – These minerals are added to brewing water to simulate the water profile of Burton-on-Trent in the UK. They are often used when brewing English pale ales (think Bass Pale Ale). This mix includes papain, an organic compound which helps to prevent chill haze.
  • Calcium Carbonate – Also know as chalk, calcium carbonate is a food-grade mineral blend. It’s one of the few beer brewing additives that raises mash pH (lowers acidity). Carbonate-rich water can help enhance hops bitterness.
  • Gypsum – Gypsum is a mineral blend composed of calcium sulfate. It lowers mash pH.
  • Magnesium Sulfate – Magnesium sulfate helps to lower mash pH.

Yeast Nutrientshop_gypsum

  • Yeast Nutrient – In addition to sugar, beer yeast requires certain nutrients in order to reproduce and convert sugar into alcohol. When it comes to brewing beers made with a high level of adjuncts, yeast nutrient can give the yeast an extra boost that will help them complete fermentation. It can also help achieve a lower final gravity and a drier tasting beer with less residual sugar.

Preservatives

  • Ascorbic Acid – Also known as vitamin C, ascorbic acid acts as an oxygen scavenger. Oxygen in beer creates oxidation, which results in stale flavors, often described as wet cardboard. Add a 1/2 teaspoon to your beer when it’s time to bottle.

Do you use beer brewing additives in your home beer making, or are a home brew purist?
—–
David Ackley is a beer writer, brewer, and self-described “craft beer crusader.” He holds a General Certificate in Brewing from the Institute of Brewing and Distilling.

Which Is Better: Fresh Wine Making Juice vs Concentrate?

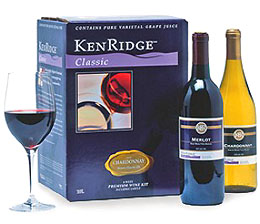
Wine Making Juice ConcentrateHow does the flavor of a wine made from fresh wine making juice compare concentrate? I know this is a broad question but are there any drastic differences?

-Matt W.
—–
Hello Matt,

Thanks for the great question.

The advancement of concentrating wine making juices has jumped by leaps and bounds over the last few decades. It has finally gotten to the point that it is indistinguishable when comparing fresh wine making juice vs concentrate.

Today, the concentrating process is done by taking nothing more than water out of the fresh juice. This is accomplished by boiling the juice and causing the water to steam off the juice. Basically it’s distilling.

But here’s the twist: they are doing it at a very low temperature. In other words, they steam the water off of the fresh juice at room temperature. You may be asking yourself, how’s that even possible? And the answer is very simple. It’s done with air pressure… or lack of it.

You may remember from your high school science class that water boils at 212°F. But this is the boiling point for water at sea level, only. As you go up in altitude the boiling point becomes lower and lower. For example, water boils at 187°F on top of Pike’s Peak. This is because there is less air-pressure to hold the steam into a liquid as you go up in altitude.Shop Fermenters

The wine concentrate producers use this fact to their advantage. The juice is placed in a vacuum that is so strong that it begins to boil at ~76°F. The water literally steams off of the juice at this temperature keeping it fresh and free from the effects of heat.

Any aroma or other volatile elements that escape during this process along with the steam are later extracted from the steamed-off water and put back into the wine concentrate as an essence.

This is the real secret behind why there is no difference between wine making juice and concentrate. There is nothing done to the wine concentrate that is negative or harmful.

A second consideration as to why you may want to consider using wine making concentrate is the fact that the grapes used to make these grape concentrates are usually superior to what you have available to you otherwise. What’s available to most home wine makers is usually very limited compared to what wine making concentrate producers have to offer. Which brings me to the last point I’d like to make…

shop_wine_making_kitsYou have an incredible variety of wine making concentrates available to you. When comparing fresh wine making juice vs concentrate, it’s not eve close. For example, we carry over 200 different kinds of grape juices collected from all over the world. These concentrates afford you the opportunity to make wines from grapes grown as far away as Italy and New Zealand.

Matt, I hope this clears things up for you. One common saying among winemakers is that, “you can not make a wine that is better than you grapes used to make it.”. That is why this subject is so important. You have to start off with a good foundation of produce to end up with a stellar wine.

Happy Winemaking,
Ed Kraus
—–
Ed Kraus is a 3rd generation home brewer/winemaker and has been an owner of E. C. Kraus since 1999. He has been helping individuals make better wine and beer for over 25 years.

Awesome Terrapin Rye Pale Ale Clone Recipe

Terrapin Rye Pale AleJust like wheat and barley, rye is a cereal grain that can be used in making beer. It’s a huskless grain with an assertive, spicy flavor. To design a rye pale ale beer recipe, one could easily start with a good American pale ale recipe and add between one-half and one pound of rye malt to the mash. This will contribute the distinctive spicy flavor that rye is best known for adding to a brew. Most rye pale ale beer recipes will have at most 10-20% of the grain bill come from malted rye.

Because its protein content is higher than barley, rye can improve body and head retention, but it also tends to get sticky in a mash. If your system is prone to stuck mashes or if your beer recipe uses more than about 20% rye, consider adding some rice hulls to the mash to improve filterability.

There are several good commercial examples of rye pale ale on the market. Terrapin Beer Company from Alpharetta, GA, entered the market with their Terrapin Rye Pale Ale, which won a gold medal in the American Pale Ale category in its first year at the Great American Beer Festival, in 2002. The brewery is now approaching 50,000 barrels of beer a year in production. Below is a Terrapin rye pale ale clone recipe you can brew up.

E. C. Kraus carries a great Rye Pale Ale beer recipe kit from Brewer’s Best, but feel free to use the tips below to develop your own beer recipe.

Types of Rye

Homebrewers typically work with either rye malt or flaked rye. Rye malt has been germinated and kilned, whereas flaked rye is pressed between hot rollers. Both contribute rye flavor, though the rye malt will be a little more toasty and sweet than the flakes. Both can be added directly to the mash. If brewing a partial mash recipe, combine the rye with some malted barley so the mash doesn’t stick.

Ready to brew a rye pale ale? Try this Terrapin rye pale ale clone or use it as a starting point for your own beer recipe!Shop Steam Freak Kits

Terrapin Rye Pale Ale Clone Recipe – Partial Mash 
Batch Size: 5 gallons

OG: 1.057
FG: 1.014
ABV: 5.6%
IBUs: 35

6 lbs. Light Malt Extract
1 lb. Rye Malt
1 lb. Munich Malt
8 oz. Victory Malt
6 oz. Honey Malt
1 tsp. Irish Moss @ 15 mins

.33 oz. Magnum hops @ 60 mins
(4.7 AAUs)
.33 oz. Fuggles hops @ 30 mins
(1.5 AAUs)
.33 oz. Kent Goldings hops @ 20 mins (1.7 AAUs)shop_brew_kettles
.33 oz. Kent Goldings hops @ 10 mins (1.7 AAUs)
1 oz. Cascade hops @ 5 mins (7 AAUs)
1 oz. Amarillo dry hop for 10 days
Yeast: Wyeast American Ale II
—–
David Ackley is a beer writer, brewer, and self-described “craft beer crusader.” He holds a General Certificate in Brewing from the Institute of Brewing and Distilling.
5 Things You Should Know About Acid Blend

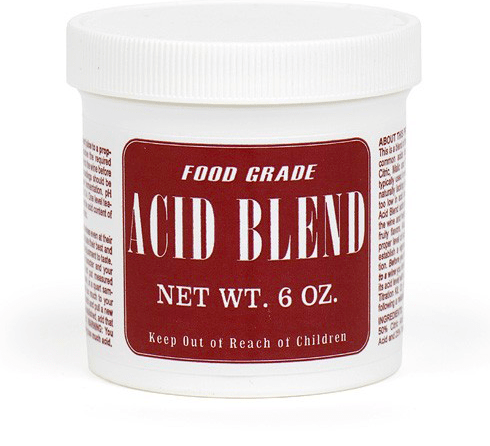
Acid Blend For Wine MakingAcid Blend is a granulated blend of the three most commonly found fruit acids: citric acid, malic acid, and tartaric acid. It is added directly to a wine or must to raise its acidity level when necessary. The acidity of a wine is the tart or sharp taste. Wines that are too low in acid are flat or flabby tasting. Wines that are too high in acid are tart or sharp tasting.

Here are 5 helpful things you should know about Acid Blend.

  1. Always Know How Much Acid Blend To Add:
    Never guess at how much Acid Blend you should be using. Either have a wine recipe that tells you how much Acid Blend to add, or use and Acid Testing Kit to determine how much Acid Blend is needed to bring the wine into a respectable range.
  1. One Teaspoon Of Acid Blend Will Raise One Gallon By .15%:
    An Acid Testing Kit will measure acidity in terms of percentage by weight. With most wines you will want an acidity level in the .55% to .70% range. Once you know your wine’s current acidity level, you can use the .15%, per teaspoon, per gallon, rule to know how much Acid Blend you need to add.
  1. Acid Blend Is Easy To Add But Very Difficult To Take Out:
    If there is ever any question as to how much Acid Blend you should be adding, always error to the low side. You can easily add more later. It’s effects are instant. But if you add too much, the process for getting it out is, quite frankly, a big pain.
  1. The Acid Level Of A Wine Can Change During A Fermentation:
    It’s not unusual for some acid to drop out of the wine during a fermentation. Conversely, the fermentation can make acid to replace what is lost. Shop Acid Test KitWith these two things in mind it is possible for the acidity level to slightly rise or fall during a fermentation. For this reason you may need to do a second adjustment to the wine just before bottling.
  1. Wine Ingredient Kits Do Not Call For Acid Blend At All:
    If you are using wine making juices in the form of box ingredient kits to make your wine, you do not need to add Acid Blend to your wine. You do not need to worry about taking acid level readings. This is because the producers of these kits have already tested and adjusted the acidity level for you. They have it corrected perfectly for the type of wine you are making.

—–
Ed Kraus is a 3rd generation home brewer/winemaker and has been an owner of E. C. Kraus since 1999. He has been helping individuals make better wine and beer for over 25 years.

4 Tips For Hitting Your Target Gravity

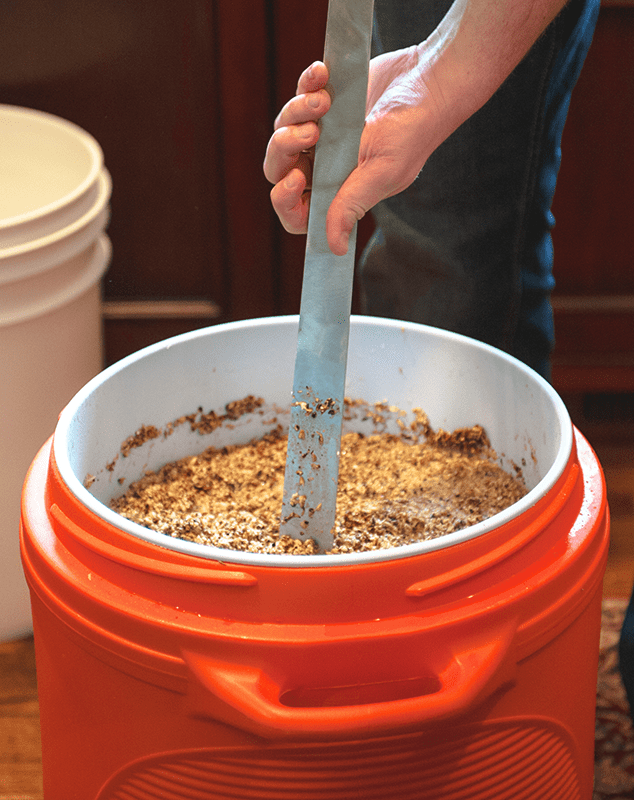
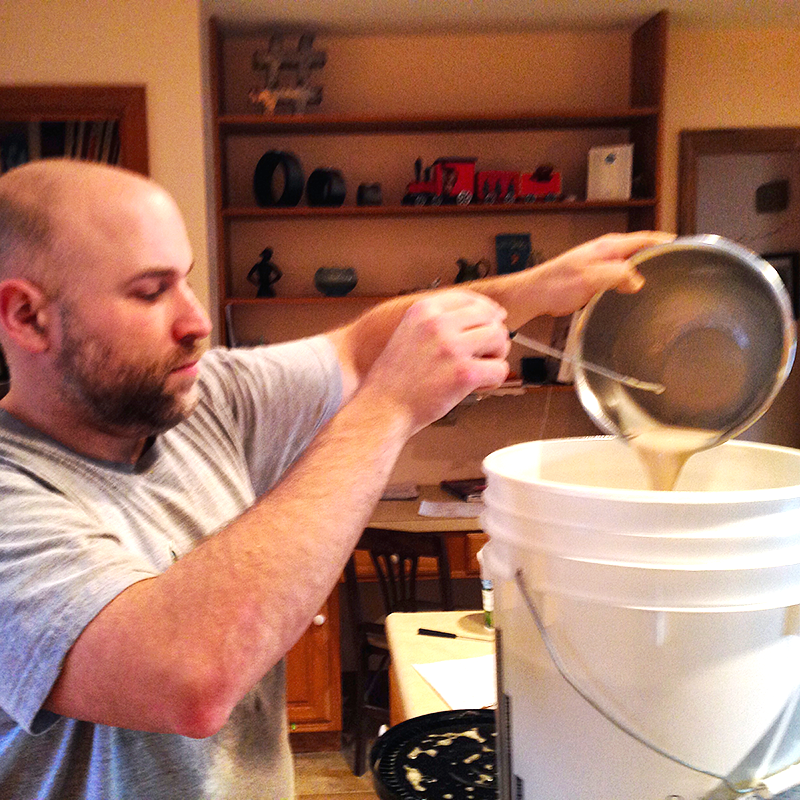
Stirring Mash When Hitting Target GravityA large part of the thrill of home brewing is discovering how your batch turns out several weeks after brewing it. At the same time, it’s nice to be able to predict with some degree of certainty what the final beer will be like.

Original gravity (abbreviated OG) plays an important role in determining what the end result of your home brewing efforts will be. The gravity, or concentration of sugars in the wort, has a major effect on the final beer’s alcohol content. On a related note, the concentration of the wort can also have a profound impact on the color, flavor, and mouthfeel of the finished brew.

While we all know that home brewing doesn’t always go the way we plan, there are a few things we can do to help assure that we are hitting our target gravity:

  1. Measure your mash efficiency. If you’re an all-grain brewer, mash efficiency will have an enormous impact on your brew’s OG. Calculating mash efficiency just requires some basic math. Take good notes so that you can make an educated guess about what your mash efficiency will be, and then plan your beer recipe accordingly. At the end of the mash, take hydrometer readings of the runnings to make sure you’re on target. If you’re off for some reason, you may be able to make adjustments later in the process to compensate for not hitting the target gravity.
  1. Watch your evaporation rate. Pay attention to how much volume you tend to lose when boiling wort. This can be an important factor when trying to hit a target gravity. Again, take notes and try to standardize the process each time you brew. A lot of homebrew recipes out there are based on a preconceived evaporation rate (or may ignore it completely). If you know that you tend to boil off a certain volume over a one-hour boil, you should start with that much more water or wort at the beginning of the boil to compensate.
  1. Shop Dried Malt ExtractSupplement with malt extract or sugar. If you’ve missed your mash efficiency and you end up with a low original gravity, don’t fret. You can add additional fermentables to the brew kettle or to the fermenter. For this reason it’s a good idea to keep some light dried malt extract, corn sugar, or cane sugar around the house. These can be stirred in at the end of the boil. Extra fermentables added to the fermenter should be fully dissolved in boiled water and then cooled before mixing. Read on for a calculation that helps with blending, and keep in mind that blending unhopped malt extract into wort may reduce the IBUs of the final beer.
  1. Dilute, but be smart about it. Overly concentrated wort can be diluted with clean, filtered, sterile water. In fact, many extract recipes call for brewers to “top off with enough water to get five gallons of wort.” That’s fine for beginners, but if you ar serious about hitting your target gravity, you should first calculate how much water to add. For example, if you want to use water to dilute four gallons of 1.060 gravity wort down to 1.050, use the following equation:

GravityA*VolumeA + GravityB*VolumeB = GravityC(VolumeA + VolumeB)

1.060(4) + 1.0(VolumeB) = 1.050(4+VolumeB)

Solving for VolumeB, use 0.8 gallons of water to dilute the wort to 1.050 OG. Of course, you may well decide that you’d rather have more beer at a lower gravity than less beer at a higher gravity. I know, it’s a tough decision!

Regardless of how you go about hitting your target gravity, the techniques above are sure to help you become a more consistent and accurate brewer.
—–
David Ackley is a beer writer, brewer, and self-described “craft beer crusader.” He is a graduate of the Oskar Blues Brew School in Brevard, NC.

There’s A Bad Odor During Fermentation In My Wine…

Removing Bad Odors From FermentationI made the County Fair peach wine and the whole time it fermented it had a bad odor. It’s done now and it tastes fine but still has the bad odor. Is there something I can do now?

Thank you,
Ron
_____
Dear Ron,

When a wine has a bad odor during fermentation, it is usually because excessive amounts of gaseous compounds such as hydrogen sulfide where produced by the wine yeast during the fermentation.

All wine yeast produce some of these unwanted compounds during fermentation — some strains of yeast are more prone to over producing them than others — but any yeast can over produce hydrogen sulfide and others if put in a stressful situation.

  • Lack of nitrogen is one reason why yeasts will over produce these off-odors. This is why it is important that yeast nutrient or yeast energizer is used in sufficient quantities in any fermentation you create. Both of these products are designed specifically to increase the amount of nitrogen that is available to the wine yeast.
  • Fermenting your wine at too warm of a temperature can cause these bad odors to occur in a wine. The warmest temperature we recommend fermenting at is 75° F. Temperatures 80° F. and above will not only induce the production of smelly compounds, but will also help to induce the growth of unwanted micro-organisms such as bacteria and mold.
  • The wine yeast is being over-worked is another major reason for having bad odors during fermentation in your wine. This usually happens when the wine yeast does not multiply properly during the first 3 to 5 days of fermentation. During the first few days of fermentation the wine yeast will typically reproduce itself to about 100 to 200 times the amount normally put in at the beginning. If this multiplying phase does not go well then you have too little yeast trying to do too much work. This type of stress causes the yeast to produce more of these compounds than it normally would. This is why it is important to have the juice exposed to air during these first few days. Air allows for the healthy reproduction of yeast cells.

The odors that these different compounds produce vary:

  • Hydrogen sulfide is described by most to reek of rotten eggs.
  • Diacetyl, another common compound, produces an odor of hot butter to butterscotch.
  • Dimethyl sulfide smells of vegetable soup to band aids. Others will smell it as rotting cabbage or wet leather.

Mild off-odors in a newly finished wine is okay. These weaker odors will usually reduce in strength to an unnoticeable level when given a little time. But there are more severe situations where action may be required.

Aeration of the wine seems to work well in most cases. By siphoning the wine into another container in a splashing manner you can cause many of these bad odors to leave the wine at an accelerated pace. In the case of hydrogen sulfide, pouring the wine across sanitized copper or through a copper wool pad can increase its release. Both of these processes may need to be repeated more than once in order to gain sufficient improvement.

Shop Potassium BisulfiteAfter you are finished applying either of the above treatments, it is important to add a dose of sodium metabisulfite or Campden tablets to the wine. This does two things: 1) it helps to drive out the oxygen that was just introduced during splashing or racking (transferring) of the wine, 2) it helps to drive out any bad odors that still might remain.

Something else to note here. These processes should only be applied to finished wines. Wine musts that are still fermenting should be left alone to finish their due course before proceeding with any of these treatments.

If you believe there is a bad odor during you wine’s fermentation, the best thing you can do is:

  • If you did not add either yeast nutrient or yeast energizer to the wine must at the beginning of fermentation, do so now. If you already have added it, you can add another 1/2 dose of either. The container they come in should have the dosages.
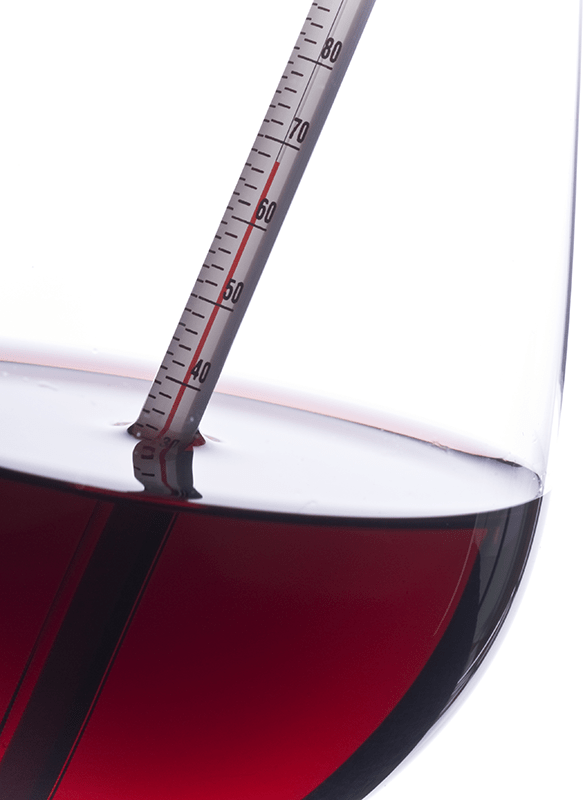
  • Use Shop Thermometers a thermometer to make sure that the fermentation temperature has not exceeded 75°F. If it has, you should cool it down to between 70° and 75°F. as soon as you can.
  • You should also verify that the fermentation is moving along at a normal rate. You can track the progress of a fermentation by taking readings with a hydrometer every couple of days. If the fermentation seems slow, this could be signs of an over-worked yeast. If that’s the case, you may want to add a second packet of wine yeast.

Realize that any fermentation has smells. There are odors of alcohol, fruit, CO2 gas (carbonation) and even sulfur (lit matches). Don’t get these normal smells confused with the bad odors discussed above. These are all aromas of a healthy, vigorous fermentation.

I hope this helps you out. Bad odors coming from a fermentation is something that even the larger wineries have to address from time to time. It’s knowing how to prevent them and deal with them when they do occur that will help you progress and improve as a home winemaker.

Happy Wine Making,
Ed Kraus
—–
Ed Kraus is a 3rd generation home brewer/winemaker and has been an owner of E. C. Kraus since 1999. He has been helping individuals make better wine and beer for over 25 years.

How to Calculate IBUs When Brewing Beer

Hops To Be CalculatedIf you are brewing a specific style of beer or recreating one of your previous batches, calculating your IBUs, or International Bittering Units, that are provided by the hops is one way to dial in the accuracy of your homebrew. There are plenty of free online calculators that will do this for you, but by understanding how to calculate IBUs, you can take your brewing skills to the next level.

Note: IBUs only measure the hop bitterness, or isomerized alpha acids in a beer. Aromas are derived from hops oils, not alpha acids.

How To Calculate IBUs

You can use this calculation before your brew using estimated values, or afterwards to get a more accurate figure.

Before we can calculate the IBUs of a beer, these are the factors we need to know:

  • W – The weight of the hops in the homebrew recipe (usually in ounces in the US).
  • AA – The alpha-acids of the hops in your recipe, expressed as AA%.
  • U – Hops utilization rates (see chart at the bottom). You will need to know the length of time (in minutes) that each of the hops will be boiled in to the wort, as well as the gravity of wort at the end of the boil (in gallons).
  • V – Volume of wort (in gallons) at the end of the boil.

This is the formula for calculating IBUs:

IBUs = (AA% x U x W x 7489)/V

But where does the 7489 come from? This is a correction value that helps us complete the formula in US units (to compute in metric units, calculate weight in grams, volume in liters, and change the correction value to 1000).shop_hops

So, what you will do is calculate the IBUs for each hop addition in your homebrew recipe, then add them all together to calculate the total IBUs in a beer.

As an example, this past weekend I brewed a 10 gallon batch of American Brown Ale with a starting gravity of 1.060 and the following hop schedule:

  • 2 oz. East Kent Goldings hops (5.2 AA%) at 60 minutes left in boil
  • 1 oz. Willamette (4.7 AA%) at :30
  • 2 oz. East Kent Goldings (5.2 AA%) at :10

Let’s plug in some number to see how to calculate the IBUs. Starting with the first hop addition, we input the alpha acids as a decimal. (Remember to shift the decimal two places to change it from a percentage to a decimal number.) Then, we need to look at the hops utilization rate when boiled for a 60 minute boil in 1.060 gravity wort. Looking at the chart below, that number is 0.211. The weight is 2 and the volume is 10:

IBUs of first addition = (.052 x .211 x 2 x 7489)/10 = 16.43 IBUs

Then we do it again for each of the next two additions:

IBUs of second addition = (.047 x .162 x 1 x 7489)/10 = 5.7 IBUs

IBUs of third addition = (.052 x .076 x 2 x 7489)/10 = 5.92 IBUs 

Add them all together, and the total IBUs for this beer is about 28 IBUs.

Shop Steam Freak KitsThat’s how to calculate IBUs. As with many things in homebrewing, IBUs are an approximation. There are a lot of factors in play, but knowing how to calculate IBUs gives you a lot more control over your brew. Plus, if you want to recreate a beer recipe that you’ve brewed before, but with hops that have different alpha acid percentages, you can use the formula to adjust the weight of each hops addition needed to arrive at the same IBUs.

Do you calculate the IBUs of your homebrew? Do you use an online calculator or do you go the old fashioned route?

Hops Utilization Chart

Hops Utilization Chart

—–
Ed Kraus is a 3rd generation home brewer/winemaker and has been an owner of E. C. Kraus since 1999. He has been helping individuals make better wine and beer for over 25 years.

What’s The Best Temperature For Clearing Wine?

Clearing Wine TemperatureI keep my wine at 72-75 when fermenting. Do I need to keep it at those temps when clearing?

Name: Ron M.
State: MI
—–
Hello Ron,

Great question! What is the best temperature for clearing wine?

Keeping your wine must at 70°F to 75°F is perfect for maintaining a vigorous fermentation. The wine yeast is very comfortable at this temperature range. However, once the fermentation has completed there is no reason to maintain this particular temperature range. The only reason for doing so is to keep the yeast happy so that they can do their job.

In fact, right after the fermentation the ideal temperature would be just above freezing. A range of 32°F to 35°F would be most beneficial to the wine for a number of reason:

  • It would allow proteins such as yeast, tannin, etc. to drop out of the wine efficiently and thoroughly, leaving behind a crispy clear wine.
  • It would cold stabilize the wine, meaning that any excess tartaric acid that may be in the wine would precipitate out of the wine as little flaky crystals. By enticing the wine to do this now, you won’t have to worry about these flakes forming later, after the wine has been bottled.
  • It would also keep the potential for any spoilage of the wine down to an bare minimum. Various little nasties like mold and bacteria will not thrive at such an inhospitable temperature.

While just above freezing my be the best temperature for clearing wine, there are two major downfalls with this Utopian temperature:Shop Bentonite

  1. It’s not very practical. This would usually mean dedicating an entire refrigerator to age the wine, and for winemakers producing 10, 20, 50 gallons, it would be almost impossible.
  1. The wine won’t age. Such a cool temperature would not allow the wine to age properly. Actually, it would suspend any aging activity to a undetectable minimum. Basically, your wine would never mature at this temperature. Most wine professionals agree that the optimal temperature for aging is 55°F.

So to answer your question, you do not need to keep your wine at 70°F to 75°F after the fermentation, but you do want to keep it cooler, not warmer. How cool is another question. The optimal thing would be to bring it down to above freezing for a few days, to cold stabilize it. Then bring the temperature up to 55°F for aging and wine bottle storage.

Shop SparkolloidIt’s completely understandable if you – as a home winemaker – are not able to do such a feat. Some things are just not practical. To that I say, do the best you can. Don’t store your wine in the hot closet. Think of a cooler place to keep it, like in a basement floor, etc. Just keep the wine out of the heat.

I hope this information helps you out. Now that you know the best temperature for clearing wine, realize that if all you can do is keep the wine in the 70°’s all the time, it wouldn’t ruin the wine or anything like that. I’m just giving you the optimal situation, so you can know what to strive for within the constraints of your situation.

Happy Winemaking,
Ed Kraus
—–
Ed Kraus is a 3rd generation home brewer/winemaker and has been an owner of E. C. Kraus since 1999. He has been helping individuals make better wine and beer for over 25 years.

Mash pH: Controlling And Adjusting

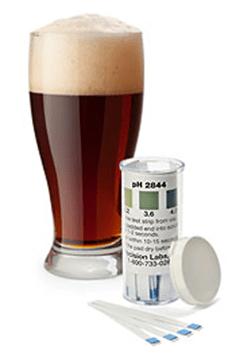
Mash pH StripsAll-grain brewers need to mash their grains in order to extract fermentable sugars. This process, called conversion, takes place in water under certain conditions of volume, temperature, pH, and time. Today, we’ll talk about mash pH: ideal mash pH range, effects of being too high or too low, and how to use pH strips or digital meter to take pH readings and make corrective adjustments.

About Mash pH

pH is simply a measurement of how acidic or alkaline something is. On a scale of 0 to 14, a pH of 0.0 is highly acidic, 7.0 is neutral, and 14.0 is highly alkaline.

The ideal mash pH range of 5.0 to 5.5. A pH of 5.4 is considered “optimal” for most applications, and it’s a good target for brewers new to homebrew mashing.

Measuring Mash pH

Whether mashing for the first time or brewing your 100th batch, it’s important to measure your mash pH. No one wants to find out after the fact that their mash was ineffective and their target original gravity much too low.

The least expensive option for measuring mash pH is the pH test strip. For just a few dollars, brewers can take dozens of readings. All you do is dip the colored end of the strip into the mash for a second or two, remove it, and then read the color. The trade-off of the low price tag is that it’s kind of difficult to get an super, accurate reading from the test strips. Personally, the best I can do is approximate within about 0.2 how close I am to the target pH. This method might work fine for partial mash brewing and beginning all-grain brewers, but before long, they may want an upgrade.Shop Digital pH Meter

The solution is a digital pH meter. Though it may be a little more expensive than a pack of test strips, the digital meter is significantly more accurate, and well worth the investment in my opinion.

Mash pH Adjustments

So now that you can measure your mash pH, how can you adjust it if it’s too high or too low?

To lower your mash pH (increase the acidity of the mash), add half a teaspoon of gypsum to a 5 or 6 gallon mash and stir well. To increase mash pH, add half a teaspoon of calcium carbonate to a 5 or 6 gallon mash and stir. Take pH readings and keep making adjustments until you are within the ideal mash pH range of 5.0 to 5.5, but do not add more than two teaspoons of either ingredient. If you choose to test the pH of your water prior to mashing in, keep in mind that adding grains to the water will cause the pH to drop.Shop Gypsum

Dealing with a mash pH, taking reading, making adjustments, etc., may sound challenging and technical, but once you get the hang of it, it will become second-nature, and you’ll be well on your way to exercising more control over your craft and brewing the beer that you ultimately want to drink.
—–
David Ackley is a beer writer, brewer, and self-described “craft beer crusader.” He is a graduate of the Oskar Blues Brew School in Brevard, NC.

Making Wine Without Sulfites

A Wine Made Without SulfitesI have a sister who has a serious bronchial reaction to drinking wine made with sulfite. I have a neighbor who’s making wine without sulfites to kill the yeast at the end. He simply waits until it dies of starvation. My sister has no reaction to his wine. I have discovered that boiling the must before starting the yeast without using sulfite is sufficient to start the process. Now I would like to find a method of killing the yeast when I want to stop the process. I thought perhaps I could use a high temperature to kill the yeast at the end, but I don’t know how high that temperature would have to be. Can you help me?

Name: Frits D.
State: Arkansas
—–
Hello Frits,

There seems to be a little bit of confusion. The reason that sulfites are added to any wine after the fermentation is to keep the wine from spoiling – to keep it fresh – not stop a fermentation. A fermentation should run its course until the sugars are all gone, starvation as you say. Sulfites can slow a domesticated wine yeast, but it can not consistently stop it completely, and therefor is not dependable for this purpose.

With that being said, making wine without sulfites is simple. The hard part is keeping the wine from degrading or spoiling after it has been made.

To start off the fermentation, I do not recommend boiling the juice or wine must. When you heat a juice you are promoting oxidation. This can cause the wine to turn color, usually orange or brown. It can also affect the wine’s flavor by adding a caramel to raisin note to it.

The one time I think you should add sulfites is before the fermentation — even if you are making wine without sulfites. Any free sulfite that is in the wine at this point will be long gone by the time the fermentation has completed. The sulfite will readily dissipate as a gas. Why not take advantage of that fact?Shop Wine Kits

This applies to making wine from fresh fruits and juices. If you are making wine from a juice concentrate, then no treatment or sulfite is required at all. For this reason, you may want to consider taking this avenue. Currently, we have over 200 different juice concentrates to choose from.

As for keeping the wine from spoiling after the fermentation, one solution is to always keep the wine refrigerated. It’s simple and effective. The bad part is you need to dedicate most, or all, of a refrigerator to this method. This is one reason why hardly anyone is making wine without sulfites.

A second option that will significantly reduce the risk of spoilage is filtering the wine with ultra-fine filtration. This mean filtering down to 0.5 microns. This is a lot finer than letting the wine drip through a coffee filter. That would only be 20 to 25 microns. Filtering down to 0.5 microns requires the use of an actual wine filter, one that can force the wine under pressure through extremely fine pads. You are literally filtering out over 99% of the wine yeast along with mold spores and bacteria.

The Mini Jet wine filter would be the way to go for this purpose. It is important to realize that before using any wine filter, the wine should be finished dropping out sediment, naturally. It should look visually clear before filtering.

Shop Mini Jet Wine FilterAlso, keep in mind that you will want to be vigilant towards keeping the winemaking area sanitary. All the equipment and anything else that comes into contact with the wine needs to be as clean and sterile as possible. There are a whole host of cleansers and sanitizers you can use to do this safely. This is a critical part to making wine without sulfites.

As a final note, there is no such thing as making a wine without any sulfites at all. In part, because sulfite is actually produced during the fermentation. It’s a natural byproduct of the fermentation. The best you can do is to keep the sulfites to a level low. You can expect to see a fermentation produce a wine with 10 to 15 PPM (parts-per-million). When adding sulfites as normally directed the wine will end up with 50 to 75 PPM.

As you can see, making wine wine without sulfites can be easily done. It’s the extra care that needs to be taken to keep the wine fresh and free from spoilage that makes it difficult. But, if you are willing to be sanitary, filter the wine and/or store the wine under refrigeration… it can be done!

I hope this information helps you out.

Happy Winemaking,
Ed Kraus
—–
Ed Kraus is a 3rd generation home brewer/winemaker and has been an owner of E. C. Kraus since 1999. He has been helping individuals make better wine and beer for over 25 years.