 I have made a 5 gallon batch of Elderberry wine. I have racked it three times since it was transferred to the secondary for bulk aging. It needs to be sweetened before bottling. My question is when I add the sugar, sorbate and metabisulfite to the carboy will stirring the wine to incorporate these ingredients expose it to too much air and cause a problem with oxidation after it’s bottled?
Name: David S.
State: Louisiana
Hello David,
Thanks for the great question.
One thing we do know is that the wine does need to be stirred. The sugar, potasium sorbate and sodium metabisulfite needs to be mixed evenly throughout the wine. There’s no way around it. This brings us to your question: does this stirring bring too much oxygen into the wine? The answer is, it can!
The trick is to do the stirring without splashing the wine. The actual act of stirring does nothing to dissolve more air or oxygen into the wine. It’s the splashing that can cause this. When you splash a liquid, you are increasing the surface area of that liquid on an astronomical scale. This increase in surface area is what causes air to saturate into the wine.
One item you can use to help you in this situation is a De-gassing/Mixing Paddle. It attaches to a hand-drill and spins quickly within the wine — no splashing. You can also do the same thing manually with a hand-held mixing paddle. The mixing paddles we offer have thin shanks so as not to splash across the wines surface.
A second force that is on your side is the sodium metabisulfite. In addition to keeping the wine from spoilage, it also helps to drive out any oxygen that does manage to dissolve into the wine. The expansion of the sulfur dioxide replaces the oxygen.
Another little related tip is eliminate the splashing from the siphon hose when racking the wine. Always fill your carboy from the bottle up. In other words, make sure that the siphon hose reaches all the way to the bottom of the fermenter you are filling.
By doing these simple things you will be helping your wine greatly. Oxidation has been known to completely ruin a wine. From an esthetic standpoint, oxidation causes the wine to turn amber/brown, making it very unappealing. From a flavor/aroma standpoint, it gives the wine a bitter, nutty character that can reach the point of intolerable.
Happy Winemaking,
Ed Kraus
———————————————————————————————————
Ed Kraus is a 3rd generation home brewer/winemaker and has been an owner of E. C. Kraus since 1999. He has been helping individuals make better wine and beer for over 25 years.
Are All Wine Yeast The Same?
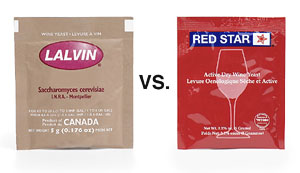 In your article about making wine from Welches grape juice you listed Red Star Montrachet yeast. I commonly use Lalvin…….at the advice of my local wine shop. You are the expert without the profit margin and I as well as others would likely appreciate your insight on yeast. Are all yeasts equal? What is the best way to select yeast? Thank you.
Name: Blaine
State: Washington
Hello Blaine,
Not all wine yeast are the same. This does not mean that one is better than the other. It simply means each type of wine yeast exerts a slightly different character onto the wine. Whether or not that character is good depends on the type of wine being made and the personal taste of the person drinking the wine.
You mentioned Red Star and Lalvin. These are two different brands of wine yeast, each having several different strains from which to choose. So when you say that your local wine shop recommends Lalvin, it is also just as important to know the particular strain of Lalvin that is being recommended.
We carry both brands, but for the Welch’s grape juice wine we recommend Red Star: Montrachet. This strain is considered an “all-purpose” wine yeast. Its flavor characteristics are fairly well muted and it works very well in many fermenting situations. It has also been consider the go-to strain when fermenting Concord grapes (Welch’s grape juice is made from Concords). This is evidenced by the majority of Concord wine recipes you will find that call for it, both in winemaking books and on the web.
Lalvin wine yeast also has a strain that is similar to the Red Star: Montrachet. The Lalvin: K1V-1116 would work just as well as a substitute in this wine recipe. I would not hesitate to use it if I were making this wine.
If your local wine shop is recommending a different strain of Lalvin than this, then I would suggest that you take a look at the Lalvin wine yeast profile chart on our website to see if you feel their recommendation is suitable to your tastes. As an additional note we also have a profile chart for Red Star wine yeast that may be of interest to you.
I hope this information helps you out. Just realize that there is no one particular right answer when it comes to wine yeast. It’s more of a matter of personal taste.
Happy Winemaking,
Ed Kraus
———————————————————————————————————
Ed Kraus is a 3rd generation home brewer/winemaker and has been an owner of E. C. Kraus since 1999. He has been helping individuals make better wine and beer for over 25 years.
There's White Scum On My Wine. What Should I Do?
 I bought table grapes at a farmer’s market, very sweet, reddish grapes for my wine. I had success with the fermentation and put it in a carboy. It made 4 gallons and I put it in a 5-gallon carboy with an air lock, thinking the CO2 would force the oxygen out. It continued fermenting and I assume no oxygen got in.
Ten months later there is a thin, white-ish particulate on surface. When I moved the carboy to a tabletop, the particulate began to filter down to the bottom very slowly, pretty much dissolving as it sank. Some of the particulate remained on the surface undisturbed.
What should I do? Should I stir the carboy a bit to make the ALL the particulate sink? Should I bottle it now?
Name: Chris
State: South Carolina
—–
Hello Chris,
For whatever reason, it sounds like a thin layer of bacteria has formed on your wine. Winemakers refer to this as flowers or flowers of wine. More specifically, it is known as mycoderma bacteria. It slowly degrades the wine and ferments some of the alcohol off the wine. It’s similar to a wine turning to vinegar, but not quite as severe.
The biggest question at this point is: how far along is this infection? Does the wine still taste fine? If not, there is not much you can do to reverse the effects. But, if the wine still taste okay, there is a lot you can do to save it!
First of all, since the wine is done fermenting, rack it into four 1 gallon glass jugs. This will eliminate any air-space from the wine. Point the end of the siphon hose at the center of the wine — away from both the bottom and the top. This will help to reduce the collection of the particles into your gallon jugs. If some make it, so be it. Just do the best you can.
Once in the glass gallon jugs, you will need to add sulfites to the wine. This could be either: Campden tablets, potassium metabisulfite or sodium metabisulfite. Your choice. Add a single dose as directed on the package in which the sulfite came.
The sulfites will do two important things for the wine:
- It will easily destroy the bacteria that is causing this issue and save your wine from getting any worse.
- It will help to drive out any off-odors you may have noticed in the wine. This would be from volatile gases produced by the bacteria.
After you add the sulfites, attach air locks to each of the jugs. We have air-lock adapter screw-caps that work well for this purpose. Let the wine sit for a few weeks or until you feel that any particles have had time to completely settled to the bottom. Rack the wine again and add another dose of sulfites and bottle.
The number one reason for this occurring is having air in the head-space of the carboy. If the air-lock was taken off, even once, or the air-lock went dry for even just a few hours, this was most likely the cause. If you are sure the carboy had an absolute seal the entire time, than the second most common reason is not treating the wine must with sulfites before fermentation.
Best Wishes,
Ed Kraus
———————————————————————————————————
Ed Kraus is a 3rd generation home brewer/winemaker and has been an owner of E. C. Kraus since 1999. He has been helping individuals make better wine and beer for over 25 years.
How To Be A More Eco-Friendly Brewer
 Let’s face it: brewing isn’t the most eco-friendly hobby. For every bottle of beer brewed, it takes a gallon of water or more to make it. Even on a commercial scale, brewers have had to figure out ways to conserve water and process their waste.
Luckily, there are several steps homebrewers can take to conserve raw materials and make their hobby more eco-friendly. You might even save a few bucks along the way!
- Compost – This is one of the easiest ways to make brewing more eco-friendly. Spent grain, trub, and yeast can all be added to the compost heap. After decomposing, these materials can be mixed into your garden soil or used as mulch. That’s money saved on both fertilizer and bed dressings! Plus, what goes in the compost heap stays out of the landfill.
- Buy organic ingredients – Ingredients that are grown organically are free from pesticides and aren’t genetically modified. This means that fewer pesticides are washed into the water system and biodiversity is ensured. The jury’s out on whether organic beers taste better, but you can rest assured that beers made with organic ingredients will have a much less negative impact on our environment. Besides, good karma tastes great in an IPA.
- Use an eco-friendly cleaner – One-Step No-Rinse Cleanser uses no chemicals, just oxygen to clean your homebrewing equipment. Keeping those chemicals out of your drains and off your equipment means everyone wins.
- Grown your own – If your region is suited for growing hops or grains, go for it! You can also grow some of your own herbs spices, or fruits for added homegrown flavor. The more you grow, the less is spent transporting ingredients. Check out the Homebrewer’s Garden for some great tips on how to get started sustaining your homebrewing self-reliance.
- Conserve water– Brewing requires a lot of water, both for the beer itself and for cleaning before and after brewing. There are several ways to minimize water use:
- Use a bottle and carboy washer for a high-pressure/low-volume rinse.
- Reuse cleaning/sanitizing water as much as possible. For example, if I’m soaking my mash tun or bottling bucket in One Step, I put everything else that will fit in there too: beer bottles, brushes, hydrometer. I’ll then run the cleaner water out through the racking cane and siphoning hose. Save the water for cleaning at the end of brew day. If there’s any left over, use it to do the dishes!
- Heating – Natural gas is more efficient than coal-fired electricity, so using a burner rather than an electric stovetop will save you kilowatts on your electric bill and time in the boiling process. Another way to get more efficient with your water hearing is to insulate your mash tun. You can build your own jacket using materials from the hardware store, but be careful around the flame! Solar hot water is another option prior to firing up the burner. If you can get the water halfway there, that’s less energy needed for heating water.
- Buy in bulk – Bulk purchases, such as this 50 lb. bag of Briess 2-Row, mean less packaging, and it saves you money! Plus, you have a built-in excuse to brew more beer. Win, win!
Homebrewing is an art, one to be constantly improved upon. In an excellent blog post, Deena Shanker writes that “Environmentalism … goes hand in hand with the art of beer making.” Adopt even a few of these eco-friendly ideas, put a delicious home brew in your hand, and cheers to Mother Earth!
——————————————————————————————————-
David Ackley is a beer writer, brewer, and self-described “craft beer crusader.” He holds a General Certificate in Brewing from the Institute of Brewing and Distilling and is founder of the Local Beer Blog.
10 Things to Know Before Brewing Your Own Hard Cider
If you’ve made hot apple cider on the stove, you’ve had a simple introduction to the cider-making process. However, hard cider is a different animal. There are a lot of variables that can affect the quality of the beverage.
Before you dive into your first batch of hard cider, read these 10 tips on how to brew a great batch. Continue reading
How to Brew a Hefeweizen: Tips from a Beginning Homebrewer
 Are you a fan of wheat beers? Guest blogger and beginning homebrewer Josh Short shares some of the lessons he learned from his recent brew day.
————————————————————–
Summer is almost here and it’s time to brew something refreshing that even the biggest non-beer-lover will enjoy. No double IPA here — let’s brew a hefeweizen.
Hefeweizen is a south German style of beer. “Hefe” translates to “with yeast” and “weizen” means “wheat.” Hefeweizens have a low-hop bitterness, usually around 6-10 IBUs, and are unfiltered, meaning that the yeast stays in the beer when it’s served. Most hefeweizens have hints of cloves and bananas, which come from the hefeweizen yeast strain, and a cloudy golden, yellow-orange appearance.
I brewed a hefeweizen recently and wrote down some tips and tricks to help you as a beginning homebrewer. Hopefully I can keep you from burning your house down!
- Read your directions and then read them again. Write down each step and tape it to your microwave since it’s probably above your oven and it’ll always be close-by.
- Clean your kitchen. Yes, I’m sorry, but do all the dishes so you have an empty sink and make sure all your countertops are clear.
- Lay out all your materials and go through each step to make sure you have everything you need:
- 4-5 gallon brew pot with lid
- Fermenter (the plastic bucket without the hole at the bottom)
- Long spoon for stirring the wort
- Airlock
- Hydrometer
- Thermometer (a regular kitchen thermometer works, but you might want to upgrade to a floating thermometer)
- Sanitizer
- Towels
- Six gallons of bottled water
- Brewer’s Best Weizenbier Recipe Kit
- Optional – Specialty grains, mesh steeping bag for specialty grains, small pot for discarded specialty grains (more info below)
- 10+ pounds of ice or a wort chiller
- Oven mitts
- Kitchen sink drain plug
- Pencil/pen for taking notes
- This step is optional, but if you’ve made a few batches before or want to be adventurous it is a fairly simple way to enhance the flavor to your brew. When you’re heating up water for the boil, grab some specialty grains and steep them in your water at 150 degrees for 15 minutes before adding your malt extract. I used half a pound of pilsner malt and half a pound of malted wheat. Make sure to take in the amazing aromas the steeping grain will give off! Here’s some additional information since it probably won’t be in your kit instructions:
- Most likely your grains will already be cracked. If they are not, run them through a corona mill or roll over them with a rolling pin or beer bottle on a cutting board.
- Pour grains into steeping bag and tie off the end. Do this over a cutting board because the grains might leave a fair amount of dust on your counter.
- Place bag into 150 degree water for 15 minutes.
- Watch the color of the water turn a golden color and enjoy the aroma. Don’t be frightened if flakes of grain escape from the steeping bag. It’ll settle to the bottom of your fermenter and you leave the bottom inch or so in the fermenter when you siphon it to the bottling bucket in a few weeks.
- After 15 minutes, remove steeping bag and place it aside in a small pot. You’re done with the grains and the pot, so put it to the side and let it cool and drain into pot before discarding. There are a ton of ways to recycle the spent grain but for a beginner, focus on the brewing for now.
- Before adding the malt extract, turn your sink faucet to hot and run one can of your liquid malt extract (LME) under it for two to three minutes. This makes it much easier to pour from the can.
- Once you get your first set of malt extract and hops into your brew pot, pat yourself on the back because there’s no stopping now! Find a place to lean on near your oven because you’re going to be there for a bit.
- Now that you are boiling your malt extract and hops, DO NOT LEAVE THE OVEN’S SIDE! Stand/Lean/Sit there and watch the boil. If you see it all starting to rise very quickly, turn the burner off, grab your oven mitt and move the pot to another burner. You just prevented a boil over. This shouldn’t happen if you are attentively watching the pot.
- Once you are done brewing and have moved your cooled wort into the fermenter, take your dry yeast packet and sprinkle it over your wort. You can prepare your yeast in a number of ways which are noted in other posts, but as a beginner homebrewer this method works just fine.
- When inserting your airlock, gently twist it back and forth into the hole in the fermenter lid. Do not jam it straight down as I did unknowingly during my first batch, splitting the plastic airlock into pieces!
- Wait patiently while the beer ferments. In as little as two weeks, you’ll have two cases of delicious beer for you and friends!
I hope the tips above will help you keep your kitchen intact! Feel free to leave comments and questions below. Cheers!
—————————————————————————————————————-
Josh Short is a beer blogger “on a mission to learn the art of craft beer.” Check out his blog, Short on Beer, to join him on his journey.
Josh Short is a beer blogger “on a mission to learn the art of craft beer.” Check out his blog, Short on Beer, to join him on his journey.
Can I Add Boiling Water To Winemaking Ingredients?
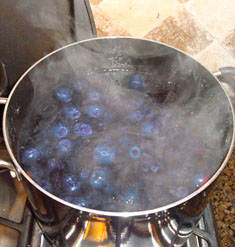 I’m making your Blueberry wine and my question is this. Can I add boiling water to the winemaking ingredients or should I wait for the water to cool first? Thank you
Name: Bill D.
State: Maine
Hello Bill,
The only winemaking ingredients I can think of that should ever touch boiling or hot water are: botanicals and sugar.
- Botanicals: Whenever making wines from herb, flowers, roots, it is normal to blanch them with boiling water. This creates kind of a tea of sorts before going on to the process of actually making the wine.
- Sugar: When adding sugar to a wine must, it is very helpful to pre-dissolve the sugar in hot water, first. By doing this you can be sure the sugar is dissolved. This also makes it much easier to mix the sugar evenly throughout the must.
In both of these instances it is critical that the mix be allowed to cool down to 80°F. or less before continuing on with adding other winemaking ingredients.
Here are how some common wine ingredients affected by hot or boiling water:
- Wine Yeast: Some of the yeast cells will start to die at about 90°F. A lot of the yeast cells will die at around 120°F.
- Yeast Nutrient: also known as diammonium phosphate. Depending on the pH of the wine, when heated up to around 150°F or higher, the yeast nutrient will begin to partially decompose into ammonia.
- Pectic Enzyme: starting at about 125°F will start to denature, which simply means become permanently inactive or ineffective.
- Wine Tannin: is unable to dissolve and saturate into the wine must at wamer temperatures. Instead, it will drop out as a sediment.
- Sulfites: this includes winemaking ingredients such as: Campden tablets, sodium metabisulfite and potassium metabisulfite. Liquids that are heated are not able to hold sulfites for any length of time. This means if you added a sulfite while the liquid was hot, you will need to add it again after the liquid as cooled.
- Fruit Acids: this includes acid blend, citric acid, tartaric acid and malic acid. These are the only common wine making ingredients that are not affected by hot or boiling water.
As an additional note, if you are blanching your blueberries with boiling water, I would not recommend this. This will tend to separate the tannins and color out of the fruit. This is not something you want to happen at this stage. The best way to treat the fruit is to lightly crush them or chop them. Once you have all the wine making ingredients mixed together, treat the entire wine must with one of the sulfites mentioned earlier.
Bill, you can find more information about the basic winemaking process on our website. This may help you out, as well.
Happy Winemaking,
Ed Kraus
———————————————————————————————————
Ed Kraus is a 3rd generation home brewer/winemaker and has been an owner of E. C. Kraus since 1999. He has been helping individuals make better wine and beer for over 25 years.
For the Home Brew Beginner: Wine Ingredient Kits or Fresh Fruit
When you enter the world of home wine making, there are no limits as to the different types of wines you can make. You are free to combine ingredients, add flavors, use locally grown fresh fruit, or berries you grow in your own home garden. You can allow your personal tastes to dictate the dryness or sweetness of your wine, or determine whether you will use fresh fruit or go with commercially available wine ingredient kits for a more traditional wine.
Wine Making Kits and Wine Making Supplies
A wine making kit is a great way to start in the art of home wine making if you are a beginner, because it will introduce you to all the basics of wine making and provide you with the essential wine making supplies and ingredients you need to get started. Once you’re familiar with the process, you may want to make wine with whatever fresh fruits are available at different times of the year.
You will be able to use all of the equipment you got when you purchased any of the different wine kits available on homebrewing.org, and purchase whatever additional supplies you may need to use when making fruit wines. When making fruit wines, the added equipment you need will require additional space, so be sure you understand this before deciding to make fruit wines.
Wine Grape Ingredient Kits
Wine grape ingredient kits allow you to choose from wine grape varieties that come from all over the world. These grape varieties will allow you to make wines from the same grape varieties as the wines you’d typically purchase from wine retailers everywhere. These concentrates give you the ability to make wine from the same grapes that are used to make your favorite European, Californian, or other types of wines that are made elsewhere in the United States or other parts of the world.
The huge range of grape concentrates that are available, and the ease with which you can get them, and the obvious difficulty you’d have in getting comparable fresh grapes means that grape concentrates are probably the best option when it comes to making traditional wines from wine grapes.
Using Fresh Fruit to Make Wine
There is a huge variety of different types of fresh fruit you can use to make your own wine, and it isn’t more difficult to make fruit wine than it is to make wine with grape concentrate. Always make sure you are choosing fruits that are in season at the peak of their ripeness. Consider using strawberries or rhubarb in spring, blueberries, blackberries, apricots, peaches, nectarines or plums in summer, and apples in fall.
When you make wine from fresh fruit, you will have to test the acidity and amount of sugar in your liquid and make adjustments accordingly. You will also need to find out exactly how much fruit you need to use to make a gallon of wine. Home wine making recipes will instruct you as you go through each of the steps in the fruit wine making process.
The decision as to whether to use fresh fruit or wine concentrate is an entirely individual one. When you’re making your own wine you can add anything you want to it to alter the taste. You may want to add dried berries, herbs, or flowers to a grape wine to enhance its flavor, or you may want to use fresh berries to make a sweeter wine. If you are going to use fresh fruit, consider purchasing it from farmers markets because you’ll know that you’re getting it at the peak of freshness and ripeness. Enjoy this fun experience, and invite your family and friends over to savor the taste of your newest creations.
5 Reasons Why You Should Take Part In A Homebrew Festival
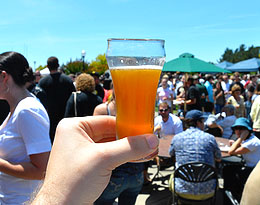 Homebrew festivals are quickly becoming a popular way to share the art of homebrewing with others. There are several possible formats. Some festivals just ask brewers to donate the beer, while others require a small fee to participate. Some homebrew festivals raise money for good causes, and many include a competition where the winning brewers can earn prizes, exposure, or even the opportunity to brew their winning beer with a professional.
But the thrill of the festivals themselves are usually motivation enough for me to participate. Here are five of the reasons why I take part in homebrewing festivals every chance I get:
- Because they’re fun! What’s better than getting together with a bunch of other beer lovers and sharing some brews?! I’ll usually bring a friend along to help me serve so we can take turns trying other people’s beers. You’ll also get to enjoy some good people-watching. (Be prepared for a lot of beards!)
- Great networking – Homebrew festivals are ideal for meeting people with interests similar to your own. Be open, be friendly. Who knows — you could meet a potential collaborator — or the business partner for that brewery you’ve always wanted to start!
- Get feedback on your brews – Homebrew festivals are the perfect opportunity to get honest, constructive feedback on your beer. You’ll soon figure out which of your brews are crowd pleasers and which are not. When I serve my beer brewed with dandelion and nettle leaf at a festival later this month, I should learn a thing or two about what people think about my off-the-wall creation.
- Find inspiration – At homebrew festivals, you’ll get the chance to try lots of different kinds of beers. This is a great occasion for figuring out what you want to brew next. Loved that guy’s Double IPA? Maybe it’s time to brew your own. Enjoyed the Wyeast 3068 in that other brewer’s hefeweizen? Now you know what you should use in that wiessbier you were planning on brewing.
- Try unusual beers – A lot of the beers you’ll try at homebrew festivals will be unlike anything you can find at the supermarket. Homebrewers are an extremely creative bunch and will pull out their best to try to win the crowd. Whiskey fennel ale? Beer brewed with beets? Homebrew festivals may be the only chance you’ll get to try crazy concoctions like these.
Yes, you’ll probably give away a fair amount of beer at a homebrew festival, but isn’t sharing your creation what it’s all about? Trust me, there’s nothing quite like passing your homebrew across the table to an eager beer fan, watching their face light up as they sip your brew, and answering them when they ask, “You made that yourself??”
Not sure how to find a homebrew festival in your area? It’s easy. Just go to Google and type in “homebrew festival” (in the quotes, followed by your nearest city, or maybe even your state. Example: “homebrew festival” kansas city
Have you ever participated in a homebrew festival? How did it go?
——————————————————————————————————-
David Ackley is a beer writer, brewer, and self-described “craft beer crusader.” He holds a General Certificate in Brewing from the Institute of Brewing and Distilling and is founder of the Local Beer Blog.
How Sweet it Is: Sugar and Honey in Home Brew Wine
Home brewed wine is a beautiful product that is composed, in essence, of three parts – material selection, method of crafting, and time given for fermentation. With the right wine making supplies, intrepid brewers can elevate their collections beyond store shelf fodder by incorporating their own twists on additives and base ingredients. Wine making kits will come with components such as grape juices, yeasts and brewing containers, but curiosity drives many home brew enthusiasts to think outside the box when it comes to wine kits, researching switches and swaps that make vino truly personal. One of the most common changes is the sugar, or sugar alternative like honey, that is used to feed the yeast that ferments the juice.
Honey: Pros and Cons
Honey is a very complex ingredient all by itself – flower pollens and dozens of sugar compounds like dextrose and maltose are all packed into that thick, sweet syrup we all know and love. The taste of honey can vary widely depending on what flowers the producing hive frequents, giving rise to classic types like wildflower and more exotic varieties like orange flower or elderflower. When incorporated into the ingredients found in wine making kits, honey adds a deep complexity and sweetness to wine that many home brewers find more attractive than sugar, but it comes at a price. Due to the multiple sugars present in honey versus the single compound in traditional wine making sugar, fermentation takes considerably longer. According to home brewing enthusiast and blogger Jack Keller of JackKeller.net, 1.25 pounds of honey can be substituted for a pound of sugar in a given wine recipe, though if all of the sugar is exchanged for honey, you’ll end up brewing a honey wine or mead, rather than a traditional wine.
Sugar: Pros and Cons
Sugar, despite being a relatively simple ingredient, also comes in a wide range of forms that affect the wine it ferments. Traditional table sugar will produce wine that is consistent and familiar, but experimenting with more unique forms such as the blonde turbinado sugar or dark muscavado sugar with its hints of molasses will give your palate plenty to explore. The drawbacks of using sugar is that table varieties may not produce the depth of a finished product that you’d like, and the more exotic forms of sugar may be outside of the price range of beginning brewers. Sugar, however, is an excellent and stable ingredient to stretch your winemaking “legs” with, making it a must-have inclusion in wine kits. Sugar can also be added to a finished wine to sweeten it; rock sugar and bar or caster sugar are the most popular choices for this option due to their respective long and short dissolve times.
If you’re interested in home brewing wine, or are already a fan of the hobby, experimenting with both honey and sugar is the best way to find out which one, or what form of combinations, will work for your needs.