Leigh Erwin: Going Shopping

Shopping For Wine Making ItemsHi all!
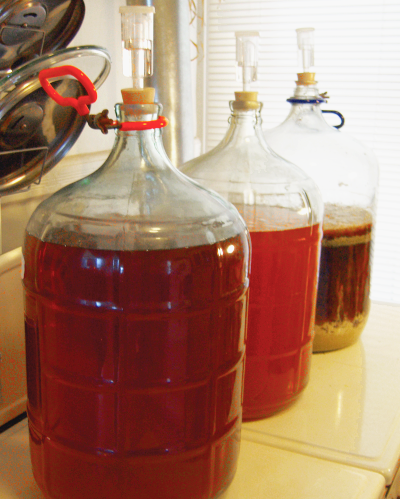
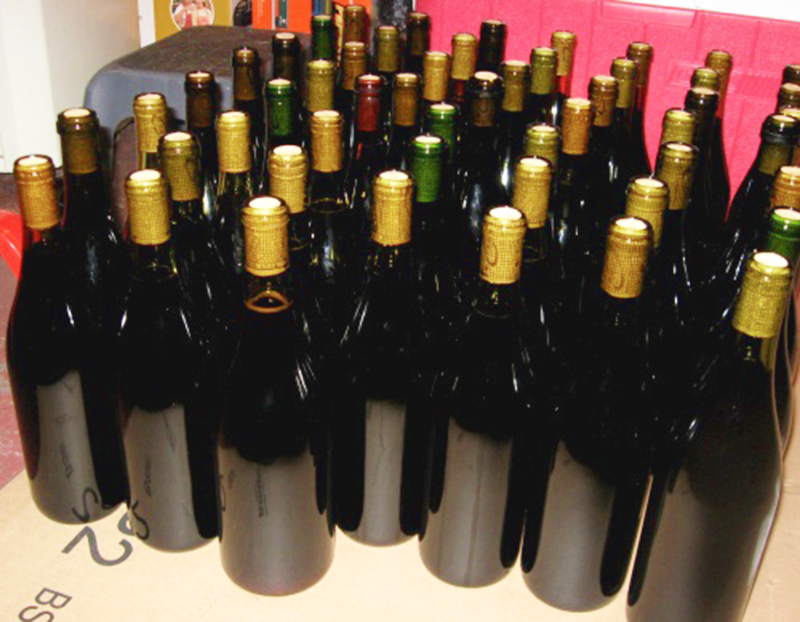
I can’t believe I don’t have any wines currently going in my little winery room right now! I feel guilty admitting that, but hey, sometimes you realize all of a sudden that you just bottled your last wine and you completely forgot to order a new wine kit in time to get a new one going as soon as the old one was finished! Whoops!
I decided to take a little time to put together a list of wine making items I need or have been wanting to purchase from E C Kraus and share them all with you now:

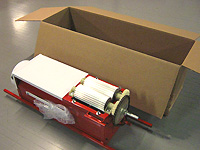
Two new winemaking kits:
I’m not ready yet to make wine from my own fruit, as a lot of fruits don’t come into season here in Colorado for a little while still and I would prefer to use local produce rather than just buy a bunch of imported stuff from the grocery store.
I definitely need to make that Chardonnay that I completely screwed up several weeks ago. As a reminder, that was the Cellar Craft Sterling Collection Chardonnay California Reserve. I am determined to see this one through all the way to bottling and fingers crossed I don’t make any mistakes with that one again.
For the red, I decided to go for a dessert-style wine and make the Cellar Craft Specialty Collection Black Currant Dessert Wine (Porto Corinto Style). I love Port-style wines and would love to be able to make one myself. Since I just making a very light style red (the Nebbiolo), I thought it would be fun to go the complete opposite and make a heavier dessert Port-style wine this time around.

Random “bits and pieces” of equipment:
I really need to get in a better habit of writing things down the moment I think of them, but I think this is everything I’ve been wanting/needing.
A new bottle brush: Shop Strainers
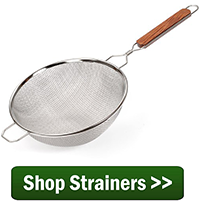
The one I currently have was one I actually bought for day-to-day dishes and not actually for cleaning wine bottles. When I went to try and clean out one particularly dirty bottle the other day, I stuck the brush in the neck and it didn’t even go half way into the bottle. That bottle ended up being tossed into recycling and now I know I need to order a wine bottle brush and not a run-of-the-mill bottle brush.
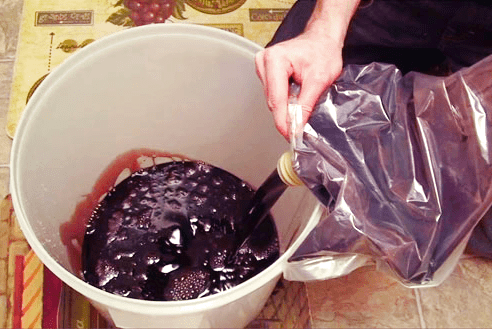
A stainless steel strainer: If you remember from one of my previous entries, I needed a way to remove elderberries from my Nebbiolo wine so they wouldn’t get transferred into my clean carboy. A strainer would have come in handy here.
I definitely have other things that I would like but don’t necessarily need right now (don’t we all have those!), but I think this list will do nicely for now.
———————————–
leigh_erwin_bioMy name is Leigh Erwin, and I am a brand-spankin’ new home winemaker! E. C. Kraus has asked me to share with you my journey from a first-time dabbler to an accomplished home winemaker. From time to time I’ll be checking in with this blog and reporting my experience with you: the good, bad – and the ugly.

Avery White Rascal Belgian Wheat Clone Recipe (All-Grain)

White BeerWhite Rascal is a popular Belgian-style witbier brewed by Avery Brewing Co. out of Boulder, CO. Witbier makes for a great summer beer. Refreshing, smooth, a little sweet, with mildly spicy citrus notes. If you’re looking for a great beer to get you through the warmer months…this could be it!
Witbier literally translates to “white beer.” The reason witbier is white is because of the high proportion of wheat in the grain bill. In the case of this beer recipe, it calls for 50% wheat malt. Wheat has much more protein than barley and gives beer body and a sweet wheat flavor, but also makes the beer cloudy. The cloudiness gives the beer a very pale appearance. Since the protein in wheat can sometimes contribute to a stuck sparge, I recommend adding rice hulls to the mash to improve filterability.
Paired with the sweet wheat flavor is a low hop bitterness and an intriguing flavor and aroma. Witbiers are made with coriander and orange peel (and sometimes other spices) which give the beer a delightfully refreshing citrus flavor. This is a beer you can drink all day while hanging out in the sun!
The final key component to brewing a good witbier is using an authentic Belgian witbier yeast. This beer recipe calls for Wyeast 3944, but 3942 would work very will, also.
The beer recipe below is from the Avery website, where they share homebrew recipes for more than a dozen of their beers (including Maharaja Imperial IPA). The ingredient weights might look a little funny (0.07 oz. of hops?), but keep in mind these are scaled down from a much larger system. At Avery, that hop addition is probably a pound or more – not so awkward at that scale.

Avery White Rascal Clone Recipe (All-Grain)
(5-gallon batch)
Specs
OG: 1.050
FG: 1.010
ABV: 5.2%
IBUs: 24
SRM: 4
Ingredients
5 lbs. pale two-row malt
5 lbs. white wheat malt
1 lb. rice hulls (do not crush)
0.4 oz. Bravo hops at :60 (6.2 AAUs)
0.07 oz. Bravo hops at :30 (1.1 AAUs)
0.27 oz. Sterling hops at :0Shop All Grain System
0.18 oz. Hersbrucker hops at :0
0.31 oz. coriander at :0
0.25 oz. sweet orange peel at :0
0.06 oz. bitter orange peel at :0
Wyeast 3942 – Belgian Wheat yeast
Directions 
Add the crushed malts and the rice hulls (not crushed) to about 3.75 gallons of water at 170˚F. Hold the mash temperature at 152˚F for one hour, then sparge with 170˚F water to collect 7 gallons of wort. Bring wort to a boil, then add hops and spices according to schedule above. Chill wort to 66˚F and transfer to a clean, sanitized fermenter. Ferment at 66˚F for about 5 days, then let fermentation temperature climb to room temperature to complete fermentation. When fermentation is complete, bottle or keg for 2.5 to 3 volumes of CO2.
Have you brewed an Avery White Rascal clone before? What’s your favorite witbier recipe?  
———————————–
David Ackley is a writer, brewer, and craft beer marketing consultant. He holds a General Certificate in Brewing from the Institute of Brewing and Distilling and is founder of the Local Beer Blog.

How to Restart a Stuck Beer Fermentation

Stuck Beer FermentationsIt doesn’t happen often to homebrewers, but every once in while, a beer fermentation stalls out. It’s called a stuck fermentation. Why does this happen?
Any fermentation that is stressed has a chance at getting stuck. Sources of stress can be a lack of yeast nutrition, fermentation temperatures being too high or too low, or the yeast itself is not of good enough quality or quantity to complete the fermentation.
One of the best things you can do is to avoid a stuck beer fermentation in the first place: build a healthy yeast starter, use yeast nutrient, and keep the fermenter within the recommended temperature range for the yeast you’re using. When all else fails, however, you may need to take measures to resolve a stuck fermentation.

How to Restart a Stuck Beer Fermentation

  1. Make sure you actually have a stuck fermentation. Check the hydrometer readings on your beer at least three days apart. Make sure you’ve cleared the hydrometer sample of bubbles, which can affect the reading (just pour the sample a few times between a couple beer glasses). If the reading hasn’t changed and you’re still a ways (more than 5 points) from your estimated final gravity, proceed. But if the reading has changed, just give the beer more time. On the other hand, if the hydrometer reading is static and within about five points of your final gravity, fermentation may just be complete.
  1. Check the fermentation temperature. The yeast may have stalled because the fermentation temperature is too cold. Try moving the fermenter to a warmer area. A five-degree rise in fermentation temperature may convince the yeast to “wake up” and get back to work.
  1. Rouse the yeast. You can also try mixing the yeast back into solution to restart a stuck beer fermentation. Swirl the fermenter or gently stir the beer with a sanitized spoon. Take care not to slosh or stir too vigorously – you don’t want to introduce air into the beer this late in fermentation.Shop Nutrients
  1. Add yeast energizer. Yeast energizer contains nutrients that will often restart a stuck beer fermentation. Start with 1/2 tsp. per gallon, adding directly to the fermenting beer. More can be added later if your fermentation needs an extra boost.
  1. If none of the above work, try racking the beer into a new fermenter and pitching a fresh batch of yeast. Remember to sanitize all of your equipment before doing so.

Stuck fermentations may not happen very often, but knowing what to do when one comes your way will help make sure you don’t miss out on a tasty batch of homebrew.
How do you usually restart a stuck beer fermentation?

———————————–
David Ackley is a writer, brewer, and craft beer marketing consultant. He holds a General Certificate in Brewing from the Institute of Brewing and Distilling and is founder of the Local Beer Blog.

A Great Grape Destemmer At A Great Value

Grape crusher / destemmerRight now we have the Marchisio Manual Grape Crusher / Destemmer for sale at a great value. It can process up to 2,000 pounds of grapes per hour with just a normal, hand-cranking speed.
I say that it’s is a great value because our price includes more than just the crusher / destemmer. It includes free shipping to your door anywhere in the 48 adjoining states. That’s nothing to sneeze at. And, it also includes custom, professional packaging.
I think it’s important to point out that we don’t just throw your grape crusher / destemmer into any old box that it will fit. Instead, we carefully package it in custom-size cartons with styrofoam packing made specifically for destemmer. Everything has a nice, snug fit that can safely and easily handle the ride from our warehouse to your doorstep.
Below are some pictures of our gang packing up one of the manual grape crusher/destemmers we have for sale. As you can see a lot of pride goes into their work. You can also see they take packing your orders very seriously. For example, the hopper goes inside a box… that’s inside a box! We promise it will get to you in perfect condition. That’s a guarantee!
Add to it free shipping, and you have one heck of a deal.
Grape Destemmer being boxedGrape Destemmer being boxed
Manual Grape Crusher / Destemmer
———————————–
Ed Kraus is a 3rd generation home brewer/winemaker and has been an owner of E. C. Kraus since 1999. He has been helping individuals make better wine and beer for over 25 years.

Leigh Erwin: Bottling My Nebbiolo Wine

My Bottled NebbioloHi everyone!
Just as a refresher, last time we caught up my Ken Ridge Classic Nebbiolo was moving along quite nicely, other than the fact that I completely forgot to add the oak granules way back in the beginning of the process.
According to the instructions that came with the Nebbiolo wine kit, the stabilization and clarification stage is only 6 days and then it’s time to bottle, however, due to my travel and unpredictable-at-times work schedule, I wasn’t able to actually bottle the wine until 13 days later. I thought this would be perfectly acceptable, since all the wine was doing at this stage was continuing to clear and if history serves me correctly, the longer I wait, the more clear the wine will be.
Since I have been having so many problems with my filter system, I decided to forgo the filtering for this particular wine and just let gravity do its thing. I do plan on revisiting this filtering system issue at some point in the near future, however, at this particular time, I was not quite ready.
So, other than the delayed bottling date and the lack of filtering, bottling the wine itself, went pretty well. I ended up getting 25 bottles (well, 24 and then ¾ of a 25th bottle) of wine out of the batch, which is probably the best yield I’ve done to date. In the past, you might remember me spilling and otherwise losing some wine, but not this time!
Other than getting sprayed a little in the eye with wine when I over-enthusiastically filled the siphoning hose prior to bottling the wine (good thing I was wearing glasses!), I didn’t lose very much at all this time. I suppose I technically lost 5 bottles since the wine ingredient kit is designed to make 30 bottles, but all in all, I’m very pleased with the yield.
Shop Wine Bottle CorkersI have to say though, my least favorite part about bottle the wine probably has to be removing labels off of old wine bottles prior to cleaning/sanitizing them for use. I know, I know, I don’t HAVE to remove the wine labels, but it just looks so much cleaner and is less confusing if all my bottles have the same (or no) label to begin with.
I put several wine bottles in a sink with piping hot water, and to my surprise all of the labels just sloughed right off without me doing anything. Unfortunately, as I put more wine bottles in, the harder it was to take the labels off and the more I had to scrap off the teeny tiny bits of glue with a knife. I don’t know if this is because the water was cooling down making the glue less likely to “let go” on its own, or if the labels are just all so different that some are easy to take off while others make you want to throw the bottle out the window.
I realize this complaint is extremely minor in the grand scheme of home winemaking, but I feel better now that I got it off my chest. Cheers!
———————————–
leigh_erwin_bioMy name is Leigh Erwin, and I am a brand-spankin’ new home winemaker! E. C. Kraus has asked me to share with you my journey from a first-time dabbler to an accomplished home winemaker. From time to time I’ll be checking in with this blog and reporting my experience with you: the good, bad – and the ugly.

Summer Beer Recipe Roundup

Assorted Summer BeersLooking for some great summer beer recipes? Thirst quenchers for the heat? Brews for your backyard barbeque? Look no further!
Since we spend so much time outdoors in the summer sun, summer beers are typically low in alcohol. They’re refreshing without being overpowering. The flavor profile can vary quite a bit, from light, easy-drinking cream ales, blondes, and lagers to more assertive IPAs and Belgian ales. Whatever you choose, you’ll enjoy it more if you brew it yourself!
Without further ado, below are ten excellent summer beer recipes to get you through the warmer months!
10 Refreshing Summer Beer Recipes

  • Brooklyn Summer Ale Clone – Just because a beer is low alcohol doesn’t mean it has to be low in flavor. For this reason, summer ales are ideal for warm weather. This beer is 4.8% ABV, with just enough citrusy hop character to keep things interesting. A great beer for the pool, the beach, or the backyard.
  • Honey Blonde Ale – Though we included this in our lineup of perfect spring beers, it’s a great fit for summer as well. It’s an easy partial mash recipe boasting sweet honey flavors from both honey and honey malt. English Kent Goldings hops bring a touch of citrus.
  • Buddy Light (Bud Light Clone) – If you’re in need of an easy-drinking lawnmower lager or a tailgate beer, this is a quintessential summer beer recipe. No, it won’t hit you over the head with hops or alcohol – it’s not supposed to. If you can, ferment this one as a lager to smooth it out.
  • Ommegang’s Hennepin Farmhouse Saison Clone – Though on the strong side at 8% ABV, this Hennepin clone is bright gold in color and full of fruity, floral, and spicy character from the use of spices and Belgian ale yeast. All this as an easy-to-brew extract recipe.
  • Bell’s Two-Hearted IPA Clone – If you like IPAs, you’ll agree that they’re always in season. This beer recipe, with both all-grain and partial mash options, is a clone of one of the most popular IPAs around. This beer features exclusively Centennial hops, offering loads of piney and citrusy hop character.shop_beer_recipe_kits
  • Blue Noon (Blue Moon Clone) – Brewed in the style of Belgian witbier, Blue Noon is a pale, citrusy, supremely refreshing clone of the ever popular Blue Moon. Enjoy outdoors with a slice of orange!
  • Hard Apple Cider – Hard cider is easy to make, light, and thirst quenching. If using fresh, unpasteurized juice, use Campden tablets to stabilize it first. Yeast nutrient is also recommended.
  • Paulaner Hefeweizen Clone – A well-brewed German hefeweizen may be the perfect summer beer recipe. Both sweet and smooth with notes of banana and clove, it’s remarkably cooling and drinkable. This clone recipe mimics one of the most popular hefeweiens from Germany.
  • Dogfish Head 90-Minute Clone – At 8.7% ABV and 90 IBUs, this is the biggest beer on the list. Though you probably wouldn’t have more than one or two in a sitting, if you like hoppy beers, this is a delicious recipe that is sure to keep your taste buds happy.

 What are some of your favorite summer beer recipes? Share them in the comment section below…
———————————–
David Ackley is a writer, brewer, and craft beer marketing consultant. He holds a General Certificate in Brewing from the Institute of Brewing and Distilling and is founder of the Local Beer Blog.

How to Calibrate Your Homebrew Hydrometer

Calibrated Hydrometer In BeerHow many times have you dropped your hydrometer in its testing jar or into a fermenter and the hydrometer tapped the bottom? Each time could tap the paper scale just a little bit out of place. Do that several times, and before long your homebrew hydrometer could be pretty far out of whack.
When using scientific gadgets in homebrewing, it’s easy to assume that they’ll do all the hard work for you. Au contraire – thermometers, pH meters, and hydrometers are not foolproof. All instruments should be calibrated periodically. This means you should calibrate you homebrew hydrometer, as well.
I calibrated my hydrometer for the first time in about five years the other day, and boy am I glad I did – it was off by 5 gravity points! Now, because ABV is measured by the difference between two readings, and not a single reading, this discovery doesn’t really affect the ABV data I have on my previous batches. But it does make a significant difference on what I thought was my extract efficiency. (If you’re an all-grain brewer, this is an important number.) Basically, I’ve been thinking my extract efficiency was better than it actually was. Time to take a closer look at my mash procedures.
Anyways, the method for calibrating a homebrew hydrometer is very easy. It’s probably not a test that needs to be done more than once or twice a year, but if you haven’t ever done it, I’d recommend you go ahead and calibrate before your next batch.

How to Calibrate Your Homebrew Hydrometer

  1. Fill your hydrometer testing jar with 60˚F (or 68˚F depending on your hydrometer calibration temperature) distilled water
  2. Suspend your hydrometer in the testing jarShop Hydrometer Jars
  3. Take note of the reading. If it’s over or under 1.000, the difference will be your correction factor. (Ex: if your hydrometer reads 1.002, you’ll subtract .002 from future hydrometer readings.)
  4. Prepare a solution of 28g table sugar and 176g distilled water and adjust the solution to the calibration temperature of your hydrometer.
  5. Use your hydrometer to measure the gravity of the solution. It should be 1.048. Make note of the difference.

If your second reading is off by the same amount as the first reading, then correction is easy. For example, if your first reading is 1.002 (instead of 1.000) and your second reading is 1.050 (instead of 1.048), then all you have to do is subtract .002 from future readings to get the true specific gravity. In the very rare case of the two readings are off by different amounts, you can simply plot the two numbers on a graph, draw a line through the two points, and use the graph as a visual tool for correcting future readings.
Have you calibrated your homebrew hydrometer lately?
———————————–
David Ackley is a writer, brewer, and craft beer marketing consultant. He holds a General Certificate in Brewing from the Institute of Brewing and Distilling and is founder of the Local Beer Blog.

How "NOT" to Win a Homebrew Competition: Common Mistakes

Man Holding Beer Bottles With Gold MedalWe’ve covered plenty of tips and advice for participating in homebrew competitions. But what about homebrew competition mistakes? Is there anything you absolutely shouldn’t do if you hope to hang a few blue ribbons on your wall? You bet!
If you want to do well in homebrew competitions, do not:

  1. Enter your beer in the wrong category – You might brew the best IPA around, but if you submit it as a stout, you won’t do very well. If you enter a BJCP or similar homebrew competition, be sure to read the rules thoroughly and enter your beer into the appropriate category. This is especially important in some of the more experimental styles, like fruit beers.
  1. Serve a beer that tastes like mayonnaise – Sure, entering your beer in a homebrew competition can be a good way to get constructive feedback on your brew. That said, if something tastes absolutely awful, do the judges a favor and don’t submit it. If you’re serving at a homebrew festival, serving bad beer will only turn people off to homebrew. So be sure to taste your beer before entering it into a homebrew competition. If you’re not sure, share it with a beer geek friend or two to get their opinion about what you should do.
  1. Enter a beer with distinguishing marks on the bottle – BJCP-style competitions are blind, meaning that the judges don’t know who submitted the beer. Any beer bottles that have something that might tip off the judges to who submitted the beer may be disqualified, so don’t get caught up in this homebrew competition mistake. To be sure, submit your beer in a plain, 12-oz. brown glass beer bottle with a plain old boring bottle cap.
  1. Submit commercial beer – Trying to pass off commercial beer as your own is just wrong. It’s disrespectful to all the other brewers who worked hard to make the best beer they possibly could, not to mention the brewer who actually made the beer. Besides, how good will you really feel if the beer you submitted actually wins something? Chances are, you won’t feel like much of a winner.Shop Beer Bottles
  1. Slam other people’s beers – If you can say something nice, don’t say anything at all. No one is immune to making bad beer, and anyone can make good beer with enough practice. If you come across a beer that has some obvious faults, do your best to offer the brewer constructive feedback. Find something good to say about the beer, and then make a suggestion about how they might make an improvement.
  1. Give up – Chances are good that you won’t win an award for every beer you submit. That’s okay! Homebrew competitions are a great way to learn how to improve your homemade beer. If you’re really determined to win a homebrew competition, you’ll constantly improve your brewing skills and eventually bring home that gold medal.

What other advice do you have for people entering homebrew competitions? What homebrewing competition mistakes have you made or seen made by others?

———————————–
David Ackley is a writer, brewer, and craft beer marketing consultant. He holds a General Certificate in Brewing from the Institute of Brewing and Distilling and is founder of the Local Beer Blog.

Leigh Erwin: Making A Nebbiolo Wine Ingredient Kit

Making Wine Ingredient KitHi everyone!
If you recall from my last entry, I had just started making another wine ingredient kit – a Ken Ridge Classic Nebbiolo. The primary fermentation was just bubbling away and everything seemed to be going smoothly.
To prepare for secondary fermentation, I was a little curious how I was going to keep the elderberries that came with the kit and were now floating in the wine, from transferring through the tubing into my clean carboy. I suppose if I had used my racking cane with the little red cap on the bottom this wouldn’t have been an issue at all, but since my primary fermenter has a spigot on it, I decided to just hook up the siphoning hose directly to the spigot and transfer away with the flip of a switch.
Since I didn’t have any sort of filter in front of the spigot nor did I have the elderberries in any sort of cheesecloth or bag, I improvised by placing a piece of paper towel in front of the hole of the spigot to keep the large pieces of elderberries from transferring into my clean carboy for secondary fermentation. I don’t know if this was the smartest idea, but the towels were clean and as far as I could tell, sanitary. I think next time this happens when making a wine ingredient kit, I’ll just go ahead and use the racking cane, or maybe fish the elderberries out first prior to transferring the wine over.
Shop Wine Ingredient KitsOther than this little improvisation, secondary fermentation went along just swimmingly. 12 days later, I performed the degassing stage which like secondary fermentation, went along just fine.
The only issue that came up here is that only now did I realize that I forgot to add the oak granulars way back in primary fermentation! I don’t know how I managed to do that, other than the fact that when I opened the drawer that the granulars were in, I noticed they were all the way in the back of the drawer so I had somehow missed them the first time around. Smooth.
While I was temporarily upset that I forgot to add the oak while making this wine ingredient kit, I decided that it didn’t really matter too much and that I would just be making a very fruit forward Nebbiolo instead of a more standard style. These little mistakes can come back to bite you sometimes, while other times, it doesn’t really matter too much if the wine is most likely only going to be consumed by you and your partner!
———————————–
leigh_erwin_bioMy name is Leigh Erwin, and I am a brand-spankin’ new home winemaker! E. C. Kraus has asked me to share with you my journey from a first-time dabbler to an accomplished home winemaker. From time to time I’ll be checking in with this blog and reporting my experience with you: the good, bad – and the ugly.

Black Lager Brew Day: Evaluation and Recipe Adjustments

Black LagerIt’s been just over three weeks since I bottled my black lager (a.k.a. schwarzbier). Though I’m generally happy with the beer recipe I used, my tasting notes have caused me to take a closer look at my all-grain brewing procedures and my methods of water chemistry adjustment (it’s a work in progress!).
First, let’s look at the tasting notes from evaluating this black lager beer:

  • Aroma: bready, with note of chocolate, dark fruit, and lager yeast
  • Appearance: dark brown with a tan head, brilliant clarity
  • Flavor: malt-forward and dry with a carbonic bite and some hop bitterness
  • Mouthfeel: medium-light bodied with prickly carbonation
  • Overall: solid recipe, no fermentation faults, but mineral content seems strong

So what do I mean by that “carbonic bite” and “mineral content seems strong”? It’s a little hard to explain, but I’ll do my best.
Carbonated soft drinks contain obscene amounts of sugar – one 12-oz. can has the equivalent of 40 packets of sugar. Part of the reason that sodas don’t taste as sweet as they are is the carbonation. The dissolved carbon dioxide reacts to create carbonic acid, which balances out some of the sweetness. What I taste is similar to the dry, slightly acidic sensation you get when drinking soda.
The reason I’m pretty sure that what I taste comes from carbonate comes from my brewing notes. Looking back over my brew day, I recall that I added 14 grams of chalk to my water in an attempt to mimic the hard water of Munich. In retrospect, 14 grams seems like a lot. What I failed to realize is that brewers in Munich often decarbonated the water before brewing with it.

What is Decarbonation?
shop_beer_recipe_kitsDecarbonation simply reduces the amount of carbonate in water. To decarbonate brewing water, brewers in Munich (and other areas with hard water) would boil their brewing water, which caused the chalk to come out of solution and settle to the bottom of the brew kettle. Then the decarbonated water could be removed for brewing. (You can read more about decarbonation here.)
It seems that brewers in Munich often decarbonated their water when brewing lighter colored beers, like Maibock or Munich Helles, but it’s unclear whether or not they traditionally decarbonated their water when brewing schwarzbier (if you have this information, I’d love to see it!).
So based on what I’ve discovered and the tasting notes from evaluating this black lager beer, what would I do next time around to make this it better?
First, I’d cut that chalk addition in half, maybe targeting a more balanced water profile than what I used. I think in general, homebrewers should take care not to go overboard with water additions. Also, I wouldn’t mind a little more sweet, bready character in the beer. Either using more Munich malt or increasing the mash temperature could help with this.
Have you ever brewed a black lager? What advice do you have about water amendments?
The Rest of This Story:
Preparing for a Black Lager Brew Day
Black Lager Brewday: Double Infusion Mash
Bottling My Black Lager Beer
———————————–
David Ackley is a writer, brewer, and craft beer marketing consultant. He holds a General Certificate in Brewing from the Institute of Brewing and Distilling and is founder of the Local Beer Blog.