5 Tips for Organizing Your Home Brewery Setup

Cluttered Home Brewery Supplies
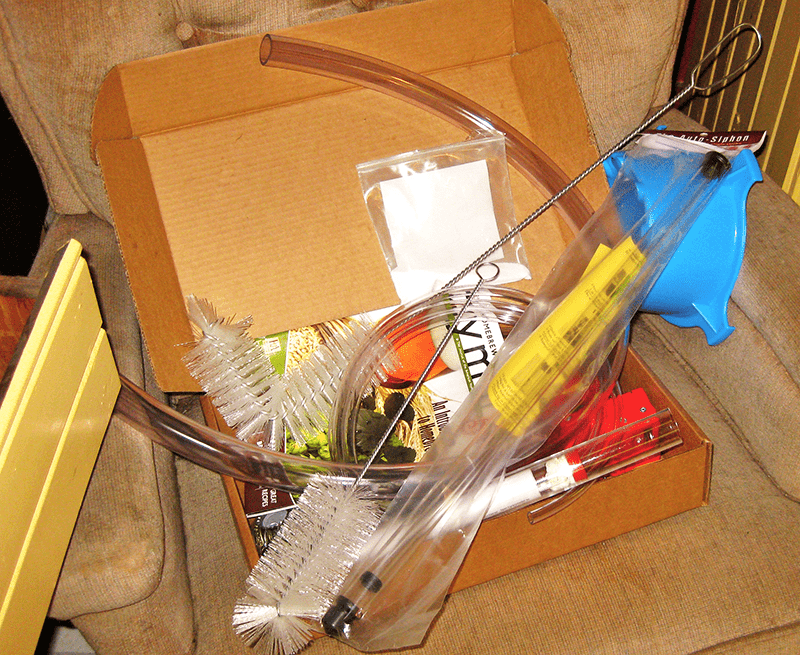
Every time I brew, I dig through all kinds of odds and ends to find what I’m looking for. I basically have a couple small boxes stuffed with all my home brewery supplies – just piled in on top of each other. I’m an apartment brewer right now, so I don’t have a lot of space, but there’s got to be a better way. Can you relate?
In a search for ways to keep my own homebrew gear neat and tidy, I scoured the web for tips on organizing my home brewery setup.
Here’s what I discovered:

  1. If It’ll Hang, Hang It
    Stirring spoons, racking canes, bottle brushes, and the like lend themselves to hanging. For a small investment, a pegboard and some hanging pegs will help store some of the more oddly shaped items in your home brewery. You might consider labeling the pegboard or drawing outlines for various pieces of equipment so that everything has its place.
  1. Go Vertical
    Plastic and wire shelving units aren’t very expensive and help to make the most of small closets and spaces along walls. If they’ll fit, try placing the largest items on the top shelf. If you have a spare table in the garage or basement, try building a shelf underneath for storing your homebrew gear.
  1. Get Creative
    You might need to think outside the box to maximize your space when organizing your home brewery supplies. For example, I found one person who uses an old office filing cabinet to store empty bottles. If you’re a handy do-it-yourselfer (which is likely if you’re a homebrewer), you could try designing your own storage unit!
  1. Compartmentalize
    I have toolbox with customize-able compartments for different tools. Something like this is a good way for organizing home brewery supplies into different categories: finings, cleaners and sanitizers, rubber stoppers, bottle caps, and airlocks, etc.Shop Conical Fermenter
  1. Container City
    A few containers can go a long way. I find that the little bags of bottle caps, DME, priming sugar tend to pile up. I transferred these to glass jars or Tupperware containers, just to make things fit together a little better. I also classified different containers for things I’ll only use on brew day, only use on bottle day, or all-purpose equipment and supplies.


Bonus tips and advice for organizing your home brewery setup:

  • To preserve their alpha acids, hops should be stored in the freezer in a sealed plastic bag.
  • Keep spare grain in retired 5 gallon buckets. Plus, you’ll save money if you buy your grain in bulk.
  • It’s not recommended to store plastic buckets inside each other. If one has a scratch on the outside, it could scratch the inside of another bucket, creating a nice little home for rogue bacteria and yeast.

If all else fails, take this advice: appease your significant other by making them some beer!
What tips do you have for organizing your home brewery setup and supplies?
Til next time…Cheers!
—–
David Ackley is a beer writer, brewer, and self-described “craft beer crusader.” He holds a General Certificate in Brewing from the Institute of Brewing and Distilling and is founder of the Local Beer Blog.

Fermentation Vessels: Buckets vs. Carboys For Homebrewing?

Homebrew Fermenting In CarboyIf you’ve ever shopped around for a new fermenter, you’ve probably asked yourself this question: What are the advantages and disadvantages of fermentation buckets vs. carboys?
As a beginning homebrewer, it may be hard to find a definitive answer to the question. Ask other brewers, and you’ll probably get a range of opinions. It seems that everyone has their preference.
But there’s a reason that homebrew equipment kits include a bucket fermenter for primary fermentation and a carboy for secondary fermentation. It all comes down to a few pros and cons:

Buckets

  • Wide mouth offers easy access – The design of a fermenting bucket makes it easy to pour into from the boil kettle – you don’t have to mess with a funnel. It’s also easy to open the lid to pull hydrometer samples or add dry hops or other flavorings.
  • Lots of headspace – Buckets offer lots of room for krausen during primary fermentation.
  • Plastic is lightweight and unlikely to break – Buckets are easier to move than glass. Plus, if you drop one, it won’t shatter and send you to the ER.
  • Easy to clean – It’s easier to get inside a bucket to clean the insides. If you need to, you can really get in there and scrub.Shop Fermenters

Carboys

  • Great for bulk aging – With carboys, it’s easy to minimize headspace. Reducing the amount of beer that comes in contact with air greatly reduces the chances of oxidation and infection.
  • A window to your fermentation – Carboys are clear, so you can see what’s happening inside.
  • They come in glass and plastic options – Some brewers feel like they get better flavor when fermenting in glass.
  • Don’t provide much space for primary fermentation – To give the krausen room to grow, you may need to rig up a blowoff tube.
  • Can be difficult to clean – Since the opening at the top is so small, it can be hard to get inside for a deep clean. We recommend using a carboy brush or an automatic carboy washer to really get inside.

Buy Carboys
Conclusion
Though both fermentation buckets and carboys work well for fermenting beer, buckets tend to be best for primary fermentation and carboys for secondary fermentation and aging. If you anticipate needing to get inside the fermenter during fermentation (to add dry hops or to stir a mead), a bucket may be your best bet. If you plan to age a beer for a long time after primary fermentation, consider using a carboy to minimize headspace. So as you can start to see there is some commonsense arguments for using a fermentation bucket vs using a carboy.
Which do you prefer: fermentation bucket or carboy?
—–
David Ackley is a writer, brewer, and craft beer marketing consultant. He holds a General Certificate in Brewing from the Institute of Brewing and Distilling and is founder of the Local Beer Blog.

Keeping Fruit Wines In Fruity Balance

Balancing Wine Making Fruit
Thank you for your wine making newsletter each month. It is very informative and helpful to me in my winemaking.  I have a question, “How do I keep the  fruit flavor in my wine? I end up with about 13 percent alcohol content but am losing the fruit flavor. Could you help?
Ed H.
—–
Hello Ed,
Thank you for all the kind words. We try very hard to bring useful, relevant information to the home winemaker.
What your question really involves is the basic balance of the wine. There are three primary elements in a wine’s basic balance profile: fruit flavor, alcohol and sweetness.
Obviously, the amount a fruit that you use in a wine recipe will affect the wine’s fruitiness. The more fruit in the wine recipe, the fruitier the wine will be, but there are limits to how far you can take this.
Using too much fruit in an attempt to increase the wine’s fruitiness can create a wine that is sharp or tart tasting. This is caused by excess fruit acid – the acid that is in the fruit. It can also create a wine that takes an incredible amount of time to completely age. So, there is only so much fruitiness to be had in a given wine recipe.
One way of maximizing the amount of fruit you use without making it too acidic is to using an acid testing kit. This will allow you to monitor how much acid is in the wine. The directions that come with it will tell you what range to shoot for.
Shop Acid Test KitWhile adding more fruit increases the fruitiness of the wine, alcohol decreases it. This happens simply because the alcohol is numbing the tongue making it less sensitive to fruit flavors. This is why you will typically find among wine recipes in various wine making books and on the web, that the higher the alcohol level, the more fruit the wine recipe will call for.
To keep a handle on your wine’s alcohol level, you will want to use a wine hydrometer. The scale on the hydrometer will tell you how much alcohol can be made with the beginning sugars that are in the wine must.
Sweetness also plays a role in balance. During a fermentation all the sugars are turned into alcohol, even the sugars that come from the fruit itself. Removing the sugars will lower the fruity impression of the wine, dramatically.
The good news is the sweetness of the wine can easily be corrected at bottling time. By adding a little sugar syrup solution you can bring back the fruitiness. Just a very slight amount of sweetness can bring out a lot of fruitiness in the wine. You don’t necessarily need to make the wine sweet. You just need to take the dry edge off the wine.
Add the sugar to taste and then also add potassium sorbate. This is a wine stabilizer that will keep the wine from fermenting the newly added sugars. This is what I recommend doing with your current batch.
Buy HydrometersAs for future batches, you will want to lower you target alcohol level a little… maybe 11% instead of 13%. This will make a noticeable difference in the fruitiness of your wine. It will seem more lively and less watery.
By working with these three basic elements of a wine: fruit flavor, alcohol, and sweetness, you can control how much fruity character your wine will, or will not, have. It is up to you to create a wine the way you like it, with the amount of fruitiness you prefer. It’s all part of learning how to make your own wine.
Happy Wine Making,
Ed Kraus
—–
Ed Kraus is a 3rd generation home brewer/winemaker and has been an owner of E. C. Kraus since 1999. He has been helping individuals make better wine and beer for over 25 years.

Easy American Wheat Beer Homebrew Recipe (Extract w/ Grains)

Man Holding Wheat BeerSince we’re about to be in the clutches of the summer heat, an American wheat beer may be something you want to consider brewing. It’s a pale, refreshing beer exhibiting the soft, somewhat sweet, grainy flavor of wheat. A typical American wheat beer recipe will produce a beer with low to moderate alcohol content and a low to moderate hop character. It’s a sessionable, easy-drinking beer that you’ll enjoy in spite of the summer heat. Some popular examples of this style include Bell’s Oberon, Boulevard Unfiltered Wheat, and Goose Island 312 Urban Wheat Ale.
The defining characteristic of American wheat beer is the use of — you guessed it — wheat. Wheat is an adjunct grain often used for flavor, body, and head retention. Extract brewers will find it easiest to use wheat malt extract. All-grain and partial mash brewers mash want to consider adding rice hulls to their mash, as the higher protein in wheat can sometimes lead to a stuck mash. Read Brewing with Wheat for more information on working with this special grain.
Unlike German hefeweizen, American wheat beer does not show the banana/clove combination of flavors from hefeweizen yeast. American yeast is more appropriate, allowing the subtle flavors of hops and grains to come through. The “Chico” strain of yeast is the classic choice for an American wheat bee recipe, but of course you’re welcome to experiment with any style of yeast you like.
The soft, subtle texture of American wheat beer makes it a great candidate as a base for fruit beer. Strawberry, blueberry, raspberry and apricot are all good options. Read A Simple Guide to Making Fruit Beers for some tips on how to add fruit to your homebrew.
Read to brew up a cool, refreshing American wheat beer? Try the recipeshop_liquid_malt_extract below, or consider brewing the Brewer’s Best American Pale Wheat beer kit.
Happy brewing!

American Wheat Beer Recipe
(5-gallon batch, extract with grains)

Specs
OG: 1.052
FG: 1.012
ABV: 5.2%
IBUs: 21
SRM: 4.5
Ingredients 
6.6 lbs. Steam Freak Wheat LME
1 lb. Briess pilsner malt
.5 lb. flaked wheat
1.5 oz. Willamette hops at :60
shop_hops.5 oz. Cascade hops at :0
1 pack Safale US-05 ale yeast
Directions 
Heat three gallons of clean, chlorine-free water to 150˚F. Place crushed pilsner malt and flaked wheat in a muslin grain bag and steep for 30 minutes. Remove grains and stir in liquid malt extract. Bring wort to a boil, keeping an eye on the kettle to avoid a boil over. At the start of the 60-minute boil, add the Willamette hops. At the end of the boil, remove kettle from heat, add the Cascade hops, and immediately start to chill the wort using an ice bath or an immersion wort chiller. Bring wort to 80˚F or below and mix in enough cool, chlorine-free water to make five gallons of wort. Stir well to aerate, then pitch yeast. Ferment at 68-70˚F for 2-3 weeks, then bottle or keg.
Are you a fan of wheat beers? Do you have an American wheat beer recipe you’d like to share below?

—–
David Ackley is a beer writer, brewer, and self-described “craft beer crusader.” He holds a General Certificate in Brewing from the Institute of Brewing and Distilling and is founder and editor of the Local Beer Blog.

Brewing Beer With Herbs: Workin' Your Green-Thumb!

Beer With HerbsWhen focusing on flavors in beer, hops and malt usually get the most attention, often followed by fruit, chocolate, vanilla, and wood. But creating delicate layers of taste and aroma can be as easy as brandishing your green thumb. Try brewing beer with herbs!
For me, I’ve found success with two herbs I’m able to grow in my backyard: rosemary and basil. Summers are hot here in North Carolina, but with a little daily attention, it’s been easy for me to grow more than enough of these herbs to use as late additions to the boil. Remember: the key to unlocking the highest quality flavors from these ingredients is to use them as fresh as possible, so brewing beer with herbs you’ve grown yourself just makes sense.
Here are a couple ways to utilize these easy-to-grow herbs for a new beer recipe.

Homebrewing with Rosemary
There are many varieties of rosemary to choose from, but the easiest for homebrewing purposes may be the “common” varietal, which does well in many climates and is sun-tolerant. If you’ve ever used rosemary for cooking, you’ll recognize it’s piney characteristic. That makes it a good complement to certain kinds of hops, especially ones with spicy or piney characteristics.
If you want to enhance piney flavors of your hop bill, consider using some rosemary with Chinook or Columbus hops. Alternatively, the piney aspect of rosemary can supplement citrus characteristics – think of how well rosemary works with lemon when preparing food dishes. In that case, rosemary can work well with Cascade, Citra, and Simcoe hops. About half an ounce of freshly cut rosemary will do the trick. You don’ t want to over-do-it. Balance is a big part of brewing beer with herbs.
I’ve only used rosemary with IPAs, but pale ales or even saisons might be a good recipe option. Here’s an IPA extract beer recipe to try with rosemary:

Recipe: Piney the Elder IPA
(5-gallon batch, extract with specialty grains)Shop Beer Flavorings
Specs
OG: 1.065
FG: 1.016
ABV: 6.4%
IBUs: 55
SRM: 10
Ingredients
1 lb. Caramel 40 malt
9 lbs. Golden light liquid extract
1 oz. Columbus hops at :60
1 oz. Chinook hops at :15
1 oz. Columbus hops at :5
0.5 oz. freshly cut rosemary at knockout
1 oz. Chinook dry hop (optional)
Wyeast 1056: American Ale yeast
Directions
Steep the grains in 2.5 gallons of water at 150˚F for 30 minutes. Remove the grains, mix in liquid malt extract, and bring wort to a boil. Add hops and rosemary according to schedule. At end of boil, cool wort to 70˚F or below and transfer to a clean, sanitized fermenter. Add enough clean water to make 5 gallons of wort. Stir vigorously for 1-2 minutes and pitch yeast. Ferment at 70˚F.

Homebrewing with Basil
The basil you grow at home or find in the store offers a delicate sweetness and a twinge of spice, a flavor combination that often pairs well with wheat beers. I’ve found great success mixing the flavor of basil with honey.
Shop HopsOnce again, when brewing beer with this herb think of using it in terms of cooking in the kitchen. Its sweetness mixes well with Italian dishes, cuts some of the heat of Indian food, and enhances the pleasant, savory feeling of meat. Similarly, using basil in home brewing should enhance the beer rather than dominate it.
The trick with basil is to focus on using it at the knockout/flameout stage of the boil or as a dry-“herbing” option. If it’s boiled too long, it will bring unwanted bitterness to your beer.
I’ve had success with this beer recipe adapted from the July/August 2011 issue of Brew Your Own magazine, which balances some of the basil flavor with medium-range alpha acid of Cascade hops.

Recipe: Honey Basil Ale (Bison Organic Beer Honey Basil clone)
(5-gallon batch, partial mash recipe)
Specs
OG: 1.052
FG: 1.010
ABV: 5.5%
IBUs: 19
SRM: 6
Ingredients
3.3 lbs. light, unhopped, liquid malt extract
2 lbs. light dried malt extract
1 lbs. two row pale malt
0.75 lbs. Crystal malt 20 L
0.7 lbs. Carapils malt
1 oz. Cascade hops at :60
0.6 oz. basil leaves at :10
0.5 to 1 lb. honey at :5
0.6 oz. basil leaves at :0
Wyeast 1056: American Ale yeast
Directions
Steep the grains in 2 gallons of water at 148˚F for 30 minutes. Remove grains from wort. Stir in liquid and dry malt extracts and begin boil. Add hops, basil, and honey as detailed above. After boil, add the wort to two gallons of cold water in the fermenter and top off to make five gallons. Stir well to aerate and pitch yeast. Ferment at 70˚F.
Interested in brewing beer with herbs? Check out Brew Your Own Herb Beers!
—–
Bryan Roth is a beer nerd and homebrewer living in Durham, North Carolina. You can read his thoughts on beer and the beer industry on his blog, This Is Why I’m Drunk, and send him suggestions on how to get his wife to drink craft beer via Twitter at @bryandroth.

How to Start Homebrewing – Basic Brewing Instructions for the Absolute Beginner

Steam Freak Starter KitWant to start homebrewing but don’t know where to begin? Allow me to walk you through the basic brewing instructions.
Brewing is the process of mixing water, malt, and hops to create a sweet, sugary mixture called wort. When yeast is added, it consumes the sugar in the wort and ferments the wort into beer. As a beginner, you can brew very simply using hopped malt extract. All you need to do is mix the malt extract with water, add the yeast, and allow the beer to ferment for about two weeks. At that point the beer is ready to be bottled. Two to three weeks later, most low- to mid-gravity beers will be ready to drink.
Below, find step-by-step basic brewing instructions for creating your first batch of beer made from malt extract.

  1. Assemble your equipment – A Steam Freak Beer Making Starter Kit includes all the equipment you need to get started homebrewing. (I actually still use most of the equipment I bought over five years ago!)
  1. Choose a beer recipe – The Steam Freak Starter kit also includes your first recipe kit. Start with something you and your friends will enjoy drinking. Any of these can recipe extract kits also work well for a first batch. Dark beers are generally more forgiving, so I often recommend starting with a brown ale or Mexican Cerveza.
  1. Clean the equipmentShop Beer Recipe KitsYou wouldn’t cook in a dirty pan would you? The same goes for brewing. Your equipment should be thoroughly cleaned and sanitized before brewing.
  1. Mix the ingredients – The exact procedure will vary depending on the recipe you’re starting out with – just follow the basic brewing instructions that come with the kit. Some recipes are boiled on the stove before fermenting, in which case you’ll need a brew kettle. Others (like the Munton’s Connoisseur kits) are just mixed with water, sugar, and yeast right in the fermenter. These are far and away the easiest way to brew.
  1. Allow to ferment for about 2-3 weeks – Just leave it alone at room temperature.
  1. Bottle – This is one of the more labor-intensive parts of homebrewing. Basically, you will mix about 4-5 oz. of priming sugar with a cup of water and place it in the bottling bucket (the one with the spigot). Then, transfer the beer from the fermenter to the bottling bucket. Next, attach a transfer hose and bottle filler to the spigot and fill and cap about 48-50 twelve-ounce bottles. Your beer recipe kit will come with instructions for how to do this.
  1. Wait 2-3 weeks and enjoy! – During this time, the yeast in the beer consumes the priming sugar and carbonates your homebrew.

That wasn’t so hard, was it?! Now you have several weeks worth of delicious, homemade beer!
Have any questions about these basic brewing instructions? Feel free to leave a question in the comments below!
—–
David Ackley is a writer, brewer, and craft beer marketing consultant. He holds a General Certificate in Brewing from the Institute of Brewing and Distilling and is founder of the Local Beer Blog.

Homebrew Hacks: Getting More Beer With Less Kettle Space

Man Pouring Wort Into PaleSooner or later we all reach the limit on our brewing equipment. When it comes to brew kettles, standard procedure is to start with a 5-gallon kettle for partial mash brewing, then eventually upgrade to an 8-, 10-, or 15-gallon kettle in order to advance to all-grain brewing and brew bigger batches.
But brew kettles can be a big investment. To bridge the gap between your current kettle and the next size up, you can utilize high gravity brewing to brew more beer with less space. In other words, you can brew 15 gallons of beer with your 10-gallon kettle. This will allow you to maximize your brew kettle output before moving to a larger size kettle.
So how does this work?
Think about your typical 5-gallon, partial mash recipe kit. Usually what we do is mix the ingredients into a 3- or 4-gallon boil, then add water (preferably clean, chlorine-free water) to the fermenter to bring up the volume to five gallons. This can also be done with your own homebrew recipes and on a larger scale.

Scaling the Beer Recipe to Maximize Brew Kettle Output

Scaling the grain and/extract side of the recipe is pretty straightforward. As a homebrewer, all you need to do is increase the malts and malt extracts in proportion to the batch size. Say for example the five-gallon recipe you usually make in your 7.5-gallon kettle uses 6.6 lbs. of malt extract. To brew a ten-gallon batch, still use the same amount of water for the boil, but double the malt extract. After diluting in the fermenter, your original gravity should be pretty close to what it is when you brew the five-gallon batch. (Things are a little more complicated when brewing all-grain, but the same principles apply.)
The tricky part with scaling recipes into high gravity versions is controlling hop bitterness. IBUs are directly influenced by hop utilization, which is a factor of boil gravity and boil time. The higher the gravity of the boil, the lower the hop utilization. To compensate for the lower hop utilization, we need to do more than double the hops to arrive at the same IBUs.
Shop Brew KettlesTo figure out how much hops to use, work backwards. Say we want the finished beer to have 40 IBUs. We’re planning to brew five gallons of a 1.080 beer, which will be 1.040 after diluting with five gallons of water. That means the IBUs of the brew pre-dilution should be 80. As an example, it may only take 1.5 oz. of hops to reach 40 IBUs when doing a full-volume boil, but it will take 4.3 oz. of the same hops added at the same time to impart the same amount of bitterness in the higher gravity brew. These calculations can be tricky – use an IBU calculator to help you sort it out. In some cases you may want to add half the malt extract at the end of the boil (a late addition) in order to maximize hop utilization.

Limitations of High Gravity Brewing
To simplify the calculations above, I’ve used a 1:1 ration for dilution (one gallon dilution water for every gallon of wort). In reality, this is about the upper extreme of how much you’d want to dilute a homebrew. Diluting a high gravity boil can certainly be effective, but you want to avoid creating a beer that tastes watered down. Diluting before fermentation will help to avoid this.
Have you every tried brewing high-gravity beers to maximize your brew kettle output? How did it go?
—–
David Ackley is a writer, brewer, and craft beer marketing consultant. He holds a General Certificate in Brewing from the Institute of Brewing and Distilling and is founder of the Local Beer Blog.

8 Tips for Taking First Place in a Homebrew Competition

Judges in a homebrew competition.
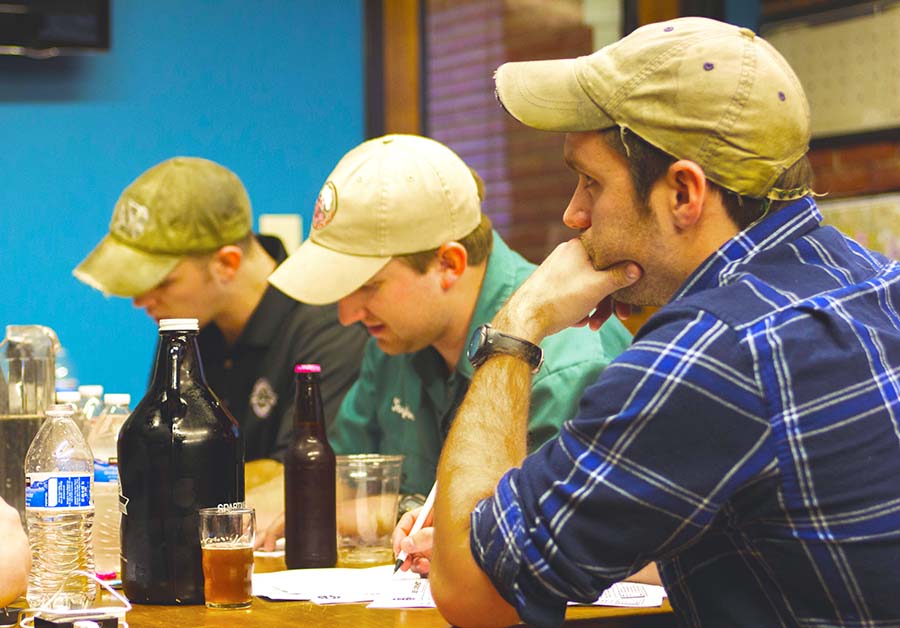
Those homebrewers with a competitive mindset will naturally be drawn to participating in homebrew competitions. Those that aren’t should still consider participating. Not only is it a great way to get feedback on your beers, it’s a fun way to interact with other beer lovers and an opportunity to have some pride in your hard work.
If you’re ready to compete with other homebrewers, consider these tips for winning in a homebrew competition. Use these 8 pieces of advice to improve your chances at winning top prize.

Know Your Competition

  1. First, keep in mind that there are generally two kinds of homebrew competitions: Those that are judged by the BJCP Style Guidelines, and those that aren’t. Your approach may vary depending on what kind of competition your participating in.

Tips for BJCP Homebrew Competitions

  1. Brew to style – This is one of the most important tips for a homebrew competition I can give you. Judges will likely be reading directly from the style guidelines as they’re judging your beer. To be successful in these types of competitions, it’s crucial that your beer is an exceptional example of a given style. Designing Great Beers is a good starting point for developing recipes according to style guidelines. If you have a beer that just kind of fits in a category, you’re better off submitting it in the Specialty Beer
  1. Plan aheadShop Steam Freak Kits – Ideally, you’ll have plenty of time before the competition to formulate a recipe based on the style guidelines. Better yet, brew the beer more than once so you can really dial it in.
  1. Watch out for the 2014 Style BJCP Guidelines – The BJCP announced changes to the BJCP Style Guidelines, that went into effect in 2015. Some competitions may be quicker than others to transition to the new guidelines, so be sure to check with your competition organizer. Review the changes at BJCP.org.
  1. Become a BJCP Judge – Learning to become a beer judge will help you become very familiar with how these competitions work. It will also expose you to a wide range of styles and improve your sensory skills.

Tips for Festival Style Homebrew Competitions

  1. Be creative – For non-BJCP homebrew competitions, you can throw the style guidelines out the window. Sometimes the competitions will have other qualities they’re looking for: best beer with local ingredients, best beer name, best IPA, best Belgian beer. The goal here is to simply make the best beer you can make. Many of these types of competitions will also have a People’s Choice Award or a Best In Show decided by celebrity judges. In this case, it often helps to showcase an unusual technique or ingredient that will make your beer stand out from the crowd. So, the number one tip in these types of homebrew competitions is to be creative.
  1. Market your beer – Colorful, easy to read signs are eye catching and let people know what you’re pouring. Creative, tongue-in-cheek names will often get people’s attention.
  1. Market yourself – Smile and invite people to come taste your beer – the more people try your beer, the better your chances at a People’s Choice Award. Above all else, have fun!Shop Beer Growlers

For many, homebrew competitions are one of the most enjoyable aspects of homebrewing. Hopefully, these tips for winning a homebrew competition will make it even more fun. Have you participated in homebrew competitions before? What tips would you add to the list?
—–
David Ackley is a beer writer, brewer, and self-described “craft beer crusader.” He holds a General Certificate in Brewing from the Institute of Brewing and Distilling and is founder of the Local Beer Blog.

Sweet Idea! Adding Fruit To Wine Kits

Fruits In Wine Glasses
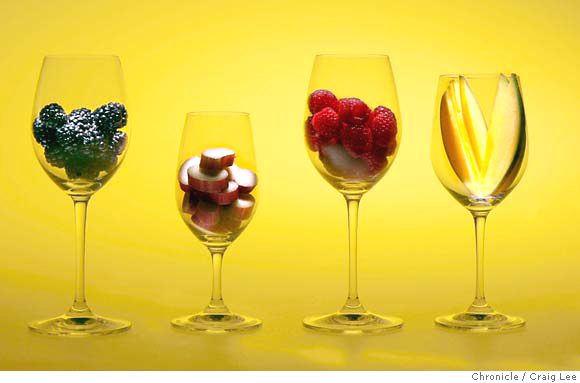
We did a Chardonnay wine kit recently. The results were very good, by all accounts. What is your position on mixing peach, apricot or even persimmon into a batch of that? Wondering. Thanks in advance for your time.
Jeff
—–
Hello Jeff,
Adding fruit to wine kits is a great way to enhance any attractive characteristics that a particular grape may possess. For example: raspberries with Merlot grapes, strawberries with Zinfandel, pears with Pinot Grigio… The options are endless and there is always room for experimentation. It’s a great way to have even more fun while making these wines.
Usually when a home winemaker wants to make a wine in this style, they will mix the wine kit and fruits together in the fermenter and proceed with the fermentation from there. After the primary fermentation has completed, the fruit is then removed as the wine goes into a secondary fermenter. However there is another – more professional – way for adding fruit to wine kits. One that will give you much better control over the end product. In other words, less chance of messing up.
Instead of mixing the grape concentrate and fruit together at the beginning of fermentation, make the chosen fruit into its own wine, separately.
In the case of your Chardonnay, you could make some peach wine – one or two gallons of it. When it is time to bottle, you can experiment with blending some or all of the peach wine with it. Buy Wine Ingredient Kits
How much peach flavor you add is a matter of personal taste. You can add a little or a lot. You could do sample taste-testings with varying ratios of the two wines. This is the real power of making the two wines separately. You have complete control over the outcome. If you had added some fruit like peaches at the beginning of fermentation, all you could do is guess as to how much peach to add and hope for the best.
By adding fruit to wine kits in this way, you will have total control over how much fruit flavor is in the wine. This method will also allow you to safely mix blending samples together without risking your entire batch.
We have more information about blending wines together in an article on our website that you may want to take a look at: Blending To Improve Homemade Wines. This article should give you some better insights as to what you are look for when putting two wines together.
As far as whether to try peach, apricot or persimmon, all I can say is that I have seen the most success using peach verses apricot and I have never tasted persimmon added to a Chardonnay. But having said this,Buy Fruit Wine Bases I would never tell you not to try any combination. There are no wrong answer when adding fruit to wine kits. Home wine making is about being creative, experimenting and seeing what you can come up.
Happy Wine Making,
Ed Kraus
—–
Ed Kraus is a 3rd generation home brewer/winemaker and has been an owner of E. C. Kraus since 1999. He has been helping individuals make better wine and beer for over 25 years.

Belgian Abbey Single Recipe (Extract with Specialty Grains)

Glass Of Home Brewed Abbey SingleIf you’re a fan of Belgian Abbey beers, you’ve probably heard of dubbel, tripel, and witbier. But what about Belgian Abbey single? If you like these beers you’ll love brewing the Belgian Abbey single recipe below.
You may have a hard time finding a beer in Belgium called single. You’re more likely to hear it referred to as table beer or just Belgian ale. But with the stronger Belgian ales referred to as dubbel and tripel, many American brewers have grown accustomed to calling the most sessionable one a single.
These Belgian pale ales are routinely brewed for daily consumption, often by monks. They are usually about 5% ABV, pale or light amber in color, and very complex and aromatic due to fruity and spicy characteristic from Belgian ale yeast. A single is the type of beer you might enjoy with lunch. As such, it shouldn’t be too heavy or alcoholic, but still features the aromatic complexities of Belgian ale yeast. Two of the best American interpretations I’ve come across are made by Hardywood Park Craft Brewery and Starr Hill.
For the homebrewer, there are a few advantages of brewing Belgian beer:

  • The complex flavors demonstrate the versatility of different yeast strains.
  • Belgian ales can often be fermented warmer than English- or American-style beers, making them convenient to brew at room temperature.
  • They offer an opportunity to brew with spices or adjunct sugars, though brewers should show restraint.

Are you looking to brew an easy-drinking Belgian ale? Try the Belgian Abbey Single recipe below!
shop dried malt extract
Belgian Abbey Single Recipe
(five-gallon batch, extract with specialty grains)
Specs
OG: 1.049
FG: 1.012
ABV: 4.8%
IBUs: 28
SRM: 9
Ingredients
3 lbs. light dry malt extract 
3 lbs. light dry malt extract (late addition)
1 lb. Dingeman’s biscuit maltShop Hops
.5 lb. Dingeman’s aromatic malt
1 oz. Styrian Gold hops at :60
1 oz. Saaz hops at :15
1 oz. Saaz hops at :5
1 packet Wyeast 1762: Belgian Abbey II
Directions
The day before brewing, prepare a two-liter yeast starter. On brew day, steep the crushed biscuit and aromatic malt in a steeping bag in one gallon of water at 150˚F for 20 minutes. Remove steeping bag, then add half the DME and enough clean, chlorine-free water to make three gallons of wort. Bring to a boil and add hops according to schedule. At the end of the boil, mix in remaining dried malt extract. Chill wort and transfer to a clean, sanitized fermenter containing about 2.5 gallons of clean, chlorine-free water. Top up with enough water to make 5.5 gallons. Mix well with a sanitized stirring spoon to aerate. Pitch yeast starter, seal the fermenter, and ferment at 70-75˚F. After 2-3 weeks, bottle with priming sugar or transfer to a keg and force carbonate.
—–
David Ackley is a beer writer, brewer, and self-described “craft beer crusader.” He holds a General Certificate in Brewing from the Institute of Brewing and Distilling and is founder and editor of the Local Beer Blog.