 When should I filter my wine? I have a wine that is about 4 months old and I’m wondering if it is to early to filter it.
Don
—–
Hello Don,
When first learning how to make your own wine it is important that you don’t become too impatient, however since the wine has been bulk-aging for 4 months, I would say you’ve been patient enough. It would be fine to filter your wine at this time.
One of the more common wine making tips I share with beginning winemakers is:
“Never filter a cloudy wine. The wine should be done fermenting and look clear before filtering”.
You can verify that the wine is done fermenting by testing it with a wine hydrometer. You should be getting a test reading of .998 or less. For more information about this you may want to take a look at the article, “Getting To Know Your Hydrometer” listed on our website.
A wine filter is not designed to remove visible particles from a wine. A wine filter is designed to take out very fine particles, smaller than the human eye can see. This gives the wine a beautiful, polished appearance. It brightens the wine.
With this in mind, it is important to make sure that all the sediment that can fall out of the wine on its own has done so, otherwise the extremely fine filter pads that are used in the wine filter will clog up very quickly.
 If you are making wine from wine concentrates, the sediment will fall out fairly easily on its own in a week or two, but if you are making wine from fresh grapes or some other fruit, getting all the sediment to drop out can sometimes be challenging. For this reason, it is suggest that you treat the wine with bentonite before filtering.
Speedy bentonite is a fining agent that will help speed up the natural falling-out of the sediment so you can filter your wine sooner and more efficiently. To learn more about fining agents you may want to reading the article, “Using Finings To Improve Your Wine“.
You will also want to rack the wine off the sediment before filtering the wine. This will eliminate the chance of drawing sediment into the wine filter.
There is another, more simple, way to answer the question: When should I filter my wine? Filter the wine when it is ready to be bottled. Make it the last step the wine goes through before it is put to rest in the bottle. There is no advantage to filter the wine before that time.
Happy Wine Making,
Ed Kraus
—–
Ed Kraus is a 3rd generation home brewer/winemaker and has been an owner of E. C. Kraus since 1999. He has been helping individuals make better wine and beer for over 25 years.
6 Tips For Making Your Beer Sweeter
 Though in some instances you might appreciate a dry beer, it’s nice to mix things up once in a while and have a sweeter beer on hand. Or, when trying to dial in a beer recipe, you may find yourself wanting to increase the sweetness of the beer in order to balance out the bitterness of the hops. But you can’t just add simple sugar to a beer to make it sweet – the yeast will just consume the sugar and turn it into alcohol. So what are some ways that homebrewers can make their beer sweeter?
6 Tips for Making Your Beer Sweeter
- Mash at a higher temperature – For all-grain and partial mash homebrewers, it’s possible to control beer sweetness by adjusting the mash temperature. Generally, mashes at the lower range of the acceptable range (144-148˚F) allow the enzymes to break up more of the starches into fermentable sugars, making them easier for the yeast to consume, thereby resulting in a drier beer. Conversely, a mash at the higher end of the range (152-160˚F) does not break up as many of the starches, so those sugar chains are harder for the yeast to consume and they remain in the finished beer. Mashing high also increases body and head retention.
- Use more caramel malt – Caramel malts are excellent for making beer sweeter. Caramel 20L and 40L offer a malty/caramel/toffee character, whereas darker caramel malts bring in flavors of raisins and burnt sugar. Caramel malts should be used sparingly to avoid over-sweetening the beer. Usually 1-2 lbs. at the most is sufficient.
- Boil longer – A longer boil promotes the Maillard reaction, a chemical reaction often confused with caramelization. Though the Maillard reaction will primarily promote color formation and bready, toasty flavors, an especially intense boil can produce some sweeter caramel flavors.
- Add unfermentable sugar – Unfermentable sugars can also be used for making your beer sweeter. Lactose sugar is one of the most popular, and it’s a key ingredient in milk stout. Use up to a pound for a milky smooth stout, or in smaller amounts to lend your beer a little extra sweetness.
- Use calcium chloride
 – For all-grain brewers working with soft water, increasing the amount of chloride in brewing water can enhance the maltiness of a beer. As an experiment, try mixing a solution of calcium chloride in water and using a dropper to dose small amounts into a finished beer. This will give you an indication of how it affect beer flavor and mouthfeel.
- Use a less attenuative yeast strain – In brewing, attenuation is the degree to which yeast convert sugar into alcohol and carbon dioxide. A highly attenuative yeast strain will consume a large proportion of available sugar, whereas a less attenuative strain will leave some sugars in the beer. Examples of less attenuative yeast strains include many of the English strains, for example Wyeast 1084: Irish Ale, Wyeast 1099: Whitbread Ale, Wyeast 1187: Ringwood Ale, and Wyeast 1968: London ESB. That said, remember that yeast selection is only one factor that affects attenuation. Yeast health, pitch rate, mash characteristics, and fermentation temperature all come into play.
Do you have any tips for making a beer sweeter? Have you tried any of the above methods?
—–
David Ackley is a writer, brewer, and craft beer marketing consultant. He holds a General Certificate in Brewing from the Institute of Brewing and Distilling and is founder of the Local Beer Blog.
Homebrewing: So Easy a Kid Could Do It
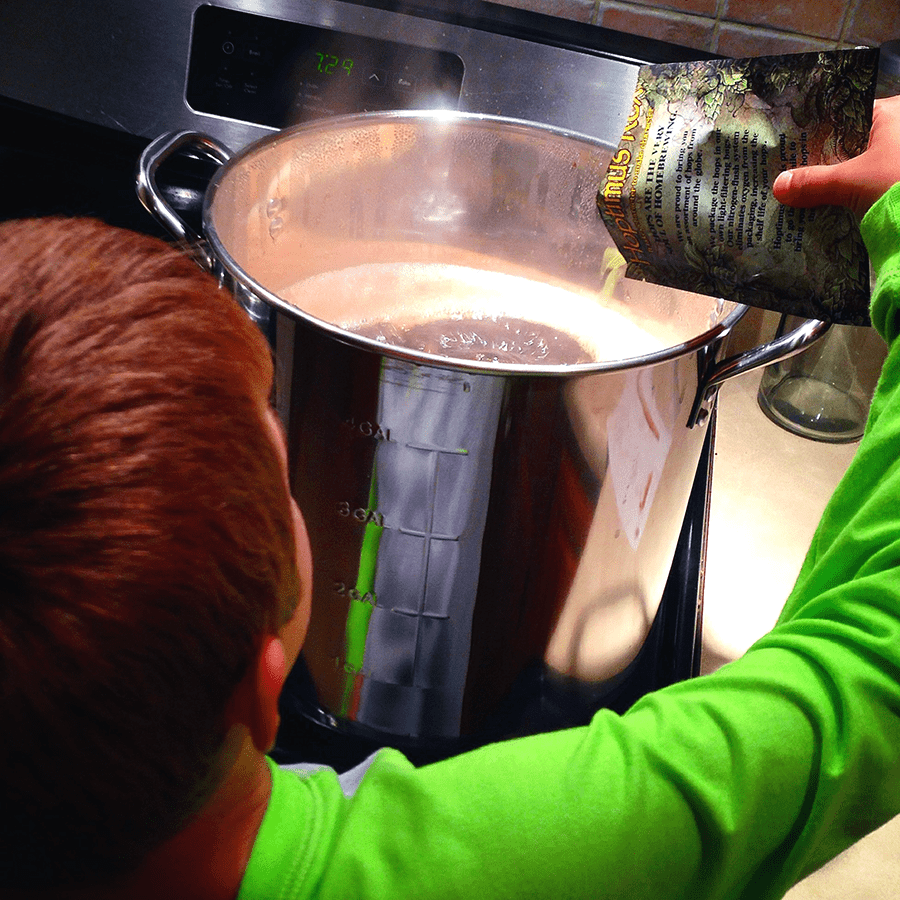 I’ll be the first to admit that I like to get technical here on the homebrew blog. I’m a bit of a perfectionist and I enjoy being able to control every aspect of the homebrew process. But homebrewing does not have to be a complicated science. Parts of it, in fact, are so easy a kid could do it!
Not that we’d actually advocate kids making beer without adult supervision (there are some safety factors that have to be addressed), but homebrewing in a basic sense is a very simple process:
- Fill a pot with hot water
- Mix in malt extract
- Boil with hops
- Allow to cool and add yeast
Would your kid be able to handle those four steps? Then an adult should certainly be able to, right?! These 4 steps illustrate how simple homebrewing can be if you let it.
Why Homebrew?
People make beer at home for many different reasons. Some enjoy the challenge of learning a new skill. Some enjoy the creative experience of developing a recipe and making something with your hands. Other find that it’s a good way to become more self-sufficient.
Whatever got you interested in homebrewing, here’s my advice: just try it! Jump in and see if the hobby is for you. Imagine the feeling you get when you share your homebrew with friends, their faces light up and they ask, “you made this?”
How to Start Simple Homebrewing
To get started with homebrewing, all it takes is an equipment kit and beer recipe kit. Both are included in our Steam Freak Beermaking Starter Kit. You can choose any recipe from the Steam Freak lineup of recipe kits, whether it’s a brown ale, a stout, an IPA, or any of the other 20+ kits. Each beer recipe kit comes with clear, easy to read, step-by-step instructions that will guide you through brewing your first batch.
 After brewing your first batch or two, there are several resources that can help you make your homemade beer even better. Previously on the E. C. Kraus Homebrewing Blog, we’ve listed 10 Homebrewing Tips for the Beginner and the 10 Best Homebrewing Resources.
Stepping Up Your Homebrewing Skills
Once you’ve got the basics under your belt, there are many ways to continue your exploration of homebrewing. If you’re a hop head, you might be interested in experimenting with different hop varieties. Or you might want to learn how to make mead. Many homebrewers enjoy taking their tasting skills to a new level by becoming a beer judge.
Whatever path you take, it will surely be an adventure!
So, what’s holding you back from starting out with some simple homebrewing? Share in the comments below!
—–
David Ackley is a beer writer, homebrewer, and self-described “craft beer crusader.” He holds a General Certificate in Brewing from the Institute of Brewing and Distilling and is founder of the Local Beer Blog.
Can I Add Liqueurs To Homemade Wine?
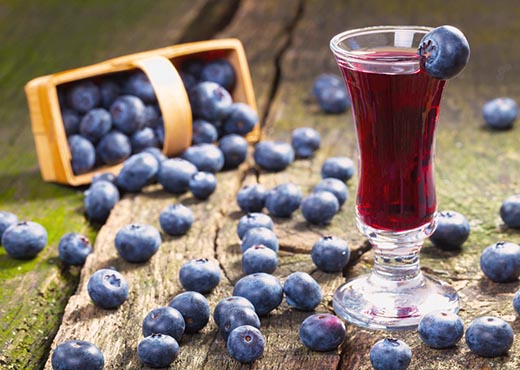 Can I add liqueur to my wines? I have added brandy to some, blackberry, peach. Will it change the taste?
Tino — NY
—–
Hello Tino,
Absolutely, you can add liqueurs to your homemade wine. I always like to encourage experimentation. Without it, nothing moves forward.
Adding a brandy or liqueur to a homemade wine puts it in the category of a fortified wine. Brandy is added to wines to produce Ports, Sherrys, Maderas and others. They typically will run around 18% to 21% alcohol. This is not uncommon at all. On a commercial level, adding liqueurs is not commonly done, but certainly has some great potential. Why couldn’t you add peach schnapps or peach brandy to a peach wine? It would raise the alcohol and intensify the flavor.
Obviously, you have to use some common sense in your combinations. The flavors needs to be complimentary to one another. For example you wouldn’t want to use orange brandy with a blueberry wine. You want to stay within reason.
I would also suggest that you take baby-steps. Do a bench-testing, first. Add the chosen liqueur to a sample of the wine. This does two things: 1) it allows you to establish a dosage ahead of time that can later be applied to the entire batch; 2) it acts as a safety-net; it you accidentally add too much to the wine sample, you can put the sample back with the rest of the batch and start all over.
 As a side note, we sell liqueur flavorings for transforming vodka, brandy and the likes into various liqueurs. They come in tiny bottles for making a quart or two at a time. You just add them to the alcohol base, sometimes with sugar, to create an array of liqueurs.
Home winemakers will use liqueur flavorings to enhance the flavors of their wine. For example, you can use the pear brandy liqueur flavoring directly to a pear wine to increase the wine’s fruitiness. It will not raise the alcohol level of the, but it will add a noticeable amount of flavor.
Also realize, that it is possible to have too much alcohol in a wine. A wine can go out of flavor balance if it becomes too hot or alcoholic. When this happens the wine will start to taste more watery, less flavorful, less fruity. This is because of the numbing effects that alcohol can have on the senses, both taste and smell. This is one good reason to look at liqueur flavorings instead of liqueurs. You get the flavor without the heat.
Regardless, I think adding liqueurs to homemade wines is a fantastic way of playing around with the flavors in your wine. I can be valuable. Not only can you come up with something spectacular, you get to exercise your senses in a way that will only help you with future batches of homemade wine. Just remember to take careful steps, and do sample tests before moving forward with the whole batch of wine.
Happy Winemaking,
Ed Kraus
—–
Ed Kraus is a 3rd generation home brewer/winemaker and has been an owner of E. C. Kraus since 1999. He has been helping individuals make better wine and beer for over 25 years.
How and Why to Brew With Yeast Nutrient
 If you’ve ever thought about using yeast nutrient in your beers but haven’t, then you may want to reconsider. There is little-to-no downfall in doing so and the additional costs are minuscule.
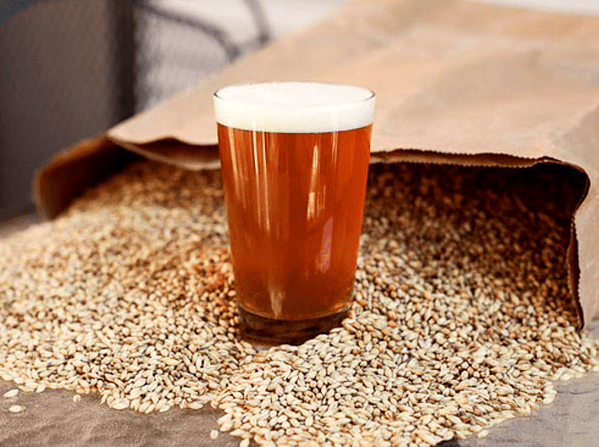
Yeast is the magical microorganism responsible for turning sugar into alcohol. Without yeast, we would have no beer, wine, or cider. And in order to do their jobs well, those billions of yeast cells have certain requirements. They’re not about to do all the hard work of fermenting your beer without a little something in return!
Though yeast are happy to eat up a bunch of sugar in just about any situation, there are some conditions that affect just how well they thrive. Temperature, for one, is important. Yeast can be killed when either too cold or too hot. When it comes to beer yeast, they tend to do best within a relatively narrow temperature range. Luckily for homebrewers, the ideal temperature for ale yeast is right around room temperature.
Another important factor in yeast performance is yeast nutrition. Since malt provides most of the nutrients yeast needs to ferment a batch of beer, yeast nutrition is usually covered when homebrewers progress beyond the basics.
In order to thrive, yeast need not just sugar, but also elements like nitrogen, fatty acids and sterols, amino acids, and vitamins. When yeast lack these ingredients, such as when brewing with large amount of adjunct grains and sugar, we begin to think about using yeast nutrients in the beer. Personally, I’ve found that yeast nutrient is a worthwhile addition to every batch of beer I brew.
Types of Yeast Nutrient and How to Use Them
- Brewer’s Yeast Nutrient – One of the chief contributors to a healthy fermentation is nitrogen. It is most often lacking when brewing a beer with a high proportion (more than 10%) of sugar or rice. Nitrogen-based yeast nutrients are usually added to a beer before fermentation, though they may also be helpful in resolving stuck fermentations. Typical dosage for beer is 1 tsp. per three gallons.
- Yeast Energizer – Yeast energizer is specifically designed for enhancing and speeding up fermentation. It has a slightly different mix of ingredients than yeast nutrient, providing what yeast needs a little later in the fermentation process. So, it is often added part way through fermentation and is especially useful in a stuck fermentation situation. Typical dosage is 1/2 tsp. per gallon.
 Properly using yeast nutrients when brewing beer will frequently reduce fermentation time and produce cleaner tasting brews. Many brewers are in the habit of adding yeast nutrient to every batch.
Are you in a habit of using yeast nutrient in your beers? Why or why not?
—–
David Ackley is a writer, brewer, and craft beer marketing consultant. He holds a General Certificate in Brewing from the Institute of Brewing and Distilling and is founder of the Local Beer Blog.
Raspberry Blonde Ale Recipe (Partial Mash)
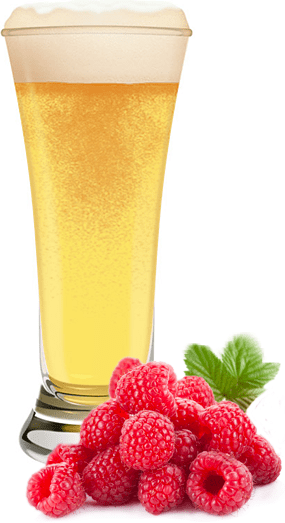 Brewing a well-balanced fruit beer, such as this raspberry blonde ale recipe, is no easy feat. You want enough fruit flavor to be able to taste it, but not so much that it overpowers the beer. And how do you even get fruit flavor in the beer in the first place?
An easy way to add fruit flavor to your beer is to use a fruit extract, but many homebrewers prefer to work with whole fruit to get a more natural flavor. The fruit is usually added to the secondary fermenter for several days to a couple weeks. For best results, blanch the berries in hot (160˚F) water for a minute or so before adding them to the fermenter. This will sanitize them and reduce the likelihood of introducing foreign microbes to your beer.
Another alternative is to use raspberry fruit concentrate, though this will likely introduce significantly more color and fermentables to the beer than the whole fruit. This will result some some kind of beer-wine hybrid (which may not be a bad thing!).
The recipe below is based on an American blonde ale. When brewing fruit beers, lightly colored and lightly hopped beers work well as a “clean slate” to showcase the characteristics of the fruit. That said, raspberries work well in other styles too, including porter, stout, and lambic.
Ready to give this raspberry blonde ale recipe a try? Happy brewing!
Raspberry Blonde Ale Recipe
(five-gallon recipe, partial mash)
Specs
OG: 1.048
FG: 1.012
ABV: 4.7%
IBUs: 15
SRM: 4
Ingredients
3.3 lbs. wheat liquid malt extract
2 lbs. light dry malt extract
1 lb. American two-row malt (milled)
.5 lb. flaked oats
1 oz. Saaz hops at :60
1 oz. Saaz hops at :30
1 packet Safale US-05: American Ale Yeast
2.5 lbs. frozen raspberries
Directions
Steep the two-row malt and flaked oats in 1 gallon of clean, chlorine-free water at 148˚F. After 30 minutes, strain the wort into a five-gallon brew pot. Add enough water, along with the malt extracts, to make a three-gallon boil. Boil wort for 60 minutes, adding hops according to schedule above. At the end of the boil, cool wort in an ice bath and/or with an immersion wort chiller. Pour about two gallons of distilled water into a clean, sanitized fermenter. Add the wort to the fermenter, plus enough distilled water to make 5.5 gallons. Stir well to aerate, pitch yeast, and ferment at 68˚F for about 7 days.
After primary fermentation, prepare the raspberries by blanching in hot (160˚F) water for a few minutes, then add them to the secondary fermenter. Rack the beer on top of the raspberries, then wait 2-3 weeks. Rack the beer one more time before bottling or kegging to separate it from the fruit…and enjoy!
Want to learn more about adding fruit to your homebrewed beer? Read: A Simple Guide to Making Fruit Beers!
Do you have a raspberry blonde ale recipe you’d like to share? Just leave it in the comments below.
—–
David Ackley is a writer, brewer, and craft beer marketing consultant. He holds a General Certificate in Brewing from the Institute of Brewing and Distilling and is founder of the Local Beer Blog.
Champagne Celebration: Make your Next Party Sparkle
 Making your own Champagne (*cough* sparkling wine for us home wine-makers) is not much different from the traditional home wine-making process. By simply substituting your yeast and adding more sugar, you can add bubbles to your favorite wine recipe or concoct a brand new favorite that is best suited as a sparkling wine. Champagnes and sparkling wines can be expensive and we want to help you get the best bubbles for your buck.
We know you’ve heard this 1,000 times before, but we are obligated to say it again – most Champagnes available are not truly champagne, but are actually sparkling wines. True Champagne must be produced in the legally identified northern region in France and have the fermentation process (giving the wine its bubbles) occur in the bottle. The Champagne Bureau in Washington, D.C. works to educate U.S. consumers about the uniqueness of the wines of the Champagne region in France and expand their understanding of the importance that location plays in the creation of all wines. You can find out more about the Bureau Du Champagne, USA on their website.
Now that formalities have been established and expectations are set, making your own Champagne (but actually sparkling wine) is an easy addition to the wine-making process and can be done so for a relatively inexpensive cost. Of course, this will be far from the authentic method for making Champagne, but you will get a similar desired effect. Adding a dry white/sparkling yeast will ferment crisp and dry, as well as low in foam, to make your favorite wine recipe bubbly!
Whether the occasion is New Year’s Eve, celebrating a birthday, or just relaxing after a long day, here are two recipes that will be sure to hitch your taste buds on the bubbly bandwagon.
Pro tip: You’re going to need a hydrometer for this champagne recipe.
Essential tools for the job:
• Dry White/Sparkling Yeast
• Bottles (need 6 per gallon)
YOU MUST USE CHAMPAGNE BOTTLES. Regular wine bottles will not even begin to hold the pressure that will be produced.
• Wire Hoods
• Champagne Stoppers
• Champagne Foil Capsules (optional)
Directions:
Step One: Start with your favorite base wine, Follow the The 7 Easy Steps to Make Wine all the way through fermentation. Be sure to use your Dry White/Sparkling Yeast.
Step Two: Siphon the wine into an open bucket after fermentation. The wine should be a little cloudy at this point, add some yeast sediment to the bucket from the bottom of the fermentation bottles if it is not.
Step Three: Make and add simple sugar syrup (ratio: 100 grams of cane sugar per gallon of wine). Simply heat to boil a mixture of two parts sugar to one part water to make the syrup. Stir the syrup while adding to the wine and be gentle!
NOTE: You must confirm with a hydrometer that the original fermentation has completed before adding the sugar syrup. Otherwise, too much carbonization will occur in the bottle. This can be done by making sure the hydrometer reads .998 or less on the specific gravity scale.
Step Four: Immediately siphon the wine champagne bottles and add their caps. Again, you MUST use champagne bottles as regular wine bottles will NOT be able to handle the pressure.
Step Five: Store the bottles upright and in a cool place for at least three months. Let the wine stand until it is crystal clear (this may take an additional month or two). After this standing period, refrigerate and store the bottles at 32 °F
Step Six: Open, pour, and enjoy!!
For our ambitious wine-makers, you can also follow the full process as done in the Champagne region of France to make your home wine as authentic as possible. Though don’t despair about getting your homebrew exactly right, they’ve had centuries to perfect the recipe and process. Pressing, first fermentation, assemblage, second fermentation, remuage, aging (for a least 15 months), disgorgement, dosage, and the finishing touch of corking and consuming have all been dialed-in to a science for creating the perfect Champagne. You can read more on this traditional methode Champenoise or methode traditionelle process from Fine Wine Concierge.
You can also try adding fruit to your champagne or sparkling wine recipe to enhance the flavors and add a new layer of fun to your wine making process. Enjoy your bubbles!
Happy Wine Making,
Ed Kraus
—–
Ed Kraus is a 3rd generation home brewer/winemaker and has been an owner of E. C. Kraus since 1999. He has been helping individuals make better wine and beer for over 25 years.
Featured Product
[bigpres skus=”GL310″ overlay=”no” animation=”fade” direction=”top” show_img=”yes” show_name=”yes” show_price=”yes” show_arrow=”no” hide_button=”no” link_to=”product” per_row=”4″ size=”medium” type=”card” show_content=”no” drop_shadow=”yes” /]
Does Making Bentonite Additions To A Wine Have A Downside?
 I’ve been reading about bentonite fining in my wine and would like to know what is the downside of using this stuff? I understand what it does, but was thinking – if there is no downside then I should use it in every wine I make. What is your response to that, please!
Steven
_____
Hello Steven,
Commercial wineries routinely make bentonite fining additions to the wine right after the fermentation. It is used at this time because it is effective in taking out large amounts of solids fairly quickly. It speeds up the clearing process.
Bentonite additions to a wine will not only take the bulk of the yeast out, but it will also take out other protein based particles such as tannin, color pigmentation and other pulp-related materials. So much so, that one might say it is too good.
For this reason one must be careful not to use more bentonite fining than is necessary to get the job done. Using too much bentonite in the wine can result in a decrease in body, color and overall character of the wine. This is the potential downside.
Fortunately, bentonite fining is efficient enough that it will do the job before threatening dosages come into play. Follow recommended dosages and you will have not have a problem. And yes, we recommend using it on any fresh fruit wine.
The bentonite fining we sell comes with detailed directions and a recommended dosage that is considered conservative. If these directions are followed and the recommended dosage is adhered to, your wine will not be negatively affected in any way.
While bentonite is effective in removing a lot of particles quickly, there are times when it will not remove the last little bit that is required to bring a polish to your wine. If you discover that a single bentonite fining addition was unable to add a bright color to the wine, then I would suggest that you go to another fining agent for a second treatment.
 Wineries will turn towards fining agents that have more polishing qualities as a follow-up treatment. These would include fining agents such as Sparkolloid, isinglass and Kitosol 40.
So in short, yes it’s not a bad idea to automatically make bentonite addition to your wines right after fermentation. There is little to no downside in doing so. Just be aware that it is so effective that there are limitations to how much you’ll want to use. Stick to the recommended dosages and your wine will be fine.
Happy Wine Making!
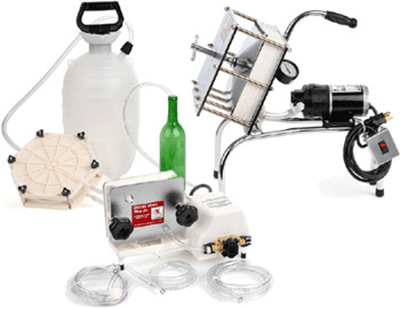
Homebrewing Kit Buyer's Guide
 Getting started in homebrewing should not be intimidating. E. C. Kraus makes the initial leap much easier by including nearly everything you need for your first batch in one homebrewing kit.
Our Steam Freak Beermaking Starter Kit includes:
- Complete Joy of Homebrewing – This book is the original homebrewer’s guidebook. It will guide you through your first few batches and well beyond into your homebrewing career.
- 6 Gallon Screw-Top Fermenter – This is what the beer ferments in for a week or so before moving to the secondary fermentation carboy. The fermenter comes with an airlock, stopper, and faucet. It can also be used as a bottling bucket.
- 5 Gallon Plastic Carboy – After about ten days in primary fermentation, the beer is moved to the carboy for further conditioning and flavor development. The carboy also comes with an airlock, stopper, and faucet.
- Triple Scale Hydrometer – This tool is used to measure the gravity of your homebrew, and those measurements are used to determine alcohol content. Learn more about working with your hydrometer in this blog post.
- 21″ Curved Racking Cane – The racking cane, along with a section of vinyl hose, helps you transfer, or rack, the beer from one fermenter to another.
- 6′ Length of 3/8″ Vinyl Hose – Attach the hose to the racking cane to complete your racking setup.
- Double Lever Capper – Used to cap bottles.
- Beer Bottle Brush – Used for cleaning bottles.
- Racking Cane Clip – This clip secures the racking cane to the bucket to facilitate racking procedures.
- 8″ Floating Thermometer – A thermometer can be used in the home brewery in a number of ways, in particular, measuring mash temperature.
- Basic A No Rinse Cleanser – A brewery-grade cleaning agents used to clean all of your homebrewing gear.
- 24″ Stirring Spoon – Used to stir and aerate the wort before pitching yeast
- Steam Freak Kit – Unlike other homebrewing starter kits, our kit includes a Steam Freak recipe kit of your choice, including bottle caps. So the tough question is this: What beer style will you make with your first batch?
In addition to the Beermaking Starter Kit, you will also need a brew kettle. The 20-qt. Brew Kettle is ideal for brewing indoors, but many homebrewers will eventually upgrade to a larger kettle (see below).
Suggested Equipment Upgrades 
Once you’ve brewed your first batch or two, you might be willing to make a few upgrades to your home brewery. Some of the most popular steps forward on the equipment side include:
- Auto-siphon – This nifty device makes siphoning from one fermenter to another a breeze.
- Temperature controller – After you brew a few batches of beer, you’ll soon discover that fermentation temperature control is a very important part of brewing good beer. If you have a spare freezer or refrigerator, a temperature controller will allow you to control your fermentation temperature to the degree.
- Additional Fermenters – Once you’re hooked on homebrewing, additional fermentation capacity will definitely come in handy.
- Mash tun cooler – If you’re interested in making the jump to all-grain brewing, you’re going to need a mash tun. A mash tun cooler is a simple, affordable way to mash the grains before the boil. (On a tight budget? The Brew In a Bag method is a wallet-friendly alternative.)
- Bigger kettle – You might need a propane burner as well.
- Stir plate – Yeast health is a crucial part of brewing good beer. This includes making sure that you have a healthy colony of yeast large enough to ferment your beer. A stir plate stirs the yeast in your yeast starter, giving it plenty of oxygen in order to grow to the right size.
What piece of equipment is on your home brewery wish list?
——
David Ackley is a beer writer, brewer, and self-described “craft beer crusader.” He holds a General Certificate in Brewing from the Institute of Brewing and Distilling and is founder and editor of the Local Beer Blog.
Dogfish Head 90 Minute IPA Clone Recipe
 Dogfish Head’s popular 60-, 90-, and 120-Minute IPAs came into being through a pretty innovative hopping technique. Instead of adding hops at intervals, the hops are adding continuously through the boil. Early on, Dogfish used a modified foosball table to shake the hops into the brew kettle. They’ve come a long way since then, but their IPAs are still delicious as ever.
Grain Bill
The grain bill for this Dogfish Head 90-Minute IPA clone recipe is surprisingly simple: 90% pilsner malt with 10% amber malt. If you haven’t heard of amber malt before, it’s a specialty malt somewhere between a caramel 20L and a caramel 40L, featuring flavors of biscuits and toast and contributing a – you guessed it – amber color to your homebrew. It’s traditionally used in English ales, up to 20% of the grist.
Hopping 
90-Minute IPA uses Amarillo, Simcoe, and Warrior hops, sprinked into the wort gradually over the course 90 minutes. Just in case you don’t have a foosball table, an easy way to do it mix the hops together and then divide them into equal parts to add every 5-10 minutes. For example, if you wanted to add the hops every 5 minutes, divide the three or so ounces of hops into 19 equal parts. This will give you a roughly 4.7 gram hop addition every five minutes, including one at flame out.
For additional hoppy aroma, the same hops used in the boil are used for dry hopping.
Ready to give this Dogfish Head clone recipe a try? It comes from Brew Your Own Magazine (with the help of Sam Calagione himself!).
Dogfish Head 90 Minute IPA Clone Recipe
(5-gallon batch, all-grain recipe)
Specs
OG: 1.088
FG: 1.021
ABV: 8.7%
IBUs: 90
SRM: 13
Ingredients
16.5 lbs. pilsner malt
1.66 lbs. amber malt
2 oz. Amarillo hops (16 AAUs) added over 90 minutes
0.62 oz. Simcoe hops (8 AAUs) added over 90 minutes
0.53 oz. Warrior hops (8 AAUs) added over 90 minutes
1 oz. Amarillo hops (dry hopped 3-5 days)
0.5 oz. Simcoe hops (dry hopped 3-5 days)
0.5 oz. Warrior hops (dry hopped 3-5 days)
1.5 packets Safale S-04
Directions
Mash the crushed grains in about five gallons of clean water at 122˚F, then raise for 149˚F for 60 minutes. Sparge to collect about 7.5 gallons of wort. Boil for 105 minutes, adding the hops after 15 minutes gradually over the rest of the boil. Whirlpool, chill wort, and transfer to a clean, sanitized fermenter. Pitch yeast at 70˚F or below. Ferment at 71˚F. After primary fermentation, transfer to a secondary fermenter and dry hop for 3-5 days. Cold crash, then bottle or keg for ~2.3 vols CO2.
If you like IPA’s but haven’t ever tried a clone recipe before, this would be a fun one for you. The Dogfish Head 90 IPA is an incredible beer. It has a lot of malt flavors and body to support the extreme hopping. It’s aggressive, but balanced.
—–
David Ackley is a beer writer, brewer, and self-described “craft beer crusader.” He holds a General Certificate in Brewing from the Institute of Brewing and Distilling and is founder and editor of the Local Beer Blog.