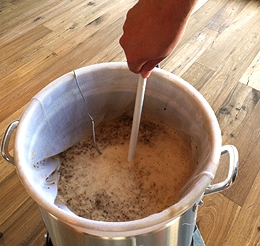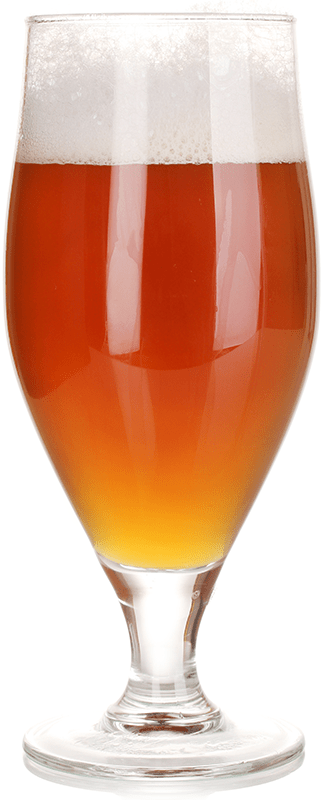
Style Guide: Brewing An American IPA

American IPAMany craft beer aficionados have heard the story about where the name “India Pale Ale” (or IPA’s) comes from. In short, to supply the colony in India, British breweries made ales with increased amounts of hops, taking advantage of the plant’s antimicrobial properties to ensure that the beer would survive the long trip. The American version of the IPA is more robust than the English version and also uses American-grown ingredients. But before I get into to brewing an American IPA, I’d like to share a little more about some of the history behind the style.
I recently picked up Ray Daniels’ book, Designing Great Beers, and learned a couple interesting tidbits about pale ales and IPAs. First, that pale ales were a product of the Industrial Revolution. The advent of steel allowed British maltsters to build better kilns, which gave them increased control over their product, which in turn made pale malts possible. Secondly, that these pale ales were considered beers for high society, while the lower classes stuck with the dark beers, like stouts and porters.
I found this quote, from 1934, to give an interesting perspective on the popularity of the style:
“[The India Pale Ale] is carefully fermented so as to be devoid of all sweetness, or in other words to be dry; and it contains double the usual quantity of hops; it therefore, forms a most valuable restorative beverage for invalids and convalescents.”
I don’t know about you, but I always feel better after an IPA! Now, back to brewing!
The BJCP Style Guidelines give us some parameters for brewing the American IPA (style 14B). The overall impression of the beer should be “an American version of the historical English style, brewed using American ingredients and attitude.” Whatever you do, don’t forget the attitude!
Here are the more easily measurable characteristics for an American IPA:

  • IBUs: 40-70
  • Color (SRM): 6-15
  • OG: 1.056-1.075
  • FG: 1.010-1.018
  • ABV: 5.5-7.5%

Now, let’s look at some of the specific ingredients you might use for brewing your own American IPA:
Grain Bill

  • All-Grain: Start with a well-modified US 2-Row Malt for the base of your grain bill (70% or so). Then use 1-2 pounds of Crystal Malt (20-40L) for color and caramel malt flavor. If you want, try a little (up to 5%) of Munich, Vienna, or Biscuit Malt for added complexity.
  • Extract: If brewing with extract, use light or pale malt extracts and consider steeping some crystal malt for flavor and color. Consider the Muntons Connoisseur Kit Type India Pale Ale kit, which contains malt extract that has already been hopped.Shop Home Brew Starter Kit

Hops

  • An American IPA should be brewed with US-grown hop varieties. Consider using Cascade, Centennial, Columbus, Chinook, and/or Willamette. Use 1-2 ounces during the boil for each of your bittering, flavor, and aroma additions. For increased hop aroma, dry-hop your beer by adding an ounce or two of hop pellets to the secondary fermenter.

Yeast

  • Use a classic American ale yeast, such as Safale US-05 or Wyeast’s #1056 American Ale. American IPAs should have a “neutral” fermentation character, so be sure to keep the fermentation temperatures within the acceptable range for your chosen yeast strain.

Follow the above guidelines and profiles for brewing an American IPA, and you’ll have a beer that is tasty and to style. What’s your favorite IPA? Do you have an American IPA recipe you’d like to share in the comments below?
Til next time…Cheers!
—–
David Ackley is a beer writer, brewer, and self-described “craft beer crusader.” He holds a General Certificate in Brewing from the Institute of Brewing and Distilling and is founder of the Local Beer Blog.

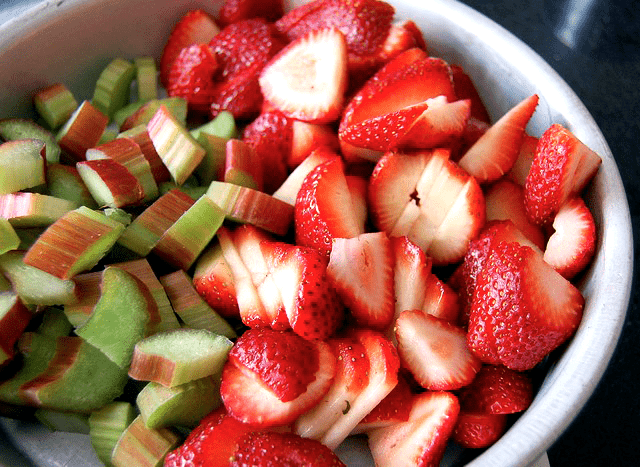
Wine Ideas: Strawberry-Rhubarb Wine Recipe

Strawberries And Rhubarb ChoppedStrawberry and rhubarb is a traditional, country combination that has worked deliciously for pies for who knows how long. With that country combo in mind, here’s a wine recipe that takes both great flavors from the pie pan to the wine bottle.
This is a strawberry-rhubarb wine recipe that has been made by several of our customer with great success. Its flavors are rich and layered with a bit of tang that sets if off. It has a glassy, garnet color that is almost irresistible when set on the table in front of family and friends.
While this particular version I experienced was made dry, I’m sure it would do quite well if it were made off-dry or even sweet. Making a sweet wine can easily be done by adding sugar and potassium sorbate (wine stabilizer) before bottling.
Since there has been such success with this particular wine recipe, I thought I’d share it here as well…
Strawberry-Rhubarb Wine Recipe
(Makes 5 Gallons)
2 Cans County Fair Strawberry
5 pounds Rhubarb (cubed, meaty stalk only)
8 pounds Sugar
5 Teaspoons Yeast Nutrient
5 Teaspoons Acid Blend
1 Teaspoons Pectic Enzyme
5 Campden Tablets (24 hrs. before fermentation)Shop Fruit Wine Bases
Water (To total batch to 5 gallons)
1 Pkg. Wine Yeast (Lalvin K1V-1116, recommended)
5 Campden Tablets (Before Bottling)
Use The 7 Easy Steps To Making Wine for the directions.  These directions will lead you through the process. If you need the equipment. The “Your Fruit!” Wine Making Kit will work perfect for this wine recipe.
Have you every made a strawberry-rhubarb wine recipe? If so, why don’t you share your recipe below?…
—–
Ed Kraus is a 3rd generation home brewer/winemaker and has been an owner of E. C. Kraus since 1999. He has been helping individuals make better wine and beer for over 25 years.

7 Tips For Clearing A Homebrew Beer!

Clear homebrew BeerFor some styles of beer, such as the Bavarian hefeweizen and the Belgian witbier, cloudiness is to be expected. The average consumer, however, has come to expect beer to be crystal clear — or “bright” as it’s known among beer geeks and professional brewers. Clarity has more influence on aesthetics than flavor, but since the appearance of a beer is the drinker’s first impression, it’s an important factor in assessing beer quality. To avoid your friends raising their eyes at your cloudy homebrew — and to achieve better scores at homebrew competitions — it’s important to know how to clarify your homebrew beer.

What Makes Beer Cloudy in the First Place?
Before we can talk about clarifying or clearing your homebrew beer, it would help to understand a little bit about what’s making the beer cloudy. Cloudiness in homebrew can come from a few different sources:

  • Malt can contribute proteins, fatty compounds (lipids), and tannins to your beer. Excessive protein can result in “protein haze” or “chill haze”, which happens when beer is clear at room temperature, but becomes cloudy when chilled.
  • After being boiled in the kettle, hops can break down and leave behind debris.
  • Yeast, as it multiplies and feeds on the sugar in your wort, it becomes suspended in the beer.

All of these a common sources for potentially keep a homebrew beer from becoming its clearest.

Common Ways to Clarify Your Homebrew Beer

There are several different ways to clarify or clear a homebrew beer. Here are the most common:

  1. Whirlpool – At the end of the boil, and before transferring wort to the fermenter, give the wort a strong stir. Proteins, lipids, and hop compounds will collect at the bottom of the kettle and form a pile of “trub” in the middle, making it easier to draw off beer and leave behind most of the protein and hops.Shop Irish Moss
  1. Kettle finings – Clarifying a beer with clearing agents is very effective. Irish moss (a.k.a. “carrageenan”) is a type of seaweed that works as a coagulant. It’s added in the last 10-15 minutes of the boil and helps make the whirlpool more effective by aiding in the coagulation of proteins.
  1. Cold break – Rapidly cooling the wort, such as with an immersion wort chiller, helps proteins settle out after the boil.
  1. Secondary fermentation – Transferring your beer from a primary fermenter to secondary fermenter is an opportunity to leave behind trub and yeast that has settled to the bottom. The length of the secondary fermentation is also a factor – the longer the fermentation, the more settling will occur. Fourteen days is usually enough for ales; lagers tend to take longer.
  1. Fermenter finingsShop Wort Chillers – Some beer finings are added to the secondary fermenter. Gelatin is a popular one. It’s derived from animal collagen, so beer made with it technically isn’t vegetarian. Clearing a homebrew beer with gelatin is quick and easy.
  1. Cold crash – Dropping the temperature on the secondary fermentation helps yeast and other particulates settle out.
  1. Filter – Many commercial breweries filter their beer, and while there are some filters available to homebrewers, in most cases the above techniques will result in sufficiently bright, clear beer.

What methods do you use to clarify your homebrew beers? Have you ever used gelatin or other fining or clear agents? Let us know about your experience!
—–
David Ackley is a beer writer, brewer, and self-described “craft beer crusader.” He holds a General Certificate in Brewing from the Institute of Brewing and Distilling and is founder of the Local Beer Blog.
Some of Our Favorite Food and Alcohol Pairings

We recently wrote a blog about tips for wine and cheese pairings – and that got us thinking, why stop there!? All kinds of alcohol, not just wine (but also wine), pairs well with many different food combinations. The right match-up can enhance the flavors and experience of both and it can be fun to experiment and find new combinations that work. Food and alcohol are made for each other – think about every fancy dinner, barbeque, sports game viewing, live concert etc. that you’ve ever been to or seen, how did the food and alcohol combination impact the experience? Arguably, the food and alcohol helped make the experience and the enjoyment often happens subconsciously – we thought it would be important to call attention to this and why it is happening specifically.
people-clinking-drink-glasses-over-food

While we could write an entire book, because drilling down into the specifics of why certain alcohols and foods pair together is truly scientific – we wanted to call out a couple of our favorite food and alcohol pairings. Any of these your favorites too?

White Wine and Seafood
White wine and seafood is a go-to delicious food and alcohol pairing – the white wine is light-hearted and delicate enough to match the weight and substance of raw fish and light, briny shellfish. If you’re typically going with Pinot Grigio, why not try champagne the next time you have seafood?
Red Wine and Red Meat
Specifically steak, we hope everyone has gotten to enjoy (at least once) the delectable combination of a decent steak and a full-bodied red wine. The tannins from the wine help to soften the fat in the meat and further release its flavor. The enhanced flavor from the fat then helps to release more of the fruit flavor from the wine – it’s a winning combination to say the least.
Red Wine and Dark Chocolate
Heavy and heavy goes together – be sure to pair the chocolate weight with the wine weight, and in general, don’t go with a particularly dry red (like a Cabernet). Chocolate also has tannins and you should try and match like with like.
Beer and Pretty Much Any Food
Beer is great because it has a complexity of flavors and goes well with almost all foods to some degree. Like pairing wines, you should match strength with strength, but also don’t be afraid to break the rules. You’ll probably have a few poor experiences, but you could also discover your new favorite!
Japanese Lager and Sushi
Absolutely one of our favorites – there is nothing better than a crisp Sapporo, Kirin Ichiban, or Asahi to pair with a large plate of sushi after a long day at work. You don’t have to stick with Japanese beer, but the macro Japanese rice lagers have been strategically designed and brewed to achieve interesting flavors that pair well with adventurous sushi plates.
Pilsner/Lager and a Soft Pretzel
Think about the signature taste of a baseball game, need we say more?
Stouts and Desserts
Similar to red wine and chocolate, full-bodied and sweeter stouts pair well with a variety of desserts. Many stouts naturally have a chocolatey flavor so they accentuate the flavor of a chocolate dessert of any kind. Maybe try a dessert beer next time you’re looking to indulge?
Also, as a bonus tip, stop “enjoying” these food and alcohol pairings, they weren’t meant to be!
Pizza and IPAs – the intensity of the IPA will totally overpower and destroy the flavor of the pizza.
Spicy food and lagers – while a crisp lager does calm the spice in your mouth, you’d be better off enjoying an IPA that will help to enhance the spice and experience overall (looking at you hot wing and Miller Lite drinkers!).
Artichokes and anythingJust don’t do it.
Blue cheese – incredibly difficult to pair with any alcohol as it overpowers all other flavors it comes into contact with – skip the blue cheese on your next cheese board.
We hope that this quick list either confirmed, made you think, or inspired some food and alcohol pairings for your next event, evening at home, or next dining out experience. Be adventurous!
—–
Ed Kraus is a 3rd generation home brewer/winemaker and has been an owner of E. C. Kraus since 1999. He has been helping individuals make better wine and beer for over 25 years.
Featured Product [bigpres skus=”BCP120″ =”no” animation=”fade” direction=”top” show_img=”yes” show_name=”yes” show_price=”yes” show_arrow=”no” hide_button=”no” link_to=”product” per_row=”4″ size=”medium” type=”card” show_content=”no” drop_shadow=”yes” /]

Rinsing Beer Yeast For Reuse

Rinsing Beer YeastWhile it’s possible to pitch wort directly onto an old yeast cake, a better method of reusing yeast is called yeast rinsing. It’s a simple technique that can help make the most of your raw ingredients and keep your yeast cost down. And if you ever decide to take your homebrewing hobby to the pro level, rinsing your beer yeast will become part of your fermentation and yeast handling routine.

What is yeast rinsing?

Yeast rinsing is a method of taking a yeast slurry from a fermenting beer and separating the healthy, viable yeast from the dead yeast cells and trub. It’s always best to pitch as pure a yeast culture as possible, and rinsing removes much of the other particulate from the yeast slurry. This yeast can then be reused in another batch of beer. It’s best to reuse yeast from a low to moderate gravity beer after fermentation has started to slow. Yeast used in a high-gravity beer is more likely to be stressed and to produce off-flavors.

Directions For Rinsing Beer Yeast

  1. At the end of primary fermentation, boil 2-3 cups of water and chill it to room temperature.
  1. After transferring the beer into secondary, pour the pre-boiled, pre-chilled water into the primary fermenter. Swirl the fermenter to stir up the yeast at the bottom.
  1. Pour the slurry into a sanitized quart-size or larger glass container. A mason jar works well for this. **Remember – everything that touches the yeast at this point should be thoroughly clean and sanitized: the glass jar, the lid, and funnel (if used).
  1. Place the jar in the refrigerator for several hours or overnight.
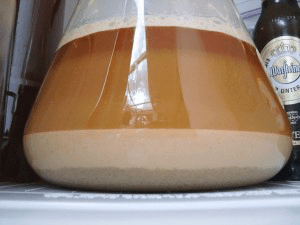
  1. The slurry will stratify into three layers: a liquid beer layer on top, a dark layer of trub on the bottom, and a whitish layer of healthy yeast in the middle. That middle layer is what we’re after.
  1. Prepare another sanitized container. Pour off (decant) most of the top layer and discard, then transfer the white yeast layer into the container, leaving behind the darker trub.
  1. Keep refrigerated and use within a week (the sooner the better).Shop Beer Yeast Culturing

That’s it! Now you can try rinsing your own beer yeast. Then you’ll be able to reuse it in a new batch of beer! I recommend using a yeast pitch calculator to estimate how much of the yeast slurry to use in your next batch.

Some pointers:

  • Though professional brewers may reuse yeast for ten or more generations, I wouldn’t recommend reusing the same yeast more than 2-3 times. You can aim for more if your sanitation practices are spot on, but as soon as you notice fermentation problems, start with a fresh batch of beer yeast.
  • Reusing yeast will take some foresight and planning. Chances are you won’t want to brew the exact same beer back to back, so keep the beers at least similar stylistically. That said, rinsing your beer yeast can open up some interesting cross-over experiments. For example, reuse your English ale yeast in an American IPA, or reuse your Kölsch yeast for an American cream ale.


Have you ever tried rinsing beer yeast? Why or why not?

—–
David Ackley is a writer, brewer, and craft beer marketing consultant. He holds a General Certificate in Brewing from the Institute of Brewing and Distilling and is founder of the Local Beer Blog.
Making Wine With Bread Yeast… Not!

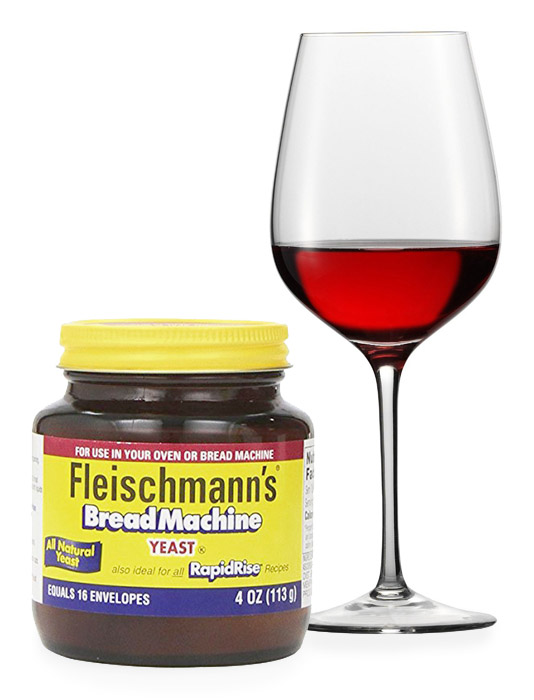
Every so often we run across someone who is making wine with bread yeast. Yes, I’m talking about the plain ole’ yeast you pick up in the baking section of your local grocery store. And every time I hear of someone using bread yeast, the question that always screams in my head is, “why?”

There are so many advantages to using wine yeast and so many disadvantages to using bread yeast that I can’t imagine why anyone would want to use it. The only conclusion I can come up with is that there is a strong misunderstanding about what yeast really are and what they do.
Yeast is what turns sugar into alcohol. Yeast cells are living organisms that consume and digest the sugars. As a result, they excrete alcohol and CO2 gas. Along with these two compounds also comes various trace amounts of enzymes, oils, acid, etc. These are the things that give different alcohols their different characters.
The point is all yeast are not the same. How one strain responds to the sugars varies from the next. There are literally thousands of different strains that have been identified or developed as hybrids, all with varying characteristics that make them suitable or not-so-suitable for performing a particular task, whether it be fermenting wine or raising bread.
This brings us back to the bread yeast. Most bread yeast will ferment alcohol up to about 8% with ease, but when trying to produce alcohol beyond this level, the bread yeast begin to struggle, very often stopping around 9% or 10%. This is short of what we’d like to obtain for almost any wine.
Shop Wine YeastAnother reason making wine with bread yeast is not a good idea is that bread yeast do not clear out very readily or settle very firmly, either. They typically will form a low layer of hazy wine in the bottom of the fermenter that will never completely clear out.
Even more importantly, bread yeast produce alcohol that is plagued with a lot of off-flavors. The bread yeast becomes so stressed and has to work so hard that off-flavored enzymes and fatty acids are produced along with the alcohol.
There are several other issues with using bread yeast to make your wine, but these are the big ones: the alcohol, the clearing, and the flavor.
There are many, many different strains of wine yeast. These yeasts are bred over time to produce something of a ‘super’ wine yeast. Each one becoming the ultimate choice for tackling the particular type or style of wine.
Some wine yeast ferment to total dryness better than others. Some have better alcohol tolerance than others. Some put off fruitier aromas than others. Some pack more firmly to the bottom of the fermenter than others. Some wine yeast even have flavor qualities that make them ideal for fermenting one type of fruit over another. The list goes on and on. And it goes without say, they all do it better than bread yeast.
On our website, we have a wine yeast profile charts listed for each line of wine yeast we carry: Red Star, Lalvin and Vintner’s Harvest Wine Yeast. You can view these profile charts from a link on the product page for each of these wine yeasts.
The last thing I’d like to point out is that buying actual wine yeast to make your wine is not expensive. Currently, you can purchase wine yeast for as little as $2.00. I haven’t priced bread yeast recently, but there can’t be that much difference in price. So if you value your time and effort at all go with the wine yeast. Don’t try making your wine with bread yeast.
—–
Ed Kraus is a 3rd generation home brewer/winemaker and has been an owner of E. C. Kraus since 1999. He has been helping individuals make better wine and beer for over 25 years.

Zen and the Art of Bottling Homebrew: 10 Tips for Bottling Day Success

Freshly Bottled HomebrewHave you ever put off bottling your homebrew because you dreaded the task?
Though many brewers bemoan the act of bottling homebrew, others find bottling their brews to be an opportunity to disconnect from the modern world, to clear the mind, and hey, why not have a homemade beer while you’re at it?
Bottling homebrew does not have to be difficult. But for some reason it can be tempting to put it off until the last minute. As Seneca once said, “We suffer more often in imagination than in reality.” Like many tasks, bottling homebrew is more stressful in our minds than it really is!
To help maintain the zen mindset while bottling your homebrew, consider these tips and make it as easy and painless as possible.

10 Tips for Bottling Homebrew

  1. Use label-free bottles. Removing labels from 50 bottles is no easy chore. Either buy some new ones, or see if you can get some from your local brewery.
  1. Set aside plenty of time for the task at hand. Rushing will only cause problems down the line. Two to three hours should be enough for bottling five gallons of homebrew (unless you have to remove labels from bottles – then plan on 3-4 hours).
  1. Clean your work area ahead of time. It’s much easier to cook in a clean kitchen. The same goes for when you’re bottling homebrew.
  1. Recruit a helper. Bottling homebrew is always more enjoyable with a friend. Dividing tasks also saves time and helps the time to go by faster. And who knows, you might end up inspiring a new homebrewer in the process.
  1. Start with clean beer bottles. This is my favorite tip for bottling homebrew. If you’re reusing beer bottles, rinse them out as soon as you’re done with them. When the bottles are already clean, all they need is a quick soak in sanitizer solution and you’re ready to go.
  1. Move the carboy into position early. Getting the carboy into position on the counter gives yeast and other sediment time to settle before racking to the bottling bucket.Shop Bottling Bucket for Bottling Homebrew
  1. Use a priming sugar calculator. Avoid bottle bombs and gushers. Use a priming calculator to pinpoint your target carbonation levels.
  1. Don’t forget the caps! This is a bottling tip I wish I could remember. More than once I’ve gotten halfway through bottling my beer, only to realize I hadn’t sanitized the bottle caps. Be sure to do this before pouring out your sanitizer solution!
  1. Reuse 6-pack carriers and case boxes. These make transport, organization, and storage easy.
  1. Keep beer bottles in a warm (room-temperature), dark area and patiently wait for 2-3 weeks. This may be the hardest tip for bottling homebrew to follow. To resist the temptation of cracking open a homebrew early, buy some nice, high-quality beer to enjoy in the interim.

What tips do you have for bottling homebrew?
—–
David Ackley is a writer, brewer, and craft beer marketing consultant. He holds a General Certificate in Brewing from the Institute of Brewing and Distilling and is founder of the Local Beer Blog.
Dealing With A Cloudy Peach Wine

Cloudy-Peach-WineI have tried to make fresh Peach wine, it has been six weeks and it still is not clear, I followed all the basis steps in wine making, even put a clearing agent in it. Do I need just to weight longer.
Thanks Tbone
—–
Hello Tbone,
What your wine may be experiencing is what’s called a pectin haze. Peach wines are notorious for having this kind of fault.
Certain fruits have a lot more pectin in them than others. Pectin is the thick, gelatinous stuff that holds the fruit’s fiber together. Peaches, strawberries and certain other fruits have an abundance of it. Normally, pectin is broken down by the yeast during the fermentation and does not cause any issues. The yeast actually produce enzymes that help to break-down the pectin resulting in a clear wine. But when there is more pectin than the yeast can handle, the result is a pectin haze.
A pectin haze cannot be settled out by a fining agent such a bentonite, isinglass or other clarifier designed to settle out particles. That’s because a pectin haze is not made up of particles. It’s made up of an organic structure that is bound to the wine itself. The only way to rid yourself of it is to break down its molecular structure.
This is where pectic enzyme comes in. If you did not add pectic enzyme to this batch, or used pectic enzyme that was too old, a pectin haze is most likely what you are dealing with. Pectic enzyme is additional enzyme that can be added to the fermentation to help the yeast break down the pectin cells. The yeast produce it naturally during the fermentation, but with some fruit – such as your peaches – it’s just not enough. More pectic enzyme needs to be added.Buy Pectic Enzyme
At this point, I would go ahead and add a double-dose of pectic enzyme to this batch. The amount will vary depending on the type of pectic enzyme you are using. Just double the recommend dosage that is stated on the container it came in.
If you purchased the pectic enzyme from us, that would be a 1/4 teaspoon per gallon – a standard dose is 1/8 teaspoon. Be sure to rack the wine into a clean fermenter first so that you do not stir up any sediment when mixing in the pectic enzyme.
The results will not be immediate. It takes pectic enzyme longer to work once the activity of the fermentation has gone. But if a pectin haze is what you are dealing with, you should start to see improvements in the wine’s clarity within a couple of weeks.
—–
Ed Kraus is a 3rd generation home brewer/winemaker and has been an owner of E. C. Kraus since 1999. He has been helping individuals make better wine and beer for over 25 years.

“German” IPA Beer Recipe (All-Grain & Partial Mash)

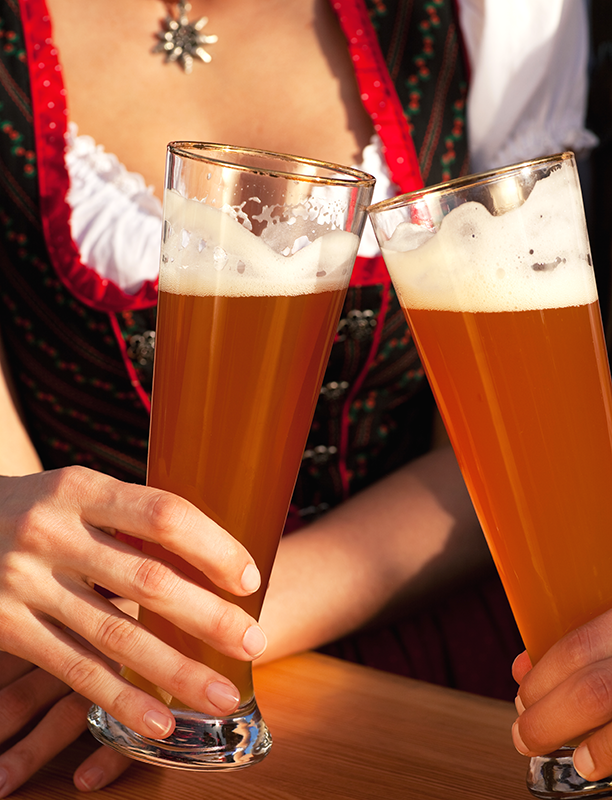
German Beer In GlassesOne of the fun things about homebrewing is mashing together different beer styles and creating something altogether new. After trying a “German IPA” at a brewpub in Atlanta, I knew I had to give it a shot. The beer had the wonderful, malty backbone and the in-your-face hop flavor of an IPA, but the hops themselves were not what you’d usually expect to find in that kind of beer. Instead of piney, citrusy American hops, this beer showcased the more spicy and floral character of noble hops.

Developing a German IPA Beer Recipe
A number of clues came from the beer menu:
Grain bill: Munich, Vienna
Hops: Magnum, Perle, Northern Brewer, Hallertau, Tettnang
Yeast: German ale yeast
These were my tasting notes: Balanced bitterness, medium to medium-full bodied, spicy notes in the flavor, but with assertive noble hop aroma.
Based on this information, I took a couple of stabs at the beer recipe, and this is its current iteration. Feel free to use it as a starting point for your own German IPA, or modify it to suit your tastes.
Good luck!

German IPA Beer Recipe – All-Grain
(5-gallon batch)
Specs
OG: 1.064
FG: 1.016
ABV: 6.3%
IBUs: 64
SRM: 11
Ingredients
9 lbs. German Vienna malt
4 lbs. German Munich malt (dark)
0.5 oz. Magnum hops at :60
1 oz. Perle hops at :20
1 oz. Northern Brewer hops at :10
1 oz. Hallertau hops at :5
1 oz. Tettnang hops at :5
1 oz. Hallertau hops dry hopped for five days
1 oz. Tettnang hops dry hopped for five days
Wyeast 1007: German Ale Yeast
Directions
shop_barley_grainsThe day before brewing, prepare a 2L yeast starter. On brew day, mash grains at 154˚F for 60 minutes. Sparge and lauter to collect about 6.5 gallons of wort in the brew kettle. Boil for one hour, adding hops according to schedule above. Chill wort and transfer to a clean, sanitized fermenting bucket. Ferment at 66˚F for about a week, then transfer to a secondary fermenter. Dry hop for five days, then bottle or keg.

German IPA Beer Recipe – Partial Mash
(5-gallon batch)

Specs
OG: 1.064
FG: 1.016
ABV: 6.3%
IBUs: 64
SRM: 11
Ingredients
2 lbs. German Vienna malt
2.5 lb. German Munich malt (dark)
6.6 lbs. Munich LME
1.65 oz. Magnum hops at :60
1 oz. Perle hops at :20
1 oz. Northern Brewer hops at :10
1 oz. Hallertau hops at :5
1 oz. Tettnang hops at :5
1 oz. Hallertau hops dry hopped for five days
1 oz. Tettnang hops dry hopped for five daysshop_hops
Wyeast 1007: German Ale Yeast
Directions
The day before brewing, prepare a 2L yeast starter. On brew day, do a “mini-mash” of the Vienna and Munich malts in 6.75 qts. of clean water. Hold at 154˚F for 60 minutes, then strain wort into the brew kettle. Add the malt extracts and enough water to make 3 gallons. Boil for 60 minutes, adding hops according to schedule above. Chill wort and transfer to a clean, sanitized fermenting bucket, adding enough clean, chlorine-free water to make 5.5 gallons. Ferment at 66˚F for about a week, then transfer to a secondary fermenter. Dry hop for five days, then bottle or keg.

Have you ever brewed a “German” IPA before? What was your beer recipe like?
 —–
David Ackley is a beer writer, homebrewer, and self-described “craft beer crusader.” He holds a General Certificate in Brewing from the Institute of Brewing and Distilling and is founder of the Local Beer Blog.
Using a Brew-in-a-Bag (BIAB) System to Make Your Beers

Brew In A BagIf you are an extract or partial mash homebrewer trying to get started with all-grain brewing, the “Brew-in-a-Bag” (BIAB) method is a great way to make the switch. It’s a little easier than the standard infusion mash, but the big advantage is that you eliminate the need for a separate mash tun (tun is just brew-talk for kettle). Instead of mashing the grains in a mash tun, recirculating your wort, and boiling it in another kettle, the Brew-in-a-Bag method allows you to do everything in one vessel.
To set up your BIAB brewing system all you need is a mesh grain bag large enough to hold 10-12 lbs. of grain (for a 5 gallon batch). I also recommend a large strainer or colander that’s big enough to sit across the top of your kettle.
The main difference between BIAB and a standard all-grain brew is that the grains go in the bag and the bag comes out at the end of the mash. Removing the bag from the wort washes the grains and eliminates the need for a sparge.

How to “Brew-in-a-Bag” BIAB

  1. Clean & Sanitize. Just as you would otherwise, clean and sanitize all of your brewing equipment. I like to use One Step No Rinse Cleanser and Star San Sanitizer.
  1. Heat the mash water to 170°F. Start with your full boil volume. Knowing that some of your water will evaporate, use more water than however much beer you plan to make. For example, if making 5 gallons of beer, you might start with 6.5 gallons. Tip: If heating water on a kitchen stove, you may want to heat water in two pots to get up to temperature more quickly.
  1. Put your mesh brewing bag in the kettle and pour the crushed grains into the bag. Give the grains a good stir to avoid clumping. Hold the temperature between 150°F and 158°F to begin converting the starches in the grains into fermentable sugar. Tip: Use a bungie cord to hold the bag in place.Shop Brew Kettles
  1. Check the pH level. To convert the starches, your mash needs to be between 5.0 and 5.5 pH. If your pH is over 5.5, add a 1/4 teaspoon of gypsum to bring it down. If it’s under 5.0, add a 1/4 tsp. calcium carbonate. Adjust until you’re in range.
  1. Pull out the grain bag. This is the whole key to a brew in a bag system. After about 60 minutes, slowly pull out the bag and all the grains, taking care not to rip it. Set the bag over a strainer or colander so that the wort drains back into the pot, then discard the grains.
  1. Bring to a boil and add hops – Heat the wort to a roiling boil and start adding hops.
  1. From here, proceed as you would with any other method of brewing.

Have any questions about Brew in a Bag (BIAB) brewing system or homebrewing in general? Drop us a question in the comments!
Til next time…Cheers!
—–
David Ackley is a beer writer, brewer, and self-described “craft beer crusader.” He holds a General Certificate in Brewing from the Institute of Brewing and Distilling and is founder of the Local Beer Blog.