Are You Sweetening A Wine Before Bottling? Then Read This…

Man Sweetening A Wine Before Bottling
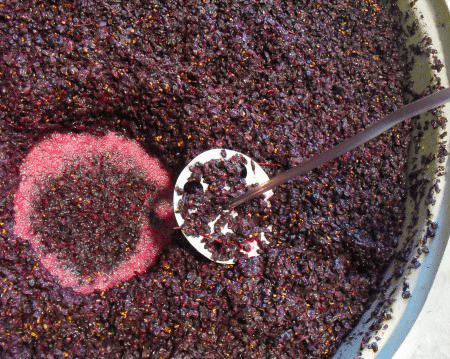
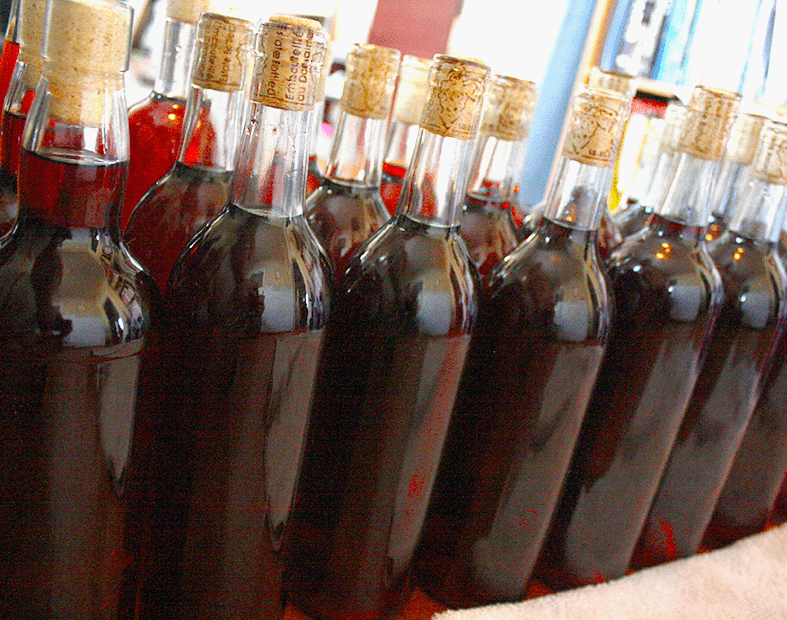
This is my first time making apple wine. So far it is racked into it’s secondary. Once ready to bottle, do I add a campden tablet to kill any remaining yeast and then add some sugar to make a sweeter apple wine? I have tried to do some research, but have found myself more confused.

Name: Matt
State: Virginia
—–
Hello Matt,

First, thank you for such the great question. Sweetening a wine before bottling is a subject that causes great confusion among many novice winemakers.

Most of the confusion surrounds the thought that Campden tablets will kill yeast. For the most part this is true. Campden tablets will kill yeast… so long as it’s a wild yeast! But, if you use a domesticated wine yeast to make your wine – just like everybody does in this century – it’s a completely different story.

Domesticated wine yeast, such as that produced by Lalvin or Red Star, have been acclimated to the active ingredient in Campden tablets, sulfite. In other words, these domesticate yeast strains have been bred to become somewhat immune to effects of sulfite.

This does not mean that using Campden tablets will not kill some of the wine yeast. In fact, it will kill some or even a significant part of the yeast colony, depending on how many tablets you use, but it will not kill all of the wine yeast. This is where the problem comes in for the home winemaker sweetening a wine before bottling.

Shop Campden TabletsIf you are sweetening a wine before bottling it is essential that the wine yeast be dealt with so that it cannot start re-growing a colony again. Campden tablets will not do this. It may put a momentary dent in the yeasts’ ability to ferment, but it does not take away their ability to propagate and grow back into numbers that can cause a winemaker some grief in the form of a rejuvenated fermentation.

If only Campden tablets are used when sweetening a wine before bottling, then there is a decent chance that a fermentation will occur in the wine bottle. The result is a buildup of pressure from the CO2 gas, and eventually one of two things will happen: either the corks will start popping out, or the wine bottles will fail. Neither one is a good thing.

So Matt, I imagine by this time you are wondering, what are you supposed to do when sweetening a wine before bottling? It’s really pretty straight forward. And, you almost had the right idea.

Sweeten The wine To Taste:
Most home winemakers will use cane sugar as a sweetener, but you can try sweetening the wine with honey, corn sugar, beet sugar, etc. There is room for experimentation. Just realize that regardless of whatever you use, it needs to be completely dissolved and evenly blended into the wine. Don’t skimp on the stirring.

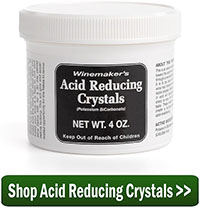
Add Campden Tablets To The Wine:
For sure, you want to add sulfites such as Campden tablets. You can also use potassium metabisulfite or sodium metabisulfite, instead. Both of these work in the same way as Campden tablets. The only difference is that they are in a granulated form. If using Campden tablets, add one per gallon. If you are using either potassium metabisulfite or sodium metabisulfite, add 1/16 of a teaspoon per gallon.Shop Potassium Bisulfite

Add Potassium Sorbate To The Wine:
Up to now I have not mentioned potassium sorbate, (aka, wine stabilizer) but it is the real key to sweetening a wine before bottling. Potassium sorbate does not kill or destroy yeast, wild or domestic, but instead, it stops them from reproducing.

Any yeast fermentation thrives on the fact that a single yeast cell can reproduce itself several times before it dies. It does so through a process called budding. A little bud will emerge from the yeast’s cell wall. The bud will eventually separate and become its own yeast cell. This is how a yeast colony propagates throughout a fermentation. If the yeast cannot reproduce, then the fermentation cannot sustain itself.

This is where potassium sorbate comes in. Potassium sorbate interrupts the reproductive process by coating the yeasts’ outer cell outer wall, making budding impossible. If the yeast cannot bud, the colony will not flourish.

The recommended dosage for potassium sorbate is 1/2 teaspoon per gallons.

Additional Thoughts:
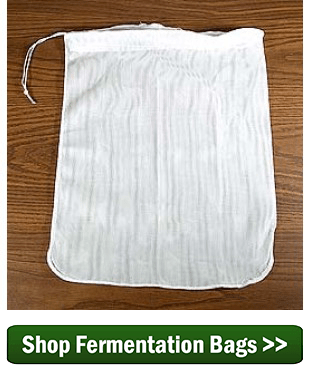
One thing you can do to insure the success when sweetening a wine before bottling is to give the wine plenty of time so that it is can drop out as much yeast as possible. Yeast will fall to the bottom when they run out of sugar to feed on, but it takes time for these very fine particles to fall completely out through gravity. To help speed up the process you can treat the wine with bentonite then follow it up with a polish fining agent such as isinglass or Kitosol 40.Shop Potassium Sorbate

Also realize that Campden tablets and potassium sorbate will have little if any effect on an active fermentation, so do not try to use these ingredients to stop a fermentation in progress. Domesticated wine yeast are too immune to sulfites, and the amount of potassium sorbate it would take to coat such a large number of active yeast cells makes the dosage required unreasonable.

That’s pretty much the ins-and-outs of sweetening a wine before bottling. To summarize quickly, you give the wine plenty of wine to drop out the the excessive yeast cells. Even use a wine clarifier. Then sweeten the wine to taste, and then add the Campden tablets, then the potassium sorbate.

Happy Winemaking!

Why Do Some Wine Recipes Call For Pectic Enzyme?

Fermentation Using Pectic EnzymeThis is Greg again with another question.  I have been making wine with your concentrated homemade wine kits for several years and have had a lot of fun for sure.  I would like to make apple wine…  saw the apple recipe you have on your website.  It looks a lot like making wine from concentrate.  The only thing I do not understand is the pectic enzyme. What is the purpose of adding pectic enzyme to a wine?

Greg
—–
Dear Greg,

Pectic enzyme is called for in almost all wine recipes that use fresh fruit. The recipes you see in books like The First Steps In Wine Making and the wine recipes on our website will all call for pectic enzymes. However, you do not need to add it to wines made from concentrated homemade wine kits, like the ones you have been making wine with. This is because the necessary pectic enzyme has already been added to the concentrate by the wine kit producer.

The purpose of using pectic enzyme in wine making is twofold:

  • First and foremost, pectic enzyme helps to break down the fruit’s fiber or pulp. This allows more flavor and color to be extracted from whatever fruit is being used during the fermentation.
  • Shop Pectic EnzymeSecondly, it helps to make sure the wine has a clearer, more translucent, appearance after the fermentation has completed and the wine has had ample time to clear up.

Pectic enzyme accomplishes both of these tasks by breaking down the pectin cells in the fruit. Pectin is the gelatinous material that holds together the strands of fiber found within fruits such as strawberry or grape. It is also the “stuff” that makes apple sauce thick and cloudy.

By breaking down these pectin cells, the fruit’s pulp becomes less thick. This allows more of the fruit’s character to be released during fermentation or even when running the pulp through the grape presses. Because pectin is somewhat opaque, if it isn’t sufficiently broken down during the fermentation, the resulting wine will have a pectin haze. For the most part, this type of defect is not correctable once the fermentation is complete.

When making wine from concentrated homemade wine kits, the flavor and color extraction has already been taken care of for you. No pulp is involved and Pectic enzyme is not necessary. It’s one more variable that these kits take out of the equation so that you can be a successful home wine maker.

shop_wine_pressSo as you can start to see there is a reason for adding pectic enzyme to a wine. Pectic enzyme has a purpose. It helps to extract more color and flavor from the fruit, and it helps to insure that the resulting wine is clear.

Happy Wine Making,
Ed Kraus
—–
Ed Kraus is a 3rd generation home brewer/winemaker and has been an owner of E. C. Kraus since 1999. He has been helping individuals make better wine and beer for over 25 years.

Making Muscadine And Scuppernong Wine

Muscadine Grapes For Making WineMy question is related to making both Muscadine and Scuppernong with 100% pure juice. I have an opportunity to obtain 100% pure juice for both products with a Brix range between 22.0-23.0.

I have always utilized real, whole fruit in all my batches and I am not sure if there are recipe differences when using pure juice. Do you have a Muscadine recipe or a Scuppernong recipes that I could follow utilizing 100% grape juice? Are all the wine making ingredients the same? Do I add water or more sugar considering the Brix is in the ideal range?

I really appreciate your assistance.

Best Regards,
John and Cathy H.
—–
Hello John and Cathy,

Most fresh Muscadine or Scuppernong wine recipes you will find typically call for both water and sugar in addition to the juice/grapes:

  • Water: to lower the higher acidity typically found in these grapes. If you use straight Scuppernong or Muscadine juice, you will most likely end up with a wine that is too tart.
  • Sugar: to bring the potential alcohol of the wine back up to a decent range. Because you added water to dilute/lower the acidity of the juice, you will need to add sugar to bring the potential alcohol level up to a descent range: 10% to 13%.

However, these wine recipes can only guess as to what are the optimal amounts of each. My suggestion to you would be to purchase two items to help you bring everything into optimal balance:Shop Wine Making Kits

  • Acid Testing Kit: This kit will allow you to test the acidity level of the Scuppernong or Muscadine juice. The acidity relates to the sourness/sharpness of the wine verses the flatness/lifelessness of the flavor. The acid testing kit also comes with directions that will tell you what the optimal readings are, so you can calculate how much water to add to the juice, if any. I would shoot for an acid reading of around .65%.
  • Wine Hydrometer: This priceless instrument is what tells you what the brix reading is of the juice. Your supplier has already given you a brix range of 22 to 23, but these numbers will change if you have to dilute the grape juice with water to lower the acidity. The wine hydrometer will tell you what the new brix reading is and help guide you back to a brix range of 22-33 when adding sugar back to the wine must.

As for the rest of the wine making ingredients, you can follow the wine recipes on the wine recipes page of our website. There you will find a Muscadine wine recipe and a Scuppernong wine recipe. Basically, add the following for every 5 gallons of wine must:

Shop Wine PressThe wine yeast recommended for the Scuppernong is the Lalvin type: K1V-1116; for the Muscadine the Red Star type: Pasture Blanc is recommended.

What About Fresh Muscadine And Scuppernong Grapes?
I would also like to point out that the above information can be applied to making wine from actual Muscadine a Scuppernong grapes. Just crush the grapes then take a reading with your gravity hydrometer and acid test kit, and take it from there.

Happy Wine Making,
Ed Kraus
—–
Ed Kraus is a 3rd generation home brewer/winemaker and has been an owner of E. C. Kraus since 1999. He has been helping individuals make better wine and beer for over 25 years.

Adding Sulfites To Homemade Wine

Adding Sulfites To WineI started fruit wine making in May. Yesterday I came across reading something on your blog which caught my attention. Something that I haven’t read or was told before. That is to add Campden tablets and sorbate after each racking. Do I need to do this after each racking or is it OK with every other racking?… By me not adding any since I started and going on my 3 and 4th rackings am I in jeopardy of losing my wine?…

Eric — LA
—–
Hello Eric,

The fact that you haven’t been adding sulfites [Campden tablets] to your homemade wine doesn’t mean you have ruined it by any means. There are winemakers that never use sulfite and turn out good wines. But having said this, I would urge you to start adding sulfites to homemade wine.

Sulfites such as Campden tablets and sodium metabisulfite make sure your wine does not spoil during the wine making process. After the wine has been made, sulfites help to insure that your wine will keep for many years and not just weeks or months in the wine bottle. Sulfites also help your wine to be free from the effects of oxidation. This is when the color of the wine darkens and the flavor taken on a little bitterness. Adding sulfites to homemade wine is not an absolute necessity, but it only makes sense to do so.

Potassium sorbate on the other hand is a different beast. It should only be used before bottling the wine – if at all. It is required if you are planning on back-sweetening your wine at bottling time. If it is not added along with the sweetening sugar, you stand a very strong chance of experiencing a re-fermentation of your wine while in the bottle. This can eventually result in popping corks and fizzy wine.

Shop Campden TabletsThere is no reason to add potassium sorbate at any other time than at bottling. In fact, if it is added before the fermentation has completed it will most likely result in a sluggish or stuck fermentation. I would not recommend adding it at bottling time if you are not making a sweet wine. It is not necessary.

If you are making wine from fresh fruit, I always recommend adding sulfite to homemade wine about 24 hours before adding the yeast. Leave the wine must uncovered during this 24 hours so that the sulfite gas may dissipate. Then add the wine yeast as you normally would. Doing this will easily destroy any wild molds, bacteria, etc. that may be coming along with the fruit.

I always recommend that sulfite be added before bottling, as well. This is the dose that keeps the wine fresh and free of oxidation while in the wine bottle. Before fermentation and before bottling are the two times I would never forgo.

I also suggest adding sulfites to wine after the fermentation has completed. This is with the understanding that the wine is going to sit for a while before clearing up. This will keep any airborne contaminants from growing on your wine while clearing.

Shop Potassium BisulfiteOnce the wine is clear and you have racked it off the sediment, I would also recommend adding a 1/2 dose of sulfites if you plan on bulk-aging the wine. If you plan on bottling within a few days don’t worry about it.

Eric, at this point I would add a dose of Campden tablets. Just on per gallon. If you are on your 3rd or 4th racking you shouldn’t need to rack your wine any more other than to bottle it, at which point I would add another dose of Campden tablets. No potassium sorbate should be added unless you are sweetening your wine.

Adding sulfites to homemade wine is important and highly recommended. It’s like buying insurance for making a wine that doesn’t spoil or oxidize. If you do not add sulfites you can make wine successfully, but most will find it hard for the wine to keep over extended periods of time without refrigeration.

Happy Winemaking,
Customer Service at E. C. Kraus
—–
Ed Kraus is a 3rd generation home brewer/winemaker and has been an owner of E. C. Kraus since 1999. He has been helping individuals make better wine and beer for over 25 years.

My Wine Stopped Fermenting Too Early

Wine That Stopped FermentingI am making a wine with black and red currants. I mixed everything together and the fermentation started the next day. But now my wine has stopped fermenting too early. It has only been fermenting for about 5 days. What should I do?

Name: Kelly F.
State: GA
—–
Hello Kelly,

It may very well be that you have a stuck fermentation, and need to figure out how to get it going again. But, more than likely the reason your wine is not fermenting is because the fermentation is simply done. Once all the available sugars have been turned into alcohol by the wine yeast, there is nothing else to do. No reason to add more yeast, etc.

While most fermentations will last anywhere from 5 days to 10 days, I have personally seen wine fermentations be completely done in less than 3 days. It’s all just a matter of how happy you make the wine yeast.

To determine if your wine stopped fermenting too early or if you have a stuck fermentation, you will need to test the wine with a hydrometer. If you do not have a hydrometer, I would strongly urge you to get one. A wine hydrometer is the single most valuable tool any winemaker can have, and it is quick and easy to use.Shop Hydrometer

  • If your wine has a specific gravity reading less than .998, then your fermentation is done. All that you need to do is to continue on with any wine recipe directions you are following. This would typically be to rack the wine into a secondary fermenter and allow it time to clear.
  • If your wine has a specific gravity reading more than .998, then you have a stuck fermentation on your hands and will need to figure out how to get the wine fermenting again.

There are a number of reasons why a wine might stop fermenting too early – too many to go over here – but fortunately you can go to our Top 10 Reasons For Fermentation Failure. There you will find the mostly likely reasons why you have a stuck fermentation. The reasons are in order from the most to least likely reason. This list was culminated from our years and years of experience with helping home winemakers. Go over them and see if any of the top 10 reasons apply to this batch of wine.Shop Yeast Energizer

In short, if you have a wine that stopped fermenting too early, it does not necessarily mean you have a problem. In fact, it could mean the opposite – that you had a very good fermentation and it is done sooner than expected. But, if the fermentation is not complete, you need to figure out why, and then address that issue.

Happy Wine Making,
Ed Kraus
—–
Ed Kraus is a 3rd generation home brewer/winemaker and has been an owner of E. C. Kraus since 1999. He has been helping individuals make better wine and beer for over 25 years.

Can I Use Potassium Sorbate To Stop A Fermentation?

Wine Fermentation That Needs To Be StoppedAs the yeast eats the sugars, the sweet taste disappears as the sugar is eaten. I have heard you can’t stop the yeast from doing their job. But if I want a sweeter wine and my reading has reached an SG of 1.010, can I put potassium sorbate in the fermentation to stop it there for some sweetness instead of letting it ferment to the end at .998 and having to try and back sweeten a dry wine?

Byron J. — FL
—–
Hello Byron,

This is a great question because it covers a two wine making topics that often trip up home winemakers: using potassium sorbate and sweetening a wine.

Let me start off by saying that it is possible to stop a fermentation in progress, but it is much more difficult than just using potassium sorbate to stop a fermentation and/or sulfites such as Campden tablets and sodium metabisulfite. These wine making ingredients will give the fermentation a blow to the gut, but vary rarely will they permanently stop a fermentation. Not good enough for a homemade wine that is destined to be bottled. The last thing any winemaker wants is fermenting bottles of wine.

The potassium sorbate does not stop or inhibit the fermenting in any way. What it does do is stop the yeast from reproducing themselves. During a typical fermentation the wine yeast will go through several re-generations. By adding potassium sorbate to a wine you are making sure that the current generation of yeast is the last generation of yeast. Eventually, the wine yeast will begin to die, but not all at once. Some yeast will live longer than others always leaving a possibility of a re-fermentation occurring, even months down the road.

Shop Potassium SorbateSulfites, like the Campden tablets and sodium metabisulfite, will destroy some of the yeast cells but not all of them. Domesticated wine yeast are somewhat immune to the effects of sulfite. They are acclimated to the sulfites when they are being produced. This is done on purpose so that a fermentation can exist with some of the protective benefits of sulfites.

Since potassium sorbate won’t stop a fermentation, here is what a commercial winery does when they want to stop an active fermentation:

  1. Chill the fermentation tanks down to about 45°F. This causes the wine yeast to stop their activity and drop to the bottom. This can be done in a matter of 3 or 4 days depending on how fast the tanks chill. As a home winemaker, refrigeration should be done for at least a week.
  1. Rack the wine off the sediment. The sediment is mostly yeast cells at this stage of the winemaking process, so by racking or siphoning the wine, you are leaving most of the yeast behind.
  1. Filter the wine. It is vital that the wine be finely filtered at this point. While almost all of the wine yeast is gone, if some is left in the wine they can propagate themselves into larger numbers, regenerating a new colony of yeast that can ferment the wine after it has been bottled. Not a good thing. A winery will typically filter a wine down to .5 micron. This will require filtration under pressure with an actual wine filter system.

Shop Potassium MetabisulfiteThis is how a winery controls the sweetness of a wine, but there is a much, much easier way available to the home winemaker. It doesn’t involve using potassium sorbate to stop a fermentation, and it doesn’t involve going through all the steps laid out above.

  1. Allow the fermentation to finish. All the sugars will be gone and the wine yeast will start dropping out.
  1. Rack the wine off the sediment. Again, this will leave most of the yeast behind – well over 90%.
  1. Add sugar syrup to taste. The sugar syrup can be made by taking equal parts water and sugar and heating them in a sauce pan until completely clear. You may want to take a measured portion of the wine and add measured portions of the sugar syrup to establish a dosage, first, before committing the entire batch.
  1. Add potassium sorbate and sulfite to the wine. The dosage should be listed on the containers they come in, but you want to use 1/2 teaspoon of potassium sorbate per gallon and 1/16 teaspoon per gallon of either: potassium metabisulfite, sodium metabisulfite, or 1 Campden tablet per gallon of wine.
  1. Bottle the wine right away. If the wine is allowed to sit, some of the sulfite will dissipate, so you will want to bottle the wine on the same day.

By allowing the wine to finish, you will have much greater control on the sweetness of the wine. Instead of saying I want the wine to finish at a specific gravity 1.010, as you have suggested, you can actually sweeten the wine to taste. This is important because some wines require more sugar than others to get the same effect of sweetness than others. Every wine is different.Shop Mini Jet Wine Filter

By operating in this way you can also bulk age the wine first. This is a great advantage, because it allows you to sweeten the wine after the harshness has been aged out. Often times when sweetening a young, too much sugar will be added. This is because the winemaker tries to cover up the harshness with sweetness — a harshness that won’t be there later.

Byron, I hope this information helps you out. Again, I’m glad you asked about using potassium sorbate to stop a fermentation for the simple fact that it’s answer will help to clear up a lot of confusion among new winemakers.

Happy Winemaking,
Ed Kraus
—–
Ed Kraus is a 3rd generation home brewer/winemaker and has been an owner of E. C. Kraus since 1999. He has been helping individuals make better wine and beer for over 25 years.

The Virtues Of Adding More Fruit To A Wine Recipe

Bowl Of Wine Making FruitYour blueberry wine recipe on your website states you need 13lbs of blueberries for making 5 gals. Will adding more fruit to this wine recipe add more color and flavor to the finished wine?

Thank-you
Gary C.

—–
Yes, adding more fruit to any wine recipe is going to intensify the flavor and add more color. But, before you take this bit of information and go running with it, here are some considerations that you may want to think over first.

Do You Really Want More Flavor?

Almost all of the wine recipes on our website are shooting for a pleasant, medium-bodied wine. If you follow the amounts called for and follow the homemade wine instructions, you will end up with a wine that everyone can enjoy, wine drinkers and non-wine drinkers alike – a wine perfect for passing out as personal wine making gifts at parties, family gatherings, etc.

If you over-do the intensifying of the flavor by adding more fruit, it has been my experience that non-wine drinkers will not be as appreciative of what you’ve made. The flavors that will come forward will be very foreign and challenging for non-drinkers to like.

What About The Fruit Acid?

When you add more fruit to a wine recipe, you are obviously adding more fruit acid as well. A wine’s acidity needs to be in a certain range to have any chance of tasting right. By adding more fruit to a wine recipe, you are potentially taking the wine out of this range. This could lead to your wine tasting either too sharp or tart.

Fortunately, you can overcome this by reducing one of the other wine making products called for in the recipe, Acid Blend. This is a blend of the acids that are naturally found in fruit. In the case of the blueberry wine recipe, it calls for 2 tablespoons of Acid Blend. When adding more blueberries you would reduce this amount to compensate.Shop Acid Test Kit

Now comes the question, “By how much does the Acid Blend need to be reduced?” This can only be answered with the aid of an Acid Testing Kit. Once all other ingredients – besides the Acid Blend – have been added to the wine must, you would use the Acid Testing Kit to determine how much Acid Blend, if any, is actually needed for the wine to taste in balance – not too sharp, or not too flat. Our acid testing kit comes with directions that will tell you how to get the wine acidity into the right range.

The Alcohol Level Needs To Kept In Balance.

In general, the fuller the flavor of a wine, the higher the alcohol level must be to keep it in balance. Wines that do not have enough alcohol as compared to their flavor intensity, will taste harsher. The astringent characters of the wine will be highlighted in the wine’s final flavor profile.

To help put this into better perspective, lighter white wines tend to be around 10% alcohol, while the heaviest of reds tend to be around 14%. The particular blueberry wine recipe you are considering is shooting for around 11.5% to 12%, that is, if you follow the homemade wine instructions.

This alcohol level is based on both the amount of sugar and fruit called for in the wine recipe. Both of these ingredients are wine making materials that provide food for the wine yeast to turn into alcohol.

If you decide to add more fruit to your wine recipe, then you should probably shoot for more alcohol. Not necessarily 14%, but maybe somewhere around 12.5% or 13%. There is no exact amount that is correct. This is where art, finesse and experience come into play.

To control the finished alcohol level of a wine, you need to control the beginning sugar level. This is done with the “potential alcohol” scale on the wine hydrometer. Once the crushed fruit and water are mixed together, instead of adding 11 pounds of sugar as directed by the wine recipe on our website, just keep dissolving sugar into the wine must until the potential alcohol scale on the wine hydrometer reads 13%.Shop Hydrometers

More Flavor Means More Aging.

Another consideration that must be thought through before increasing the amount of fruit is the amount of aging that will be required before the wine is considered mature and ready for consumption.

Here again, the more fruit you add to a wine recipe, the more aging the wine will need before it comes into its own. With the original 13 pounds of blueberries, maximum aging would be around 6 to 9 months. With 20 pounds it may take as long as 12 to 18 months before the improvement brought by aging is fully realized.

This does not mean that you can not drink the wine before this; it just means that you can expect the wine to continue improving with even more time. Again, neither I nor wine making books can tell you when the wine has reached full maturation, this is for you to learn how to determine on your own as you sample the wine through out the aging process.

As You May Begin To See…

There are a lot of factors that go into putting together a solid wine recipe: picking out the various wine making products; determining their amounts, etc.

Shop Wine Making KitsAll the wine recipes we offer on our website have been bench tested and used many, many times. While you can alter them as you like, realize that any changes you make to any one ingredient, usually means that you will need to change another ingredient to keep things in line.

Happy Wine Making,
Ed Kraus
—–
Ed Kraus is a 3rd generation home brewer/winemaker and has been an owner of E. C. Kraus since 1999. He has been helping individuals make better wine and beer for over 25 years.

6 Tips For Using An Acid Test Kit

Sample For Using With An Acid Test KitI have the hardest time with the acid titration kit as far as finding the right color stop (acid level) any suggestions on using an acid testing kit, how to tell when to stop at the right level.

Manuel Q. – NM
—–
Hello Manuel.

For those of you who have never used an acid test kit: basically what you are doing is taking a measured sample of wine and slowly adding sodium hydroxide to it until the wine permanently changes color. By knowing how much sodium hydroxide it took to get the color change, you can determine you wine’s acidity level.

An acid test kit can be a little awkward to use until you get the hang of it. I sometimes suggest to customers that they practice on some finished wine, first, before they actually need to use it. Here are some additional information for using an acid test kit. These are tips that go beyond the instructions you typically find with a titration kit.

  1. Run Through A Quick Test
    When I’m using the acid test kit, the first thing I like to do is go through a test quickly. This is to establish “about” where the color change will occur. Then when doing a second test, I start off by adding enough sodium hydroxide to get close to the point of a color change. Then I add the sodium hydroxide one drop at a time. Adding the bulk of the sodium hydroxide all at once will save you a lot of time and aggravation in the long-run. With each drop you will want to shake the test-tube and see that either a magenta or grey color is dissolving completely away in the sample of wine. Streaks of either color are okay. They just need to be swirled out. It’s when the color stays permanently and alters the color of the entire sample. That’s when you want to take your measurement reading.
  1. Use A White Background 
    This tip for using an acid test kit is the one I think is the one that is most helpful. By holding the test tube up to a white background like a wall or sheet of paper you will be able to discern the color change more easily. You are essentially blocking out colors from the room, giving you a cleaner frame of reference when taking a titration of the wine.Shop Acid Test Kit
  1. Use A Second Wine Sample For Comparison  
    Having a second test tube with another wine sample for comparison may be helpful. Put them side-by-side. Expect the color of the sample being tested to get lighter and lighter as more sodium hydroxide is added. That’s okay. You are not comparing the lightness or the darkness between the two wine samples. You are comparing the color hue of the two wine samples. 
  1. Dilute The Wine’s Color  
    This tip for using an acid test kit does not apply to every wine. If the color of the wine is too opaque to see a color change, you can dilute it. Some red wines are just to dark for performing a titration. You can dilute it with distilled water. You do not want to use tap water or drinking water. Use distilled water, only. Dilute as much as you need to. This will not alter at what point the color change will occur or the math you use to calculate it. 
  1. Make Sure The Wine Is Free Of CO2   
    The wine sample needs to be flat. You do not want CO2 (carbonation) from the fermentation to be in the wine sample. Carbon dioxide will throw off your reading. For this reason, the most opportune times to test your wine is before fermentation and before bottling. The wine must should be free of CO2 at both these times. If you are making your wine from fresh fruit, I would recommend testing at both times. The acidity level can change during a fermentation. The first test is to get the acidity close so that the fermentation can be healthy. Acidity plays a role in how well a yeast ferment. The test before bottling is to adjust for flavor – flat vs. tart flavors.
  1. Make Sure The Acid Test Kit Is Still Good    Shop Acid Reducing Crystals
    Here is the last tip for using an acid test kit. Both the activator and the reagent in your acid test kit will get old with time. This can throw off a titration reading – sometimes significantly. For this reason, it is not a bad idea to store these ingredients in the refrigerator for longer shelf-life. If you are not sure how old your acid test kit is, you can run a test on Welch’s grape juice – not from concentrate, straight Welch’s grape juice off the store shelf. It should have a reading of .67%-tartaric. If you get a reading that is higher than this, it means that your reagent (sodium hydroxide) is old and does not have its full strength.

Using an acid test kit is a great way for controlling your wine’s acidity. Hopefully these tips for using the acid test kit will help to make the process a little easier and an little more accurate.

Happy Winemaking,
Ed Kraus

—–
Ed Kraus is a 3rd generation home brewer/winemaker and has been an owner of E. C. Kraus since 1999. He has been helping individuals make better wine and beer for over 25 years.

Help! My Wine Fermentation Temperature Is Too High!

Wine Fermentation Temperature Is Too HighCould you tell me how I might control my fermentation temperature? I have been making wine for 15 or so years from real grapes. Many times the wine’s fermentation temperature is too high. What is the best way to control it. Thanks in advance.

Name: Al J.
State: NY
—–
Hello Al,

Thanks for the great question. This is something that plagues a lot of home winemakers, so I’m glad you brought it up.

For those of you who do not know, a fermentation creates heat. It’s usually not a problem during the cooler months or with smaller batches, say 5 gallons or less. But when the weather is hot or you are fermenting in 15 gallon batches or larger, heat can build up and should be on the winemaker’s radar.

Depending on the type of wine you are making and the type of wine yeast you are using, you would like your fermentation to around 70° to 75° F.  Once you start getting over 80°F. you run the risk of off-flavors and possible spoilage.

There are several ways you can go about keeping a fermentation cool. Unfortunately, most of them are a pain in the behind. For a professional winery it simple. They use fermentation vats with cooling jackets and/or refrigeration coils that keep the temperature stable under computerized control. Sweet! But for us home winemakers we have to use a little more ingenuity to keep our fermentation temperatures stable.

I’ll go through a few of the basic methods you can use if the wine fermentation temperature is too high, but it’s going to be up to you to figure out which one is going to be most practical for your situation:

  • Use Smaller Fermenters
    This one is pretty basic. A 5 gallon carboy is not going to over-heat as easily as a 15 gallon demijohn. This is because you have more external surface area per gallon as you go down in size. That means the heat can dissipate more readily from a smaller fermenter than it can with a larger fermenter.
  • Blocks Of Ice
    Shop CarboysThis is the one I hate the most, but is most used by home winemakers. It’s simply using blocks of ice in ziplock bags directly into the wine. I hate this for two distinct reasons: 1) you never know when a ziplock bag is going to fail and empty melted ice into the wine, 2) there is very little control. While it’s designed to help you out when the wine fermentation temperature is too high, you could easily get the fermentation too cool, stalling the fermentation. For these reasons I do not recommend this method, but it could be used in a pinch.
  • Evaporation Method
    The basis behind this method is when water evaporates it cools whatever it is touching. By keeping evaporating water against the outside of the fermenter, you can get the fermenter to cool down. A common way of accomplishing this is to sit the fermenter in a bath of water. It does not need to be deep, just a few inches. Next put fabric over the fermenter that drapes into the water. As an example, you could use a cotton t-shirt over a carboy. The water will then wick up the fabric and then evaporates, cooling the fermenter. You an use a fan to blow air across the fermenter to speed up the evaporation. The faster the evaporation, the more the fermentation gets cooled.
  • Heat Ex-changer
    This method is done simply by putting a coil of stainless steel tubing in the wine Buy Temp Controllerand then running cold water through the tube. This is a great way to cool the wine. The biggest problem with it is that you have to use stainless steel tubing which is expensive. Other metals will corrode which is detrimental to the wine, so stay away from copper, aluminum, etc.
  • Dedicated Refrigerator
    This is the ultimate solution for when a wine fermentation temperature is too high. This method involves using a refrigerator as a temperature controlling device. The obvious issue with this method is you need a refrigerator. The second issue is that the thermostat of a refrigerator does not go high enough. For this reason you will need to buy a electronic temperature controller with the correct temperature range to control the power to the refrigerator.

Unfortunately, all these methods involve some effort on your part. As mentioned before, all them work, it’s more a matter of picking out the method that is most practical for your situation.

Happy Winemaking,
Ed Kraus
—–
Ed Kraus is a 3rd generation home brewer/winemaker and has been an owner of E. C. Kraus since 1999. He has been helping individuals make better wine and beer for over 25 years.

Why Is Stirring A Fermenting Wine So Important?

Stirring Fermenting WineI have started making 5 gal of Blackberry wine and I am using your ingredients. One question is in your wine recipe you say after the first day add the yeast with the fermentation bag still in the must and leave it for an additional 7 days before transferring it to the carboy. Should I continue to stir the wine also ? Do I need to add make up water after removing the bag ?

Name: Charles P.
State: SC
—–
Hello Charles,

Once you add the yeast you will want to stir the fermenting wine must around as much as you can. The goal is to not allow any of the pulp to become too dry during the fermentation. Stirring it around once or twice a day should be sufficient.

In a winery they call this punching the cap. When fermenting grapes there is so much pulp involved that a thick solid cap is formed. The winemaker has to punch it down with a punch down tool that looks similar to a large potato masher with a long handle.

With your fermentation there is much less pulp. I’m assuming you used around 15 pounds of blackberries to make your five gallons, whereas with a grape wine there would be about 40 pounds, so simply stirring the fermenting wine should be sufficient in your situation.

If you have our regular size fermentation bag, just open it up and stir the pulp so as to circulate the dryer pulp towards the bottom. Rotate the pulp. If you have our jumbo fermentation bag, then it should be left open and rolled backwards over the brim of your primary fermenter. All you need to do is give the pulp a quick stir in kind of a folding manner.Shop Fermentation Bags

The reason you want to keep stirring the wine must is twofold. The first one is simple. When the pulp becomes to too dry for too long of a period, it provides a perfect place for mold an bacteria to grow – damp, nutritious pulp that is exposed to air. The second reason is if a solid dry layer forms it will interfere with the fermentation. Wine yeast needs air to successfully grow and multiply into a large enough colony to support a healthy, vigorous fermentation. If a dried cap forms it creates a barrier that traps the CO2 gas in the wine must and cuts the air off from the yeast.

As you suggested, once your primary fermentation is done and you are ready to remove the fermentation bag, there will be some loss in volume, but it will not be as much as you might think with your blackberries. What you are looking at now is the plump fruit. Once the fermentation gets hold of it, it won’t be so plump. The fermentation will break down the pectin in the blackberries making the pulp just a shell of what it was before.

If you do find your batch is excessively short then you should top up the wine when going into secondary, but is should not be a major issue. Just be sure to get as much liquid as possible when racking into your secondary fermenter — even if some sediment is coming along with it. Also, when you pull the fermentation bag out, wring it as best you can. The more juice the merrier.Shop Stirring Paddle

Charles, I hope this answers your questions about stirring fermenting wine. Just remember that stirring the wine must daily to keeping any cap from becoming hard and dried is a critical part of having a healthy, active fermentation.

Happy Winemaking,
Ed Kraus
—–
Ed Kraus is a 3rd generation home brewer/winemaker and has been an owner of E. C. Kraus since 1999. He has been helping individuals make better wine and beer for over 25 years.