What Are The Different Malts Used in Homebrew Recipes?

Malted Barley Grains
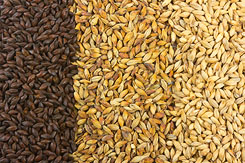
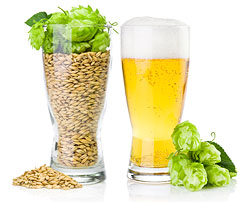
The market is flooded with different types of barley malts, and each variety has its own character. To a large extent, the flavor and strength of the beer depend on the malt that is used in the beer recipe.
The salient features of different varieties of barley malts are as follows.

  • Crystal Malt: The crystal malt adds color, body, and flavor to the beer. In these malts, the starch is already converted into caramelized and soluble sugars, hence a plain water steep is all that is required to extract flavors. They are well suited for augmenting malt extract in a beer recipe.
  • Cara-pils and Dextrin Malt: These malts have complex starch content and are light in color. When these malts are mashed, diastatic enzymes convert dextrin into a soluble form.
  • Two Row Pale Malt: Most all-grain brewing recipes use pale malt because it contains starch and needs mashing in order to make soluble fermentable sugars. It is light-colored, has a crisp flavor and contains a lot of diastatic enzymes.
  • Specialty Malts: Briess offers top-notch handcrafted malts which are most suited for steeping. Briess malt extracts is a popular choice when it comes to extract brewing. The carapils malt is innovative and different than the other dextrin malts available in the market.
  • Pilsner malt: It has the lightest flavor and color and is used as a base grain in light German styles. During mashing, pilsner malt generally needs protein rest. Some varieties of this malt (especially those with low enzyme levels) need careful mashing.
  • Chocolate malt: It requires a fairly high kiln temperature to produce, which creates a dark brown color and a rich flavor. Chocolate beer malt renders a roasted, nutty flavor to the beer. It is a vital ingredient in stouts and porters.

________________________________________________________

Read More About Barley Grains And Other Brewing Topics,
FREE  EMAIL NEWSLETTER:


________________________________________________________

Where Can I Find Pabsts Blue Ribbon Malt?

Blue Ribbon Malt
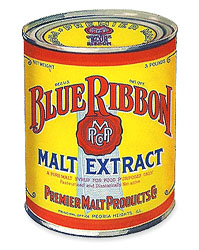
My dad used to make home brew in the 50s and 60s with Pabst Blue Ribbon malt. A website directed me to you for the malt. I don’t find any of your malts with a reference to Pabst Blue Ribbon. Can you help me please! Thanks in advance.
Name: C. Rusmisel
Hello Mr. Rusmisel,
I’m sorry to say that Pabst Blue Ribbon malt extract is no longer with us. We carried it up until about 2 years ago when its production was completely halted.
Back in the 50’s and 60’s it was the only malt you could find on the grocery store shelf. It was mostly sold for “baking” (wink, wink) and was a plain, light syrup. In 1985 Pabst Brewing was taken over by a new owner and the Pabst can malt extract production was taken over by another company all together and renamed “Premier Malt” The labeling looked very similar except for the name itself, Premier.
Premier Malt added different varieties of malt besides just “light”. In addition, you could get it in dark, extra pale and pale light… with or without hops. We carried them all and home brewers loved them. Unfortunately, as home brewing became more popular, so came the competition, and eventually Blue Ribbon Malt was squeezed out.
Now you can get malt extract in many different brands and many different flavors. There’s no shortage of choices. The two main brands we now have are Briess and Munton’s malt extract. Between both brands there are 15 flavors to choose from. We also have malt extract kits. These are blended malts that produce specific styles of beer, everything from American Light to Stout. We carry these blended kits in 5 different that offer a combined 26 different styles of home brew.
My point here is that while Pabst Blue Ribbon malt is no longer produced, that’s no reason not to make beer. There are more choice of malt available now than ever before providing the home brewer with a great opportunity to brew a wide variety of beers.
Happy Brewing,
Ed Kraus
———————————————————————————————————
Ed Kraus is a 3rd generation home brewer/winemaker and has been an owner of E. C. Kraus since 1999. He has been helping individuals make better wine and beer for over 25 years.

Choosing the Right Beer Hops for Making Your Own Beer

Pelletized Beer HopsHops play a pivotal role when making beer, and there are a wide variety of beer hops from which to choose: Casade, Fuggles, Chinook, Willamette, Nugget., Tettnang, Perle… The list goes on-and-on as to how many types of beer hops can be found on the market these days. So how does one choose?
In general, hop varieties fall in two major groups: aroma hops and bittering hops. Many of these varieties can serve double-duty, meaning that they can act as both an aroma hop and a bittering hop. Some tips for selecting the best hops for making premium quality beer are given below:

  • IBU or International Bitterness Units are a measure of the bitterness levels of a beer. The alpha-acid percentage in a hop is directly related to this bitterness level. Hence, select the bittering hops that has the right alpha-acid percentage for the type of beer your are making.
  • Dual purpose hops generally have intermediate or medium alpha-acid content and serve a dual purpose; they provide good aroma and satisfactory bitterness at the same time.
  • Aromatic hops have significantly lower alpha-acid percentages. The aromas range from floral to grassy and from citrus to perfume. Some smell quite subtle while others may be very distinct. So in order to make the beer of your choice in your home brewery, you should select the hops carefully.
  • Rather than using just one variety of hops, homebrew recipes often use a combination of them. While blending, you must select hops that complement each other.

The essential oils present in the lupulin glands of aroma hops are responsible for the rich aroma and flavor produced by these hops.  Myrcene, caryophyllene, farnesene and humulene are the major constituents of essential oils. The ratio of these components determines the type and the quality of the aroma produced by the hops.

________________________________________________________

Read More About Hops And Other Winemaking Topics,
FREE  EMAIL NEWSLETTER:


________________________________________________________

How Do I Get The Wine From The Sediment?

Siphoning WineI used too much Speedy Bentonite to clear my last batch of wine. The bentonite worked, but there is a bunch of sediment. I racked off the wine that was clear. It tasted fine. There is about a gallon and a half of sediment. Will the bentonite continue to settle and is it worth the time and trouble for a few extra bottles
Name: Hans Wikle
State: WV
Hello Hans,
The general rule-of-thumb is to always get as much liquid as you can when you rack (siphon) your wine, even if it comes along with some sediment. It is only during your last racking, before bottling, that you need to be concerned with leaving all the sediment behind. By the time you get to that part of the process there will be little more than a dusting of sediment to avoid.
If you use this approach what you will discover is that your homemade wine will be just as clear when it comes time to bottle, and you will have much less loss of wine. This is true whether or not you add Bentonite to the wine.
You said you have already racked the wine, so I am assuming that you have a fermenter with this sediment and liquid in the bottom. Go ahead and try to get the liquid out and add it to your new fermenter that you just racked into. In the future, when your rack your wine, don’t stop when you get to the sediment, just keep going until you have all the liquid.
One item you may want to consider purchasing is a racking cane. It is basically a piece of clear rigid tubing that you slip onto the end of your siphon hose. Not only will it help you to direct where your siphon is pulling from (like a wand), it also comes with a diversion cap on the very tip of the wand. This keeps your from accidentally digging the racking cane into the packed sediment and drawing it. These racking canes come on all different  lengths and have a curve at the top-end so that you do not have to worry about your siphon hose crimping as it comes out of the fermenter.
Best Wishes,
Ed Kraus
———————————————————————————————————
Ed Kraus is a 3rd generation home brewer/winemaker and has been an owner of E. C. Kraus since 1999. He has been helping individuals make better wine and beer for over 25 years.

Making Malt Extract From Barley

Malt extract is obtained from barley. Barley grains undergo a series of steps that turn it into malted barley which contains sugars. The malted barley is then cook into a soup, known in home brewing as a mash, and then condensed into a malt extract. This extract is the centerpiece of a home brew recipes. It is what provides the color, the body and the sweetness in a beer.
Malting
Brewing grains are soaked in water to accelerate germination. However, just before the barley fully sprouts, the grains are heat dried and in most cases roasted or toasted to varying degrees. Although this step prevents the growth of barley seedlings, it retains important enzymes in the barley malt.
Mashing
The malted barley is then crushed or cracked through a grain mill and added to water to form a mash. The mash is then cooked at precise temperatures to release the goodness from the barley grains — this goodness being primarily sugars, enzymes and proteins.
Extraction
Once the mashing has been completed the liquid is further subjected to evaporation to reduce its mass and make it more concentrated. Although most extracts are liquid based, some maltsters prepare dry extracts as well. This is done by taking a reduced mash and spray drying it into a powder.
Types of Malt Extract
Most home brewers use liquid malt extract as opposed to dried. Each as their advantages. While liquid incorporates into the kettle more easily, the container it comes in needs to be used in total. Dried malt extract works well when a beer recipes calls for an odd amount. Once the package is opened the rest can be saved for later. Regardless of the form chosen, they readily come in either: light, amber and dark.

________________________________________________________

Read More About Malt Extract And Other Home Brewing Topics,
FREE  EMAIL NEWSLETTER:


________________________________________________________

Making Beer and Exploring Ingredients

Beer, Barley, Hops
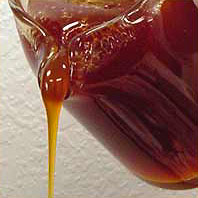
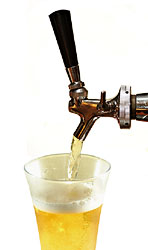
Beer is that one magic drink that none of us can stay without. Moreover, why would anyone even think of staying away from it? It is one of the lightest yet most soothing drinks available on the market.
Beer has been ruling parties all over the world since time immemorial. Its light fizz can make anyone its fan. What is the secret formula of beer that makes it so special? Let’s take a look.
As we all know, beer is a fermented amalgamation of hops, yeast, barley, and water. The main ingredient used in beer is water. The water used in it is first purified for a good blend. Then comes the beer yeast. It is used the littlest, but without this, beer would have never been created. Yeast is responsible for creating the froth of beer. When yeast is added to the barley and water mixture, it breaks down the sugars present in the liquid and gives out alcohol and carbon dioxide.
Fresh hops are very important for adding flavor to the beer. Beer hops are flowers that are grown in vine yards. They balance the sweetness in beer and they act as preservatives too. These bitter flowers are added in different proportions to create different beer flavors. They are the main reason why your beer is bitter.
Apart from the above mentioned ingredients, beer needs proper care during fermentation. Ideal temperature and hygienic surroundings are required for brewing the finest quality beer.
Though tastes and preferences may vary from person to person, this is how beer is made in almost all parts of the world.

________________________________________________________

Read More About Beer Ingredients And Other Home Brewing Topics,
FREE  EMAIL NEWSLETTER:


________________________________________________________

The Important Role Yeast Play In Brewing Beer

Beer yeast is what makes the beer alcoholic through fermentation. Since fermentation is a vital part of brewing beer, commercial as well as home breweries try to source the best brewer’s yeast to produce high quality beer. Yeast converts the beer wort’s sugars into alcohol. It also produces carbon dioxide in the brew. This beer yeast is responsible for imparting some of the characteristic beer feel and taste.
Brewing beer takes time, patience, and the right equipment. Since a fermentation takes place slowly over a period of a few days, beer fermenters are fitted with an air-lock to protect the brew from oxidation and contamination. The air-lock allow CO2 gas from the fermentation to escape without the outside environment getting in and potentially compromising the beer’s freshness. A beer yeast acts on the stored liquid to produce the intoxicating aroma and the base of the beverage.
All beer yeast are not the same, and a brewer must choose a yeast strain that will bring the desired flavor and appearance to the beer. Beer yeast usually comes in two basic varieties – top fermenting and bottom fermenting. Each has specific characteristics and affects the beer in a specific manner. Top fermenting yeast gathers near the upper surface of the beer wort while the bottom fermenting collects at the bottom of fermenter.
Beer yeast is what gives the beer alcoholic character. It produces ethanol alcohol through metabolism. Yeast is a living, microscopic, single-celled life form that is adept in anaerobic respiration. The amount of yeast required to ferment beer depends upon the volume of malt syrup and water. However, before a brewer can begin the fermentation, the beer yeast needs to grow in number. This is achieved by placing the beer yeast in a small sample of the beer wort a couple of days earlier. This is called a yeast starter.

________________________________________________________

Read More About Beer Yeast And Other Home Brewing Topics,
FREE  EMAIL NEWSLETTER:


________________________________________________________

Some Tips for Kegging Homebrew

In olden times, beer was stored in wooden casks but in the modern scenario, people mostly use beer kegs. For those who have just stepped in home brewing or are novice in this field, some tips on kegging homebrew are enlisted below.

  • Avoid shaking the keg during transportation as it may result in the formation of unwanted foam. This usually happens when you remove the keg from your car and drag it inside your home. Rolling the keg is a big No- one should always gently handle the keg and keep it upright.
  • A corney keg is easy to clean and maintain while a commercial Sankey keg is difficult for the novice. Corney kegs are a good pick as they are compact, they don’t break, and they stack well. They are perfect for secondary fermentation. Although they can be used for primary fermentation too, using them for secondary fermentation helps keep them clean.
  • The keg is pressurized with either carbon dioxide gas alone, or nitrogen, or a combination of both the gases. Earlier carbon dioxide was used in kegging systems as people had no choice, but now people all over the world are blending nitrogen with carbon dioxide. The combination of both gases allows an elevated pressure which is ideal for complex dispensing systems.
  • Draught beer refers to beer which is stored and served from a keg or cask. While kegging beer, you must always ensure that kegs and kegging equipment are clean. You can simply use a brush and hot soapy water to clean the keg. Use a non-abrasive pad or a sponge for cleaning. Remove all the seals and fittings prior to washing.

Use the tips given above to keg your homebrew and get delicious each and every time.

________________________________________________________

Read More About Kegging And Other Home Brewing Topics,
FREE  EMAIL NEWSLETTER:


________________________________________________________

Getting The Wine In The Bottle…

Bottle Tree And Corker
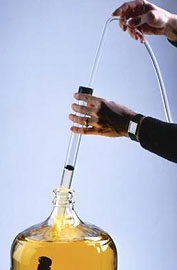
There are many steps to home winemaking, and each individual step is critical in maintaining the quality and acceptability of your homemade wine.  First, you have to prepare the must either from juice or the fruit itself.  Next, the must undergoes fermentation to convert the sugar in the must to alcohol.  Further racking, clarifying, stabilizing, and aging steps help develop the wine to an even greater quality.  Once you’ve past these steps, you may think you’re in the clear; however, bottling homemade wine is just as important as any one of the previous steps for maintaining homemade wine quality.
The first thing you need to do prior to bottling homemade wine is to prepare the wine bottles. You need to be sure the wine bottles you use are clean, not cracked or chipped, and free from all labels.  If you recycle old bottles, remove the labels thoroughly by soaking in hot water and cleaner designed to clean winemaking equipment.  For drying many bottles at once, it would be wise to invest in a bottle tree: they are great for drying and storing bottles while you wait to use them for bottling homemade wine.
The next step in bottling homemade wine is to prepare the wine bottle corks. You’ll need to decide if you would like to use natural cork or synthetic cork, though the use of synthetic cork is becoming more and more popular for bottling homemade wine in recent years.
To get the wine into your bottles, you may either pour directly from the spout on your storage container, or if you have a lot of wine to bottle or you’d like to get the process of bottling homemade wine done faster, a bottle filler is a great investment. This device allows you to fill multiple bottles at once, thus increasing your output and significantly reducing your bottling time.
The final step in bottling homemade wine is sealing them with corks.  There are a lot great pieces of equipment out there that will help you in the process, as no one is strong enough to push a cork into a bottle of wine with just their bare hands.  There are several different styles of corkers, from smaller hand-held devices or mid-sized bench top devices for small to medium quantities of wine, to larger floor corkers that are better for larger quantities of wine.
Whichever method you choose, bottling homemade wine is a step that is critical in ensuring and sealing in the quality of the wine while in storage.
———————————————————————————————————
Ed Kraus is a 3rd generation home brewer/winemaker and has been an owner of E. C. Kraus since 1999. He has been helping individuals make better wine and beer for over 25 years.

Can I Sanitize My Wine Bottles With Hydrogen Peroxide?

Hydrogen PeroxideEd,
I rinsed my bottles with a mild solution of hot water and hydrogen peroxide. could this hurt the wine when it is bottled??.
Name: Butch Bellas
State: PA
Hello Butch,
Using hydrogen peroxide in hot water as a rinse for your wine bottles will not hurt the wine in any way, but it should be pointed out that this is not an effective sanitizer. If your purpose is to sanitize the wine bottles, then you need to do something completely different.
If using hydrogen peroxide as a sanitizer it needs to be used as a 3% solution. This is the strength you will find it on the store shelf. When you dilute it with water you are making it too weak to do any good. It needs to be used straight out of the bottle to sanitize. As you can start to imagine this can be cost prohibitive.
A better and cheaper way to sanitize wine bottles is to use one of the many sanitizers we offer. The three most popular are PBW, StarSan, and Easy Clean. If used as direct there is no question that your wine bottles will get completely sanitized.
Any of these sanitizers can also be used to sanitize your equipment or or anything else your wine or beer comes in contact with. This will help to insure that you never have to experience a spoiled batch.
Best Wishes,
Ed Kraus
———————————————————————————————————
Ed Kraus is a 3rd generation home brewer/winemaker and has been an owner of E. C. Kraus since 1999. He has been helping individuals make better wine and beer for over 25 years.