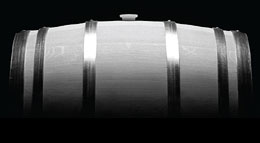
 I put a sterilization solution in the barrel of citric acid and sodium bisulfite. I am now ready to put the wine in, but am worried the rinsing won’t be enough to get the chemicals out of the wood. The directions say to rinse, fill with water, wait 24 hrs then empty and fill with your wine.
Name: Craig R.
State: Wisconsin
—–
Hello Craig,
I understand your concern, but you really have little to be worried about. Having a remnant amount of sodium bisulfite left in the wine barrel is of little consequence. If some did get left behind and into the wine, it would have an unnoticeable effect on it. Even if a lot actually got into the wine, it would not ruin it. Any negative effects from such an accident could be remedied as well.
Sodium bisulfite is something you should be using directly into the wine, anyway: before the fermentation, after the fermentation, and again before bottling. It is also interesting to note that sulfites are a natural by-product of a yeast fermentation, so it’s something that is very much a part of wine regardless if you add it or not.
Another factor is that sodium bisulfite wants to turn into a gas when dissolved in a liquid. It wants to leave through dissipation. Citric acid is also added to the solution to help this release of sulfites. By lowering the pH of the solution your are increasing the ability of the sulfites to release as SO2 gas. By the time you drain the barrel and rinse it, most of the sulfites have already left.
With this in mind, all that can really be left behind after preparing the wine barrel is pretty innocuous: trace amounts of citric acid, sodium and sulfur. None of them harmful in any way to the wine or to us humans in such insignficant amounts.
Happy Winemaking,
Ed Kraus
———————————————————————————————————
Ed Kraus is a 3rd generation home brewer/winemaker and has been an owner of E. C. Kraus since 1999. He has been helping individuals make better wine and beer for over 25 years.
Category Archives: Wine
Winemaking Equipment Guide: Fruit Press, Digital Scale & pH Meter
 There are lots of pieces of homemade wine equipment than can be described in one post. It’s important to learn about each piece of homemade wine equipment and whether a particular item is needed in your own home winemaking practice. Today’s post features the fruit press, the digital scale, and the pH meter.
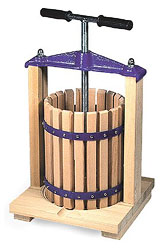
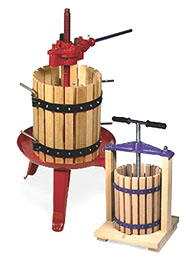
- The Fruit Press: If you’re making wine from fruit, you’re going to need homemade wine equipment that squeezes the juice from the fruit. A fruit press is going to be necessary for this, and there are a couple of different styles that you can get. For smaller batches or for work areas that are limited on space, a Table-Top Fruit Press is a great choice. This piece of homemade wine equipment uses a screw-type press design, sets up easily on a table or lab bench, and is strong enough to press enough juice out of the fruit that the remaining fruit bits are barely damp. If you make larger batches of wine (up to 30 gallons at once), the Double Ratchet Fruit Press may be a better piece of homemade wine equipment for you. This fruit press stands on the floor, and uses a commercial double-ratchet design to efficiently press your fruit and extract as much juice as possible without leaving much behind.
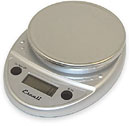 The Digital Scale: This piece of homemade wine equipment is a very important tool that will help you measure ingredients more accurately, ultimately creating a more refined wine. There are a couple different types of digital scales that you can get, which basically differ in their complexity. The Escali Primo Digital Scale is provides accurate weight measurements of up to 11lbs (5kg) and measures in pounds, ounces, or grams. On the other hand, the Escali Alimento Digital Scale provides accurate measurements up to 13.2lbs (6 kg) and measures in a greater variety of units, including g/kg, lbs/oz, oz, g, and lbs. In general, the Alimento scale is piece of homemade wine equipment that is a bit more complex and provides more options than the Primo scale.
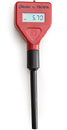 The pH Meter: This piece of homemade wine equipment is essential for monitoring the progress of your wine. If you don’t monitor the basic chemistry of your wine, you won’t know if there is a problem or if you need to adjust the pH at any point during the process. The Hanna Checker Digital pH Meter gives you accurate pH measurements down to a tenth of a pH in a matter of seconds.
Finding the right homemade wine equipment for you will not only save you from headaches and extra work, but will also help to improve your winemaking skills and ultimately help you create better wines!
———————————————————————————————————
Ed Kraus is a 3rd generation home brewer/winemaker and has been an owner of E. C. Kraus since 1999. He has been helping individuals make better wine and beer for over 25 years.
Which Grape Press Is Right For You?
 Whether you’ve recently made the decision to make your own homemade wine from grapes or you’ve been toying with the idea for a while but haven’t made the leap yet for one reason or another, it is important to know your options in regards to how you plan to process your grapes. Making wine from grapes requires the extra steps of processing the grapes into must that you didn’t have to do when making wine from juice that requires extra equipment that you haven’t had to use until now.
When you think about grape presses, the first thing that may come to mind is the good old foot! The historical and romanticized version of the grape harvest culminated with the ceremonial stomping of the grapes by barefoot ladies in huge vats. In these modern days of health codes and sanitation, the grape stomp has been retired in winemaking and is now only performed as ceremonious activities and the juice of which is not used for any winemaking or consumption purposes.
If you’re not planning on stomping your grapes to get to the juice (which I recommend you don’t), the biggest equipment acquisition you will need to make prior to making wine from grapes is the grape press. In order to turn your grapes (or other fruit) into the must, you need to somehow get the juice out of the fruit. Getting yourself a reliable grape press is an investment you must pursue in order to even think about making wine from grapes or other fruit.
One type of grape press you could use is the Table Top Fruit Press. This grape press is made of hard woods and is put together using strong cast iron supports. You can load up to 20 pounds of fruit into this grape press, and can actually press all sorts of fruits inside of it—not just grapes! If you’re planning on making 5, 10, or 20 gallons of wine from grapes or fruit, this grape press is the ideal size for your needs.
If you’re planning on producing wine at a larger scale, in the range of 15 to 50 gallons of wine, the R-30 Double Ratchet Fruit Press would be an ideal choice for your needs. Made of similar hardwood and cast iron as the Table Top Fruit Press, the Double Ratchet Fruit Press comes equip with a solid ratchet crank to efficiently and easily press a lot of fruit in a short period of time.
Once you’ve made the decision to make your homemade wine with grapes (or other fruit), it’s very important to invest in a good grape press. A grape press is not only more sanitary and clean than stomping with your feet, but it’s more efficient and you’ll be much more productive!
———————————————————————————————————
Ed Kraus is a 3rd generation home brewer/winemaker and has been an owner of E. C. Kraus since 1999. He has been helping individuals make better wine and beer for over 25 years.
Can Stirring A Wine Oxidize It?
 I have made a 5 gallon batch of Elderberry wine. I have racked it three times since it was transferred to the secondary for bulk aging. It needs to be sweetened before bottling. My question is when I add the sugar, sorbate and metabisulfite to the carboy will stirring the wine to incorporate these ingredients expose it to too much air and cause a problem with oxidation after it’s bottled?
Name: David S.
State: Louisiana
Hello David,
Thanks for the great question.
One thing we do know is that the wine does need to be stirred. The sugar, potasium sorbate and sodium metabisulfite needs to be mixed evenly throughout the wine. There’s no way around it. This brings us to your question: does this stirring bring too much oxygen into the wine? The answer is, it can!
The trick is to do the stirring without splashing the wine. The actual act of stirring does nothing to dissolve more air or oxygen into the wine. It’s the splashing that can cause this. When you splash a liquid, you are increasing the surface area of that liquid on an astronomical scale. This increase in surface area is what causes air to saturate into the wine.
One item you can use to help you in this situation is a De-gassing/Mixing Paddle. It attaches to a hand-drill and spins quickly within the wine — no splashing. You can also do the same thing manually with a hand-held mixing paddle. The mixing paddles we offer have thin shanks so as not to splash across the wines surface.
A second force that is on your side is the sodium metabisulfite. In addition to keeping the wine from spoilage, it also helps to drive out any oxygen that does manage to dissolve into the wine. The expansion of the sulfur dioxide replaces the oxygen.
Another little related tip is eliminate the splashing from the siphon hose when racking the wine. Always fill your carboy from the bottle up. In other words, make sure that the siphon hose reaches all the way to the bottom of the fermenter you are filling.
By doing these simple things you will be helping your wine greatly. Oxidation has been known to completely ruin a wine. From an esthetic standpoint, oxidation causes the wine to turn amber/brown, making it very unappealing. From a flavor/aroma standpoint, it gives the wine a bitter, nutty character that can reach the point of intolerable.
Happy Winemaking,
Ed Kraus
———————————————————————————————————
Ed Kraus is a 3rd generation home brewer/winemaker and has been an owner of E. C. Kraus since 1999. He has been helping individuals make better wine and beer for over 25 years.
Are All Wine Yeast The Same?
 In your article about making wine from Welches grape juice you listed Red Star Montrachet yeast. I commonly use Lalvin…….at the advice of my local wine shop. You are the expert without the profit margin and I as well as others would likely appreciate your insight on yeast. Are all yeasts equal? What is the best way to select yeast? Thank you.
Name: Blaine
State: Washington
Hello Blaine,
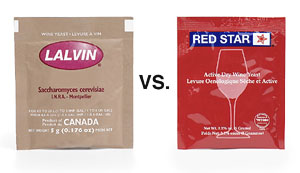
Not all wine yeast are the same. This does not mean that one is better than the other. It simply means each type of wine yeast exerts a slightly different character onto the wine. Whether or not that character is good depends on the type of wine being made and the personal taste of the person drinking the wine.
You mentioned Red Star and Lalvin. These are two different brands of wine yeast, each having several different strains from which to choose. So when you say that your local wine shop recommends Lalvin, it is also just as important to know the particular strain of Lalvin that is being recommended.
We carry both brands, but for the Welch’s grape juice wine we recommend Red Star: Montrachet. This strain is considered an “all-purpose” wine yeast. Its flavor characteristics are fairly well muted and it works very well in many fermenting situations. It has also been consider the go-to strain when fermenting Concord grapes (Welch’s grape juice is made from Concords). This is evidenced by the majority of Concord wine recipes you will find that call for it, both in winemaking books and on the web.
Lalvin wine yeast also has a strain that is similar to the Red Star: Montrachet. The Lalvin: K1V-1116 would work just as well as a substitute in this wine recipe. I would not hesitate to use it if I were making this wine.
If your local wine shop is recommending a different strain of Lalvin than this, then I would suggest that you take a look at the Lalvin wine yeast profile chart on our website to see if you feel their recommendation is suitable to your tastes. As an additional note we also have a profile chart for Red Star wine yeast that may be of interest to you.
I hope this information helps you out. Just realize that there is no one particular right answer when it comes to wine yeast. It’s more of a matter of personal taste.
Happy Winemaking,
Ed Kraus
———————————————————————————————————
Ed Kraus is a 3rd generation home brewer/winemaker and has been an owner of E. C. Kraus since 1999. He has been helping individuals make better wine and beer for over 25 years.
There's White Scum On My Wine. What Should I Do?
 I bought table grapes at a farmer’s market, very sweet, reddish grapes for my wine. I had success with the fermentation and put it in a carboy. It made 4 gallons and I put it in a 5-gallon carboy with an air lock, thinking the CO2 would force the oxygen out. It continued fermenting and I assume no oxygen got in.
Ten months later there is a thin, white-ish particulate on surface. When I moved the carboy to a tabletop, the particulate began to filter down to the bottom very slowly, pretty much dissolving as it sank. Some of the particulate remained on the surface undisturbed.
What should I do? Should I stir the carboy a bit to make the ALL the particulate sink? Should I bottle it now?
Name: Chris
State: South Carolina
—–
Hello Chris,
For whatever reason, it sounds like a thin layer of bacteria has formed on your wine. Winemakers refer to this as flowers or flowers of wine. More specifically, it is known as mycoderma bacteria. It slowly degrades the wine and ferments some of the alcohol off the wine. It’s similar to a wine turning to vinegar, but not quite as severe.
The biggest question at this point is: how far along is this infection? Does the wine still taste fine? If not, there is not much you can do to reverse the effects. But, if the wine still taste okay, there is a lot you can do to save it!
First of all, since the wine is done fermenting, rack it into four 1 gallon glass jugs. This will eliminate any air-space from the wine. Point the end of the siphon hose at the center of the wine — away from both the bottom and the top. This will help to reduce the collection of the particles into your gallon jugs. If some make it, so be it. Just do the best you can.
Once in the glass gallon jugs, you will need to add sulfites to the wine. This could be either: Campden tablets, potassium metabisulfite or sodium metabisulfite. Your choice. Add a single dose as directed on the package in which the sulfite came.
The sulfites will do two important things for the wine:
- It will easily destroy the bacteria that is causing this issue and save your wine from getting any worse.
- It will help to drive out any off-odors you may have noticed in the wine. This would be from volatile gases produced by the bacteria.
After you add the sulfites, attach air locks to each of the jugs. We have air-lock adapter screw-caps that work well for this purpose. Let the wine sit for a few weeks or until you feel that any particles have had time to completely settled to the bottom. Rack the wine again and add another dose of sulfites and bottle.
The number one reason for this occurring is having air in the head-space of the carboy. If the air-lock was taken off, even once, or the air-lock went dry for even just a few hours, this was most likely the cause. If you are sure the carboy had an absolute seal the entire time, than the second most common reason is not treating the wine must with sulfites before fermentation.
Best Wishes,
Ed Kraus
———————————————————————————————————
Ed Kraus is a 3rd generation home brewer/winemaker and has been an owner of E. C. Kraus since 1999. He has been helping individuals make better wine and beer for over 25 years.
Can I Add Boiling Water To Winemaking Ingredients?
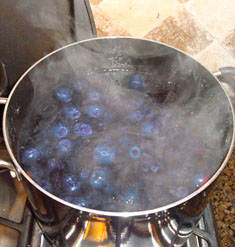 I’m making your Blueberry wine and my question is this. Can I add boiling water to the winemaking ingredients or should I wait for the water to cool first? Thank you
Name: Bill D.
State: Maine
Hello Bill,
The only winemaking ingredients I can think of that should ever touch boiling or hot water are: botanicals and sugar.
- Botanicals: Whenever making wines from herb, flowers, roots, it is normal to blanch them with boiling water. This creates kind of a tea of sorts before going on to the process of actually making the wine.
- Sugar: When adding sugar to a wine must, it is very helpful to pre-dissolve the sugar in hot water, first. By doing this you can be sure the sugar is dissolved. This also makes it much easier to mix the sugar evenly throughout the must.
In both of these instances it is critical that the mix be allowed to cool down to 80°F. or less before continuing on with adding other winemaking ingredients.
Here are how some common wine ingredients affected by hot or boiling water:
- Wine Yeast: Some of the yeast cells will start to die at about 90°F. A lot of the yeast cells will die at around 120°F.
- Yeast Nutrient: also known as diammonium phosphate. Depending on the pH of the wine, when heated up to around 150°F or higher, the yeast nutrient will begin to partially decompose into ammonia.
- Pectic Enzyme: starting at about 125°F will start to denature, which simply means become permanently inactive or ineffective.
- Wine Tannin: is unable to dissolve and saturate into the wine must at wamer temperatures. Instead, it will drop out as a sediment.
- Sulfites: this includes winemaking ingredients such as: Campden tablets, sodium metabisulfite and potassium metabisulfite. Liquids that are heated are not able to hold sulfites for any length of time. This means if you added a sulfite while the liquid was hot, you will need to add it again after the liquid as cooled.
- Fruit Acids: this includes acid blend, citric acid, tartaric acid and malic acid. These are the only common wine making ingredients that are not affected by hot or boiling water.
As an additional note, if you are blanching your blueberries with boiling water, I would not recommend this. This will tend to separate the tannins and color out of the fruit. This is not something you want to happen at this stage. The best way to treat the fruit is to lightly crush them or chop them. Once you have all the wine making ingredients mixed together, treat the entire wine must with one of the sulfites mentioned earlier.
Bill, you can find more information about the basic winemaking process on our website. This may help you out, as well.
Happy Winemaking,
Ed Kraus
———————————————————————————————————
Ed Kraus is a 3rd generation home brewer/winemaker and has been an owner of E. C. Kraus since 1999. He has been helping individuals make better wine and beer for over 25 years.
Winemaking Equipment Guide: Bottle Filler, Wine Thief & Brew Hauler
 There are many pieces of homemade wine equipment than can be described in just one post. It’s important to understand each piece of homemade wine equipment, how it functions, and whether or not a particular piece of equipment is needed in your own home winemaking practice. Today’s post features three more important pieces of equipment: the Three Spout Bottle Filler, the Wine Thief, and the Brew Hauler Carboy Carrier.
Three Spout Bottle Filler:
This piece of homemade wine equipment comes in very handy when you have a lot of bottles of wine to fill. This bottle filler is best suited for 50 to 500 gallons of wine, which is common for busier home winemakers and small wineries. This piece of homemade wine equipment is gravity-fed, allowing it to be efficiently used without using electricity. Place three wine bottles in line under the three filling rods, push down, and the flow of wine is started. When full, all wine bottles stop at the same exact level, so you never have to worry about a wine bottle being too full or not full enough.
Wine Thief:
 This next piece of homemade wine equipment, while small and simple, is very important for removing samples of wine for various analyses and tests. Not much more than a simple tube with sometimes a bulb on the end, the wine thief can be used to remove wine samples from everything from glass jugs to carboys to barrels and everything in between. These pieces of homemade wine equipment come in different types of material, with the more common being glass and stainless steel. The main difference is that the stainless steel wine thief can be used in more samples, such as samples with very high alcohol or samples that have been heated to a higher degree than the glass could accommodate safely.
Brew Hauler Carboy Carrier:
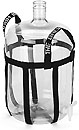 This final piece of homemade wine equipment is a handy device that once you buy you’ll wonder why you hadn’t always had one. Basically, the Brew Hauler Carboy Carrier aids in – you guessed it – carrying carboys! It’s convenient if you need to move a heavy carboy from one location to another and you are concerned about slippage or dropping. This piece of homemade wine equipment works well for 3 to 7 gallon carboys, and can handle up to 100 pounds. The Brew Hauler Carboy Carrier is an essential piece of equipment for the home winemaker to safely move carboys from one place to another that costs next to nothing!
Understanding the various types of homemade wine equipment will not only save you from headaches, pains, and extra work, but will also help to improve your winemaking skills and ultimately help you create better wines!
Other Winemaking Equipment Guides from the past:
- Winemaking Equipment Guide: Airlocks, Refractometers & Filters
- Winemaking Equipment Guide: Hydrometer, Fermentation Carboys & Bottle Corkers
- Winemaking Equipment Guide: Heating Pad, Transfer Pump & Steam Juicer
———————————————————————————————————
Ed Kraus is a 3rd generation home brewer/winemaker and has been an owner of E. C. Kraus since 1999. He has been helping individuals make better wine and beer for over 25 years.
Winemaking: A Pastime That's Hard To Beat!
 Home winemaking, while it can be hard work at times, is a delightful hobby that for some can turn into something more serious such as a second career. For most, however, winemaking provides a lot of pleasure and excitement in creating something that can be enjoyed by not only them but also by friends and family. Before you get to that point, however, you need to start at the beginning and learn how to make your own wine.
How to make your own wine starts with gaining knowledge. Yes, you’ll want to read a lot of books, article, blog posts, and forums to get an idea of the fun you’re about to embark in. There are a lot of great resources out there, in particular the books The Joy of Home Winemaking, by Terry A. Garey, The Home Winemaker’s Companion: Secrets, Recipes, and Know-How for Making 115 Great-Tasting Wines, by Gene Spaziani, and many others.
Learning how to make your own wine also requires the knowledge of what type of equipment you’ll need to use. For the beginner, purchasing a homemade wine kit is a great way to learn how to make your own wine, as these kits come complete with all the basic equipment you’ll need to make your first batch of wine, as well as detailed instructions on how to make your own wine from the kit. There are several different types of home winemaking kits, so find the one that best suits the type of wine you’d like to make and have fun!
Learning how to make your own wine eventually comes with the ability to adjust on the fly and figuring out what adjustments you need to make to you wine in order to get things back on a good track. Learning how to make your own wine and adjust on the fly comes with experience and research, but after a while will come second nature to you. It will all come with experience.
Finally, learning how to make your own wine is a fun challenge. As time goes by and more experience comes about, you will be able to create your own wines. Your own unique creations that do not need the aid of a wine recipe. You’ll be the one writing the recipe. You’ll know why each and every wine ingredient is called for and how each one affects a wine. It is at this point you will be able to call yourself a pro!
———————————————————————————————————
Ed Kraus is a 3rd generation home brewer/winemaker and has been an owner of E. C. Kraus since 1999. He has been helping individuals make better wine and beer for over 25 years.
Does My Fermentation Have Too Much Sugar?
 I have been making wine for years and never had any trouble, but I tried a new wine recipe and made a six gallon batch. I’m afraid the specific gravity of the must was too high-1.1200 + and it has stalled out at about 1.100–too sweet. We will not drink wine that sweet. Is there any way I can salvage the 6 gallons by blending or trying to restart fermentation?
Name: John S.
State: Kansas
Hello John,
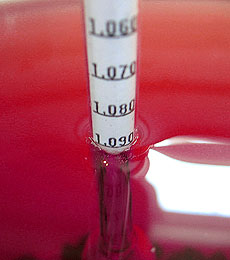
Your starting Specific Gravity on your wine hydrometer is a little high. We normally don’t recommend starting a fermentation any higher than 1.100. At an S.G. of 1.120 the potential alcohol for the fermentation is right at 15%. That’s just a little too high to shoot for and not have a potential for a stuck fermentation. The higher sugar concentration starts to act as a preservative, inhibiting the wine yeast activity.
Having said this, there is something that is a little puzzling. You say that the fermentation started and moved 20 points down to a Specific Gravity of 1.100. If the sugar level of the wine must was the issue at hand, typically the fermentation would not start at all. The fact that it did start tells me that the sugar concentration of the must is not what’s causing the stuck fermentation. Or at least, it is not the main contributing factor.
Now the obvious question is: If it’s not the sugar level that’s holding the fermentation up, what is?
This could be one of an array of issues. It could also be a combination of two or more issues. While there may be something else causing the stuck fermentation, the higher sugar concentration level could be a contributing factor. It could be the jab to the upper-cut.
We could go through all the reasons why here, but that would not be very productive, and it would require me to go through a back-and-forth of questions and answers with you to get to the bottom of things. But here’s what we can do. On our website, we have put together The Top 10 Reasons For Fermentation Failure. This is a list of what we have discovered to be the top reasons why a wine must is not fermenting.
This list has been compiled through many years of experience with helping home winemakers through their more challenging moments. It is my feeling that this list covers well over 95% of the issues we run across. By going through them I’m fairly confident that we can solve your stuck fermentation riddle.
Going back to your sugar concentration, I wanted to bring up something real quick. I don’ t believe it to be the primary problem, currently, but as the fermentation continues and the alcohol level rises, it could indirectly cause a problem with the fermentation being able to finish completely. Just as too much sugar can interfere with a fermentation, so to can too much alcohol.
Happy Winemaking,
Ed Kraus
———————————————————————————————————
Ed Kraus is a 3rd generation home brewer/winemaker and has been an owner of E. C. Kraus since 1999. He has been helping individuals make better wine and beer for over 25 years.