Leigh Erwin: A Beginner's Wine Making Journey: Part 11

Glass Of Pinot GrigioHi guys!  Leigh here!
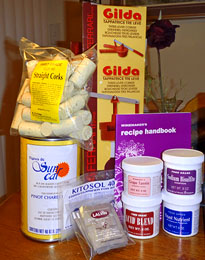
It’s been 2.5 weeks since I bottled my first batch of Pinot Grigio that I made from the winemaking kit from Homebrewing.org, and I wanted to pop open a bottle with you to share with you how it is developing.  If you remember, I did have half a bottle (the last of the wine at bottling) and of course I had to drink that!  I believe I had made a comment about how I thought I could taste plastic from the fermenters and carboys that the wine had been in, so I definitely wanted to see if that would go away over time.
Taking the bottle out of the fridge, it still looks very clear!  There was a teeny weeny “dusting” of sediment on the bottom of the bottle, but it was so minor that I still do not regret not filtering my wine prior to bottling.
Popping the cork, I really can’t tell if I am still smelling the plastic, or if it’s all in my head.  I’m afraid since I wasn’t tasting this blind that I am really at a disadvantage here.  I should have purchased another bottle of Pinot Grigio and tasted that one against mine in a blind setting to see where I could improve.
Anyway, after tasting the wine, I do think that the “plastic” smell/taste I noted before is starting to go away slowly.  It has a strong mineral character to it, though I don’t think it is completely balanced.  I think the acidity in the wine may be on the higher side, though I couldn’t tell you for sure since I didn’t purchase an acid testing kit (next on the to-buy list?).  After a couple of sips, I think my wine is totally drinkable, though it’s certainly not an award winner (I wasn’t expecting it to be).
I think this particular wine of mine would be better with food in order to help balance it out more, but when it’s all said and done, I’m really happy with the way my first try at making homemade wine came out!
What made me feel really great about my first home winemaking experience and results was when I was chatting with a couple of my friends who happen to be commercial winemakers.  They commended me for doing home winemaking, as they said that home winemaking is much more difficult than commercial winemaking!  Really?  These two guys that make award-winning wines think I’m awesome for making my own small batch homemade wine?  ALL RIGHT!  They basically told me that with small batch, it’s really hard to make a wine that’s “perfect” or in other words, not faulted.  They said that with commercial wine, you’re making it in much larger quantities, so a little spot in a huge tank that happens to be bad will blend away into the rest of the “good” wine, while a little spot in a teeny carboy will basically ruin the entire batch of wine.
Impressing two solid commercial winemakers with my home winemaking endeavors made me so stoked!  Granted, I didn’t actually have them taste my wine, but we’ll leave that for another day when I’m a more seasoned home winemaker!
Cheers!

——————————————————————————————————–
Leigh ErwinMy name is Leigh Erwin, and I am a brand-spankin’ new home winemaker! E. C. Kraus has asked me to share with you my journey from a first-time dabbler to an accomplished home winemaker. From time to time I’ll be checking in with this blog and reporting my experience with you: the good, bad — and the ugly.

Leigh Erwin: A Beginner's Wine Making Journey: Part 10

Ingredients To Make Homemade Wine With SunCal Grape ConcentrateIt’s like Christmas all over again at the Erwin residence!
Coming home from work today, I saw a package waiting at my doorstep, and I knew exactly what it was—my new order from ECKraus!  I had such a fun time making my first batch of wine, that I couldn’t wait to get started on the second!
I was trying to figure out what to do next, when I decided that I would try something different than the wine ingredient kit.  Don’t get me wrong—I really loved using the kit!  I just figured ECKraus has so many products that it wouldn’t be fair to the rest of the items to only buy the same thing over and over again :).
Anyway, instead of purchasing the pre-packaged kit, I decided to instead purchase all the wine making ingredients separately and try to make it more “free style”.  This may turn into a bad decision, as it’s only my second time making wine and I’m not sure if I’m ready yet to be “let loose” without the comfort and convenience of the pre-made kit.  Oh well, only time will tell, I suppose!
So, what did I get, you ask?
Well, I still wanted to make grape wine, so I decided to purchase some grape concentrate.  For this, I purchased the Pinot Chardonnay concentration from SunCal brand.  I decided to stick with white wine for now, as I feel like red would be more complicated, and I didn’t want to throw myself under the bus too quickly.  Next time, however, I will likely do a red, and I will do it from a kit to make it a little easier for myself.
One great thing about the Adventures in Homebrewing website is that within the product info for the SunCal concentrate, they included a link to the actual recipe required to make the SunCal!  This way I knew exactly what other wine making ingredients I needed to buy in order to pull this off without a kit.
In addition to the SunCal Pinot Chardonnay grape concentrate, I purchased some Acid Blend, Yeast Nutrient, and Wine Yeasts.  I also purchased Kitosol 40 fining agent , as well as Sodium Bisulfite, as these are items that I felt every home winemaker needs to have on hand.
In terms of the yeast, I made the decision to purchase the Lalvin ICV D-47 yeast strain based on the recommendation on the handy yeast profile chart on the ECKraus website.  It was an incredibly helpful chart, as since I am still so new at the whole home winemaking thing, I had no idea which yeast strains were best for specific types of wine.  So, I choose ICV D-47 since I plan to make a dry white wine, and the yeast strain chart indicated that this strain would likely be the best for this type of wine.
Next, I purchased some First Grade Size #9 Straight Corks, as I wanted something that was more substantial than the press-in, mushroom corks I used previously.  Of course, those corks worked just fine and were fantastic because I didn’t have a corker at the time, but I figured this time I’d put a little more elbow grease into it and purchase the corks that required a little more finagling to get in the wine bottle.  That being said, I also needed a corker!  Due to my current small living space, I decided to go with the simple hand corker from Gilda brand.  One day when I move into a larger house where I have much more space, I’ll get a floor-standing corker, but for now, my arms will be getting a workout.
Finally, I purchased the “Winemaker’s Recipe Handbook”.  At first I thought I didn’t get it, because it is such a thin book (it was hiding in the fantastic packing job!), but I found it and all was right with my world!  While the book may be thin, it is loaded with different wine recipes!  100 recipes to be exact!  Everything from grape wine to rhubarb wine and then to tomato wine!  It’s nuts how much diversity is in this wine making book, and once I move into a “real” house where I have space to process these other fruits or vegetables and I’ll try out some of this more “odd ball” wine recipes!
I’m looking forward to starting this Pinot Chardonnay wine very soon.  I’ll definitely keep you all posted on my progress (good or bad!).
Cheers!

——————————————————————————————————–
Leigh ErwinMy name is Leigh Erwin, and I am a brand-spankin’ new home winemaker! E. C. Kraus has asked me to share with you my journey from a first-time dabbler to an accomplished home winemaker. From time to time I’ll be checking in with this blog and reporting my experience with you: the good, bad — and the ugly.

Top 10 Wine Making Blog Posts Of 2013

Top 10 Wine Making Blog PostsYour votes have been counted, and the results have been tallied. Below are the 10 most popular winemaking blog posts of 2013 from the E. C. Kraus blog. The results are based on a combination of: visits, social sharing and comments from you the reader.
So without any further delay, I give to you The Top 10 Wine Making Blog Posts of 2013!

  1. 3 Tips For Getting More Flavor In Your Wine
    When it comes to making wine, everyone is always looking for that edge that will put their homemade wines over the top. Here’s three things you can do to help get that done… More >>
  2. Bulk Storing Wine In A Carboy
    Learn the pro’s and con’s of storing your wine in a carboy for an extended period of time. It’s something that many home winemakers do, but is it right for you? More >>
  3. What’s The Rules For Topping Up Wine
    Here’s the skinny on what topping up is… the when’s and why’s of topping up are explained so that you’ll know just how to handle every winemaking situation. More >>
  4. What Every Winemaker Ought To Know About Sulfites
    Get a clearer perspective on what sulfites are, what they do, and why they are so important to the production of wine. More >>
  5. How To Handle A Stuck Fermentation
    Learn what a stuck fermentation actually is and what can cause one to happen. Also, learn what you can do if your fermentation becomes stuck and what can be done in the future to prevent it from happening again. More >>
  6. 4 Tips For Losing Less Wine
    Here’s a list of 4 things you can do to make sure you end up with more wine at the end of the winemaking process. Simple things that any home winemaker can do. More >>
  7. Did Using Distilled Water Ruin My Wine?
    Is distilled water what you should be using in your homemade wines? Why do ingredient kits ask for it? Why do we NOT recommend it? This and other info! More >>
  8. How Do I Make More Alcohol In The Wine
    If you’re a home winemaker that wants to make your wines with more alcohol then read this! Higher alcohol is possible, but there’s some things you should know first. More >>
  9. How To Stop A Wine Fermentation
    Stopping a fermentation is not an easy thing to do. Care has to be taken if you don’t want to end up with popping corks. Here are all the particulars for stopping a wine fermentation dead in its tracks. More >>
  10. When To Aerate A Wine
    Providing air to a fermentation is important, but it has to be done at the right time. If not, your wine could be in for a dose of oxidation.  More >>

———————————————————————————————————
Ed Kraus is a 3rd generation home brewer/winemaker and has been an owner of E. C. Kraus since 1999. He has been helping individuals make better wine and beer for over 25 years.

Fermentation Temperature Too Low And Used An Airlock On Primary Fermenter

Carboy With Fermentation Temperature Too Low
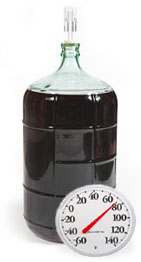
I started out wrong by air-locking my vessel from the start. I have two 5 gallon carboys; one containing Ruby Cabernet and the other French Colombard. The second mistake I made was to allow the juice to get too cold; below 40 degrees. I have since brought the juice home to a warmer atmosphere, where the French Colombard began to produce tiny bubbles, whereby popping at the air gap device; however, the Ruby is lying dormant. How should I proceed from here?
Name: Mark S.
State: PA
—–
Hello Mark,
The first thing that needs to be pointed out is that there is that there is absolutely no way that a wine yeast will ferment at 40°F. The fermentation temperature is too low. This is by far the most critical issue of the two. It will take some time for the carboys to warm up, but by the time you get this message hopefully they will be at a temperature that is more suitable to a fermentation (70°F. – 75°F.). Just realize that this is an absolute. The fermentation will not work at a temperature of 40°F. It’s just too low.
Having an airlock on the primary fermenter can hinder or slow the fermentation, but it is not an absolute. Rarely is using an air-lock during this time the root cause of a stuck fermentation.
Just think of the airlock as the icing-on-the-cake to your stuck fermentation. Both the low fermentation temperature and the airlock are working in concert to keep your fermentation from happening, but the fermentation temperature being too low is the main reason.
At this point you will want to leave the airlocks on both carboys until you do see some fermentation activity as the temperature rises. This is to protect the wine must from spoilage while it is still. Once you see some signs of fermentation, then you can safely take the air-locks off.
Signs of fermentation would be things like seeing bubbles rise along the side wall of the carboys or little patches of foam on the surface of the wine must. Do not rely on the airlock bubbling as an indicator. Bubbling will occur without the fermentation simply because the liquid is expanding from being warmed up. The expansion is causing the air in the head-space to forced out through the airlock.
In the future I would suggest starting the fermentation in a bucket fermenter as opposed to the carboys you are using for your primary fermentation. While taking the airlocks off the carboys is an improvement, the smaller opening restricts the amount of air that can get to the wine must. You can use the carboys with air-locks, later, after your first racking. This is when you want to minimize head-space with the wine, and carboys are great for doing this. Here’s some more information on why you do not what you use an airlock on a primary fermenter.
Once you do these simple things I do not expect you to have any more problems with getting your fermentation started, but if by chance you do not get one or both of them sufficiently going, I would suggest looking over the Top 10 Reasons For Fermentation Failure. See if any of the other 8 reasons ring a bell. Then take the corrective action.
Thank you for the great question and allowing me to share it with other winemakers. Having a fermentation temperature too low and using an airlock on a primary fermenter are both common beginner mistakes that need to be pointed out from time to time.
Happy Winemaking,
Ed Kraus
———————————————————————————————————
Ed Kraus is a 3rd generation home brewer/winemaker and has been an owner of E. C. Kraus since 1999. He has been helping individuals make better wine and beer for over 25 years.

Leigh Erwin: A Beginner's Wine Making Journey: Part 9

Leigh ErwinHello Everyone,
I wish I could report to you how lovely my first batch of homemade wine tastes after going through the process of making it all with you, however, I don’t really know, as I’m trying to be patient and let it sit to get over bottle shock and all that other moving around it’s been doing during the past month!
I did try a little bit of the wine right at bottling time, and I have to say I was a little disappointed with the nose.  Earlier during the winemaking process, I had noted a strong nose of citrus fruits and some floral character (at least that’s what it smelled like to me!), but when I smelled the wine again prior to bottling, the nose had nearly disappeared!  It was very odd—it was almost as though it was all tart citrus, and more muted than it had been previously.  I’m really hoping it’s just in an “immature” stage at this point, and that the more balanced nose I had noted previously comes back.
A couple of days after bottling, I did open up one of the wine bottles to see how it was doing, and not too much had changed yet.  Is this par for the course for this wine?  Or did I do something wrong?  When I tasted the wine, I didn’t really find anything that I could sense as a “fault”.  Then again, I am a newbie, so I’ll admit I might not recognize particular faults if they were there, however, I thought in general the wine tasted fine and that it would be no trouble drinking the other 22 bottles that I have waiting for me.
I remember at one point chatting with the folks at Adventures in Homebrewing, and they said that the wine wouldn’t taste very good so soon after bottling because of bottle shock ailments, so I hope they are right and that my wine will become more balanced as it sits in my house.
What’s next for me now as a home winemaker, now that my first batch of wine is complete?  Well, I think I’m going to stick with white wine for now, just because there are in general fewer steps to mess up than with red wine, though I will challenge myself a little more by making things from a wine recipe and raw ingredients instead of through the kit.  I feel confident that I can follow a recipe without a wine making kit, and since I want to start a stock of raw ingredients going eventually anyway, I may as well do it now!  Also, I plan on making a chardonnay that had been aged in oak chips, to create a completely different style of wine than the Pinot Grigio that I just finished, and to add a little extra complexity to the process before launching into red wine making.
I’ll still use the plastic fermenter and plastic carboy that I have from the wine kit I bought from Adventures in Homebrewing, since I don’t have any space right now for glass equipment, however, that is an upgrade I plan on doing later this year.  So excited!
Overall, I’m really happy with my first experience as a home winemaker, and am looking forward to trying something a little different and challenging myself a little more with a more complicated recipe!
Hope you all are having a fabulous New Year!  Cheers!

——————————————————————————————————–
Leigh ErwinMy name is Leigh Erwin, and I am a brand-spankin’ new home winemaker! E. C. Kraus has asked me to share with you my journey from a first-time dabbler to an accomplished home winemaker. From time to time I’ll be checking in with this blog and reporting my experience with you: the good, bad — and the ugly.

Winemaking Terms You Should Know: Part 7

Bottle TreeIn several earlier posts, we introduced a few home winemaking terms that you may or may not be familiar with.  There are many terms to learn in home winemaking, and this post, like all the previous posts, gives you a short introduction to a few of those terms to help you get started in home winemaking, or perhaps brush up on some of the terms you may not have seen in a while.

  • Bottle Tree:  This is a tree grown in the vineyard that produces bottles instead of fruit.  Well, no, actually a bottle tree is essentially a drying rack for bottles.  After cleaning and sanitizing your bottles, you can hang them on a bottle tree until dry.
  • Campden Tablets: These are basically sodium metabisulfite in the form of a tablet.  Campden tablets are used in home winemaking for killing or otherwise getting rid of undesirable bacteria.  These tablets are also very useful for sanitation purposes, as well as preserving the color and flavor of your wine.
  • Fermentation Inhibitor:  Sometimes you don’t want fermentation to occur, sometimes you do.  For situations where you want to prevent a fermentation re-starting, you can add a fermentation inhibitor such as Potassium Sorbate. You can also use Wine Condition for the purpose and sweeten the finished wine at the same time.
  • Head Space:  The head space refers to the gap between the top of the wine and the walls of the fermentation vessel, aging vessel, or the cork in the case of a wine bottle.  You want to keep the head space at a minimum, as excess head space significantly increases the chances of something going wrong with your wine, particularly oxidation or other undesirable processes.
  • Oenology or Enology:  For all you new home winemakers reading this, you may not be as familiar with this term as established winemakers.  Basically, Oenology or Enology is the term for the study of wine and winemaking.
  • Punt:  The punt is the indentation that is found on the bottom of some wine bottles.  There is no consensus as to the origins of the punt, but they range anywhere from an artifact of glass blowing to allowing for easier stacking of one wine on top of another.
  • Specific Gravity: The specific gravity refers to the sugar content in the wine.  As the amount of sugar in the wine increases, so does the specific gravity.  Using a hydrometer, you can measure exactly how much sugar is in your wine.

— Other Winemaking Terms You Should Know:
Part 6
Part 5
Part 4
Part 3
Part 2
Part 1
———————————————————————————————————
Ed Kraus is a 3rd generation home brewer/winemaker and has been an owner of E. C. Kraus since 1999. He has been helping individuals make better wine and beer for over 25 years.

Leigh Erwin: A Beginner's Wine Making Journey: Part 8

Wine Bottles Ready For Bottling Homemade WineBottling day is here!  1 month of waiting is finally over!  As excited as I was to bottle my wine, I still wanted to make sure I followed the winemaking instructions and get through everything as thoroughly and correctly as possible.
The first thing I did was I siphoned the wine into my primary fermenter.  Now, the instructions had said to siphon into a carboy, but just like last time, I only had a primary fermenter available and not a second carboy.  I also liked the idea of using the primary fermenter for the bottling the wine instead of a carboy, as getting the wine out through the spigot seemed a lot cleaner and easier to me than attempting to siphon the wine into each wine bottle.
One thing I did not do, which was recommended in the winemaking instructions, was that I did not filter my wine prior to bottling.  First of all, I didn’t have a wine filter, nor did I have any of the proper equipment to do such filtering.  Second and lastly, my wine had become very clear after the stabilization and clarification process, so I didn’t feel like it even needed to be filtered prior to bottling.
Cleaning and sterilizing the wine bottles was actually pretty easy for me this first time, as I had purchased brand new wine bottles from E. C. Kraus, therefore other than a little cardboard dust, they were very clean already.  I just rinsed them several times in very hot water, then immersed them in the cleaning solution for a few minutes.  Afterwards, I rinsed them again several times, this time with cold water, and then lay them upside down in the dish rack in the kitchen (on some paper towels).  After this, I realized a bottle tree would be a great investment.   Put that on the list!
Once the wine bottles were dry, I set myself up underneath the primary fermenter and slowly opened the spigot to fill up one wine bottle at a time.  As far as the corks were concerned, I read some mixed reviews about soaking them versus not soaking them prior to use, and ultimately I decided not to soak them.  It sounds like the soaking of the corks is an old technique that was carried over from home winemaking past, and that it’s really not necessary anymore with all the advances the field has made.  In fact, commercial wineries don’t soak their corks, so why should I?  What I did instead was I quickly rinsed the corks in water to get any dust off of them, and then just pushed them into the wine bottles by hand once the bottle was filled with wine.  I was able to push in the corks by hand, since these corks were the kind that were attached to a little plastic cap on the top, thus making hand corking very easy.
Here is a short clip of me filling my first bottle from the fermenter—you’ll notice a lot of bubbles in there….I did get better at not having it so agitated as the bottling process wore on:

After the bottling process was complete, I ended up with 23 and 1/3 bottles of wine.  If you recall, I did end up losing some wine earlier on in the process due to human error (i.e. I forgot to make sure the spigot in the primary fermenter was in the off position!), but still, I was very happy with the yield that I got.  Every single bottle appeared to me to be as clear as the bottle before, so I’m pretty certain I did things correctly during the clarification and stabilization phase!
After two days, I placed the wine bottles on their sides in a more long term storage position, and then left town for two weeks.  The corks seemed to be holding tight when I left, so hopefully when I come home, I do not come home to a pool of Pinot Grigio all over the floor!
All in all, I have to say this first time making homemade wine was a success!  Only time will tell how it actually tastes, however, just looking at it, it appears as though I did most things correctly.  I’m looking forward to making my next batch of homemade wine!

——————————————————————————————————–
Leigh ErwinMy name is Leigh Erwin, and I am a brand-spankin’ new home winemaker! E. C. Kraus has asked me to share with you my journey from a first-time dabbler to an accomplished home winemaker. From time to time I’ll be checking in with this blog and reporting my experience with you: the good, bad — and the ugly.

My Air-Lock Stops Bubbling!

Wine Air Lock Bubbling
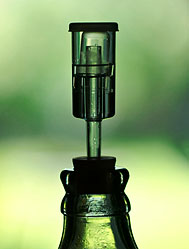
During the 2nd racking of the juice. I have had my Senior Air-Lock sometimes just stop working. What cause’s this? I use water in my Air-Lock’s.
Name: Linda H.
State: Nevada
—–
Hello Linda,
I believe what you are saying is that your wine air-lock stops bubbling, then starts up again. There could be a number of reasons for this, but by far the most likely reason is a temperature change of the wine must.
In order for a wine yeast to ferment it needs to be in a particular temperature range. Most wine yeast feel comfortable at 70° to 75° F. Fermentations that are cooler than this become slow and will even stop completely if too cold. For some wine yeast they can even completely stop bubbling at temperatures of 67° or 68° F.
The difference of the rate of fermentation between 70° and 75° can even be quite dramatic. It can mean the difference of an air-lock that bubbles once a minute or once a second.
So what I believe is happening to your fermentation is that the temperature is fluctuating. When the weather gets cooler and the ambient room temperature gets a little cooler, the fermentation slows down, crawls and then stops. When a spot of warmth comes along, the fermentation temperature rises and the fermentation takes off again.
This begs the question of what you are to do when your air-lock stops bubbling. Obviously, you need to stabilize the temperature of the fermentation, but how? The simplest solution is to provide a heat source to the fermenter. This can be done in a number of ways. The important thing to remember is to make it a mild heat source. It is easy to overdo it, which can be just as bad. Having a fermentation too warm could lead to even worse problems such as mold or bacterial growth.

  • I have found that over the years that if an older-style, 100 watt light bulb is place 1 foot off to the side of a 5 or 6 gallon batch of wine, it will warm it up 8° to 10° F. depending on how cold the room is. You can place if farther away or closer for varying effect. What you do have to watch out for with this method is exposing the fermenting wine to the direct light from the light bulb. Excessive light exposure can oxidize the wine over time, so make sure that it is an opaque fermenter or block the light in some fashion.
  • I have not done this, but I have heard of people using an electric blanket to warm up the fermentation. The problem with electric blankets is that they are way, way too hot. But you could conceivably take a corner of one, on a low setting, and stick it under part of the fermenter. The big issue here is that you don’t know how much of the electric blanket to use, so the risk of getting the fermentation too warm is very real. I definitely would not try this without having a thermometer directly tracking the wine must’s temperature.
  • Fermentation Heating Pad MatFortunately, these days there is a product designed specifically for this purpose. It’s called the Copper Tun Heating Pad. Just like the name sounds, it is a pad that you sit the fermenter on to keep it from getting cold. The heating pad will raise the temperature of the wine must between 10° and 20° F. Since this item has came out, I do not use anything else. It is simple to use and effective.

Beyond these methods remember that you always have the option of moving the fermenter to a warmer room or corner of your home. This is often the simplest action to take when your air-lock stops bubbling.
Happy Winemaking,
Ed Kraus
———————————————————————————————————
Ed Kraus is a 3rd generation home brewer/winemaker and has been an owner of E. C. Kraus since 1999. He has been helping individuals make better wine and beer for over 25 years.

Leigh Erwin: A Beginner's Wine Making Journey: Part 7

Clearing Wine Ingredient KitDay 22!  Otherwise known in the wine making instructions as Stage 4: Stabilizing & Clarification.  Throughout secondary fermentation, I had noticed the wine clearing up quite a bit as the yeast and yeast byproducts slowly sank down to the bottom of the carboy.  I was definitely excited to see just how much more clear the stabilization process actually made the wine!  Would it even work?  One of the first things the instructions said was if the wine wasn’t completely degassed, then the fining agents would not be effective.  How the heck do I know if all the gas is removed?  Whenever I shake or stir the wine, I always see bubbles on the top.  Is that due to bubbles coming out of solution still?  Or just new bubbles from me agitating the beast?  Of course, being the internet sleuth that I am, I looked it up and was assured that the wine will actually never stop bubbling when you stir/shake it, so get over it already and move on!  If I followed the instructions and stirred the wine at least 8 times (which I did!), it should be just fine.  I ended up stirring/shaking the wine a couple extra times anyway, just for good measure.
In the beginning of the stabilization process, I was instructed to add Potassium Sorbate to ½ cup of warm water.  Well, I didn’t know if room temperature would be warm enough, as was the temperature that my bottled water was sitting at, so I washed and sterilized a glass measuring cup, poured in ½ a cup of bottled water into it, and popped it in the microwave for about 45 seconds to a minute.  Then, I added the Potassium Sorbate and mixed it in the water with a sterilized spoon.  Seemed to work perfectly, as the solid Potassium Sorbate almost immediately dissolved into the water at this temperature.
Cloudy Homemade Wine Ingredient Kit
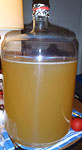
Next, I shook up and added the pouch of Kieselsol to my wine, which came in liquid form.  Basically, it poured in a little thicker than water, and was really easy to work with.  After a nice, solid stir, I closed the carboy back up and left it on a table where it will hopefully remain undisturbed for the next few days!
One other tiny piece of equipment I didn’t have that the instructions recommended was a solid bung to seal up the carboy during this waiting period.  I have a bung, however, it is the kind with the hole in the middle for an airlock.  Hmmmm, what to do about this….should I just go ahead and leave the airlock in?  Or find some other way to close up that hole?  It’s too late for me to buy another bung at this point, so I needed to come up with some solution quickly.  I ended up not feeling totally comfortable leaving the airlock in place, for reasons unbeknownst to me, so what I ended up doing was securing a piece of tin foil over the top of the bung and locking it in place with a rubber band to insure an air-tight seal.  Let’s hope it does the trick!
Close Up Of Wine Ingredient Kit Clearing
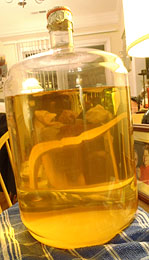
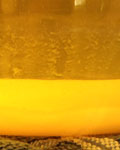
By the end of the night, I was starting to notice the wine clearing up quick a bit already.  I wasn’t expecting it to work its magic this fast, but apparently it does!  One thing I found really cool was that the Kieselsol interacting with the proteins in the wine formed a white precipitate, which then settled down to the bottom of the carboy.  I knew the clarification step had to be working properly, as the wine was starting to get much clearer than it had been at any other stage, and the proteins that had been clouding up the joint were obviously now laying at the bottom of the carboy.  I believe my exact words to my fiancé were: “Look, honey!  It’s science!  Tasty, tasty science!”.  Both of us being scientists, with strong chemistry backgrounds, it was really fun talking to each other about the chemistry behind what we were witnessing in the carboy.
Now, I just let my wine sit for the next 6 days, and then…….BOTTLING DAY!  I’m so excited, and a little nervous, about bottling day.  It has come down to the final step.  Best not screw up now!

——————————————————————————————————–
Leigh ErwinMy name is Leigh Erwin, and I am a brand-spankin’ new home winemaker! E. C. Kraus has asked me to share with you my journey from a first-time dabbler to an accomplished home winemaker. From time to time I’ll be checking in with this blog and reporting my experience with you: the good, bad — and the ugly.

Why Does My Homemade Wine Have A Woody Taste And Woody Smell?

Glass Of Wine That Has A Woody Taste And Woody SmellWhy do some of my wines turn out with a woody smell or taste?
Name: Dina T.
State: Ohio
—–
Dina,
The obvious reason your homemade wines would have a woody taste and woody smell is because it is either being aged in wood, or wood was added during the making of the wine, for example, our French Oak Chips. If you are not doing either of these, then we have to start looking at the not so obvious.
Here are three things to look out for to make sure your homemade wine does not end up with a woody taste or smell:

  • Over Processing the Fruit: When I say over process I am referring to doing things like chopping up the fruit in a blender or food processor of sorts, or even by over chopping them by hand. When thing like these are done too much tannin and other compounds are released from the fruit, giving the homemade wine a dry, toothpick to earthy aftertaste. The fruit only needs to be very coarsely chopped or the skins bursted. Anything more than this is overkill.
  • Not De-stemming the Fruit Completely: The fruit should also be cleared of stems and remnant foliage. For example, in the case of strawberries, core the tops; in the case of grapes, remove away all the stems, etc. These parts have high amounts of tannin that can contribute to the woody flavor and woody smell you are perceiving in your homemade wine.
  • Leaving the Fruit in the Fermentation too Long: The longer the fruit is left in the fermentation, the more the fruit is broken down by the fermentation. In a sense, this is similar to over processing the fruit. More tannin is being allowed to release into the wine with the additional time in the fermenter. The optimal amount of time can vary from one fruit to the next, but the general consensus would b about 5 days. If you want your wine to have a lighter body and be drinkable sooner, then 3 days. If you are looking for a more robust, fuller wine that will take a year or two to age out, then 7 days. But, never longer than this.

I would not dump any of your homemade wines out that have a woody wine taste or woody smell. It is very possible that these wines will improve remarkably with aging. I would suggest giving them some time before making any such decision.
Happy Winemaking,
Ed Kraus
———————————————————————————————————
Ed Kraus is a 3rd generation home brewer/winemaker and has been an owner of E. C. Kraus since 1999. He has been helping individuals make better wine and beer for over 25 years.