Leigh Erwin: What I've Learned

Mead In Caboy With HoseHi everyone!
My, oh my, that mead experience was somewhat of a fiasco.  I’m so done talking about it, though today I will mention just a few things I learned from that experience, and what I hope to do next in my home winemaking adventures.
First: Don’t freak out if things aren’t going “on schedule”.  The wine isn’t necessarily ruined because it hasn’t cleared up in the amount of time the instructions said they would.  Just take a breather and be excited!  We get to troubleshoot and really make this wine our own!
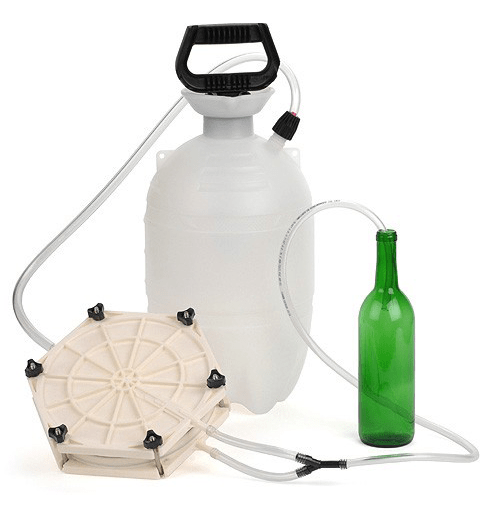
Second:  Read all instructions.  Carefully.  Twice.  No, maybe multiple times.  If not, you could end up making silly errors that didn’t need to happen (i.e. you might set-up your wine filter system slightly wrong and only do half as good a job as you would have if you paid attention during the instruction reading session).
Third: Learn from your mistakes and try again.  This wine was certainly a test for me, and I definitely will not give up just because things got a little difficult.  In fact, I’m looking forward to the day I can try mead again.  I’ll probably take a little break from it for now, as I think we both need our time apart.
So what’s next for Leigh on the home winemaking front?
Well, after we get back from our honeymoon, we’re probably going to move, so really the next step is to come up with a game plan for the next batch of wine and set up shop in the new house.  It’ll be interesting to see what kind of a space we end up with and how many winemaking goodies I can fill it up with!
shop_fermentersI’m hoping we end up with a decent sized yard, as I would like to plant a couple of vines and play around with those.  Depending upon where we end up living, I may buy some native varieties instead of vinifera due to the relative ease of care, but we’ll see.  I’ll probably get a quick little soil analysis and evaluate what I think can grow there, and then plant.  I don’t plan on having an entire vineyard, but it could be a lot of fun to grow a few plants to have my own grapes for blending with other things!
I can definitely see myself making some other fruit wines in the near future.  It was interesting with the honey, but I think it might be fun to try something else other than grapes or mead next.  Only time will tell, I suppose!
——————————————————————————————————————–
leigh_erwin_bioMy name is Leigh Erwin, and I am a brand-spankin’ new home winemaker! E. C. Kraus has asked me to share with you my journey from a first-time dabbler to an accomplished home winemaker. From time to time I’ll be checking in with this blog and reporting my experience with you: the good, bad — and the ugly.

Leigh Erwin: Bottling My Mead

Bottled WineHi everyone!
Bottling day for the mead is (finally) here!  I’ve been through quite a lot with this wine.  I think I ended up racking it at least 3 times to not much avail, then finally figured out that I might be dealing with a stuck fermentation and added the appropriate ingredients to get that going again (yeast nutrient and yeast energizer).  That seemed to do the trick to clear things up, even though the specific gravity barely changed (if at all).
I made the executive decision to move forward and filtered the wine for my first time ever.  As luck would have it, I ran into some troubles there as well, which were 100% human error (how about reading the instructions out loud….that might help).
We’re finally at bottling day!  We’re down to the wire—about to get married, go on a honeymoon, then possibly move into a new house somewhere (who knows where at this point).  The time to bottle the wine is now, and there is no other way about it!
Shop Wine Bottle CorkersSo, I rinsed all the bottles I’d been saving in very hot water (I had been sure to rinse them out immediately after emptying them so there wouldn’t be any foreign bodies growing in there), then added a couple turkey baster sized squirts of sanitation liquid to kill anything that might be still living in there.  All went well—no problems there (that I am aware of).
I ended up with exactly 24 bottles of wine, with the last few being dubbed “the dregs”.  I think this entire batch will be consumed by both my fiancé and I, as I’m not proud of it enough to give it to anyone else.
After bottling, I noticed that the wine was still a little hazy.  I’m not surprised, since I only really partially filtered the wine during my first attempt.  I did have enough filter pads to do it again, but I figured I would just learn from my mistake, move on, and save the pads for my next batch of wine that I hopefully won’t mess up so much!
I’m happy that the mead is done.  It’ll probably be a nice “second bottle of the night”.  Perhaps I’ll pair it with some cheese if it’s too awful to have by itself. Ha!  All I have to say now is I am glad that space the carboy was taking up is now clear—any table space is prime real estate these days.

——————————————————————————————————————–
leigh_erwin_bioMy name is Leigh Erwin, and I am a brand-spankin’ new home winemaker! E. C. Kraus has asked me to share with you my journey from a first-time dabbler to an accomplished home winemaker. From time to time I’ll be checking in with this blog and reporting my experience with you: the good, bad — and the ugly.

Mold On Top Of Wine Cork

Man Pouring WineA friend gave me a bottle of homemade wine and the top of the cork is green and fuzzy. Is it still safe to drink?
Name: Lois
State: NY
—–
Hello Lois,
Having mold on top of the wine cork of your friend’s homemade wine has little to do with what’s inside the wine bottle. In other words, the mold did not come from the wine but from the environment outside the wine bottle. It also has nothing to do with the fact that the wine was homemade. It’s not unusual to cut the neck capsule away from a commercially made wine only to find mold underneath.
Mold is everywhere. Invisible to the naked eye, it floats through the air waiting for a place to land and grow. This is why it’s just about impossible to keep fresh strawberries for more than a few days. A single mold spore or two has little effect on anything, but give them nourishment — such as fresh strawberries — and you will see a handful of mold spore grow into a healthy, thriving colony — one that is visible.
This is why your friends homemade wine has mold on top of the wine cork. What little mold that was in the air found its way to the wine bottles and was able to grow on the cork. The nourishment, in this case, is coming from wine slowly seeping through the cork.
Shop Wine CorksWine corks are meant to stay moist. The moisture keeps them expanded and sealed tight against the inside barrel of the bottle’s neck. Most of the time the cork will seal tight enough to stop the wine from seeping all the way through, but there are many times when wine will slowly wick itself through the entire cork. It’s never in great amounts, for no one wants to waste wine, but it does happen.
After the wine makes its way to the end of the cork, it’s only a matter of time before mold will find it and have a feast on it.
I’m sure you’re wondering what you should do at this point. You’ll be happy to know that the only additional step required is that you take a clean, wet rag and wipe the mold clean from the wine bottle. Once you have done this, you can simply decant the wine as you normally would.
So now you know why there is mold on top of the wine cork. It has absolutely nothing to do with what’s inside the bottle. The mold cannot get to it, it can only grow on the outside.
Happy Wine Drinking,
Ed Kraus
—————————————————————————————————————–
Ed Kraus is a 3rd generation home brewer/winemaker and has been an owner of E. C. Kraus since 1999. He has been helping individuals make better wine and beer for over 25 years.

Leigh Erwin: Using My Wine Filter System

Wine Filter SystemHi guys!
Just wanted to update you on the filtering of my mead wine.  It’s now to the point where it’s ready to be filtered.  Using my wine filter system went OK, though I have to say the one thing that went “wrong” per se was my own stupid fault and I’m such an idiot.
I’m blaming it completely on the mental fatigue due to all the wedding-related things, and not the fact that I didn’t read the instructions that came with the wine filter system carefully enough.
First thing I did before using my wine filter system is bust out all the parts.  Looks simple enough!  One thing that should have been really obvious to me and taken about 2.5 seconds was hooking up the pump plunger to the unit, but for some reason is stumped me.  I was sitting there all confused trying to figure out how the heck I was supposed to take it apart and attach it to the unit, and then it dawned on me after LOOKING AT A PICTURE how silly I was and how ridiculously easy it was to do it.  Basically, all I had to do was insert the plunger all the way into the unit and screw it in place.  Seriously?  So much confusion for one of the easiest things I’ve ever done.
If that wasn’t embarrassing enough, after I put together the entire wine filtering system, ran some water through the unit to make sure there were no major leaks or anything, AND filtered the entire carboy of wine did I realize that I didn’t put the wine filter pads in the housing correctly.
Shop Wine BottlesWhat I was supposed to do was this according to the instructions:  “The filter unit consists of three parts: Bottom Housing, Top Housing, and Separator. Into this assembly the two filter pads must be inserted. The pads are assembled with the cloth looking flat side outwards. The correct sequence is thus: Bottom Housing, Filter pad, Separator, Filter pad, Top housing.”
So what did I do?  Well, I foolishly kept the two filter pads TOGETHER and placed then between one of the housing pieces and the separator.  I was supposed to take the filter pads apart and place each one separately between one of the housing units and the separator.  I have no idea why my brain decided that I wasn’t going to do it the proper way.  While I didn’t end up with much leaking, I probably ended up leaking more wine out of the unit than if I had set it up properly.
Quite embarrassing that I would do something like that when it was obviously incorrect.  I guess I wasn’t having a very good day!  In the end though, I did end up partially filtering my wine, which is more than I have ever done in the past.  Half filtered wine is probably better than no filtered, right? I won’t be making that silly mistake again when using my wine filter system.  Read the directions.  More than once.  Sigh…

——————————————————————————————————————–
Leigh ErwinMy name is Leigh Erwin, and I am a brand-spankin’ new home winemaker! E. C. Kraus has asked me to share with you my journey from a first-time dabbler to an accomplished home winemaker. From time to time I’ll be checking in with this blog and reporting my experience with you: the good, bad — and the ugly.

Did A Malolactic Fermentation Ruin My Wine?

Wine Going Through Malolactic FermentationEd, I was looking for answers for when a malo-lactic fermentation is completed and came across your [malolactic fermentation] article. This is the first time I have used fresh grapes for making wine. I have 15 gallons in 3 five gallon carboys right now. I bought the malo- lactic culture at my local supply shop, they knew what kind of wine I was making. You stated in your article that malo-lactic fermentation should not be done to zinfandel wine….that’s what I am making. Did I screw up?
John F. — OH
—–
Hello John,
To say a malolactic fermentation ruined your wine is a bit of an over-statement. As I recall, the point I was trying to get across in the article about malolactic fermentation is that not all wines will benefit from a MLF, and in fact, some wines will not improve because of it, but may even become worse.
This does not mean that the wine will taste bad or be undrinkable. Barring any other faults in the wine, my guess is it will still be quite nice… it’s just that it probably could have been better.
I have never tasted a Zinfandel that has gone through a malolactic fermentation, so I do not know the potential results with any certainty. I am only going by what I see in the market, traditionally, and my imagination as to what it might taste like.
One of the stronger characters of any Zinfandel is its jammy/berry qualities. It’s what has made the Zinfandel grape so popular. This quality is much more prevalent in this grape than any other grape I can think of. It is what a Zinfandel drinker has come to expect from this type of wine. A malolactic fermentation will reduce this particular character of the Zinfandel. It will reduce the assertiveness of the berry flavors and bring it more towards earthy and rich. This would be OK if you are looking for the rich, earthy tones of a Burgundy, but with a Zinfandel you’re not. You are looking to showcase the perceived opposite — fruity and assertive..
Shop Potassium MetabisulfiteIf you have just introduced the wine with the malolactic culture, you still have a choice. Malolactic bacteria is very sensitive to sulfites. That is to say, you can treat your wine with a single dose of either: Campden tablets, potassium metabisulfite or sodium metabisulfite to stop the malolactic fermentation. No harm, no foul.
Another thought is since you have three carboys going, maybe you could stop the malolactic fermentation in two of them and let the third one go. This would only be if you were interested in having better understanding of what a malolactic fermentation does to a wine. If you really don’t care and do not want to give up 5 gallons “to science”, then add sulfite to all three.
I hope this information helps you out and help you to understand why the malolactic fermentation did exactly ruin your wine. I know that everything I’ve said is not 100% definitive. This is because we are talking about wine. Everyone’s perception of it is different. For example, it is possible that you will like the Zinfandel that has gone malolactic fermentation better than that which has not — not likely, but possible. I can only go by what my personal taste are and what I have learned to be the tastes of most others. For this reason, don’t take my words as gospel. Take them as some practical advice.
Happy Wine Making,
Ed Kraus
—————————————————————————————————————–
Ed Kraus is a 3rd generation home brewer/winemaker and has been an owner of E. C. Kraus since 1999. He has been helping individuals make better wine and beer for over 25 years.

Leigh Erwin: Finishing My Mead

Mead Is Not Bubbling
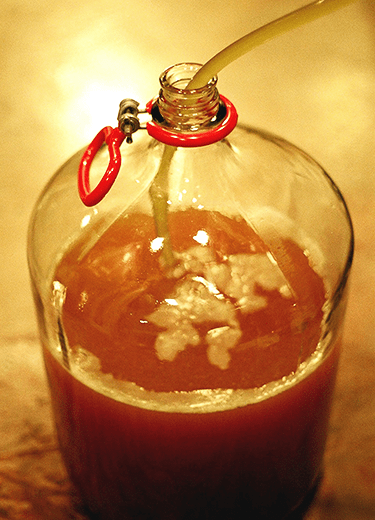
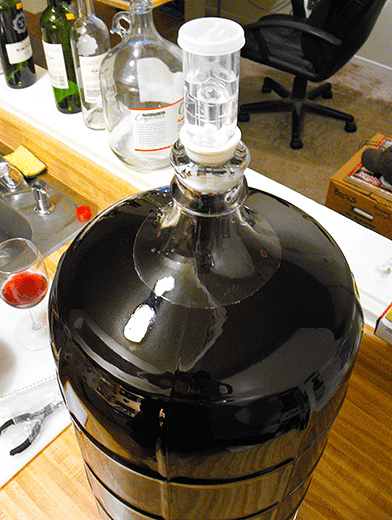
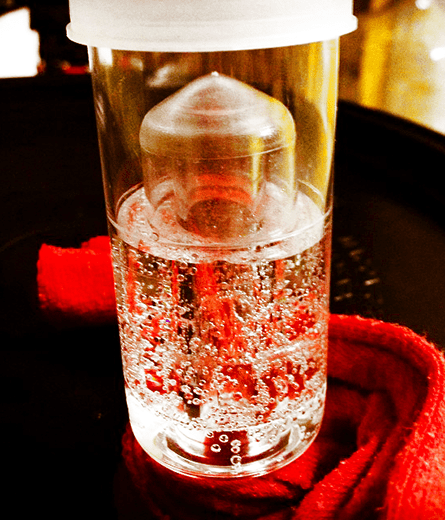
Well I have some good news to report in that my mead finally cleared up!  Actually, it was rather amazing how quickly it cleared up after I added yeast nutrient and yeast energizer.  I swear, I noticed a difference the very next day, and within a few days it was looking very clear.  I take this to mean that the yeast energizer and nutrient worked to get the remaining yeasts off their little butts and to finish fermentation and fall down to the bottom after death. Now we can move on to finishing my mead up and getting it bottled.
One concerning thing, however, is that when I checked the specific gravity with my hydrometer, it was still at 1.002.  It looks very clear now at this point, and tastes fine, and since I have too much going on in the next couple weeks to worry about that 0.004 specific gravity “points”, I’m going to press forward with the filtering and then bottling process and finishing my mead.
I also decided that due to time constraints, I am not going to sweeten my wine.  I’m just going to leave it as a dry mead and be satisfied with that.  I tasted it; my fiancé tasted it, and we both decided to just go for it and call this one just about done.
Now that I’m not going to sweeten my wine, there is really only a couple of steps left.
First, is to filter the wine.  I recently purchased a wine filter system from ECKraus and am looking forward to trying it out.  Hopefully all will go well there!
Second, and finally, I’ll need to bottle the wine.  I’ve done this a few times already now at this point, so I’m not concerned about this step at all. Granted, I’m still going to perform the task with care, as really nothing is “safe” until everything is all bottled and put to bed.
Shop Wine FiltersI’m actually very relieved I’m going to be finishing my mead soon.  As you know if you’ve followed any of my posts the past couple of months, I have had some struggles with this wine, from stuck fermentation to me just not really having a lot of time and energy to focus on the task.  In fact, I’m getting married in 10 days and starting in the next couple days will have no time for anything but wedding-related tasks!  That being said, I better just go ahead and bottle this mead now as is and put it in the past.
I am really looking forward to making a new batch of wine where I can really focus on that and not all the other thousands of things going on in my life right now!

——————————————————————————————————————–
Leigh ErwinMy name is Leigh Erwin, and I am a brand-spankin’ new home winemaker! E. C. Kraus has asked me to share with you my journey from a first-time dabbler to an accomplished home winemaker. From time to time I’ll be checking in with this blog and reporting my experience with you: the good, bad — and the ugly.

Should I Filter Homemade Wine Before Or After Barrel-Aging?

Wine Barrel With Barrel-Aging.I am about to age Cabernet Sauvignon in a six-gallon barrel. Should I filter the wine before it goes into the barrel or after it comes out before bottling?
John S. — VA
—–
Hello John,
Thanks for the great question. I don’t think this question has ever been asked or answered on our blog before, so here we go…
You want your homemade wine to go through the barrel-aging process before filtering. But having said this, it is important to understand that you want to give the wine some time before going into the barrel. You don’t want it to go straight in to the wine barrel the moment the fermentation completes. Give time for the solids to settle out, first. This might only take a few days or it could be a couple of weeks. Regardless, give the wine whatever time it needs.
The goal is to keep the bulk of the sediment from getting into the wine barrel. Most of the sediment at this stage will be comprised of dead yeast cells. Typically, this is something you do not want your wine resting on while in the barrel. The result could be something called autolysis. This is a process that leads to a bitter-nut to metallic taste in the resulting wine.
Shop Wine BarrelsThe reason you want to filter your wine after barrel-aging is because of what happens while the wine is in the barrel. There are a lot of processes that go on. One of the more significant ones is tannin precipitation. As tannin is leached from the wood of the barrel, it sets off a chain-reaction, of sorts, that causes the excessive tannins that are normally in a young wine to solidify and drop out as sediment. This is one of the key factors in reducing the harshness of a wine.
There are many other organic process that go on during aging besides this that can contribute to other precipitates as well. With this in mind, it only makes sense to filter the homemade wine after the barrel-aging and not before. Why filter the wine when there is more sediment on the way.
John, I hope this answers your question. Just remember to also give your wine plenty of time before going into the barrel and then plenty of time while its in there. You can filter your homemade wine after the barrel-aging is complete.
Happy Winemaking,
Ed Kraus
—————————————————————————————————————–
Ed Kraus is a 3rd generation home brewer/winemaker and has been an owner of E. C. Kraus since 1999. He has been helping individuals make better wine and beer for over 25 years.

Leigh Erwin: Stuck Fermentation?

Frustrated About Her Meads Stuck FermentationHello everyone!
You’re probably all getting sick of me talking about my mead at this point, but I suppose the whole point of this diary is to take you through both the good and the bad times of my home winemaking adventures, so there are bound to be problems that arise and stick around for a while!
I actually think the “issue” I am having isn’t really that big a deal, but since I haven’t had as much time on my hands, it has dragged out a lot longer than I had hoped.
Anyway, last I checked the specific gravity, it was 1.000. Still not quite were I want it to be (want it around 0.998 or so), but since it’s been holding pretty steady around this point for many weeks now, I came to the conclusion that I have a stuck fermentation.  Also, between when I racked the mead the first time and when I racked it the second time, there was little to no sediment left over but still a ton of “stuff” in suspension.  All that plus the fact that it still tastes a little yeasty to me, leads me to believe that there is still some yeast in there but it’s on strike, thus a stuck fermentation.
Shop Yeast EnergizerWhat I decided to do is add both yeast nutrient and yeast energizer.  According to the packaging on both products, I can use them to try and jump start a stuck fermentation at ½ a teaspoon per gallon (each), so if the instructions say I can do that, then I’m going to go ahead and do that!
Since I have roughly 5 gallons of mead (maybe a little less at this point, but for easy math I’m sticking with 5), that equals 2.5 teaspoons of yeast nutrient and also 2.5 teaspoons of yeast energizer.  I added both to my mead, then gave it a nice stir to get everything in suspension and hopefully waking up that remaining yeast.
I also put an airlock on the carboy, so hopefully I’ll start to see a little activity (albeit very slow most likely) over the next few days, and put this stuck fermentation behind me.
I’ll probably give it another week or so, then test the specific gravity again.  If the fermentation is still stuck, then I think I’ll add some new yeast to try and finish the job.  Also, it would probably be wise of me to purchase a pH testing strips as well, as knowing the pH of the mead would probably be helpful in figuring out how to address this issue!

——————————————————————————————————————–
Leigh ErwinMy name is Leigh Erwin, and I am a brand-spankin’ new home winemaker! E. C. Kraus has asked me to share with you my journey from a first-time dabbler to an accomplished home winemaker. From time to time I’ll be checking in with this blog and reporting my experience with you: the good, bad — and the ugly.

A Simple Guide To Adding Wine Making Ingredients

Adding Wine Making Ingredients To A Batch Of Wine.
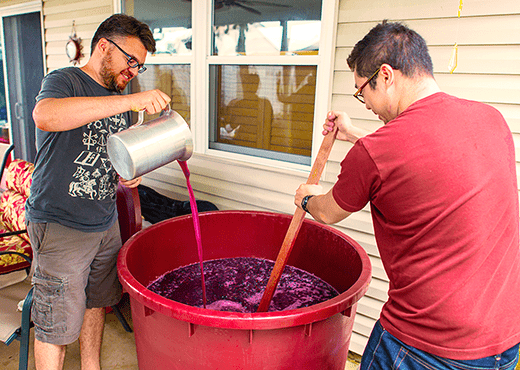
How do you add the yeast and yeast nutrients to the wine juice? Do you pour it on top and leave it be or do you mix/stir it in? This is for the primary fermentation.
Daniel — CA
—–
Hello Daniel,
Thanks for the great question. Adding wine making ingredients to a batch of wine is something that can be taken for granted, but there is good way to do it, and a not-so-good way to do it.
In general, it’s a good idea to dissolve any winemaking ingredients in a little bit of the wine before adding it to the entire batch. This includes both the wine yeast and yeast nutrient.
Having said this, I can tell you that I am guilty of not following my own advice. I have often added acid blend, nutrients, tannin and other wine making ingredients directly to whole batch and then stirred to dissolve them.
How we like to go about adding wine making ingredients wouldn’t make much difference one way or the other except that when you add these ingredient directly, you are never 100% sure that they are getting completely dissolve. My guess is they usually are — at least with some time — but this is only a guess on my part. For this reason I would play it safe and pre-dissolve the wine making ingredients in a little sample then blend that back into the batch.
As for adding wine yeast to a batch of wine, there are some different opinions. Even the directions on the packets of dried wine yeast say to do something different than dissolving it into some of the wine must. So why do I differ?
Shop Digital ThermometerWine yeast directions typically say to put the yeast into warm water, at a specific temperature, for a specific length of time. This is to re-hydrate the wine yeast… to wake it up, so to speak. Even if these directions are being followed exactly, a portion of the wine yeast is being killed, but not nearly enough to cause the fermentation to fail. When these directions are not being followed precisely, a very large number of the yeast cells can be killed — even all of them.
I have discovered over the years that many home winemakers do not follow these directions precisely. The water temperature is not checked and the length of time is not timed. Sometimes the yeast is left sitting on the counter until completely cooled, when it should have been at that temperature for maybe 10 minutes. The result is dead yeast and a failed fermentation. Every minute the yeast remain at that high temperature, more yeast cells are dying. For every degree higher then the temperature specified, more yeast cells are dying. So as you may be starting to see, there are pro’s and con’s to using either method of adding wine making yeast.
When you add dried wine yeast to a little wine at room-temperature you do not have all these risks. The wine yeast will not take off quite as fast as if it had been re-hydrated per directions, but usually we are talking only a few hours. Some of the yeast cells will die using this method because of cell wall damage, but not anything even close to the extent as if the yeast were over-heated.
For these reasons, I suggest dissolving the dried wine yeast in wine must. Unless you’re actually planning on taking the waters temperature and timing the length of time the yeast spend at that temperature, this is usually your best option.
Daniel, I hope this answers your question about adding wine making ingredients. Just make sure you pre-dissolve everything and you should be good to go!
Best Wishes,
Ed Kraus
—————————————————————————————————————–
Ed Kraus is a 3rd generation home brewer/winemaker and has been an owner of E. C. Kraus since 1999. He has been helping individuals make better wine and beer for over 25 years.

Help! There’s Mold Growing In My Airlocks

There is no mold growing in this airlock.
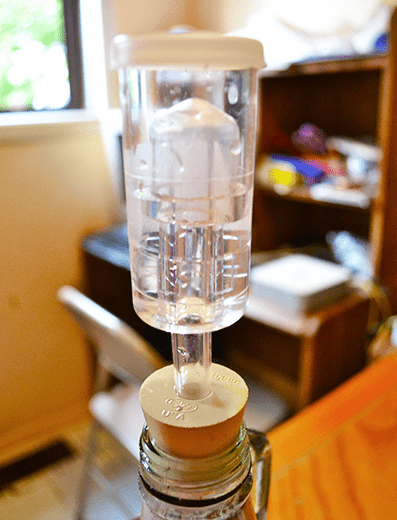
I am making several batches of wine and every one of them has formed a ring of black mold growing at the top of the airlock. I use cleanser water in the airlock assuming it will kill anything it comes in contact. What would cause this mold to form and will it hurt the wine?
Greg R. — ID
—–
Hello Greg,
Not only is there mold growing in your airlock, there’s mold floating in the air, in our cars, on our clothes, in our homes. There’s mold spores everywhere, just in small enough numbers as to be of no consequence to anything or even to be detectable. But, if mold gets the right conditions, it can grow and colonize. Because of this, no matter how well you clean and sanitize a surface, mold can land and grow there if the conditions are right — temperature, humidity, sunlight, nutrients, etc.
The mold growing in your airlock, by itself, is not going to hurt the wine by being there. If there is a fermentation, CO2 gas will be blowing off keeping any mold spores from getting to the wine. However, this can become a big problem once the fermentation has stopped. Not only is there no protective gas blowing out through the airlock, there is a possibility that some air can flow backwards through the airlock and into the wine, taking mold spores along with it. If fact, if your fermentation is already complete, I would strongly urge you to add a dose of sulfite to the wine, if you have not done so already, This could be either Campden tablets, potassium metabisulfite or sodium metabisulfite.
Shop Potassium BisulfiteI normally don’t recommend this, but since you have a stubborn mold growth going on, you may want to consider filling your airlock with a high-alcohol distillate such as grain alcohol or Everclear. This will keep your airlock continuously free of mold growth and kill any mold spores that my be trying to get their way into your precious wine. Also, if the alcohol gets sucked into the wine for whatever reason, it would not harm it. Any mold spores in the alcohol will be dead.
The reason I don’t normally recommend using alcohol in an airlock is because the alcohol evaporates rather quickly and can cause the airlock to go dry if you are not paying attention. But you can go this route. Just understand that you will need to add more alcohol every few days. Don’t let the airlock go dry; check it often.
Having mold growing in airlocks is not a pressing issue that winemakers normally have to deal with. Sanitizing the airlocks and filling them with water is usually enough, but it seems that there is a lot of mold in your neck of the woods right now, so it is something that needs to be dealt with. Don’t feel that you will always need to use alcohol in your airlocks. Next time you make wine there may be no mold growth in the airlock at all.
Happy Wine Making,
Ed Kraus
—————————————————————————————————————–
Ed Kraus is a 3rd generation home brewer/winemaker and has been an owner of E. C. Kraus since 1999. He has been helping individuals make better wine and beer for over 25 years.