 Hi everyone!
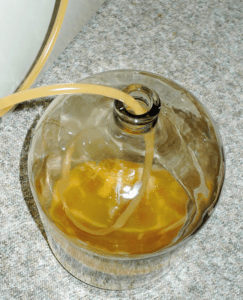
Time for a Day 8 check-in on my Gewurztraminer!
Backing up a little bit, I think everything is moving along OK with my new wine. I could tell the wine yeast were starting to do their thing 24 hours or so after adding them into my wine base/water/bentonite solution, though it never was “roaring” by any means.
I kept an eye on the temperature with a liquid crystal thermometer, and I did notice once it was pushing 80°F, so I unplugged the heating pad for a bit. Since it is a little cool down here in our finished basement where my new “winery” is located, I didn’t want to leave it unplugged forever, so I basically ended up unplugging and plugging in the heating pad periodically throughout the week, in an attempt to keep it between 68-77°F per the instructions.
One thing I thought of later was that I probably shouldn’t have left the lid on the primary fermenter with a fermentation lock like I do when I’m in secondary fermentation. I don’t think leaving the lid on is going to hurt it per se, but perhaps that’s why the yeast were never “going crazy” as I would have expected? Oh well, next time I’ll try to remember to leave the top off (but covered with a towel or something similar).
So, Day 8 is supposed to indicate the start of secondary fermentation, but only if the specific gravity is at the target <1.010 level. I was not sure if the fermentation was there yet, as I could still hear the pitter patter of little yeasty feet, but it’s been a while since I’ve actually made any wine, so I could be wrong.
 After sterilizing all the appropriate equipment, I checked the temperature of my wine and it was at about 64.5°F. A little cool for primary fermentation of this Gewurztraminer, so perhaps I shouldn’t have been leaving the heating pad unplugged so much. Anyway, this lower temperature made me think that maybe the wine wouldn’t be quite ready to move on to secondary fermentation yet, as when the temperature is lower, fermentation tends to progress more slowly.
Anyway, I measured the specific gravity of the wine with a hydrometer and it read 1.016 on the specific gravity scale. So close to 1.010, but not close enough. Since it’s been a little on the cool side during primary fermentation, I’m confident that plugging in the heating pad and leaving the wine for another day or two should do the trick.
I’ll check again around the same time tomorrow and see if we’re ready to move forward with secondary fermentation.
————————————————————
 My name is Leigh Erwin, and I am a brand-spankin’ new home winemaker! E. C. Kraus has asked me to share with you my journey from a first-time dabbler to an accomplished home winemaker. From time to time I’ll be checking in with this blog and reporting my experience with you: the good, bad — and the ugly.
Category Archives: Wine
Lowering The Alcohol Level Of Wine With Water
 Can you tell me when to add water to my wine, is it during fermentation or after? I make wine using Cabernet Sauvignon and Zinfandel grapes mixing 50 /50, but it always comes out very strong, I like that smooth taste, any suggestion?
Thanks Joe,
—–
Good Morning Joe,
Both of the grapes you mentioned are normally made using 100% grape — no water added. This isn’t the case with all grapes, just with wine varietals such as these. They will produce a wine anywhere from 11% to 13% depending on how the growing season went that particular year.
If you want to lower the alcohol level of your wine with water, the optimal time to add it would be before bottling. The wine is clear and stable and can easily be blended with water.
It is important that you use distilled water at this stage of the winemaking process. Tap or bottled drinking water has oxygen saturated in it. The oxygen in this water can promote oxidation in the wine if it is added.
How much distilled water you add is entirely up to you, but I would suggest that you keep the wine at an alcohol level of 8% or above. Wines below this have a harder time protecting themselves from spoilage. For the same reason, I would also urge you to add sulfites to the wine before bottling. This could either be by way of Campden tablets or potassium metabisulfite. Either of these will help to protect the wine.
The only way to know with certainty how much distilled water to add and still keep the wine above 8% alcohol, is to start by knowing how much alcohol is in the finished wine. This will require the use of a wine hydrometer. The hydrometer will allow you to determine how much alcohol is in your wine. You will need a reading taken before the fermentation and another one after the fermentation. By comparing the two hydrometer readings you can calculate the alcohol level of your wine.
To know how much distilled water to add to get from your finished alcohol level to the one you desire. I would suggest you use a tool called the Pearson Square. It is a method of calculating ratios when blending two different wines. In your case you are blending wine and water. Use the Pearson Square in this way. The distilled water is 0% alcohol.
Lowering the alcohol level of a wine with water is something that is not typically done, however rested assured that if you use the methods above you will have no problems with getting your wine safely to an alcohol level you prefer.
Happy Winemaking,
Ed Kraus
———————————————————————-
Ed Kraus is a 3rd generation home brewer/winemaker and has been an owner of E. C. Kraus since 1999. He has been helping individuals make better wine and beer for over 25 years.
Leigh Erwin: New Winery Setup
 I’m so excited! I FINALLY get to make wine again after a seemingly un-endless hiatus due to major life events and changes.
Once my husband and I moved into our new home, I made sure one of the first rooms I set up was the “winery” in the finished basement. It’s still a work in progress, and it’s kind of pathetic when I look at how many pieces of equipment and winemaking supplies I actually have. It’s slim-pickin’s over here. I think eventually I’ll be able to remedy that with the help of E C Kraus!
So, I ordered a couple of different winemaking kits, as I am hoping to be able to run a couple of wines at once. I also purchased a Copper Tun heating pad, as I noticed it’s relatively cool down here in the basement and there isn’t really any good system to keep the heat down here at the moment. In retrospect, I really should have purchased two heating pads if I want to run two wines at the same time, since it is a little too cold for most yeasts to function properly. I’ll have to put that high on my list of winemaking equipment to purchase in the near future.
I purchased both a white and a red wine, and since it’s been a while since I’ve had a chance to actually make wine, I decided to start with the white, since there are fewer steps and it’s theoretically easier than the red. The white I’ll be working on for the next several weeks is the Gewurztraminer from California Connoisseur.
Before I did anything, I read up on the water in the new city I live in, and turns out, like most municipalities, our water is chlorinated at some point during its treatment process. So, I poured off what I needed in a clean bucket and left it overnight to allow any residue chlorine to blow off.
 The next day, after making sure I got all the moving dust off my equipment, I set up with my sterilizing solution (sodium bisulfite) and got to cleaning! I should note: I am using a brand new primary fermenter, so I will admit I didn’t sterilize it longer than I probably would have it had been used previously.
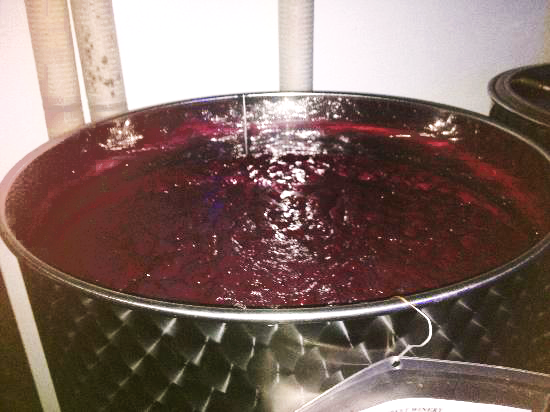
I added the water and bentonite to the Gewurztraminer wine base per the instructions. The temperature of the mixture was a little low (64oF.) so I turned on the heating pad and brought it up to 68oF. before measuring the specific gravity and adding the yeast.
The specific gravity ended up being 1.112 (1.113 after adjusting for calibration temperature of the hydrometer) prior to adding the yeast.
Finally, I added the yeast and crossed my fingers! Now I wait until Day 8 to see how things are progressing!
————————————————————
My name is Leigh Erwin, and I am a brand-spankin’ new home winemaker! E. C. Kraus has asked me to share with you my journey from a first-time dabbler to an accomplished home winemaker. From time to time I’ll be checking in with this blog and reporting my experience with you: the good, bad — and the ugly.
Leigh Erwin: 2015 Plans
 I hope everyone is having a great New Year so far! I’m looking forward to spending a lot more time improving my home winemaking technique in 2015, and hopefully cranking out some more quality wines!
I’m so excited to have my own room dedicated to winemaking. It’s a great upgrade from the teeny tiny space we had previously in our old condo.
In our new house, we also have a two car garage. While I probably can’t do too much with both of our vehicles in there, I am looking forward to using it as needed to do the more “messy” parts of home winemaking, including sorting and pressing fruit and the like. If I don’t have enough space when both cars are in there, I’ll just move one of them into the driveway for a day or so until I’m finished with whatever I’m doing related to home winemaking.
Once I’ve got everything completely unpacked, I’ll finally be able to start making wine again. So excited!
Here are my goals for this new chapter in my home winemaking adventures in 2015:
- Get set up in the new “winery” room in the new house.
- Start 2 wines at the same time instead of just working on one (maybe stagger the start time by a couple days or so).
- Attempt to make wine starting with whole fruit instead of concentrate.
- Make a rose style wine.
- Make a “weird” wine (i.e. something that someone wouldn’t associate with ever being a flavor of wine).
- Make another mead wine that actually tastes good (sigh).
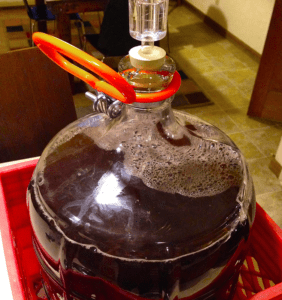
The first goals that I plan to do are to set up the new winery room, and to start two wines around the same time. Which wines should I try? I think I’ll do both a white and a red to get things started.
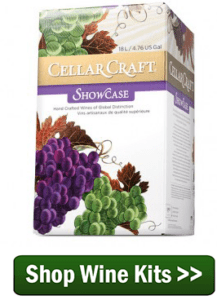
Looking through the wide selection on the ECKraus website, for the red I’ve decided to order the Cellar Craft Showcase Collection: Rosso Fortissimo. The description listed sounds amazing: “Super-Tuscan styled wine vinted from Cabernet Sauvignon, Merlot, Sangiovese and other native Italian varieties. Fermented on Yakima crushed Merlot grapes. A big, full-bodied wine with solid structure and bold fruit notes. Complex cassis, plum and cherry notes balance the bold tannins. French and American oaks contribute toasty vanilla and greater depth in this intense wine.”
For the white, I’m going to try the California Connoisseur: Gewürztraminer. The description reads: “Its aroma is similar to that of raisins with some noticeable hits of anise and mint. Very spicy. Its flavors are intensely fruity and instantly bring to mind: apples, pears and grapefruit. Some cinnamon flavors as well.”
To get back into the swing of things, I’m going to do complete kits for both wines, since it’s been a little while since I’ve actually be able to make any wine. I hope I’m not too rusty!
————————————————————
My name is Leigh Erwin, and I am a brand-spankin’ new home winemaker! E. C. Kraus has asked me to share with you my journey from a first-time dabbler to an accomplished home winemaker. From time to time I’ll be checking in with this blog and reporting my experience with you: the good, bad — and the ugly.
Leigh Erwin: Stainless Steel vs. Plastic Fermenters
 Hi folks! Leigh here!
I wanted to elaborate a little more on my last post, particularly the part about purchasing a stainless steel fermenter. Since it’s a pretty large investment (well, large for the beginner winemaker), I want to make extra sure switching to stainless steel from plastic is really the best option for me. So, I decided to look up some pros and cons about both plastic fermenters and stainless steel fermenters to try and help me in my quest for the appropriate vessel.
Some Pros of Plastic Fermenters:
- Least expensive option out there.
- Light weight, so easier to lift and move around if need be.
Some Cons of Plastic Fermenters:
- Easier to scratch when cleaning. Scratches are great places for hiding icky bacteria and other things you really don’t want in your wine.
- Oxygen can diffuse faster from plastic than it can from something more dense, so it’s really not a great option for long-term storage.
- Plastic tends to hold in odors no matter how well you clean it, which could affect your next batch of wine.
Some Pros of Stainless Steel Fermenters:
- Much easier to clean.
- Oxygen ingress is significantly less than a plastic fermenter, and the seals on stainless steel fermenters tend to be better/tighter than they are in plastic fermenters.
- Less risk of contamination since the steel will not scratch like plastic, you won’t be harboring any bacterial stow-aways.
- Stainless steel is more durable than plastic, so in theory it will last longer.
Some Cons of Stainless Steel Fermenters:
- They are much more expensive than plastic fermenters.

- They are more bulky and difficult to move once you get wine in them.
I’m sure there are other pros and cons of both types of fermenters, but just by reviewing these first few, I’ve already made up my mind. I like the idea of using plastic fermenters when you are just starting out as a home winemaker, as in the beginning you don’t really know if you’re even going to like doing it or if you’ll be able to continue making wine after your first couple batches. If you’re really getting into it and know you plan to continue making wine for a while, and perhaps know you’d like to increase your output, the upgrade to stainless steel (or glass) is more than worth it, in my opinion.
How about you all? Have you made the switch from plastic? If you are sticking with plastic fermenters, why did you decide to do so? Remember, there are pros and cons to each, so no one is “right” or “wrong”, but it’d be interesting to hear why others made the decisions that they did in terms of what kind of fermenter to use.
————————————————————
My name is Leigh Erwin, and I am a brand-spankin’ new home winemaker! E. C. Kraus has asked me to share with you my journey from a first-time dabbler to an accomplished home winemaker. From time to time I’ll be checking in with this blog and reporting my experience with you: the good, bad — and the ugly.
A Simple Recipe And A Holiday Wish
 We would like to stop and take a moment to wish you the very best this holiday season. We sincerely hope that your Christmas is full of joy and excitement, and that the New Year brings you the brightest of days and provides you with all for which you strive.
In keeping with the holiday spirit I have listed below an eggnog recipe that I have used for many years. It has ‘Breakfast’ in its title, but have found that works equally well for lunch, dinner and bedtime cap. I’d like to share it with you in hopes that it might bring a little warmth to your holiday season.
Holiday Breakfast Eggnog
- 10 ounces of Apricot Brandy
- 3 ounces of Triple Sec
- 1 Quart of Eggnog
- Mix together and sprinkle with Nutmeg
MERRY CHRISTMAS!
From Everyone At E. C. Kraus
———————————————————————————————————
Ed Kraus is a 3rd generation home brewer/winemaker and has been an owner of E. C. Kraus since 1999. He has been helping individuals make better wine and beer for over 25 years.
Leigh Erwin: A Vineyard Daydream
 Hi guys! Leigh here!
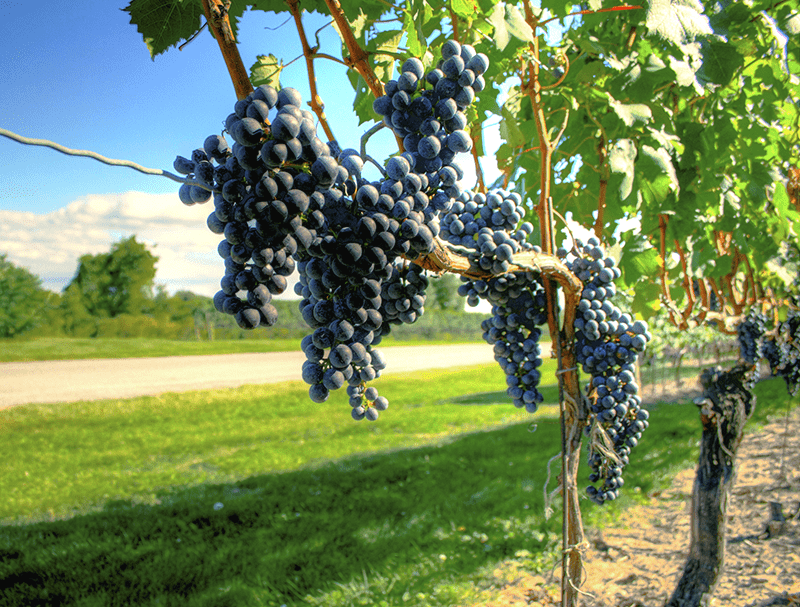
While I’m sitting here looking at potential homes to buy, I got to thinking—is there enough space in these yards to grow enough of my own grapes for making my own wine? How much space and how many vines do I actually need?
After doing some reading, turns out the answer kind of depends on how much quality I want to get out of my wine. If I don’t care about quality, I can just pack a bunch in together and see what happens. If I do care about quality, I need to pay a lot closer attention to the types of grapes I choose, how far apart they are from one another, and how many I need to plant. All of theses factors come into play when growing grapes for wine.
One of the biggest considerations I need to make is related to the type of grape I should plant. Do I plant Vitis vinifera? Or do I plant native varieties? This really all depends on the climate (including temperature and humidity) as well as the soil. Not all grapes grow well under the same conditions, so depending upon where I live could make a huge difference in what I plant.
There is a great little “post” regarding growing grapes for wine that I read on Homebrewing.org, which confirms this idea of picking the right grapes for where you live. This post also mentions what to expect once you actually plant the grapes, and how many vines you should plant if you’re sticking with small batch winemaking.
Once you plant the vines, you can’t expect to be making wine immediately. In fact, it takes a good 3-4 years before you end up with a decent crop for winemaking. So, if you’re in a hurry to make wine with grapes, obviously you’ll need to buy someone else’s grapes for a few years while you’re waiting for yours to grow and mature. All the while you need to make sure you set up trellises for when the grapes start putting out their long, dangly vines, and you need to regularly prune them. 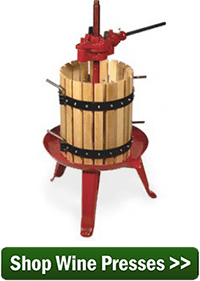
It is recommended that the vines be planted in a very sunny area, with good soil drainage and nutrient-poor soils. When growing grapes for wine, stressing out the plant a bit is actually good for wines, as the plant will put all of its energy into reproduction (i.e. the grapes!!) resulting in super concentrated, higher quality fruit.
So, if I wish to continue making super-small batch wine like I am currently (i.e. using the 6 gallon fermenters and carboys), how much should I plant? According to what I’ve read, it takes about 10 pounds of grapes to make a gallon of wine. Therefore, in order to make a small batch of wine, you’d need to plant about 10-20 vines. I should probably keep that in mind when I’m looking for a new home, and hope the yard is big enough to squeeze 10-20 vines in!
Anyone else out there growing grapes for wine?
————————————————————
My name is Leigh Erwin, and I am a brand-spankin’ new home winemaker! E. C. Kraus has asked me to share with you my journey from a first-time dabbler to an accomplished home winemaker. From time to time I’ll be checking in with this blog and reporting my experience with you: the good, bad — and the ugly.
Leigh Erwin: Using A Juicer
 Hello readers! Leigh here! I’m back from my wedding/honeymoon adventures!
Remember how I thought we would have been moved by now? Well, we’re not….yet. We at least know now that we are not staying in the state where we live currently. Because of this, I’m holding off on any major home winemaking purchases as I can’t really start any new wines right now and it’ll be a pain to have to move more than we really need.
I don’t want to lose the momentum I had earlier regarding my desire to make my own wines, so I’ll spend some time thinking about my next major steps and talking with you about what I would like to do and how I plan to do it.
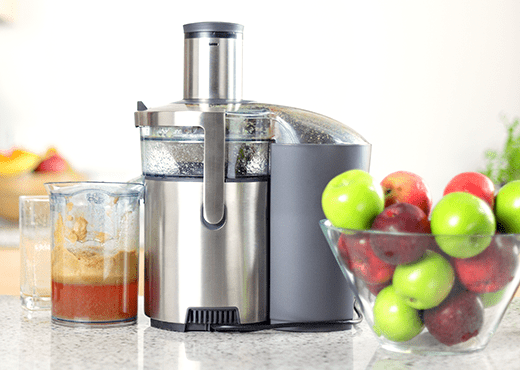
One thing that just popped in my mind, actually, is related to one of the wedding gifts we received. Someone had purchased a juicer for us so we can make our own homemade juice. I’m certain they had random fruit juices to drink in mind, but I’ve been thinking—could I use this same juicer to make a bunch of juice to be fermented into wine? Does anyone have any experience with using a juicer for winemaking?
I did a little digging around the ECKraus website, and turns out there is someone else who had the exact same question that I did! Can we use a juicer for winemaking? To some up in one phrase, the answer was “sort of”.
 When you use this type of a juicer for red wines (i.e. one not made with winemaking in mind), the resulting wine will be lacking in body and color. Wines get most of the color from the skins, seeds, and pulp of the fruit, and the juicer will just end up separating all that. However, the juicer could be used for white wines (white fruit) since you don’t need the skins and seeds for that process!
Cool! So, while the gift giver did not have winemaking in mind, I’ll certainly be using my juicer for making white fruit wines until I upgrade to a more appropriate piece of equipment like a grape press.
——————————————————————————————————————–
My name is Leigh Erwin, and I am a brand-spankin’ new home winemaker! E. C. Kraus has asked me to share with you my journey from a first-time dabbler to an accomplished home winemaker. From time to time I’ll be checking in with this blog and reporting my experience with you: the good, bad — and the ugly.
I Forgot To Add Campden Tablets To My Wine!
 I started a 5 gallon batch of raspberry wine yesterday and I had to wait until the batch cooled down to add the Campden tablets…and I forgot. I pitched the yeast last night and about an hour later I remembered that I forgot to add the Campden tablets the wine, so I added them at that point. Now this morning I still have no activity from the yeast. Did I kill the yeast? Should I put in more yeast? What can I do at this point?
Richard H. — GA
—–
Hello Richard,
From what you are telling me it seems like you killed most of the wine yeast.
When you add Campden tablets to a wine must it is to add SO2, or sulfur dioxide, to sanitize it. All the wild mold and bacteria are destroyed by the SO2’s presence. Given enough time, the sulfur dioxide will then dissipate out of the wine must as a gas and leave.
Campden tablets are added 24 hours before the wine yeast. This is so the wine yeast will not be destroyed by the Campden tablets, as well. In your case you added the wine yeast at the same time you added the Campden tablets, so it is most likely that some — if not most — the wine yeast was killed. This is the bad news…
The good news is that a remedy is very simple. Add another packet of wine yeast. The wine should start fermenting just fine.

If you have been keeping your primary fermenter sealed up under an airlock, you will want to take them off and allow the wine must to breath for 24 hours before adding the wine yeast. This is to allow the time necessary for the SO2 gas to escape from the wine must. Once you have done this, you can then add the 2nd packet. It will be like nothing ever happened.
Richard, you are not the first person to come to me and say, I forgot to add Campden tablets to my wine and then added them along with the wine yeast. I’ve seen this scenario play out more than once with good results, so I am very confident that your wine will turn out just fine.
Happy Winemaking,
Ed Kraus
—————————————————————————————————————–
Ed Kraus is a 3rd generation home brewer/winemaker and has been an owner of E. C. Kraus since 1999. He has been helping individuals make better wine and beer for over 25 years.
Do Wine Fining Agents Need To Be Stirred?
 First of all, your wine making articles are great. One answer I have not seen in your posted articles is whether to stir fining or clearing agents multiply times after adding them in wine. Your article on using Bentonite as a wine clarifier states that it should be stirred several times once added. But what about other clearing agents such as Sparkolloid and Kitosol 40?
Kermit G. — LA
—–
Hello Kermit,
Most wine fining agents, such as the Sparkolloid and the Kitosol 40 you mentioned, do not need to be stirred repeatedly to do their job. All one needs to do is when adding these clarifiers is to stir them evenly throughout the wine. That is all that is necessary for them to do their job.
The reason for this is because these wine fining agents are light enough to stay suspended on their own for extended periods of time while in the wine . This gives the fining agents plenty of time to attract or absorb what they need to before settling out. In the case of liquid isinglass, it could stay suspended for weeks if not months. It is not until it actually attracts a group of particles that it will gain mass; lose buoyancy; and settle out. On its own, it’s just lingering.
However, this is not necessarily the case with bentonite. Some of the bentonite will settle out fairly quickly, not giving them enough time to collect as much as they possibly can. By stirring every few hours for the first day or two, you are increasing the clearing power of these heavier bentonite particles by keeping them suspended longer.
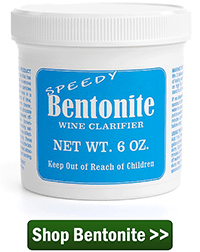 Please realize, that even if you did not stir the bentonite more than once, it will most likely clear the wine just fine. Bentonite is a very effective wine fining agent. It is capable of taking out a lot of the protein solids that are left behind after a fermentation. Any additional stirring would be just for added insurance.
Also realize, that it is possible to over fine a wine. A wine that has been treated over-treated with wine fining agents will start to lose body. The tannin structure of the wine will begin to diminished to some degree. And, in some more drastic cases, the color of the wine can be lightened a shade or two. Not good, if you’re trying to produce a big red wine.
Kermit, I hope this clears things up for you a bit [no pun intended]. In general, you don’t need to worry about stirring wine fining agents. They will do just fine on their own. However, if using bentonite giving it an extra stir or two during the first day or so isn’t a bad idea.
Happy Winemaking,
Ed Kraus
—————————————————————————————————————–
Ed Kraus is a 3rd generation home brewer/winemaker and has been an owner of E. C. Kraus since 1999. He has been helping individuals make better wine and beer for over 25 years.