 Hi everyone!
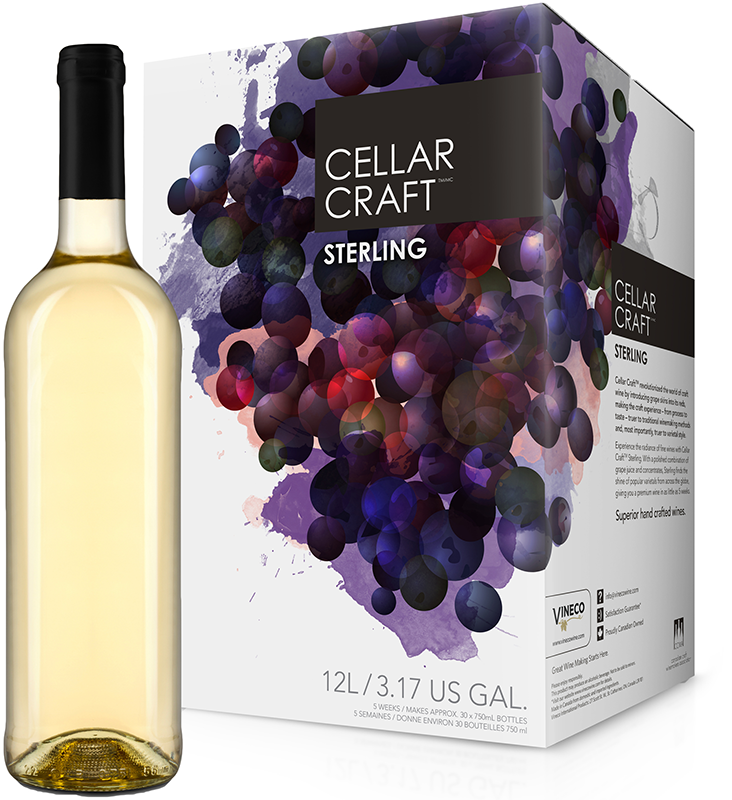
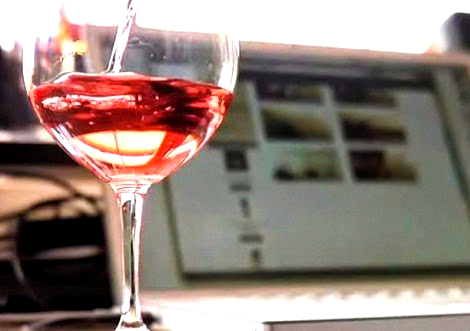
I’m so excited I’m finally giving that Cellar Craft Sterling California Chardonnay another go! If you recall, the last time I started this wine making ingredient kit I totally screwed up with the fermentation temperature. It was too cool. I didn’t really catch the error until it was too late. I tried to resurrect it, but alas, it was not to be.
This time I came prepared with my fermenter heating pad and barring any long-term power outages here in Colorado (knock on wood), I shouldn’t run into that problem again!
I find it so funny that I need to use a heating element when it’s been about 90 degrees outside for the past two weeks, but at least I know that my basement is a great place to hang out if I get too warm! I keep the air conditioning running but even though I have the vents closed to the wine room, it’s still a lot cooler down there than the rest of the house, necessitating the use of the heating pad basically all year round. That’s OK with me though – whatever keeps the temperature steady makes me happy!
Anyway, I decided today’s the day I’ll be starting a wine making ingredient kit. So I pulled out the directions that came with the wine kit and got to work. I mixed together some hot water and the bentonite packets. Gotta love that clay smell! Then, I added in the wine base (love the smell of the juice!) and enough water to bring the total volume up to 23L/6gallons.
At this point, I checked the specific gravity with my wine hydrometer, and it was 1.100 at about 74°F. Running that through an online temperature corrector for the calibration temperature of my hydrometer, the specific gravity was about 1.101. At this little of a difference, I wonder if it really matters if I even do the correction. I suppose if it were borderline and I had to decide whether or not to move forward based on that value, I’d certainly want to do it. But for calculating the alcohol content at the end, I don’t think it’ll matter too much, especially since I’m not selling this to anyone!
After the specific gravity reading, I added the oak shavings, gave it a stir, then sprinkled the wine yeast on the top.
I plugged in the heating pad, covered the primary fermenter, and said a silent prayer that this batch wouldn’t turn out the way the first one did! I have a better feeling about this one, so fingers crossed it all comes out the way it is supposed to!
That’s really all there is to starting a wine making ingredient kit. Now I just sit and wait for 6-8 days before checking the specific gravity again to determine if the wine is ready to move on to secondary fermentation. I have learned my lesson from last time, however, and I will be at least poking my head in daily to make sure the yeasts are doing their thing and fermenting!
———————————–
 My name is Leigh Erwin, and I am a brand-spankin’ new home winemaker! E. C. Kraus has asked me to share with you my journey from a first-time dabbler to an accomplished home winemaker. From time to time I’ll be checking in with this blog and reporting my experience with you: the good, bad – and the ugly.
Category Archives: Wine
Leigh Erwin: Making Wine From Scratch
 Hi all!
Even though I’ve been continuing to order wine ingredient kits, I’ve been thinking a lot about making my own wine from scratch. Something about making wine from scratch makes me feel like I am in complete control over how the wine comes out, while when I make wine from a kit, it’s kind of like I’m just going through the motions and my wine will taste almost exactly the same as someone else’s wine who made the same kit and followed the instructions to the letter just like I did.
Don’t get me wrong – I love how easy the wine ingredient kits are to use and how great the wines taste when they are finished (as long as I haven’t done something stupid along the way…), but part of me doesn’t really feel like a “real” winemaker if I didn’t make the wine all from scratch using ingredients I have already in stock in my little winery shelves.
At the same time, I am terrified of going about it on my own. What if I’m not ready to make wine without a kit and I end up wasting ingredients and my time? How am I supposed to just whip up a batch of wine without any pre-organized kit?
Well, that’s where wine making sites like E. C. Kraus can really come in handy. There are so many great resources for making wine online and folks like E. C. Kraus do a great job of answering common questions that plague home winemakers both new and seasoned.
Additionally, there are a ton of great wine making books out there that can help with making wine from scratch. I have a couple of books myself, so other than stocking up on “raw” ingredients, I really have all the resources I need to be able to set out and make a batch.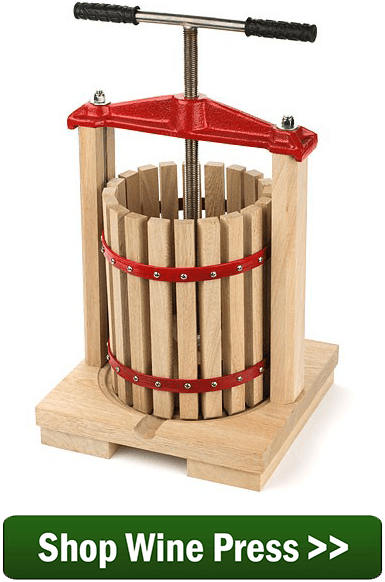
I feel as though the only way I’m really going to learn how to be a real winemaker is to do it myself from start to finish without having it all set out nicely for me ahead of time. I need to be able to think on my feet and one day know “oh, right, I need to add this ingredient now if I want the wine to do such and such”, instead of just checking off the boxes as I go.
In reality, I’m definitely going to continue using wine ingredient kits as they are pretty great and get you nice wines every time (if you follow the instructions and keep things clean and sanitized anyway), but I think from now on, in addition to making one wine from a kit, I’ll simultaneously make a wine from scratch on my own from “raw” ingredients to see if I really understand winemaking or if I’m just really good at ready directions and checking off boxes.
———————————–
My name is Leigh Erwin, and I am a brand-spankin’ new home winemaker! E. C. Kraus has asked me to share with you my journey from a first-time dabbler to an accomplished home winemaker. From time to time I’ll be checking in with this blog and reporting my experience with you: the good, bad – and the ugly.
What Equipment Do I Need To Make Grape Wine?
 This time of the year we receive a lot of various questions about making wine from the different fruits that are coming into season. One particular question we get quite often has to do with making homemade grape wine:
What equipment do I need to make grape wine?
Well… it depends. I know what your thinking, why can’t this guy give us a straight answer? I want to, but that would not do you or the question any justice.
The answer depends on the amount of grapes you need for your wine recipe. And, that is based on the kind of grapes we are talking about and the size of the batch you intend to make. If you are making wine from wild grapes such as mustang, muscadine, scuppernong, fox, etc., you’ll only need to prepare 20 to 40 pounds of grapes to make a 5 gallon batch. This is certainly manageable by hand and no exclusive equipment will be needed to make the grape wine.
But, if you plan on making 10 gallons of wine using actual wine grapes such as Cabernet Sauvignon, Merlot, or even Foch, now you are dealing with about 160 pounds of grapes… this is when you need some equipment to make your grape wine.
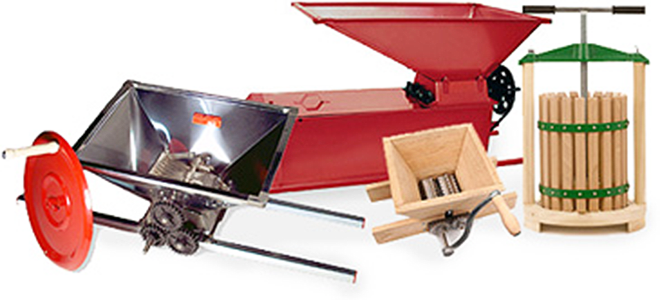
Before any grape can be fermented it needs to be crushed with a grape crusher. A grape crusher is different from the grape press. A grape crusher only bursts the grape skins open. You can certainly crush the grapes by-hand, depending on the amount needed to be crushed, but the grapes definitely need to be crushed before they can be pressed.
At some point in the wine making process you will need to squeeze the pulp to get all the liquid out of it. For white wines this pressing is done right after the grapes are crushed. For red wines the grapes are pressed after the must has fermented with the crushed grapes for about 3 to 7 days.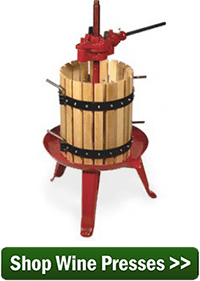
You can squeeze the pulp by-hand, just be aware that this will lead to a wine with less body and color. Also, you won’t be getting all of the juice. You will not be able to press the pulp nearly as well as an actual wine press can. Unless you are dealing with a very small amount of grape – say, 20 or 30 pounds – shopping for a grape press is probably in your future.
For larger volumes of grapes, say 500 pounds or more, another piece of equipment you will need to make grape wine is a grape crusher/destemmer combo. When you make wine from grapes a majority of the stems need to be removed. If this does not happen, a ropy bitterness can be present in the finished product. Doing this by-hand is not so bad if dealing with a few hundred pounds, especially if you get the kids involved, but for larger amounts you will probably want to invest in a crusher/destemmer.
In general, the grapes need to be crushed, destemmed and pressed to make it through the wine making process. Any of this can be done by hand, but if you are dealing with 50 or 100 pounds or more, you will want to use some equipment to make your grape wine.
———————————–
Ed Kraus is a 3rd generation home brewer/winemaker and has been an owner of E. C. Kraus since 1999. He has been helping individuals make better wine and beer for over 25 years.
Leigh Erwin: Going Shopping
 Hi all!
I can’t believe I don’t have any wines currently going in my little winery room right now! I feel guilty admitting that, but hey, sometimes you realize all of a sudden that you just bottled your last wine and you completely forgot to order a new wine kit in time to get a new one going as soon as the old one was finished! Whoops!
I decided to take a little time to put together a list of wine making items I need or have been wanting to purchase from E C Kraus and share them all with you now:
Two new winemaking kits:
I’m not ready yet to make wine from my own fruit, as a lot of fruits don’t come into season here in Colorado for a little while still and I would prefer to use local produce rather than just buy a bunch of imported stuff from the grocery store.
I definitely need to make that Chardonnay that I completely screwed up several weeks ago. As a reminder, that was the Cellar Craft Sterling Collection Chardonnay California Reserve. I am determined to see this one through all the way to bottling and fingers crossed I don’t make any mistakes with that one again.
For the red, I decided to go for a dessert-style wine and make the Cellar Craft Specialty Collection Black Currant Dessert Wine (Porto Corinto Style). I love Port-style wines and would love to be able to make one myself. Since I just making a very light style red (the Nebbiolo), I thought it would be fun to go the complete opposite and make a heavier dessert Port-style wine this time around.
Random “bits and pieces” of equipment:
I really need to get in a better habit of writing things down the moment I think of them, but I think this is everything I’ve been wanting/needing.
A new bottle brush:  The one I currently have was one I actually bought for day-to-day dishes and not actually for cleaning wine bottles. When I went to try and clean out one particularly dirty bottle the other day, I stuck the brush in the neck and it didn’t even go half way into the bottle. That bottle ended up being tossed into recycling and now I know I need to order a wine bottle brush and not a run-of-the-mill bottle brush.
A stainless steel strainer: If you remember from one of my previous entries, I needed a way to remove elderberries from my Nebbiolo wine so they wouldn’t get transferred into my clean carboy. A strainer would have come in handy here.
I definitely have other things that I would like but don’t necessarily need right now (don’t we all have those!), but I think this list will do nicely for now.
———————————–
My name is Leigh Erwin, and I am a brand-spankin’ new home winemaker! E. C. Kraus has asked me to share with you my journey from a first-time dabbler to an accomplished home winemaker. From time to time I’ll be checking in with this blog and reporting my experience with you: the good, bad – and the ugly.
A Great Grape Destemmer At A Great Value
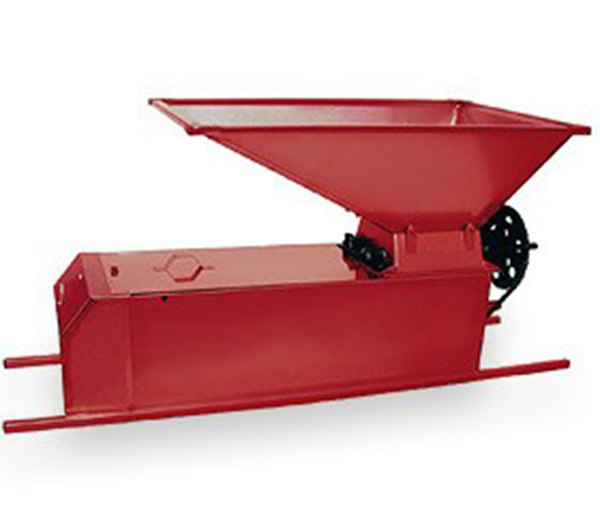 Right now we have the Marchisio Manual Grape Crusher / Destemmer for sale at a great value. It can process up to 2,000 pounds of grapes per hour with just a normal, hand-cranking speed.
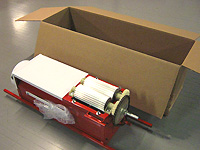
I say that it’s is a great value because our price includes more than just the crusher / destemmer. It includes free shipping to your door anywhere in the 48 adjoining states. That’s nothing to sneeze at. And, it also includes custom, professional packaging.
I think it’s important to point out that we don’t just throw your grape crusher / destemmer into any old box that it will fit. Instead, we carefully package it in custom-size cartons with styrofoam packing made specifically for destemmer. Everything has a nice, snug fit that can safely and easily handle the ride from our warehouse to your doorstep.
Below are some pictures of our gang packing up one of the manual grape crusher/destemmers we have for sale. As you can see a lot of pride goes into their work. You can also see they take packing your orders very seriously. For example, the hopper goes inside a box… that’s inside a box! We promise it will get to you in perfect condition. That’s a guarantee!
Add to it free shipping, and you have one heck of a deal.


Manual Grape Crusher / Destemmer
———————————–
Ed Kraus is a 3rd generation home brewer/winemaker and has been an owner of E. C. Kraus since 1999. He has been helping individuals make better wine and beer for over 25 years.
Leigh Erwin: Bottling My Nebbiolo Wine
 Hi everyone!
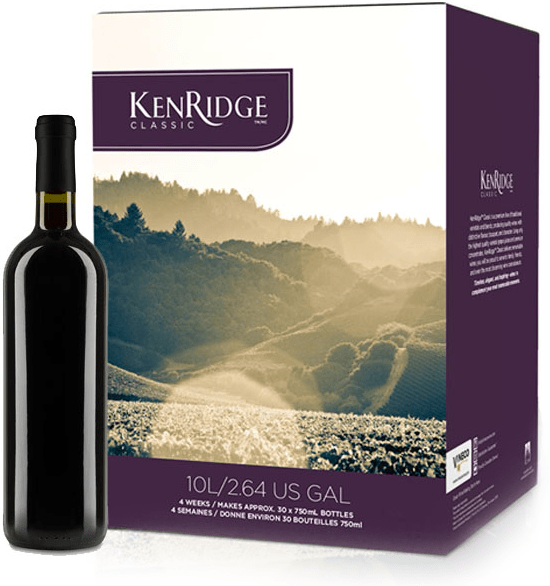
Just as a refresher, last time we caught up my Ken Ridge Classic Nebbiolo was moving along quite nicely, other than the fact that I completely forgot to add the oak granules way back in the beginning of the process.
According to the instructions that came with the Nebbiolo wine kit, the stabilization and clarification stage is only 6 days and then it’s time to bottle, however, due to my travel and unpredictable-at-times work schedule, I wasn’t able to actually bottle the wine until 13 days later. I thought this would be perfectly acceptable, since all the wine was doing at this stage was continuing to clear and if history serves me correctly, the longer I wait, the more clear the wine will be.
Since I have been having so many problems with my filter system, I decided to forgo the filtering for this particular wine and just let gravity do its thing. I do plan on revisiting this filtering system issue at some point in the near future, however, at this particular time, I was not quite ready.
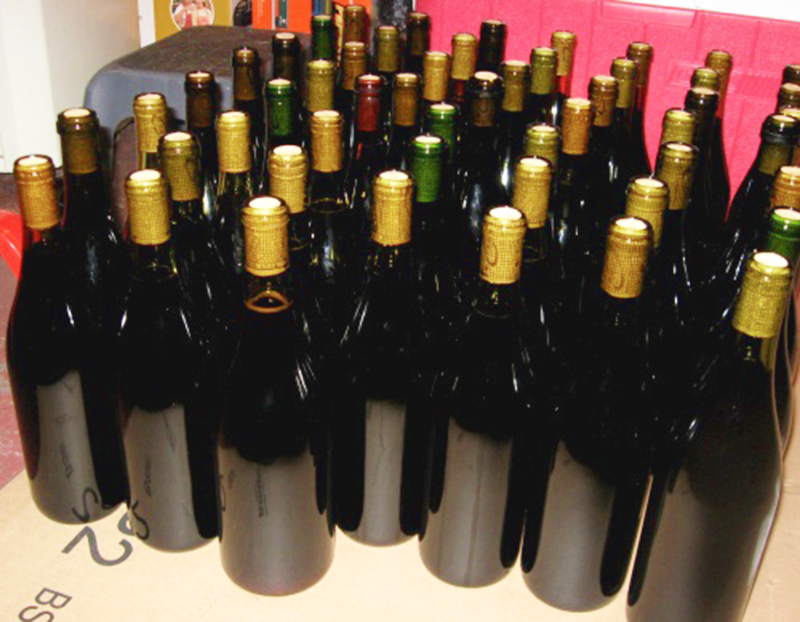
So, other than the delayed bottling date and the lack of filtering, bottling the wine itself, went pretty well. I ended up getting 25 bottles (well, 24 and then ¾ of a 25th bottle) of wine out of the batch, which is probably the best yield I’ve done to date. In the past, you might remember me spilling and otherwise losing some wine, but not this time!
Other than getting sprayed a little in the eye with wine when I over-enthusiastically filled the siphoning hose prior to bottling the wine (good thing I was wearing glasses!), I didn’t lose very much at all this time. I suppose I technically lost 5 bottles since the wine ingredient kit is designed to make 30 bottles, but all in all, I’m very pleased with the yield.
 I have to say though, my least favorite part about bottle the wine probably has to be removing labels off of old wine bottles prior to cleaning/sanitizing them for use. I know, I know, I don’t HAVE to remove the wine labels, but it just looks so much cleaner and is less confusing if all my bottles have the same (or no) label to begin with.
I put several wine bottles in a sink with piping hot water, and to my surprise all of the labels just sloughed right off without me doing anything. Unfortunately, as I put more wine bottles in, the harder it was to take the labels off and the more I had to scrap off the teeny tiny bits of glue with a knife. I don’t know if this is because the water was cooling down making the glue less likely to “let go” on its own, or if the labels are just all so different that some are easy to take off while others make you want to throw the bottle out the window.
I realize this complaint is extremely minor in the grand scheme of home winemaking, but I feel better now that I got it off my chest. Cheers!
———————————–
My name is Leigh Erwin, and I am a brand-spankin’ new home winemaker! E. C. Kraus has asked me to share with you my journey from a first-time dabbler to an accomplished home winemaker. From time to time I’ll be checking in with this blog and reporting my experience with you: the good, bad – and the ugly.
Leigh Erwin: Making A Nebbiolo Wine Ingredient Kit
 Hi everyone!
If you recall from my last entry, I had just started making another wine ingredient kit – a Ken Ridge Classic Nebbiolo. The primary fermentation was just bubbling away and everything seemed to be going smoothly.
To prepare for secondary fermentation, I was a little curious how I was going to keep the elderberries that came with the kit and were now floating in the wine, from transferring through the tubing into my clean carboy. I suppose if I had used my racking cane with the little red cap on the bottom this wouldn’t have been an issue at all, but since my primary fermenter has a spigot on it, I decided to just hook up the siphoning hose directly to the spigot and transfer away with the flip of a switch.
Since I didn’t have any sort of filter in front of the spigot nor did I have the elderberries in any sort of cheesecloth or bag, I improvised by placing a piece of paper towel in front of the hole of the spigot to keep the large pieces of elderberries from transferring into my clean carboy for secondary fermentation. I don’t know if this was the smartest idea, but the towels were clean and as far as I could tell, sanitary. I think next time this happens when making a wine ingredient kit, I’ll just go ahead and use the racking cane, or maybe fish the elderberries out first prior to transferring the wine over.
 Other than this little improvisation, secondary fermentation went along just swimmingly. 12 days later, I performed the degassing stage which like secondary fermentation, went along just fine.
The only issue that came up here is that only now did I realize that I forgot to add the oak granulars way back in primary fermentation! I don’t know how I managed to do that, other than the fact that when I opened the drawer that the granulars were in, I noticed they were all the way in the back of the drawer so I had somehow missed them the first time around. Smooth.
While I was temporarily upset that I forgot to add the oak while making this wine ingredient kit, I decided that it didn’t really matter too much and that I would just be making a very fruit forward Nebbiolo instead of a more standard style. These little mistakes can come back to bite you sometimes, while other times, it doesn’t really matter too much if the wine is most likely only going to be consumed by you and your partner!
———————————–
My name is Leigh Erwin, and I am a brand-spankin’ new home winemaker! E. C. Kraus has asked me to share with you my journey from a first-time dabbler to an accomplished home winemaker. From time to time I’ll be checking in with this blog and reporting my experience with you: the good, bad – and the ugly.
Why Does Wine Turn Into Vinegar?
 I’m curious as to why does wine turn to vinegar. When the threat of this happening over, if ever, and what causes it. Is there an in depth explanation anywhere I can get?
Thanks Jane
—–
Dear Jane,
When you talk about how or why a wine turns to vinegar, you have to start with the acetic acid. This is the stuff that makes vinegar taste like vinegar. It’s the tang. If you had acetic acid in a jar and poured some of it into a fruit drink, it would immediately start to take on the characteristics of vinegar. It’s what makes vinegar, vinegar.
Acetic acid is made by a bacteria known as acetobacter. This bacteria is everywhere: in the air, on fruit, on grape presses, etc. When acetobacter gets into your wine it can slowly turn the alcohol into acetic acid, if left unhindered.
The key takeaway here is: if you control the acetobacter; you control the vinegar.
During a fermentation the wine is relatively safe. The gases from the fermentation help to keep acetobacter fall-out from getting into the wine must. Also, domesticated wine yeast are bred to inhibit bacterial growth, giving them the term killer yeast. It is not until the fermentation is over that caution needs to be taken.
Fortunately for us winemakers, acetobacter can be very easily destroyed before they have a chance to colonize and produce acetic acid. All it takes is the addition of sulfites in the form of either Campden Tablets, Sodium Metabisulfite or Potassium Metabisulfite. Use any of these in the wine, and the acetobacter will be very easily destroyed.
 I would suggest using sulfites 24 hours before adding the wine yeast. Do not use an air-lock or lid on the fermenter during this time. You need the sulfite gases to dissipate into the air during the 24 hours, otherwise it will remain in the wine must and destroy some or all of the wine yeast when you add it. I also suggest adding sulfites just before bottling to keep the wine fresh while in the bottle. You can find more information on our blog about when to add sulfites to your wine.
Make sure you use a domesticated wine yeast to keep your fermentation clean. And, always sanitize your homemade wine equipment with a sulfite/water solution before using it.
The bottom line to the question: “why does wine turn to vinegar?” is because acetobacter was allow to grow in your wine. Stop the acetobacter, and you’ll stop the vinegar.
Happy Wine Making,
Ed Kraus
———————————–
Ed Kraus is a 3rd generation home brewer/winemaker and has been an owner of E. C. Kraus since 1999. He has been helping individuals make better wine and beer for over 25 years.
Leigh Erwin: Starting A Nebbiolo Wine Ingredient Kit
Hello everyone,
If you recall from before, at the same time I purchased my Chardonnay kit, I also purchased the Ken Ridge Classic Nebbiolo wine ingredient kit.
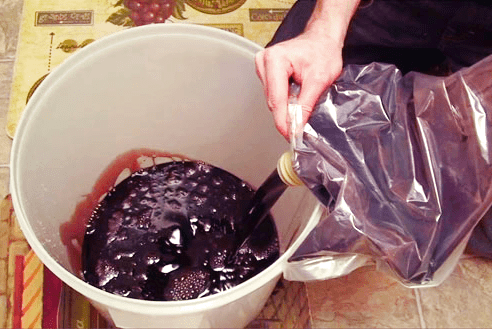
Just like all other times, I drew off tap water the day before to blow off any potential chlorine that might be in the water. Then, the next day, I poured the grape juice concentrate from the kit into my cleaned and sterilized primary fermenter and used the water to rinse the bag. The instructions that came with the wine ingredient kit said to use warm water but I used room temperature water instead. I don’t THINK that’ll make a difference, but I could be wrong.
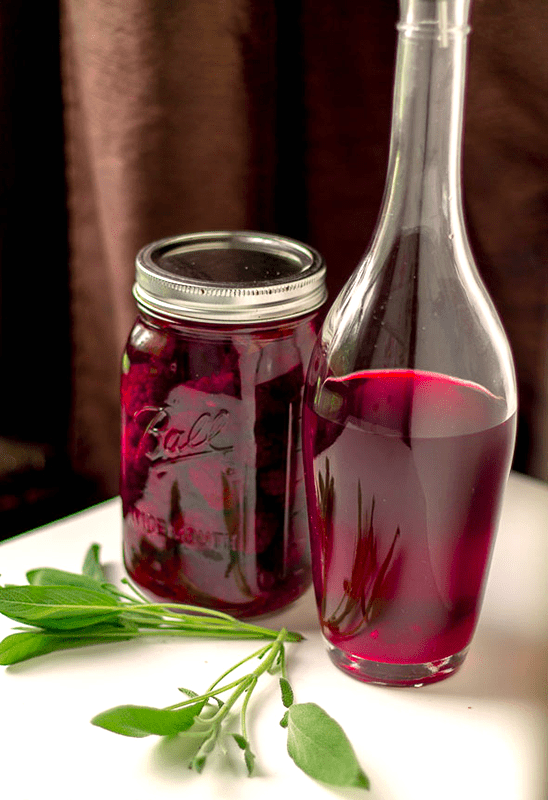
At this point, I added the elderberry packet that was included in my wine kit and then added enough water to bring the whole thing up to 6 gallons. I think the elderberries will be a nice touch to the particular wine.
At this point, I took the temperature with my thermometer and the specific gravity measurement with my wine hydrometer, which came out to 64°F. and 1.092, respectively. Since the temperature was a little low to start the primary fermentation, I turned on the heating pad and left the whole thing overnight to heat up a bit before adding the yeast. The next day, the temperature was up to 74°F. which was perfect.
I then sprinkled in the wine yeast and left the cover loosely on the primary fermenter.
One thing I did differently this time to keep the wine nice and appropriately warm was to warm a towel around the fermenter. I noticed that based on the shape of the base and the material of the fermenter, it was taking a while to heat up, so I wrapped it in a towel to get it going faster.
I’ve been checking on the wine every day now, and it has been bubbling along quite nicely and it smells great. I did notice the temperature was starting to creep up to a little too high (it was 84°F. last I checked), so I removed the blanket so that hopefully the temperature will drop back down a couple of degrees. I remember reading somewhere that too warm of fermentation temperature can promote off-flavors in the wine, so we’ll have to watch that – 70°F. to 75°F. is what I’m shooting for.
I’m very excited about this wine ingredient kit. The Nebbiolo smells and looks great. I can’t wait for it to be done.
———————————–
My name is Leigh Erwin, and I am a brand-spankin’ new home winemaker! E. C. Kraus has asked me to share with you my journey from a first-time dabbler to an accomplished home winemaker. From time to time I’ll be checking in with this blog and reporting my experience with you: the good, bad — and the ugly.
Degassing Homemade Wine
 At the very center of wine making is the process of fermentation. Fermentation occurs because the yeast want to consume the sugars in a wine must. As a result, the sugars are converted into both alcohol and CO2 gas by the fermentation. Normally as winemakers, we are concerned about the alcohol, but in this post we are going to change directions and talk a little about the gas.
Almost all of the CO2 produced during a fermentation dissipates into the air and goes away very quickly, but not all of it. Any liquid – wine included – has the ability to hold some CO2 gas for a period of time. It stays saturated in the wine. This CO2 gas is the same stuff that puts the fizzy in soda pop, beer and even the sparkle in sparkling wines, but when it comes to still wines we don’t want CO2 gas to do anything but be gone.
A Little Degassing Background
When I first started making wine, degassing was not even a word in the winemaker’s vocabulary. Finished homemade wines always sat around long enough in bulk glass jugs clearing and aging and whatnot, that they degassed themselves naturally with time. Wines back then needed extra time, and along with this time the wine was able to release all the CO2 gas it contained.
But things changed when 28 day and 6 week wine kits came onto the scene. These kits allowed the home winemaker to bottle their wines in a relatively short amount of time. This is not enough time for the CO2 gas to escape on its own. Because of this, the wine kit producers added the extra step of degassing in their directions they included in the kit.
How Do You Degas A Wine?
 A portion of the CO2 gas can stay saturated in a wine indefinitely because the gas molecules will lightly bond with the wine, but by agitating the wine with something as simple as a stirring spoon, the gas molecules will start to release and float to the surface and dissipate. If you stir the wine long enough, all but an untraceable amount of the CO2 gas will be released. The amount of time it takes to degas a homemade wine the with a stirring spoon can vary greatly. It could take a few minutes or a few hours depending on how much CO2 is still in the wine at this point.
One way to speed up the process is to use a degassing/mixing paddle. The paddle attaches to a hand drill just like a drill bit would. This significantly reduces the amount of labor and time needed to degas a wine.
Another way of degassing a homemade wine it by putting the wine under a vacuum. This can be done with a wine preserving vacuum pump, like our Vacuvin Wine Saver or any other hand-held wine preservation system to degas the wine. By putting the vacuum pump directly over the air-lock hole of a rubber stopper, you can literally suck the CO2 gas out of a glass jug.
———————————–
Ed Kraus is a 3rd generation home brewer/winemaker and has been an owner of E. C. Kraus since 1999. He has been helping individuals make better wine and beer for over 25 years.