 Began the game when I was 16 yrs. old when I began making wine out of pumpkins. It’s amazing the aroma you get, especially when you use the actual wine yeast carried out before as a starter. Today in a preiod of one month I can produce 100 litres having reiceved enough knowledge form this website. Big up kraus. Lets enjoy the game.
Name: Tamale Peter
State:
A Simple Guide to Home Brewing Malt
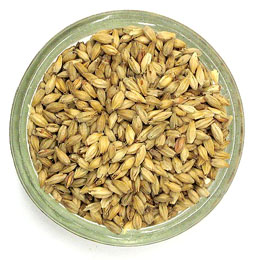 Malt is one of the main ingredients found in beer; and it’s what provides beer with a distinct color, flavor and body. But while the concept of malt can be quite simple, one of the first questions any beer-maker asks when they first start out is, “What is malt?”
Malt, in its most basic form, is barley or other type of grain that has gone through a malting process. That process includes germinating the grain, soaking it, and drying it so that it can provide a superior flavor and important sugars to beer and other products. The entire process includes a variety of malting products from which you can typically choose to malt yourself, or purchase malt extract or dry malted grains.
However, no matter what type of products or process you’re using, you’ll still be able to choose from a huge variety of different types of malts.
Standard base malts include 2 row pale malts, 6 row, Pilsner, and wheat malts. Specialty malts are also available, and these malts typically add a stronger flavor, color, and body to the overall beer. These types of malts include Carapils, Honey malts, Munich, Rauch, Rye, special roast, Victory, and Vienna.
If none of these specialty malts can provide that rich, distinct flavor you’re looking for, crystal malts may be able to do the trick. And they’re a completely different type of malt altogether.
When crystal malts undergo their malting process, their starches are turned to a sugar; and that sugar then becomes caramelized. Once that has taken place, crystal malts provide a rich, sugary taste along with good head retention and a color that can be anywhere from light tan to deep mahogany.
The world of malts is just one that you need to understand when you set out to create your own special blend of home brew. The good news is that it’s a fun area to explore, and it helps you create your own uniquely flavored beer! To read more about the various malted barleys and the role the play in a beer recipe, you might want to take a look at another blog post: “What Are The Different Malts Used in Homebrew Recipes?“
Winemaking Equipment Guide: Hydrometer, Fermentation Carboys & Bottle Corkers
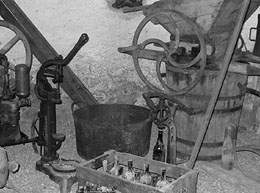 Whether you are just starting to get involved in home winemaking or you have been making wine at home for some time, it’s a good idea to have a good understanding of the different types of homemade wine equipment, how they function, and whether or not a particular piece of equipment is needed in your home.
Of course, there are many more pieces of homemade wine equipment than can be described in one short post, however, below are just a few of the must-have pieces of homemade wine equipment that if you don’t have in your collection already, you certainly should purchase it soon!
The Wine Hydrometer:
The purpose of the wine hydrometer is to monitor the progress of wine from the must stage through the fermentation process. The hydrometer measures specific gravity of a fluid by floating in the liquid at a certain height which can be read using the demarcations on the device. There are many types of wine hydrometers, the most common of which can measure specific gravity, sugar, and potential alcohol. This is a must-have device for your homemade wine equipment stash.
Fermentation Carboys:
Fermentation carboys come in a wide range of sizes, and are typically made of either plastic or glass. Carboys are primarily used for secondary fermentation, which is the slower fermentation step that functions to convert the remaining sugar left by the wine yeasts after primary fermentation into alcohol and carbon dioxide. Secondary fermentation is also known as anaerobic fermentation, since the vessel is closed off to air. The fermentation carboy must be closed with a rubber stopper and a fermentation lock in order to keep air and bacteria out of the fermenting wine.
Wine Bottle Corkers:
Once you’ve made your homemade wine, you’ll want to bottle it so you can either age the wine for some time, or pass it along to friends and family as gifts. One piece of homemade wine equipment that will save you a lot of time and physical distress is the wine bottle corker. This piece of homemade wine equipment comes in a variety of styles and sizes from smaller bench-top corkers to larger floor corkers. If you have a relatively small inventory or are limited in space, a bench-top corker would be a good fit for you. Alternatively, if you’re starting to produce larger quantities of wine and have a little more work space, a floor corker would be a better fit.
There are so many more pieces of homemade wine equipment that would help you in making your homemade wine experience more efficient and enjoyable than can be discussed in one simple post. Another blog post that goes through more of this equipment is “What’s In A Homemade Wine Kit?” You might want to take a look at it, but also stay tuned for more homemade wine equipment descriptions in the future!
———————————————————————————————————
Ed Kraus is a 3rd generation home brewer/winemaker and has been an owner of E. C. Kraus since 1999. He has been helping individuals make better wine and beer for over 25 years.
How To Sanitize Your Home Brewing Equipment For Fresh, Clean-Tasting Beer
 Keeping your home brew stuff clean at all times and sanitizing it is essential for creating clean and fresh tasting beer. The beer brewing process encourages the growth of microbes to accommodate a yeast fermentation. Unwanted bacteria will have a chance to grow as well, so it is best to eliminate it up-front through sanitation.
Your home brewing equipment will come into contact with sugars, malt extract, malted grains, beer yeast, hops, and many other substances. Make sure that all the equipment is sanitized if you wish to brew healthy and delicious beer.
First clean all visible dirt, stains, and dust from your equipment. After this use a sanitizer to kill the invisible microbes. After you have made your wort from the partial mash, if any foreign substance comes into contact with it, your homebrew can become infected. Boiling will kill the bacteria, but after the boiling process has been completed, you need to be extra careful with the resultant beer wort.
Make sure that the brew kettle, beer fermenter, airlock, lauter tun, hoses, utensils, carboys, wort chillers, beer bottles, rubber stoppers, and all other home brewing equipment are properly sanitized. Anything, which is made from plastic, needs to be cleaned with special care. Do not use abrasives such as scouring pads on these product, or this will scratch the plastic – the perfect hideout for bacteria.
While cleaning your equipment make sure that the sanitizers you are using are made for the very purpose. There are many sanitizers on the market that are specifically designed for cleaning homebrew equipment. A few of the more popular ones are: Basic A, Iodophor, B-Brite and Star San. All of these will sanitize you equipment safely and effectively.
Do Not Dump It Out. I Repeat, Do Not Dump It Out.
 I’m in the process of making my first batch of wine. I’m making apple wine. When I started, I took a hydrometer reading and it was in between 1.080-1.100. I let it ferment in the bucket for about a week and a half. When I racked it into the carboy I took another hydrometer reading and it was about the same.(this was on the 7th of January.) I just took another hydrometer reading today( Jan 21) and the hydrometer wouldn’t even float inside the wine thief. Did I screw something up or is the wine ready to be filtered and bottled. I also tasted the wine. It had a really good flavor but it also had a little tartness to it. Please tell me that it’s ok, I really don’t want to have to dump it out!
Name: Ben Marquard
State: Wisconsin
Hello Ben,
Do not dump it out. I repeat, do not dump it out. Your first hydrometer reading of 1.080 – 1.100 indicates that it was in a reasonable range for starting a fermentation. This reading indicates that your final alcohol level should end up around 10.5% to 12%. Your second reading I can not explain. After a week and a half you should have had a reading around .996 – 1.020 on your gravity hydrometer. You said it did not change.
Now you are saying that you can not get the gravity hydrometer to float. That is good news! This is an indication that your fermentation is almost done, if not done already. The reason the wine hydrometer will not float is because you do not have it in something deep enough to test for the final reading.
You should be expecting a Specific Gravity reading at this point of around 0.994 to 0.998. This is at the very tip-top of the hydrometer’s scale, so you need something deep enough to get it to float and get the reading. Find something taller to test the apple wine in, or you can put the gravity hydrometer directly into the batch of apple wine to get the reading.
What I suspect you will find is that the fermentation has completed and all that needs to be done now is to give the wine time to clear up and then eventually bottle. You have the option of back-sweetening the wine with sugar before bottling, but you must also add Potassium Sorbate or the wine will start fermenting again in the bottle.
You should also be using sulfites such as sodium metabisulfite or Campden tablets in your wine. At minimum, you should be adding either of these right before bottling. If you plan on bulk-storing the wine before bottling then you should add a dose sooner and then again at bottling time.
One thing I might suggest for future batches is to get a hydrometer jar. This is basically a tall tube that allows you to take accurate readings. You might also want to take a look at the following article on our website: “How To Make Homemade Wine“.
Happy Wine Making,
Ed Kraus
———————————————————————————————————
Ed Kraus is a 3rd generation home brewer/winemaker and has been an owner of E. C. Kraus since 1999. He has been helping individuals make better wine and beer for over 25 years.
6 Benefits Of Using Cornelius Kegs For Kegging Your Homebrew
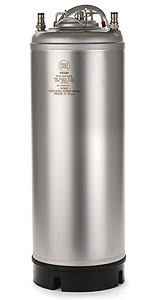 Cornelius kegs, which are sometimes called “corney kegs”, are a boon for homebrew lovers. They have a wide array of advantages. The popularity of these kegs has increased simply because they have afforded the home brewer the ability to put their beer on tap. They have a multitude of benefits and here are some of the advantages of Cornelius kegs:
• Forced carbonation is the perhaps the biggest advantage that had made them popular among people owning home breweries. You don’t have to wait for bottle conditioning. Just fill the keg and charge with CO2.
• Kegging beer saves you from troubles of routine maintenance that are associated with bottling. No more cleaning, filling and capping beer bottles.
• Corney kegs have a small footprint. This is one of the prime reasons why people love to use them for kegging homebrew. You can typically fit up to 4 in a full size refrigerator.
• High reliability and easy availability of these kegs has made them famous among novice and pros alike. If a seal does eventually wear out, they are very easy and inexpensive to replace.
• Beer bottles tend to break while plastic kegs or king kegs may develop scratches. Glass bottles are fragile, and though they cost much less initially, they cost a lot in the long run. When you calculate the breakage associated with bottles and compare it with the onetime investment that is associated with Corney kegs, the results are just the same. Many people feel that kegs are costly but they ignore the damage that happens because of broken bottles.
• The corney keg makes it easy for you to rack beer and store it efficiently. Hence, it helps in converting your room into a brewery really easily.
Other than these points, kegs are a cool alternative. If you dislike washing beer bottles, kegs are the way to go. These kegs save a lot of space and are easier to handle. Save time and money, and get these kegs for your homebrew. To read more about kegging you homebrew, take a look at “Basic Homebrewing Tips For Kegging Your Beer“.
________________________________________________________
Read More About Corney Kegs And Other Homebrewing Topics,
FREE EMAIL NEWSLETTER:

________________________________________________________
Why Did My Homemade Wine Start Re-Fermenting?
 Sort of new to the wine making process, but have been very successful or lucky so far. I’ve made 4 flavors of wine in the past and have tasted well above my expect ions. But a year ago I started a cranberry wine and it has been doing great for a year now but recently it began to start to referment. Why now? It’s temp and location hasn’t changed. I’ve racked it every 3 months as it called for, very little sediment is collected on the bottom of the carboy. Why would this occur now and how or do I want to stop the process? It is stored at temperatures between 59 and 61 degrees. I have never added a sugar solution to increase the taste. I have only racked the wine every 3 months.
I’m not sure what other information you need in order to better help me. Any input or idea’s would be greatly appreciated. Waited a long time for this one. Thank-you Renee
Name: Renee
State: MN
The fact that you are still getting any sediment out of a wine after a years time is somewhat disturbing. It is possible to get some proteins such as tannin to drop out over time, but that normally happens at warmer temperatures, not the temperatures you have indicated. Because of this, one of the first things that comes to mind is: did the wine ever complete its fermentation originally?
If a fermentation is healthy and timely it will complete in one to two weeks. The rest of the time involved is just getting the wine to clear. If you haven’t done so already, it would be useful to take a gravity hydrometer reading to make sure that all the ordinal sugars were fermented and that you don’t have a fermentation that’s spread out over a years time. The hydrometer reading should be .996 or less on the Specific Gravity scale. If you get a Specific Gravity reading that is higher than this, then this opens the the door to the possibility that what you are seeing is, in fact, a refermentation.
As to your questions, “why now?” Even though you have your wine stored in cool temperatures, the rackings could be causing the problem, themselves. When a racking is performed more oxygen is introduced to the wine. This can do one of two things: 1) it can invigorate the wine yeast to ferment some more, 2) it can invigorate bacteria or mold to grow.
If you have been adding sulfites such as Campden tablets or Sodium Metabisulfite to the wine after each racking #2 is not very likely to be the problems, but if you have not been adding sulfites along the wine the #1 or #2 is very possible.
I hope this information helped you out. My goal is to cover the most likely scenarios. At this point what needs to happen is a gravity hydrometer reading. If the reading indicates the fermentation is complete, then add sulfites to the wine to stop whatever activity is occurring.
Happy Wine Making,
Ed Kraus
———————————————————————————————————
Ed Kraus is a 3rd generation home brewer/winemaker and has been an owner of E. C. Kraus since 1999. He has been helping individuals make better wine and beer for over 25 years.
Ask Ed Your Wine/Beer Making Question
 Do you have a wine making or beer brewing question that you’d like some expert help with? Ask your question below, and we will feature your question (with the answer) on our blog!
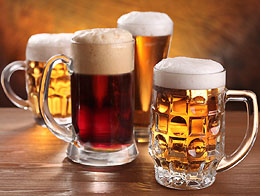
Home Brewing Beer: It's Not Rocket Science!
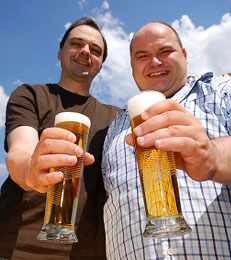 In a recent survey that was conducted at a university, it was stated that beer was the highest consumed hard drink among people of all ages, (we are talking about adults of course). Beer is an every-night-out’s staple drink. You might be going through dozens of bottles every month for your weekend parties, but did you ever stop to think how this amazing drink is brewed? It’s not really rocket science.
To brew it yourself, you need some very simple homebrew stuff that is generally present in a regular kitchen. Beer generally takes approximately three weeks to brew.
To begin with, gather all the home brewing ingredients that is called for in your beer recipe. This usually consist of malt extract, specialty grains, beer hops and beer yeast. Make sure the home brewing equipment you use is sanitized.
Next step is to add the specialty grains to hot water, usually at about 160° F. After an hour or so, filter the barley. Now add to this tea of sorts the malt extract and bring to a boil.
Add the beer hops into the wort. Hops are responsible for a lot of the flavor in a beer. Hops are bitter in taste, so you need to take care. Also, the more you boil hops, the more they will lose their bitter flavor, so it is important that you follow your beer recipe directions closely during this step.
Cool the wort and add water to it until the total volume reaches the intended batch size. Now you can add the beer yeast and let the fermentation begin. Once the beer yeast has completed the fermentation, usually about 5 days, it will produce what you’ve been craving for. Yes, alcohol and carbon dioxide. Alcohol adds an amazing taste to beer, and carbon dioxide takes the form of foam.
Now it’s up to you. You can put your homebrew on tap and keg the beer, or you can bottle it allow it to carbonate within the beer bottles, a process known as priming.
Now your down to the very last step — drinking. Having a world a beers available to you that you’ve made with your own efforts is a very exciting and fulfilling venture. And, it’s easier to make than it’s ever been. Beer ingredient kits have made the steps above easy to accomplish with there pre-measured ingredients and proven beer recipes. So why not give it a try.
To read more about how to make your own beer you might want to take a look at “5 Simple Steps To Making Beer“. This is another blog post the goes over the brewing process in a little more detail.
________________________________________________________
Read More About Home Brewing And Other Beer Topics,
FREE EMAIL NEWSLETTER:
________________________________________________________
The Patron Saints Of Wine Making
 We are going to go off topic a little bit here and talk about something that I find very fascinating. In any industry or business where there is a lot invested, there can be a lot of superstition revolving around those involved. Maybe a soccer player wears dirty socks throughout the season for good luck, or someone else carries around a rabbit’s foot for “protection”. Even still, some people may wish to knock on wood in order to avoid jinxing themselves into quickly falling into bad luck. For the religious or spiritually inclined, they pray!
There seems to be patron saints for everything, with patron saints being those entities some pray to in order to be blessed with good luck and good fortune. Wine makers are certainly no different! In fact, there are several patron saints of wine makers, and whether you are spiritual, religious, or think this is all a fairy tale, it’s always fun to know a little bit of history and culture related to wine makers and the history of winemaking!
There are several patron saints of wine makers, with each having their own special niche in the patron saint realm. The most well-known patron saint of wine makers is probably St. Vincent of Saragossa. St. Vincent is not only the patron saint of wine makers (vintners) but is also the patron saint of vinegar makers.
Other patron saints of wine makers include St. Trifon the Pruner, St. Amand of France, St. Lawrence of Rome, St. Martin of Tours, St. Morand of Cluny, St. Urban of Langres, St. Goar of Aquitaine and St. Walter of Pontnoise.
St. Amand of France was also known as the patron saint of brewers, vintners, inn keepers, and bar staff. He was given these names due to the fact that he did much of his teaching in wine making and brewing regions. His Saint’s Day is celebrated February 6th.
St. Morand of Cluny was also known as the patron saint of people in the grape and wine trade. One interesting fact for this patron saint of wine makers was that it was believed he lived the entire period of Lent (40 days of fasting) on one cluster of grapes. His Saint’s Day is celebrated June 3rd.
St. Urban of Langres was also known as the patron saint of barrel makers, vine growers, vine dressers, and vintners. While trying to escape persecution, St. Urban hid in a vineyard in France. He managed to convert the vine growers to Christianity and they helped him escape and spread his message. His Saint’s Day is celebrated January 23rd.
If you’re fascinated by the history of wine makers and winemaking, as well as the history and culture of religion, learning about these historical individuals is not only entertaining but educational!
———————————————————————————————————
Ed Kraus is a 3rd generation home brewer/winemaker and has been an owner of E. C. Kraus since 1999. He has been helping individuals make better wine and beer for over 25 years.