Keeping Your Winemaking Area Sanitary

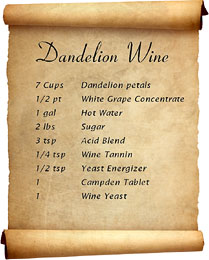
There appears to be plenty of information on equipment and supplies, cleaning/sanitation/sterilization, yet I”m having a difficult time of locating a protocol specifically related to maintaining a production area for a home winemaker (counters, floor, fixtures, sinks, drains, walls, etc.). I currently clean up splashes as they occur and monthly I do a fairly thorough wipe down of all surfaces with a B-brite dilution and spray with a kms [potassium metabisulfite]/citric solution. Hope you can provide some guidance.
Name: Roy R.
State: North Carolina
Hello Roy,
You are absolutely correct. There is not much information out there in regards to sanitizing a winemaking area. You can find some mention of it in several winemaking books, but not much more than a paragraph.
I have to tell you that what you are doing is pretty much what I do, however there are some differences in how I approach it.

  • The first main difference is that I do not clean on a monthly schedule. I clean and sanitize right before I plan to use the area. These mean I sanitize anytime I plan on exposing the wine or wine must.
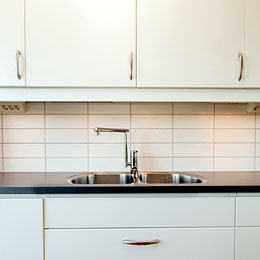
  • The second difference is that I do not use B-Brite as a wipe-down solution. This product works well for sanitizing wine bottles, fermenters, stirring paddles, etc, but I have found Five Star: Star San to be better for wiping-down counters. It has a slight foaming action to it that helps get into corners an crevasse. After this, I spray everything down with a solution of sodium metabisulfite and citric acid, just as you do.
  • The last difference is, that since I do my winemaking in a basement area that has exposed floor joists, etc., I feel it is necessary to spray the joist and sub-flooring that is immediately over the winemaking area. I do not do this every time, but only on occasion. I use the same sodium metabisulfite/citric acid mix that I use to spray the counter, faucets, etc.

One additional thing I do is anytime I’m checking on the wine, or just down there, I will spray the sulfite solution on to the air locks and around the neck area of any carboys.
Having said all of this, one thing I would like to make clear is that most of the spoiled wines we run across do not become infected because of an unsanitary work area, but rather, because of unsanitary wine making equipment. So while it is always good to keep your winemaking area sanitary, it is critical that you keep your wine making equipment sterile.
Happy Winemaking,
Ed Kraus
———————————————————————————————————
Ed Kraus is a 3rd generation home brewer/winemaker and has been an owner of E. C. Kraus since 1999. He has been helping individuals make better wine and beer for over 25 years.

How Will I Know When to Use Stabilizer?

Brewing wine or beer at home requires some basic knowledge about the different stabilizers that are used. Although the stabilizers for wine and beer differ, determining when to use the stabilizing agent has certain similarities.
Increasing the Shelf-Life
The most common use of a stabilizer for beer or wine is related to the shelf life of the final product. A stabilizing agent is added after brewing the beer or wine to keep the final product good for a longer period of time.
In the case of beer, stabilizing agents are used to slow the development of haziness. When haziness develops, beer is no longer good. A stabilizing agent for beer can work in one of two ways: it will either degrade the proteins that cause haziness or it will bond to the proteins so that the beer lasts longer in storage.
When it comes to wine, stabilizing agents are added to increase the shelf life and prevent re-fermentation from occurring. When a stabilizer is added to wine, it will last longer even if it is not possible to store it in a cellar or fridge.
Adding for Flavor Maintenance
Although the primary purpose of a stabilizer for both wine and beer is increasing the shelf life of the brew, it can also help maintain flavor in particular situations.
A stabilizer is always added to sweet wines because it is possible for re-fermentation to occur. The stabilizer maintains the flavor of the wine by preventing it from starting to ferment a second time. Although it is appropriate to prevent re-fermentation in sweet wines, it is not necessary to add the stabilizer to a dry wine. Dry wines do not have room for more fermentation.
Stabilizers do not have much impact on the flavor of beers except as it relates to shelf life. If a beer does not have excellent taste before adding a stabilizer, it will not improve when the stabilizer is added.
Equipment Considerations
A stabilizing agent is not useful when the wine or beer has a poor flavor. When brews are consistently coming out with a poor flavor, it is best to look at the cleanliness and sanitation of the equipment or the filtration system. Poor taste is more often the result of equipment problems or minerals in the water than the wine or beer going bad in a short period of time.
The decision to add a stabilizer to wine or beer is a personal choice. Stabilizers can help increase the shelf life and maintain a good flavor, but it does not help if the original flavor was not good. Deciding when to add stabilizers will depend on personal goals and the type of brew.

How To Find The Best Wine Recipes

Wine Recipe On A ScrollWhen you’re relatively new to home winemaking, following each and every step of a wine recipe is critical,  but where do you even begin finding good wine recipes?  There are a lot of resources out there, and hopefully this post will shed some light on where to find them.

  • Wine Making Books
    There are a large number of wine making books out there that are full of wine recipes.  It is important to note that if you’re just looking for a book containing only recipes, you’ll want to pay close attention to the description of the book, as a lot of wine books contain other important educational information and fewer recipes than a book dedicated only to wine recipes. One book that is dedicated solely to providing you with great wine recipes is the Winemaker’s Recipe Handbook.  This book contains over 100 wine recipes to create nearly any type of wine.  From apricot and beet, to rose hip and grapes, this book has you covered! If you’re a beginner and are looking for a book that not only has recipes but also teaches you how to become a successful winemaker, The Art of Winemaking is a great choice.  It uses simple language, has a nice selection of wine recipes, and can act as a quick reference guide whenever you need it.
  • Wine Making Kits
    If you purchased a wine making kit, then you already have some recipes!  Some kits are designed with a particular type of wine in mind, and rather than give you the equipment and ingredients while leaving you high and dry, winemaking kits come equipped with wine recipes to help you in your new winemaking adventure.
  • Internet Search
    You can always find anything on the internet, so a search for “wine recipes” will certainly pull up a few.  Be advised, there is a lot of bad information on the internet, so you’ll have to have a critical eye open when perusing these sources. You can find wine recipes on our website on the recipe page. There is also the 7 Easy Steps To Making Wine which are specific step-by-step instructions for making wine with these recipes. They are all dependable recipes that have been used many, many times by winemakers all over the country.

What if you want to tweak the recipes you already have?
If you have a good handle on some recipes and you’re getting more comfortable with different ingredients, you may want to experiment with altering those recipes somehow.  You’ll want to keep a careful record of what you change, in case you love the results and want to reproduce it or it’s terrible and you want to avoid that change in the future.  In this case, you want to get start a log book to keep track of everything you do while making your wines.  Even if you aren’t changing your recipes, it’s probably a good idea to take notes so you can review hydrometer readings and dates, etc.
———————————————————————————————————
Ed Kraus is a 3rd generation home brewer/winemaker and has been an owner of E. C. Kraus since 1999. He has been helping individuals make better wine and beer for over 25 years.

5 Foods You Should Never Pair With Wine

A good wine will have beautiful facets and notes that bloom from the glass and inspire the palette as it glides across the tongue. Pair it with the wrong foods, however, and all of those lovely nuances will be destroyed – tangled in unpleasant ways with the natural chemicals and PH balance of your vintage or situated in a way that blocks delicate notes from reaching their perceptual destination. When you keep these tipsy pairings on your no-go list, your next dinner party will escape the sour taste of a wine faux pas.
1.) Eggs and Dairy: Using these ingredients in a dish gives it a tendency to coat the tongue and block components of wine from reaching the drinker’s palette. The thick consistency of the milk fat and egg yolk resists washing away with bites of food or sips of wine, unlike thinner-consistency fare.
2.) Salty foods: Wines with pronounced tannic notes pair poorly with salty foods like prepared ham because these two strong characteristics “argue” with each other in the mouth. When serving dishes are heavy in salt, tannic wines should actually be swapped out in favor of lighter, acidic choices to ensure that no clash occurs.
3.) Vinegar-laden sauces: As editor Ted Loos notes in a piece for Epicurious, vinegar sauces will diminish the fruity flavors of a Pinot Noir and provide an unpleasant finish. Vinegar and pickled dishes will “flatten” normally complex wine flavors, leaving even the most intrepid wine taster disappointed.
4.) Fish: Offerings such as smoked fish will overpower some lighter wines, while the flavor profile of more delicate fish will be lost when stacked against complex bouquets and strong note groupings.
5.) Baked Goods: While some wines actually do pair well with sweet treats, don’t reach for a brisk bubbly with these confections. The tart flavors of champagne do a disservice to even the finest icing, ruining both treats before they have a chance to impress an eager partygoer. Opt for a gentle white wine in lieu of a glass of sparkling bubbly and you’ll save dessert for everyone.
Bear in mind that none of the foods on this list are necessarily “bad” foods, nor are any of the cautioned-against wines less than delightful to vino enthusiasts. They simply don’t play well together. When you select the right dishes and sauces to accompany your favorite wines, however, your choices will elevate your fare to a true harmony on the palate.
Have you found particular wines that don’t pair well with your food? Let us know what those are so we can share with others!

Best Way to Clean my Homebrew Kit and Other Equipment

Although a homebrew kit and other brewing equipment will have some basic instructions for sanitation, it is not always enough to simply clean off all of the minerals on the equipment. When minerals or organic materials used in brewing are left behind, the next batch of beer will not come out the way it is expected. Fortunately, cleaning the homebrew kit and equipment properly is not a hard process.
Scrub the Equipment
The best way to clean any kit and equipment used in brewing is by scrubbing away the visible dirt, debris, materials and stains. Start the process by rinsing off as much large debris or items as possible.
After rinsing, apply an appropriate cleaner to the equipment. The best cleaner is a powdered brewery wash, or PBW, which is designed specifically for cleaning the kit and equipment. If the brewery wash is not available, then a powdered oxy cleaner, liquid dish soap, or baking soda is also appropriate.
Remove any dirt, stains, or debris with a small amount of water with a cleaner and a scrub pad or brush. If the equipment is plastic, then use a terry cloth to avoid leaving behind scratches. Rinse the equipment until the cleaner is completely removed.
Sanitize the Equipment
Cleaning and sanitizing are not the same process. Sanitizing is only performed after the cleaning is complete because it is not possible to sanitize the debris left behind. Sanitation is the process of killing any microscopic organisms that are left behind after cleaning.
Sanitizing your homebrew equipment is a simple process. A sanitizing chemical, such as One Step No Rinse Cleanser or sodium metabisulphate, is dissolved in water and allowed to sit on the equipment and kit for the duration of time specified in the directions. In most cases, sanitizers will sit for roughly five minutes to bring the level of yeast, bacteria, and other microscopic concerns to a minimum. Don’t worry about knowing specifics; these sanitizers will have specific instructions on how to determine the amount of time and ingredients required.
Similar to wine, there are so many types of cleaners on the market you probably won’t know what is going to work best for you until you try them. If One Step and sodium metabisulphate don’t do the trick you can always try B-Bright Cleaner, Cleanpro SDH or campden tablets. Check out our full line of home wine making cleaning supplies and homebrew cleaning supplies for your system today. Cleaning is not only vital to getting the best taste; it is also a simple process.

Can You Have Head-Space In Your Secondary Fermenters?

Tuff-Tank Primary FermenterI have purchased 2 of your 9 gallon Tuff-Tanks and planned to use as both the primary and secondary fermenters. I read your article re: vinegar issues and you indicated air exposure can be an issue. Is using the 9 gallon tuff tank an issue for secondary fermentation? I find the tuff tanks an easy apparatus to use for transferring and racking as gravity flow works well and sediment separation is manageable. Should I use a carboy vs the tuff tank?
Name: Al
State: Maine
Hello Al,
Thanks for the great question. There always seems to be some confusion surrounding primary fermenters, secondary fermenters and head-space, so it’s great to have this opportunity to clear it up a little.
The important thing to understand is that air-exposure can only become an issue after the fermentation has stopped. During the fermentation there is plenty of CO2 gas coming off the liquid to keep the wine must protected from any foreign, airborne contaminants and to keep the air from getting to the wine and breathing life into the few bacterial cells that may be in it already.
The CO2 gas coming off the fermentation is heavier than air. This means that if the Tuff-Tank is left undisturbed, the CO2 gas will have to be force out with more gas. It will not simply float away on its own. This is an important point. This means that as long as you leave the lid and air-lock on the Tuff-Tank, there is no way for air to get into its head-space. This is true for any primary fermenter. There is nothing but CO2 gas in the head-space. It is only after the fermentation has ceased and you take the lid or air-lock off, that the air-exposure will actually have an opportunity to begin.
Typically, having air in with the wine for a few days is not going to matter that much. And the fact that you should be adding sulfites to the wine at this point, such as Campden tablets or sodium metabisulfite, also helps to protect the wine from any type of spoilage. The the sulfite gas will form a protective layer in the fermenter as well. So there is no great urgency in any of this, however once you take the lid off the fermenter and determine that the fermentation is complete you will want to make plans to get the wine clear and bottle it. If you can not get it bottled in a matter of days, then you should consider putting the wine in a carboy or something similar that will not allow for head-space until you do have time.
I hope this clears if up some. In short, as long as you have CO2 gas from the fermentation in your Tuff-Tanks there is nothing to be concerned about. It is only after you the fermentation has completed and you have taken the lid or air-lock that you have to take some form of action: either bottling the wine in a few days or move the wine to a carboy or similar.
Happy Winemaking,
Ed Kraus
———————————————————————————————————
Ed Kraus is a 3rd generation home brewer/winemaker and has been an owner of E. C. Kraus since 1999. He has been helping individuals make better wine and beer for over 25 years.

Can You Help Me Clear My Red Wine?

Bentonite For Clearing WineMy red wines have been coming out great, but are not clear even after many rackings. Is there anything to add to reds wines to prevent this?
Name: Bruce K.
State: CA
Hello Bruce,
Anytime a wine is not clearing the first thing you have to ask yourself is: “has the wine completed its fermentation?” The number one reason a wine does not to clear is because the fermentation is still continuing very slowly. The slightest amount of fermentation can cause a significant amount of cloudiness in a wine.
For this reason it is important that you check your wine with a hydrometer to verify that the fermentation has finished. You should expect to find a reading of .998 or less on the Specific Gravity scale. If your reading is higher than this, then your problem is getting the fermentation to finish, not clearing the wine. Going over the article, Top 10 Reasons For Fermentation Failure should help you in this regard.
If your fermentation is complete, then yes, there are some things you can do to help speed the clearing along. Winemakers use what’s called fining agents to help clear a wine. There are several different types of fining agents. Each will clear a wine in its own way.  Often, more than one type of fining agent will be used in the same wine.
If it seems that the cloudiness is not minor, but significant, then you’ll want to start off by adding a dose of Bentonite. We offer it as Speedy Bentonite and it comes complete with its own directions. Bentonite is good for clearing out yeast cells and other proteins that are causing a significant haze.
What bentonite is not good at is giving a brilliant polish to the wine. For this you will want to follow up with either Isinglass or Kitosol 40. Each of these are good at giving your wine a illuminating polish, but they should not be used until the bentonite has had ample time to remove the bulk of the cloudiness, first. This can happen as quickly as 24 hours, but can take up to 3 days. After each of these treatments you will want to rack the wine off the resulting sediment.
Happy Winemaking,
Ed Kraus
———————————————————————————————————
Ed Kraus is a 3rd generation home brewer/winemaker and has been an owner of E. C. Kraus since 1999. He has been helping individuals make better wine and beer for over 25 years.

Spring Beer Guide: 5 Beers You Won’t Want to Miss

Spring is in the air! For many of us that means our favorite frosty brews are finally available. Here are some we suggest not skipping this spring; grab yours while it’s cold and still available. Even better, use these beers as inspiration for your next batch of home brewed beer.

Port Brewing Company: Hot Rocks Lager

This lager is a deep ruby brown with an aroma of dark caramel, chocolate, and toffee. In the early days of home brewing hot rocks were used because of their ability to conduct heat and boil water. Hot Rocks Lager’s smoky caramel flavor is said to remain present because of this old fashioned way of brewing. Get yours today – out in early spring!

Gordon Biersch: Maibock

Translated from German Maibock means the rock beer of May. This brew is available seasonally from February through April only. The caramelized Munich malt combines with the perfect level of bitterness to create the perfect flavor. With a 7.3% alcohol volume (standard for many craft beers) so when enjoyed in moderation the effects might just creep up on you. Gordon Biersch’s Maibock is brewed with a Weihenstephan 34/70 yeast strain similar to our Fermentis Beer Yeast, Salfager W-34/70.

Rogue: Morimoto Soba Ale

Morimoto Soba Ale is a specialty beer that Rogue started brewing in 2003 and with internationally known Chef Masaharu Morimoto – a James Beard awarded chef. Soba, known as buckwheat, is a member of the rhubarb family giving this Ale its fruity flavor. Morimoto Soba ale is made with no chemicals, additives or preservatives and only 8 ingredients.

Dogfish Head: Aprihop

Aprihop, an American IPA, is a seasonal fruity beer for “hopheads”. Brewed with Pilsner and Crystal malts gives this beer its especially hoppy taste. Along with its hoppy taste is a nice addition of apricots to finish it off with a fruity flavor. This is one of Dogfish’s most popular seasonal beers and is only available from March through May.

Heavy Seas Beer: Loose Cannon

While not a true seasonal beer, this IPA is said to win people over upon first smell. Its fragrant smells of grapefruit, herbs, and pine make this beer especially perfect for spring. Similar to Dogfish’s, Airhop, Loose Cannon is also a hoppy beer. Loose Cannon is hopped in three ways: kettle, hop back, and dry hopped.
We’re hoping this was enough inspiration to pull out your dusty home brew kit and start brewing your own spring or summer beer. We suggest starting with something easy like a pilsner. Try making your own home brewed Pilsner with our beginners Brewers Best Beer Recipe kit.

Taking Your First Steps In Winemaking

Winemaking KitHome winemaking is an enjoyable hobby that can bring you great joy, but if you’re not prepared, it can be frustrating and near impossible.  It’s important to understand the first steps in winemaking; to get a solid grasp of the basics, as well as an understanding of why it is you are doing what you are doing at any step of the way.
One of the first steps in winemaking that you should do is to get educated.  Sign up for classes at your local University or Community College, or purchase some home winemaking books and get reading.  There’s nothing worse than buying homemade wine equipment and launching right into making wine without knowing what you are supposed to be doing.  Having knowledge of why it is you’re doing what you’re doing, again one of the first steps in winemaking, is extremely important, particularly when it comes to needing to adjust a fermentation on the fly.  Written wine recipes are great when everything goes according to plan, but if something goes awry, it’s very important to have the knowledge and understanding as illustrated in these first steps in winemaking in order to know how you can adjust things to get back on the right path.
Another one of the first steps in winemaking is to decide what type of wine you’d like to make.  Determining what type of wine you’d like to make will ultimately decide what type of winemaking equipment you need.  As we learned about in the first steps in winemaking listed in the previous paragraph, knowing what type of wine you’d like to make is important, as you’ll need to know what type of equipment you need to buy and what steps you’ll need to take during the winemaking process.  There are slight differences between making wine with grapes and making wine with fruit or anything else, so it’s important as one of the first steps in winemaking to have a solid grasp on what you’d like to do.
One final first steps in winemaking is to purchase the appropriate winemaking equipment.  If you’re new to winemaking, purchasing a winemaking kit is a great idea.  This way, you’ll know you aren’t missing any particular piece of winemaking equipment and you have a nice, easy wine recipe to follow along with.  If you’re a more seasoned home winemaker, you may wish to purchase pieces of winemaking equipment individually, as this will give you more options and flexibility in terms of the style of wine you’d like to create, and ultimately how easy and fun it is to make! It’s important never to lose sight of the first steps in winemaking, as forgetting the basics could come back to haunt you!
———————————————————————————————————
Ed Kraus is a 3rd generation home brewer/winemaker and has been an owner of E. C. Kraus since 1999. He has been helping individuals make better wine and beer for over 25 years.

Blending Wine Like A Pro

Wine Ingredient KitI am making a Cab Sauvignon from the California Connoisseur wine kit. I also plan on making a Merlot next and would like to blend some of the two wines before bottling. I would like to save half of the Cab in a 3 gal carboy and bottle the other half. However, at what step in the process is it best to store the bulk Cab while I am making the Merlot? After Stabilization and Clarification?
Name: Darryl M.
State: Montana
Hello Darryl,
I’m so glad to get a question on blending wines. This is something I always love to talk about. It’s also something that I feel is greatly underutilized in home winemaking. Thanks for the great question.
You want to get the wine to the point of being ready to bottling before putting it in a carboy to be bulk aged. You want to get all the steps in the provided winemaking directions out of the way before leaving the wine to rest. That means making sure the wine is clear. I would also suggest that you add a dose of potassium metabisulfite to any wine that is going to go through a bulk aging of any kind.
One thing I would like to point out is that the Cabernet Sauvignon you made is not 100% Cabernet Sauvignon grape. Smaller amounts of other grapes are blended in as well, probably some Merlot grape. We don’t exactly, because the producer of this brand does not provide this information. The same will be true for the Merlot. This is no different than the Cabs and Merlots you buy commercially at the store. They have small amounts of other grapes blended with them to round out the character of the wine.
Because of this and because all small-batch wines tend to come out slightly different each time you make them, It is impossible to know ahead of time just how much of each wine you will want to use in a blending. Something like 3 gallons of one and 3 gallons of the other seems clear-cut and simple, but it may not be the optimal blend or ratio for your two wines. In fact, you may be making a wine that taste worse than each of the wines used to produce it. It is possible. With that being said, don’t assume a particular plan of action without basing it on some type of test-tasting first.
If I were in your shoes I would bulk age the entire 6 gallons of Cabernet Sauvignon. Once the Merlot wine is ready, then I would do blind taste-testings with an array of different blends/ratios of the two wines, by the glass. Have one person blend and the others taste without knowing what’s in each glass. Whatever blend is the most like is the blend you apply to the rest of the batches. Go through this step and you’ll be blending wine like a pro.
As a side note, this makes a great party event. Invite your friends and have them help determine the blend to use with blind tastings.
If you do not want to commit the entire 6 gallons, that’s okay. I understand. It’s hard to have 6 gallons of wine sitting around when you could be drinking on it, but to get the most ‘bang’ out of your blending efforts, this is how I would proceed.
There’s a great article on our website on blending wines that I would urge you to check out, Blending To Improve Homemade Wines. It goes into both the art and science of blending wine in much greater detail than I can go into here.
Hope this helps you out.
Happy Winemaking,
Ed Kraus
———————————————————————————————————
Ed Kraus is a 3rd generation home brewer/winemaker and has been an owner of E. C. Kraus since 1999. He has been helping individuals make better wine and beer for over 25 years.

________________________________________________________

Read More About Blending Wines And Other Winemaking Topics,
FREE  EMAIL NEWSLETTER:


________________________________________________________