Winemaking Equipment Guide: Bottle Filler, Wine Thief & Brew Hauler

Bottle FillerThere are many pieces of homemade wine equipment than can be described in just one post.  It’s important to understand each piece of homemade wine equipment, how it functions, and whether or not a particular piece of equipment is needed in your own home winemaking practice.  Today’s post features three more important pieces of equipment: the Three Spout Bottle Filler, the Wine Thief, and the Brew Hauler Carboy Carrier.

Three Spout Bottle Filler:
This piece of homemade wine equipment comes in very handy when you have a lot of bottles of wine to fill.  This bottle filler is best suited for 50 to 500 gallons of wine, which is common for busier home winemakers and small wineries.  This piece of homemade wine equipment is gravity-fed, allowing it to be efficiently used without using electricity.  Place three wine bottles in line under the three filling rods, push down, and the flow of wine is started.  When full, all wine bottles stop at the same exact level, so you never have to worry about a wine bottle being too full or not full enough.

Wine Thief:
Wine Thief, Stainless SteelThis next piece of homemade wine equipment, while small and simple, is very important for removing samples of wine for various analyses and tests.  Not much more than a simple tube with sometimes a bulb on the end, the wine thief can be used to remove wine samples from everything from glass jugs to carboys to barrels and everything in between.  These pieces of homemade wine equipment come in different types of material, with the more common being glass and stainless steel.  The main difference is that the stainless steel wine thief can be used in more samples, such as samples with very high alcohol or samples that have been heated to a higher degree than the glass could accommodate safely.

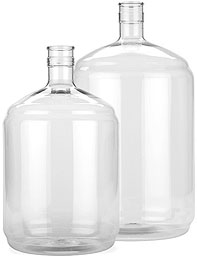
Brew Hauler Carboy Carrier:
The Brew Hauler
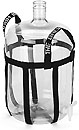
This final piece of homemade wine equipment is a handy device that once you buy you’ll wonder why you hadn’t always had one.  Basically, the Brew Hauler Carboy Carrier aids in – you guessed it – carrying carboys! It’s convenient if you need to move a heavy carboy from one location to another and you are concerned about slippage or dropping.  This piece of homemade wine equipment works well for 3 to 7 gallon carboys, and can handle up to 100 pounds.  The Brew Hauler Carboy Carrier is an essential piece of equipment for the home winemaker to safely move carboys from one place to another that costs next to nothing!
Understanding the various types of homemade wine equipment will not only save you from headaches, pains, and extra work, but will also help to improve your winemaking skills and ultimately help you create better wines!

Other Winemaking Equipment Guides from the past:

———————————————————————————————————
Ed Kraus is a 3rd generation home brewer/winemaker and has been an owner of E. C. Kraus since 1999. He has been helping individuals make better wine and beer for over 25 years.

New to Wine Making? 9 Wine Making Tips Debunked

Everyone who becomes a home winemaker has their own reasons for deciding to home brew their own wine. There is so much available information about wine making on the Internet, it’s enough to make your head spin. To eliminate your need to hunt for some basic “must know” information all over, we’re providing you with what we think are 9 most important aspects you need to know about home wine making so you don’t miss something important in the beginning.
1. Invest in Wine Making Kits
When you first see the price of wine making kits, the price may scare you. However, when you take the time to take a look at all the things you get with the kit you will see that almost all of the wine making supplies are reusable, so you will continue to use them when you brew future batches of wine. This, in turn, saves money over time. Plus, purchasing kits assures beginning wine makers that they have all the supplies they need for the process.
2. Making Your Own Wine Isn’t More Expensive
If you drink wine regularly, the cost of wine kits will save you money as you brew more and more batches.
3. Making Wine With Fresh Fruit Isn’t More Difficult
When making wine from fresh fruit understand the need for extra equipment such as the catch stand, crusher, destemmer and fruit press. If you don’t have a lot of room, this isn’t a good option for you.
4. Wine Concentrates Offer a Much Larger Grape Selection
Because of the huge selection, and because wine concentrates are made with grapes that are picked at the peak of their freshness, they consistently produce excellent tasting wines. If you try to buy grapes or use your own, the quality of the grapes may not be as good.
5. First Time Home Wine Makers Are Better Off Using Wine Concentrates
Wine concentrates offer reliability. Concentrates come in the exact amount needed to make a batch of wine. Consistency is important, and it will minimize discouragement and frustrations.
6. Only Use Mature Ripe Fruit When Making Fruit Wines
Unripe green fruit has too much acid and very little sugar, neither of which are qualities that will produce the best tasting fruit wines.
7. You Can Make Wine From Dried Berries or Rose Hips
Only purchase dried berries or rose hips from places that sell wine making supplies as opposed to grocery stores or other locations. These dried flowers and berries are cultivated specifically for wine making. Buying berries from these sellers assures you that you get the right amount for specific amounts of wine.
8. Adding Oak Chips to Your Fermenter Will Give Wine the Flavor of an Oak Barrel 
Oak barrels aren’t practical for home winemakers because of the cost, and because of sanitation issues. When you add oak chips to your fermenter, you are adding oak chips that are made from the same wood that is used to make wine barrels.
9. Homemade Wine Lasts Just as Long as Store Bought Wine 
Red wines get their deep color from the skins, so the longer you leave those skins on, the deeper the color will be. Acid or tannin in the wine also helps retard spoilage and prevent oxidation. The flip side of this is that high amounts of acid or tannin change the taste of the wine – though not for the better. Allowing wine to age creates a deeper and more flavorful wine.
If you are a wine lover the process of making your own wine can be a very rewarding one. You can also get customized labels to give your wine a more professional look. Regardless of whether you’re a wine connoisseur or someone who is new to the world of wine, by making your own wine, you will develop a far greater appreciation for the wine making process, and the taste of great wines.

Winemaking: A Pastime That's Hard To Beat!

Drinking Homemade WineHome winemaking, while it can be hard work at times, is a delightful hobby that for some can turn into something more serious such as a second career.  For most, however, winemaking provides a lot of pleasure and excitement in creating something that can be enjoyed by not only them but also by friends and family.  Before you get to that point, however, you need to start at the beginning and learn how to make your own wine.
How to make your own wine starts with gaining knowledge.  Yes, you’ll want to read a lot of books, article, blog posts, and forums to get an idea of the fun you’re about to embark in.  There are a lot of great resources out there, in particular the books The Joy of Home Winemaking, by Terry A. Garey, The Home Winemaker’s Companion: Secrets, Recipes, and Know-How for Making 115 Great-Tasting Wines, by Gene Spaziani, and many others.
Learning how to make your own wine also requires the knowledge of what type of equipment you’ll need to use.  For the beginner, purchasing a homemade wine kit is a great way to learn how to make your own wine, as these kits come complete with all the basic equipment you’ll need to make your first batch of wine, as well as detailed instructions on how to make your own wine from the kit.  There are several different types of home winemaking kits, so find the one that best suits the type of wine you’d like to make and have fun!
Learning how to make your own wine eventually comes with the ability to adjust on the fly and figuring out what adjustments you need to make to you wine in order to get things back on a good track.  Learning how to make your own wine and adjust on the fly comes with experience and research, but after a while will come second nature to you. It will all come with experience.
Finally, learning how to make your own wine is a fun challenge. As time goes by and more experience comes about, you will be able to create your own wines. Your own unique creations that do not need the aid of a wine recipe. You’ll be the one writing the recipe. You’ll know why each and every wine ingredient is called for and how each one affects a wine. It is at this point you will be able to call yourself a pro!
———————————————————————————————————
Ed Kraus is a 3rd generation home brewer/winemaker and has been an owner of E. C. Kraus since 1999. He has been helping individuals make better wine and beer for over 25 years.

Does My Fermentation Have Too Much Sugar?

Hydrometer In Red Wine
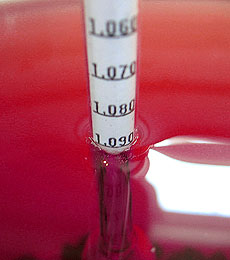
I have been making wine for years and never had any trouble, but I tried a new wine recipe and made a six gallon batch. I’m afraid the specific gravity of the must was too high-1.1200 + and it has stalled out at about 1.100–too sweet. We will not drink wine that sweet. Is there any way I can salvage the 6 gallons by blending or trying to restart fermentation?
Name: John S.
State: Kansas
Hello John,
Your starting Specific Gravity on your wine hydrometer is a little high. We normally don’t recommend starting a fermentation any higher than 1.100. At an S.G. of 1.120 the potential alcohol for the fermentation is right at 15%. That’s just a little too high to shoot for and not have a potential for a stuck fermentation. The higher sugar concentration starts to act as a preservative, inhibiting the wine yeast activity.
Having said this, there is something that is a little puzzling. You say that the fermentation started and moved 20 points down to a Specific Gravity of 1.100. If the sugar level of the wine must was the issue at hand, typically the fermentation would not start at all. The fact that it did start tells me that the sugar concentration of the must is not  what’s causing the stuck fermentation. Or at least, it is not the main contributing factor.
Now the obvious question is: If it’s not the sugar level that’s holding the fermentation up, what is?
This could be one of an array of issues. It could also be a combination of two or more issues. While there may be something else causing the stuck fermentation, the higher sugar concentration level could be a contributing factor. It could be the jab to the upper-cut.
We could go through all the reasons why here, but that would not be very productive, and it would require me to go through a back-and-forth of questions and answers with you to get to the bottom of things. But here’s what we can do. On our website, we have put together The Top 10 Reasons For Fermentation Failure. This is a list of what we have discovered to be the top reasons why a wine must is not fermenting.
This list has been compiled through many years of experience with helping home winemakers through their more challenging moments. It is my feeling that this list covers well over 95% of the issues we run across. By going through them I’m fairly confident that we can solve your stuck fermentation riddle.
Going back to your sugar concentration, I wanted to bring up something real quick. I don’ t believe it to be the primary problem, currently, but as the fermentation continues and the alcohol level rises, it could indirectly cause a problem with the fermentation being able to finish completely. Just as too much sugar can interfere with a fermentation, so to can too much alcohol.
Happy Winemaking,
Ed Kraus
———————————————————————————————————
Ed Kraus is a 3rd generation home brewer/winemaker and has been an owner of E. C. Kraus since 1999. He has been helping individuals make better wine and beer for over 25 years.

Problems With Siphoning A Gassy Wine

Carbonization In Siphon HoseWhen I do my first racking, there is a lot of carbonation in the wine, and it does not siphon well at all. How should I handle this?
Name: Bryan P.
State: GA
Hello Bryan,
Yes, this can be quite a problem. For the readers out there who don’ t understand what Bryan is talking about, let me explain a little bit.
During a fermentation, CO2 gas is created by the wine yeast. This is the same stuff that creates the fizzy in beer and soda pop. This CO2 gas is saturated into the wine must.
When Bryan is racking [siphoning] his wine must from his primary fermenter to his secondary fermenter, the gas starts to release from the liquid within the siphon hose. This is because the liquid is being agitated, much like shaking a bottle of soda pop. The gas collects and rises to the highest point of the siphon hose and forms a gas pocket, which eventually breaks off the siphon and stops the flow of the liquid. This is known as a vapor-lock.
One thing I have done in the past, is raise the exit-end of the siphon hose as high as I can to get the gas pocket to rise and release out the end of the hose and then start the siphon again, but this is a very annoying process and may be required more than once during a 5 gallon racking. It is also very hard to do if you are employing a curved racking cane in the siphon process. The rigid curve in the racking cane requires you to turn the cane completely upside-down to get the gas to release.
Siphoning without a racking cane is no good either. This is because a loose hose in the bottom of a fermenter will do nothing but sabotage your racking efforts by stirring up the sediment that has collected at the bottom. The rigid tube of the racking cane allows you to keep the end of the siphon under control a not sloshing all around, sort of like a wand.
The only way I’ve been able to get completely around the vapor-lock issue is to use fermenters that have spigots at the bottom. You attach the siphon hose directly onto the spigot . Then you can depend completely on gravity to start the flow. By siphoning in this way there is no opportunity for a CO2 gas pocket to develop. There is no rising curve coming up and out of the top of the fermenter as with a regular siphon.
All the primary fermenters we offer have spigots at the bottom that will accept a 3/8″ I.D. vinyl siphon hose. The spigots are strategically placed away from the bottom so that sediment will not be drawn. As you get towards the end of the siphon, gently tilt the fermenter towards the faucet-side to round up the last bit of liquid.
Last year we also introduced secondary fermenters that have the same faucet at the bottom. They are plastic carboys of varying sizes: 3, 5 and 6 gallon. They are all made out of the same exact plastic that is used to 2 liter soda pop bottles, only thicker.
By using these types of fermenters you can avoid the vapor-lock issue all together. Also, you are not sticking anything into the fermenter that can potentially stir up the sediment. The sediment stays at the bottom quiet and undisturbed through the entire racking.
Happy Winemaking,
Ed Kraus
———————————————————————————————————
Ed Kraus is a 3rd generation home brewer/winemaker and has been an owner of E. C. Kraus since 1999. He has been helping individuals make better wine and beer for over 25 years.

American Homebrewers Association: Big Brew 2013

Homebrew BeersIn celebration of the fun, social hobby that is homebrewing, the American Homebrewers Association (AHA) schedules a Big Brew event every year in conjunction with National Homebrew Day. It’s an event in which homebrewers around the world brew the same beers at the same time and celebrate the joy of homebrewing. This year, the Big Brew takes place on Saturday, May 4th, with a world-wide, simultaneous toast happening at noon CDT. Last year, over 7,000 homebrewers around the world brewed more than 11,000 gallons of beer!
Sounds like fun, right? Read on to learn how you can participate!
You can join in the AHA’s Big Brew in one of the following ways:

  1. Join a registered Big Brew event near you. Meet new people, make some friends, and celebrate one of America’s favorite, fastest growing hobbies.
  2. Register your own Big Brew event. Can’t find a Big Brew event near you? Organize your own and register it with the AHA! Coordinate with your local homebrew supply shop and area homebrewers to make the event a good one!
  1. Invite some friends and family over for a brew day! Share your passion for homebrewing with those closest to you!
  2. Don’t forget to raise your glass at 12pm CDT for the worldwide toast to homebrewing!

Homebrewing is one of the greatest social activities there is. Brewing with a friend makes the hobby immensely more enjoyable. Not only do you have an extra set of hands to help out, but brewing with a buddy or two is a great opportunity to share your homebrew, get some feedback, and wax philosophical over some beers!
Check out the AHA’s How to Celebrate page for more ways to get involved in the 2013 Big Brew!
Big Brew Recipes
Part of the fun of the Big Brew is that homebrewers around the world all brew the same beer. This year, the AHA selected three winners from the Great American Beer Festival Pro-Am competition for the Big Brew. Click the links below for extract and all-grain recipes and visit the Adventures in Homebrewing web store to find the ingredients you need.
Each recipe is for a five-gallon batch of homebrew:

  • More Fun Blonde – a Belgian blonde ale by Jay Shambo and New Belgium Brewing Company. (Recipes: extract, all-grain)
  • Pointon’s Proper – an English style dark mild ale, by Scott Pointon and RAM Restaurant & Brewery. (Recipes: extract, all-grain)
  • Classic American Pilsner – an American-style Pilsner by Kyle Sisco and Minneapolis Town Hall Brewery (recipes: extract, all-grain)

Are you new to homebrewing and in need some equipment for the Big Brew? Check out our Beermaker’s Necessities Kit, containing all the equipment you need to brew a batch of beer. Each kit includes a Brewer’s Best Extract Kit of your choice. Don’t forget to check out our Guide to Extract Brewing for step-by-step instructions for the beginning homebrewer!
——————————————————————————————————-
David Ackley is a beer writer, brewer, and self-described “craft beer crusader.” He holds a General Certificate in Brewing from the Institute of Brewing and Distilling and is founder of the Local Beer Blog.

My Wine Formed Sediment After I Bottled It!

Cloudy WineI racked and filtered my Pinot Grigio and it was crystal clear when I bottled it. Now, some bottles (but not all) have a white almost milky sediment in the bottom of the bottles and it has a slightly “dirty sock” aftertaste. I’ve been told it was a protein and I might be able to remove it with Sparkolloid but have not tried it yet. Any suggestions?
Name: Neal C.
State: CA
Hello Neal,
Normally, when someone tells me they have a milky/dusty/silty substance at the bottom of their wine bottles, I tell them that they either bottled their wine too soon — before everything had a chance to clear out completely — or that the wine started slightly fermenting again while in the bottle.
But something you have explained has changed this whole scenario: that is the fact that you have filtered the wine. I’m assuming that when you say filtered, you mean that you put the wine through an actual wine filter and didn’t just strain it through some cheesecloth or similar.
Filtering the wine would have taken out anything that could have caused a visible sediment later, so having the sediment caused by particles that were still suspended in the wine at bottling is out of the question. Filtering would have also taken out a huge chunk of the yeast cells that may have remained in the wine, so a re-fermentation is highly unlikely, as well.
What this means is that what you are seeing is something that was created after the wine was bottled. It wasn’t from microscopic particles still in the wine. It wasn’t from a re-growth of yeast cells. It was from something that was precipitated out of the wine while in the wine bottle.
Precipitation occurs when there is more of a particular compound in a liquid than the liquid can hold. Instead of staying dissolved or saturated within the liquid, it releases as a solid substance.
By far, the two most common substances to precipitate from a wine are tartaric acid and tannin. Tartaric acid will precipitate as little crystals, about the size of popcorn salt or smaller. It may look white, but is more likely to be beige in color. Tannin precipitates as a powdery substance, about the consistency of flour. It can be white in color, but it is more likely to be beige, or in the case of a red wine, rose colored.
Based on your description I would say that you have a tannin precipitation problem. I would also like to point out that the person that said it was protein was correct. That’s because tannin is a protein. And like that person said, I would also recommend putting the wine back into a common vessel and treating it with Sparkolloid, with only one difference. I would also treat the wine with Bentonite, beforehand. Both are fining agents.
One other thing I would recommend is that after pouring the bottles of wine back into a fermenter you should immediately treat the wine with sulfites such as sodium metabisulfite. This will drive the oxygen out of the wine that was just introduced through the splashing. Once the wine has been successfully treated with the Bentonite and then the Sparkolloid, you will want to treat the wine again with sulfites and bottle right away.
Finally, you may want to take a look at the following article that is listed on our website: Maintaining Temperature Stability In Your Wine. This article goes over the precipitation issue in much great detail than I can here: how to determine it; how to prevent it.
Happy Winemaking,
Ed Kraus
———————————————————————————————————
Ed Kraus is a 3rd generation home brewer/winemaker and has been an owner of E. C. Kraus since 1999. He has been helping individuals make better wine and beer for over 25 years.

Who Else Wants Real Ginger Ale?

Real Ginger Ale
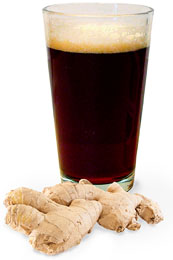
Before hops were a common ingredient, beer was flavored with all kinds of herbs, spices, vegetables, flowers, and roots. One such ingredient was ginger, the intensely flavored root frequently used in cooking Indian food and ginger bread cakes. In one of my favorite new brewing books, Sacred and Herbal Healing Beers, Stephen Buhner notes that ginger was used by the ancients for its medicinal properties that improve circulatory function, digestion, nausea, and a number of other ailments.
Ginger was also used when hops weren’t readily available. Marty Nachel notes that “The original ginger ale really was Ale. The concoction was a standard beer in colonial America because the colonists used ginger and other spices in the absence of hops to offset the malty sweetness of beer.” According to Sanborn Brown’s Wines and Beers of Old New England, “There were times in the country’s history before the introduction of lager beer when the commercial sale of ginger beer exceeded both hopped beer or cider.”
Some American craft breweries are reviving the use of ginger in beer making. Hardywood Park Craft Brewery, in Richmond, VA, makes a Gingerbread Stout that scored 100 out of 100 points in Beer Advocate Magazine. Believe it or not, you can brew your own ginger ale. It’s a great way to bring a little creativity and old-world tradition into the home brewery!
It’s easy to brew your own ginger ale! I like to use a brown ale as a base, but you can technically do it with any base beer you’d like.
How to Brew a Ginger Ale

  1. Start with a brown ale extract kit or your favorite brown ale recipe
  2. Peel and chop or grate fresh ginger root. Charlie Papazian recommends between .25 – 1 oz. per gallon of beer. (I’ve gone as high as 2 oz. — this comes out very spicy!) Tip: When in doubt, start with less, and if it’s not enough, you can always use more in a later batch.
  3. Brew your brown ale as you would otherwise, adding the ginger to the last 15 minutes of the boil. Either put the ginger in a small straining bag, or…
  4. As you transfer to the primary fermenter, strain the ginger out of the wort. You can pour the ginger into the primary fermenter if you’d like, but I recommend doing a secondary fermentation so you can separate the ginger from the wort prior to bottling day.
  5. Continue with fermenting and packaging as you would normally.
  6. When the beer is ready to drink, give it a taste. If the ginger is too strong, let it age a while to give the ginger a chance to balance out.

Have you tried brewing with ginger before? How did it turn out?
——————————————————————————————————-
David Ackley is a beer writer, brewer, and self-described “craft beer crusader.” He holds a General Certificate in Brewing from the Institute of Brewing and Distilling and is founder of the Local Beer Blog.

There's A Plastic Taste And Smell In My Wine

Plastic CarboysHi, I was told by a local winemaker, that if you add vanilla bean to a racking of chardonnay, it gives it a subtle nice flavor. Well, we put just half a vanilla bean in and racked it for a month. We just racked again and took the vanilla bean out. The wine has a weird plastic-like taste and smell to it that is rather unpleasant. We are so disappointed because we were so looking forward to this batch of chardonnay! Is this smell and taste because of the vanilla bean? Did we leave it in too long? And, how do we salvage this batch of chardonnay? Help!
Name: Mary A.
State: MA
Hello Mary,
Adding vanilla bean to a wine recipe is one of those tricks that many home winemakers try out from time to time. I have not used vanilla beans, myself, but I have tasted wines with their addition and observed no negative effects — certainly, nothing like you are describing. I’ve also had lots of other winemakers describe to me their use with varying degrees of success, but I’ve never had someone come to me with a bad experience from its use. So, I think it is highly unlikely that the vanilla bean is the root of your problems.
By far the most common reason for having a plastic taste or smell in your wine is using fermenters that are not made of a food-grade plastic. It is very important to verify that any plastic vessel that comes in long-term contact with the wine be food-grade. Plastics that are deemed food-grade are made from a plastic that is more pure, with no dyes or other additional chemicals that can leach out into the wine. They are also mostly made from non-recycled plastic.
Any container you that get from a food supplier or that is being sold for the purpose of holding consumables, should work just fine. Stay away from containers that you find at the hardware store and other such places. The only exception to this is if the container is being sold specifically for food use or actually says “food-grade” on it.
One common misconception is that you can tell if a plastic container is food-grade by the recycling symbol that is stamped onto the container. The recycling symbol is the arrowed triangle that’s seen on plastic containers. It will have a number in the center of the triangle ranging from 1 through 7. These numbers denote the type or class of plastic from which the container is made. These symbols are used so like-plastics can be easily sorted together for recycling.
But one thing these symbols do not do is tell you if the plastic is food-grade or not. While only certain types of plastics are capable of being food-grade for liquids (numbers 1, 2, 4 and 5), not all containers made from those plastics are food-grade. What makes them food-grade is how pure of plastic is being used. Is it made mostly from recycled plastic or not? Does it have dyes and other chemicals that can release from the plastic.
Mary, hopefully this is not what’s going on with your wine, but based on your description, that’s what it sounds like. I know of no effective way to reverse these types of defects. You may get some marginal benefit from fining the wine with gelatin. You may also notice a reduction of the odor with the addition of a sulfite such as Campden tablets or potassium metabisulfite. Time may also reduce these effects. But beyond this there is not much else you can do.
Best Wishes,
Ed Kraus
———————————————————————————————————
Ed Kraus is a 3rd generation home brewer/winemaker and has been an owner of E. C. Kraus since 1999. He has been helping individuals make better wine and beer for over 25 years.