
 Howdy,
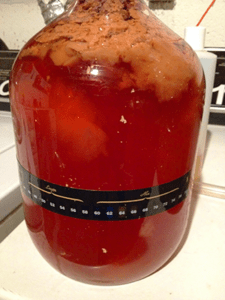
I am new at wine making and just learning how to make white wine with one of your wine ingredient kits. I am in the last stages and decided to take a small taste test even though I still have 2 or 3 days left in the last stage. It is terrible! Can the wine get better in that short period of time or is it to far gone and will not come out good? I followed the directions word for word.
I did find 1 difference in the articles and the directions given on the ingredients kit. Articles say not to put fermentation lock but the directions say to do so. I did and I am wondering if this is the reason for the result that I am experiencing.
Thank you,
Tom
———-
Dear Tom,
It is normal for the wine to taste disgustingly bitter at this stage of the process. Aging plays a very important and dramatic role in the development of the wine’s flavor and the rounding of rough edges, so to speak. The wine will experience incredible improvement over the next 30 to 60 days and then marginally so over the following few months.
One interesting thing you can do is to open a bottle of the wine every 30 days and take notes on your impression of the wine. In essence, make a diary of the wine. The more detailed the better.
At a certain point further down the road you will notice that the wine is no longer changing or improving. This may be at around a year’s time; it may be 18 months; it may be 9 months. Every wine is different.
A lot of factors come into play such as were natural corks or synthetic corks used to seal the wine bottles? Typically, natural cork will age the wine more quickly than synthetic corks. How much body does the wine have? Heavier bodied wines take longer to age the lighter boded wines, (Merlot vs. Riesling). These are just two examples of many.
Going back to your concerns, I would not hesitate to bottle this wine with great optimism. I see no reason to believe that it will turn out bad based on the information you have given.
Best Wishes,
Customer Service at E. C. Kraus
———————————————————————————————————
Ed Kraus is a 3rd generation home brewer/winemaker and has been an owner of E. C. Kraus since 1999. He has been helping individuals make better wine and beer for over 25 years.
Category Archives: Wine
Why Does My Wine Have To Sit So Long?
 Hello Kraus,
My neighbor is trying to show me how to make white wine using your County Fair Symphony concentrate. He told me that the wine will need to sit many months to age before it is ok to drink or bottle. I have read the homemade wine instructions on the side of the can and in the First Steps In Winemaking book that i got from you. I am still confused about why it has to sit so long before i can drink it.
Todd B.
———-
Dear Todd B.,
First, I would like to say that the Symphony grape makes an excellent wine. I’m sure you will be pleased with its outcome. Also, you are very lucky to have someone who can show you the ropes as it were, being a beginning wine maker and all.
Now, let me see if I can shed some light on the issue.
One of my favorite wine making tips is When In Doubt, Wait. What I mean to say by this is you can get into more trouble by rushing the wine making process along than you can by adding some extra time between the some steps.
Your friend has found through their own wine making experiences that you should wait several months before bottling. This is okay and will not hurt the wine in any way, and may potentially help the wine. But, it may not be necessary either, depending on the situation. Every wine is different in terms of aging need.
In my humble opinion in this situation, if the wine is bottled right after the fermentation has completed and the wine has had time to clear, it will be very drinkable at about 30 to 60 days. However, the wine should marginally improve on up until about 6 to 9 month.
What your friend may be doing (consciously or unconsciously) is trying to eliminate the temptation of drinking all the wine before it is at its best. If it’s stowed away for a few months before it’s bottled it will be out-of-mind and age just as well — if not better — while in bulk.
Best Wishes,
Customer Service at E. C. Kraus
———————————————————————————————————
Ed Kraus is a 3rd generation home brewer/winemaker and has been an owner of E. C. Kraus since 1999. He has been helping individuals make better wine and beer for over 25 years.
Transferring Your Wine To A Clean Fermenter
 Part of learning how to make your own wine is mastering the process of racking. Racking means to transfer the wine or must from one fermenter to the next so as to leave any sediment behind. This process usually needs to be done once or twice with the wine brewing and at least once before you bottle.
If you have one of our plastic fermenters with a faucet at the bottom, racking is simple. Just attach our 3/8″ vinyl hose to the spigot and turn it on with the hose leading to the next fermenter. The faucet is away from the bottom of the plastic fermenter so as to not draw sediment.
As you get to the end of the wine or must you can tilt the fermenter to get the last bit of wine. The sediment should stay fairly well stuck to the bottom.
If you don’t have this kind of setup or are racking from glass jugs or similar, you will need to start a siphon with some vinyl hose. There are a few ways you can go about getting the siphon started.

- You can suck on the end of the hose to get is started, just like siphoning gas (yuk).
- You can fill (prime) the hose with water from the sink, then discard the first cup or so of the siphon (hassle).
- You can put as much of the hose into the wine as possible and then put your thumb over the end to create a vacuum. Pull out the hose and stick the end with your thumb into the next vessel (messy).
- You can get one of our Siphon Kits that allows you to start the siphon from gallon jugs or glass carboys by blowing into a tube.
- You can get The Auto Siphon. This starts the siphon by pumping it slowly, one-time, kind of like a bicycle tire pump.
———————————————————————————————————
Ed Kraus is a 3rd generation home brewer/winemaker and has been an owner of E. C. Kraus since 1999. He has been helping individuals make better wine and beer for over 25 years.
Has Vinegar Ruined My Glass Carboy?
 Please help:
I recently noticed that a partially full carboy of apple cider wine had developed mother of vinegar proteins. What is the likelihood that I will be able to use that carboy again for wine making? I am currently using a sodium metabisulfite solution in an attempt to sanitize it. Will this be sufficient?
Thank you.
Robin M.
———-
Hello Robin M.
Sorry to hear about your apple cider going rogue vinegar on you.
The good news is that acetobacter – the bacteria the produces vinegar – is easy to destroy with a normal dose of sodium metabisulfite. Getting any glass carboys that have been exposed back into a sanitized condition will be no issue at all.
There are a couple of thing I would like to point out for your consideration. The first is that acetobacter can be a little sneaky, so you need to look beyond your glass carboys. You need to consider things like rubber stoppers, air-locks… any wine making materials that might have come into contact with the acetobacter. These bacteria like to hide in crevices, cracks and dark corners. Because of this, rough surfaces need extra-special attention.
The second issue is that acetobacter can become air-born. It can float onto counter-tops, the floor, floor-joists, etc. I’m not saying this to scare you but to make you aware of the potential that acetobacter has. With that being said, you should do a quick wipe-down the immediate area. You can use a solution of bleach and water, 1/4 cup to each gallon.
Happy Wine Making,
Customer Service at E. C. Kraus
———————————————————————————————————
Ed Kraus is a 3rd generation home brewer/winemaker and has been an owner of E. C. Kraus since 1999. He has been helping individuals make better wine and beer for over 25 years.
101 Useful Tips for Making Your Own Wine
 Sometimes learning a new hobby really has more to do with learning all the little ins-and-outs than it does with learning the basics. For example, to get some wine brewing is really quite easy. You just mix all the ingredients together; add the yeast; and let it ferment; and you’ll have wine.
There’s a lot of activities that are this way, from playing baseball to frosting a cake. The basic are simple, but the details are endless. In baseball who goes for the bunt when the plays at third? When decorating a cake, what’s the best decorating tip to use for making rose peddles?
The reason I bring all this up is because we have come across a wine making book that has nothing to do with wine making fundamentals and everything to do with the details. It’s called, 101 Wine Kit Tips.
As the title suggests, it’s a collection of wine making tips that quite often fills the holes that other wine making books may leave uncovered. Such as tip #82, what to do when your wine is too dry. It’s also a journey into practicality. For example, tip #12 show how to use an everyday wire hanger to suspend a funnel over an open, bucket fermenter, and 99 others.
These are wine making tips that will save you time, energy, and a bit of stumbling. It’s a great addition to any winemaker’s library, and will help to solidify your knowledge of wine making at home. Now you can get 101 Wine Kit Tips at a reduced price of $9.95. It used to be $12.95, making it an even greater value than before.
———————————————————————————————————
Ed Kraus is a 3rd generation home brewer/winemaker and has been an owner of E. C. Kraus since 1999. He has been helping individuals make better wine and beer for over 25 years.
Grape Vines And Refractometers Go Hand-In-Hand!
Refractometers are vital to the successful operation of any vineyard, large or small. Even the individual who may just have a few vines in his/her backyard should strongly consider getting a refractometer of their own. Their value in helping you to determine when to pick your grapes makes them essential for anyone who plans to make their own wine.
Refractometers have come down in price in recent years as well, making them more affordable for an individual to own. The refractometer we offer today cost only $79.95. Ten years ago you would have paid over $200.
You may be asking yourself, what is it exactly that refractometers do any? Simply put, refractometers measure the percentage of sugar that is in the grape juice. The scale it does this with is call brix. For example, a brix reading of 20 would mean the grape juice is 20% sugar.
By monitoring your grapes’ brix level as they mature and become sweeter, you can then determine if it is time to pick yet. For more information on using refractometers to determine when to pick, you may want to take a look at the following blog post that covers the use of refractometers in a harvest situation, Picking When To Pick… The Winemaker’s First Decision.
———————————————————————————————————
Ed Kraus is a 3rd generation home brewer/winemaker and has been an owner of E. C. Kraus since 1999. He has been helping individuals make better wine and beer for over 25 years.
How Does A Steam Juicer Work?
 If you’re the kind of home wine maker that always seems to have fresh fruit coming your way, one piece of homemade wine equipment you should have on hand is a steam juicer.
It works beautifully for extracting juices from a huge variety of different fruits, so no matter what type of fruit ends up falling your way, the steam juicer will be able to help you to turn it into wine.
A steam juicer works by bursting the fruit with steam and then collecting the fruit’s juice as it freely drains from the pulp.
As you can see in the diagram on the right, the fruit is put into a perforated pan with a lid. This pan then sits on top of a collector pan. All this sits over a pan of boiling water which is being heated by your stove.
As the water boils, steam rises through the opening of the collector pan to the fruit. As the fruit breaks down from the steam, it releases the juice from the pulp. The juice then falls through the perforated holes into the collector pan.
From there you can drain the juice into canning jars for later use, or you can drain it directly into your fermenter so you can start making your next batch of wine.
———————————————————————————————————
Ed Kraus is a 3rd generation home brewer/winemaker and has been an owner of E. C. Kraus since 1999. He has been helping individuals make better wine and beer for over 25 years.
How Big Does A Secondary Fermenter Need To Be?
 Help,
Help,
I’m getting together some homemade wine equipment. Question: does the secondary fermenter have to be (6) gal. for making (5)gal.of wine???
Thanks
James T.
———-
Hello James T.,
The primary fermenter needs to be about 6 gallons for 5 gallons batch of wine. This is to allow room for the foaming, otherwise you have a potential for foam to come through the rubber stopper, out the air-lock and on to your floor.
But when it comes to the secondary fermenter, you would like it’s size to match the size of the batch. There should be very little foam at this stage of the fermentation to be concerned about. By eliminating the extra head-space you are reducing your chances for having your wine adversely effected by oxidation.
Headspace is not so much important when the fermentation is still releasing gases, there’s no oxygen in this space, but it does become a consideration once the fermenetation has stopped and the rubber stopper has been taken off for whatever reason.
Best Wishes,
Customer Service at Adventures in Homebrewing
———————————————————————————————————
Ed Kraus is a 3rd generation home brewer/winemaker and has been an owner of E. C. Kraus since 1999. He has been helping individuals make better wine and beer for over 25 years.
Can I Add Sodium Metabisulfite To My Wine Now?
Here’s a question from a customer who has essentially aged his wine in bulk for a few months. He wants to know if he should be adding sodium metabisulfite at this time.
 ———-
———-
Fellow Winemakers,
Can I add sodium metabisulfite to my wine now?
I have 25 gallon of grape wine in 5 gallon glass jugs that I made in September of 2009 filled to the top no air space to stop bacterial infection can I add sodium metabisulfite before I rack the wine? and how long should I wait before I rack the wine? I want to thank you for taking the time for all the information.
Thank again,
Richard R.
———-
Yes, you should put in the sodium metabisulfite, but add it after you rack the wine, not before. If you add it before the racking, much of the sulfites will dissipate into the air. You should use a full-dose (1/16 teaspoon per each gallon) unless you have already added it before since the fermentation has ceased. In this case, I would suggest adding a half-dose instead.
In general, you should rack the wine after 5-7 days of fermentation, then again once the fermentation is complete. Then a final racking is done after the wine has clear. This can take anywhere from 2 to 6 weeks. You can bottle the wine at this time, or you can elect to leave it in bulk for a while to age.
Best Wishes,
Customer Service at Adventures in Homebrewing
———————————————————————————————————
Ed Kraus is a 3rd generation home brewer/winemaker and has been an owner of E. C. Kraus since 1999. He has been helping individuals make better wine and beer for over 25 years.
Preparing Your Synthetic Corks For Bottling
 One of the primary goals of this blog is to continuously provide wine making tips and advice that will make life easier for the home winemaker. With that in mind, here’s another tidbit that you may want to look over.
One of the greatest advantages of using synthetic corks is that they are easy to sanitize. Their surface is not porous like an natural cork, so you can quickly and confidently sanitize them with a quick, straight-forward process. All you need to do is give them about 20 minutes or better of contact time with a mixture of sodium metabisulfite and water.
The simplest way I’ve found to accomplish this is to put the corks in a gallon glass carboy and fill the glass jug about half way with water. Then add 1 teaspoon of sodium metabisulfite and shake the jug to dissolve the sulfite crystals. Then fill the jug the rest of the way with water and put screw cap on and let sit for at least 20 minutes. The corks are buoyant so this is why you can’t just put them in a bowl of the mix.
The same thing can be done with natural corks as well, except in this instance the corks should be treated for 24 hours. This is for two reasons: 1) To give time to for the sulfites to sanitize the porous openings of the natural cork, and 2) to give time for the corks to soften slightly so that they will go in the bottle more easily with a wine bottle corker.
———————————————————————————————————
Ed Kraus is a 3rd generation home brewer/winemaker and has been an owner of E. C. Kraus since 1999. He has been helping individuals make better wine and beer for over 25 years.