Wine Oxidation:Part II: Avoiding The Slow Death

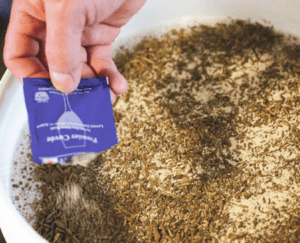
wine yeast and fermenting wine in a bucketThis is Part II of a 2 part series on wine oxidation. Part I covers the effects of oxidation. Part II, this part, covers how to avoid it.
The first thing I’m going to say about avoiding oxidation might not be what you’d expect, but it’s important to know. Make sure the fermentation has plenty of oxygen in the beginning — particularly the first 2 to 3 days of fermentation. This is the time when the little packet of wine yeast you add to the must needs to multiply itself into a colony that is 100 to 200 times its original size. The wine yeast desperately needs oxygen to accomplish this.
Oxidation is not of a huge concern at these beginning stages of fermentation, because the CO2 that is being produced is saturated within the wine, keeping oxygen (air) out of it. If the CO2 was not in the wine, oxygen would then be capable of being saturated.
It is later, when the fermentation begins to slow down, that controlling air exposure always needs to be considered. The CO2 releases as a gas and dissipates giving an opening for oxygen to take over.
1. RACK YOUR WINE CAREFULLY
Racking is a time when excessive oxygen can be introduced into the wine, but this is not going to happen to you because you are going to do some simple things that are going to keep this oxidation under control.
The first thing is to eliminate the splashing. When you splash a wine you are increasing the wine’s ability to soak up oxygen. When you rack or siphon a wine, do it in a way that does not splash. I like to make sure that the siphon hose is all the way to the bottom of the fermenter being filled. I fill the fermenter from the bottom-up, so to speak.
If the fermentation has already completed at the time of racking, the second thing you should do is add a dose of Sodium Metabisulfite. The SO2 from the sulfites will help to drive out any oxygen that may have made its way into the wine.
2. ELIMINATE ANY HEAD-SPACE THAT’S WITH YOUR WINE
If the fermentation has completed, there is no longer any CO2 gas coming off the wine to protect it. Because of this you want to avoid having large amounts of head-space in your fermenter with your wine. Having too much head-space is not a problem for a week or so, but anything longer than this should be avoided. There are two common ways to handle this:

  • Change Fermenters: Move the wine from a bucket fermenter to an appropriately-sized carboy., something that has a narrow neck. Make sure the wine is up into the neck of the carboy. You may even want to use a series of glass gallon jugs for this purpose. If you have 4 gallons of wine, a 5 gallon carboy is not a good option. Four 1 gallon glass jugs would be better.
  • Replace The Head-Space: Fill-up the head-space in the fermenter. This can be done by adding a similar wine to the batch. This could either be a commercially made wine or a wine you made yourself. This method would be appropriate if the head-space were small — a quart or less. Another way is to use glass marbles to fill the head-space. It is important that the glass marbles be sanitized first. Be careful not to crack your carboy with the marbles as you put them into your wine fermenter.

3. USE PROTECTIVE INGREDIENTS THAT FIGHT OXIDATION
Sulfites should always be used before bottling your wine. Also, Ascorbic acid should be used in some cases where oxidation is very likely.

  • Sulfite: It is important to treat your homemade wines with a sulfite such as Sodium Metabisulfite or Campden Tablets before bottling. This will go a long way towards fighting oxidation. The sulfites also have the added benefit of squashing the growth of any microorganisms, including acetobacter which is what causes a wine to turn to vinegar.
  • Ascorbic Acid: Some wines are more susceptible to oxidation than others. White wines in general are more sensitive than reds to oxidative forces. And more specifically apple and pear wines are very sensitive to oxidation. We recommend adding ascorbic acid to these to wines. It raises the acid level of the wine without raising the acidic flavor or tartness of the wine. Having this higher level of acid in your wine will help to slow the effects of oxidation.

4. TAKE CARE WHEN STORING YOUR WINE
Even if the oxygen level of your wine is very low, oxidation can start to adversely affect your wine, if given enough time. There are two external factors that can control how fast your wine will respond to oxidation. One is light the other is heat. Have too much of either, and you will speed up the oxidative process.

  • Light: If you bottle your wines in green wine bottles you are already doing something to help keep light exposure down. The green filters out much of the UV rays which is the actual catalyst for oxidation. But beyond this, how about keeping it simple. Store your wines in a dark place then you won’t have to worry about what color of wine bottles.
  • Heat: You need to keep the wine’s temperature from being too hot. Almost all wine experts agree that the optimal temperature for storing wine is 55º F. But understand that if you can only keep that wine at 60º or 70º F. that’s still several times better than 80º F. So, just do the best you can with what you’ve got.

There you have it: The basics of keeping your homemade wines from succumbing to the effects of oxidation. They are all really very simple things to do. Practice them and your wines will live a long and healthy life.
———————————————————————————————————
Ed Kraus is a 3rd generation home brewer/winemaker and has been an owner of E. C. Kraus since 1999. He has been helping individuals make better wine and beer for over 25 years.

Wine Oxidation: Part I: The Slow Death Of A Wine

Steve Martin holding wine bottles

Not Louis Pasteur

Sorry to give this post such a grim title, but oxidation is really not a very happy subject for me. I’d rather be writing about something more positive, but that wouldn’t be doing you any favors. Every home winemaker needs to learn about the harsh realities of wine oxidation. If not for any other reason, so that they can learn how to avoid it.
Louis Pasteur, the father of modern microbiology, once said: “Oxygen is the greatest enemy of wine”. He may have been right. We see oxidation inflicting way too many homemade wines… needlessly.
WHAT IS OXIDATION?
In its strictest terms, oxidation is a chemical reaction between the oxygen in the air we breath and the phenolic compounds in your wine. Phenolic compounds are the “organics” of your wine. It’s the stuff that makes up the wine’s color, flavor and bouquet — the wine’s heart and sole.
As oxygen comes in contact with these phenolic compounds it deteriorates them along with everything they represent to the wine. As a result, a wine that becomes oxidized will take on a brownish or orange tinge to its color. Its flavor will become flat or more one dimensional with no fruity notes. And, its aroma will be mostly that of raisins or caramel. In extreme cases, the wine can even develop unpleasant off-flavors and aromas.
WHO HAS THE MOST PROBLEMS WITH OXIDATION?
Almost all the cases we see are wines made from fresh fruits: grapes, berries, apples, etc. as opposed to wines made from concentrates or wine ingredient kits. This is partially because of the way the ingredient kits are set up, but it’s also because of the great directions that come with these kits. The directions keep you on the straight-and-narrow, so to speak — keeping you away from oxidation without you even realizing it.
So the good news is, if you make wine using wine ingredient kits, follow the directions, and oxidation will not be of much concern to you. The bad news is, if you make wine from fresh fruit, oxidation needs to be your concern. You need to understand it and know what causes it so that you can avoid it. If not your wine could fall victim to this ‘disease’ called wine oxidation and ‘die a slow death.’
In part II of the is two part blog we go over the meat-and-potatoes of avoiding oxidation. You’ll discover that with just a few simple precautions and maybe a minor change or two in your winemaking procedures, you’ll be able to eliminate any chance of oxidation in your precious homemade wines.
———————————————————————————————————
Ed Kraus is a 3rd generation home brewer/winemaker and has been an owner of E. C. Kraus since 1999. He has been helping individuals make better wine and beer for over 25 years.
Sanitizing Your Winemaking Equipment Is No Hocus Pocus

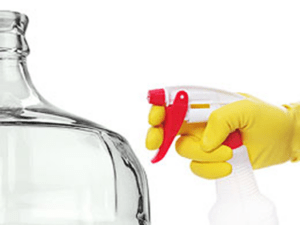
sanitizing wine equipmentHello Winemakers:
I am getting ready to start my first batch of wine from concentrate. I am a little confused about the sanitizing process for large pieces of equipment. The directions say to dissolve so much sanitizing stuff to one gallon of water. Does this mean a gallon will do the job? With a 6 gallon tuft tank or a 6 gallon glass carboy, for example, do you pour the gallon in the container and slosh it around? If so for how long? Directions say to soak corks from 5 to 10 minutes. Small items such as hydrometers can be submerged, but I am a little vague on doing the big items and some of the other details?
Thanks,
Mike H.
—–
Hello Mike,
The methods you are referring to are appropriate when using sulfites (sulfur dioxide) to do your sanitizing.
Sulfite is the most common ingredient home winemakers use to sanitize their equipment and supplies. Sulfites can be purchased as either Sodium Metabisulfite or Potassium Metabisulfite — both are granulated powders — or as Campden Tablets. Any of the three can be mixed with water to create a solution with the same active ingredient,  SO2 (sulfur dioxide). Some of the sulfur dioxide will bond to the water itself. Some will start to release slowly as a gas. This gas is known as the ‘free’ SO2. This free gas is what actually does the sanitizing.
In the case of sanitizing your fermenters, you only need to put in a few inches worth of the solution to sanitize them. Just seal the fermenter up with a lid and/or airlock, and let it sit for a few minutes. The fumes from the sulfite solution will do all the work. You do not need to slosh, soak, scrub, or do any of that kind of stuff. Just follow the directions that are listed on the side of each of the containers we offer.
If you are sanitizing a container with a larger opening such as a bucket-type plastic fermenter, you can also put all your smaller winemaking equipment inside, and sanitize everything at the same time. Hydrometers, hoses, rubber stoppers, airlocks can be put in the plastic fermenter and easily taken care of in a single step.
It is important to realize that a sulfite solution made with any of these three ingredients: Sodium Metabisulfite, Potassium Metabisulfite or Campden Tablets, are the only solutions that do not need actual surface contact time to do their sanitizing. All the other sanitizers we offer ‘do’ require some contact.
These contact sanitizers work well for the smaller items that can be easily soaked, and for larger items that can be easily wiped down, such as grape crushers and grape presses. But when it comes to sanitizing fermenters, wine bottles, glass jugs and other containers, it’s hard to beat using a sulfite solution.
Happy Wine Making,
Customer Service
———————————————————————————————————
Ed Kraus is a 3rd generation home brewer/winemaker and has been an owner of E. C. Kraus since 1999. He has been helping individuals make better wine and beer for over 25 years.
No More Tart Wine

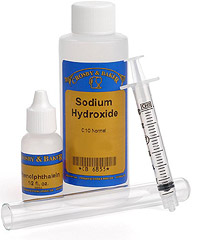
Wine Acid Testing KitAre you a winemaker who loves to make wine with fresh fruits? If you are, here is one of my quick and easy wine making tips for you. The simplest thing you can do to make your wines better is to start using an Acid Test Kit.
By taking acid level readings of your wine or wine must with an Acid Test Kit you can get the tartness of your wines perfect instead of just close.
This fruit acids along with any Acid Blend you might add to your wine recipes are what control how tart or flat your wines will taste. Too much, and your wines can be enough to give you heartburn. Not enough, and your wines can taste lifeless.
Wine recipes can generally tell you how much Acid Blend to add along with the fruit to get the wine to an acceptable range of acidity — one that’s in balance. But the reality is, fruits vary in the amount of acid they bring to a wine. How acidic the fruit is can vary based on the growing season, variety, etc. By testing the acid that the fruit is actually providing, you can know exactly how much Acid Blend to add to make up any difference.
Using an Acid Test Kit is relatively simple. You take a small sample of the wine or wine must and add a couple of drops of an activator solution to it. Then you add a second solution, known as the Reagent. You keep adding the Reagent until the wine sample changes color. By measuring how much Reagent it took to change the wine’s color, you can determine exactly how much acid is in your wine recipes.
The Acid Test Kit comes with these two solutions along with a glass test tube and a measuring syringe. So, you’ll have everything you need to do the test. But more importantly, the Acid Test Kit comes with complete directions. It also has a chart that tells you what range of acidity your wine should be in for great balance. The directions also tell you how much Acid Blend you need to add to the wine or wine must to get from point ‘A’ to point ‘B’. All the guesswork has been removed.
———————————————————————————————————
Ed Kraus is a 3rd generation home brewer/winemaker and has been an owner of E. C. Kraus since 1999. He has been helping individuals make better wine and beer for over 25 years.
Tell Me More About This Airlock Thing You Mentioned

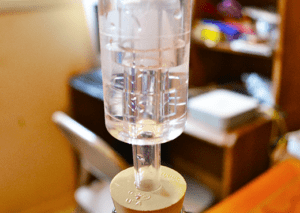
bubbling airlockHi:
I have always made my wine in a humongous stone crock.  What is an airlock thing that is mentioned?   My wine is really good, and I’ve never gotten sick from it.  Nobody else has either.  So would that airlock thing make my wine better???  By the way, I make Elderberry and Choke Cherry wine.
Thanks, Lois
—–
Hello Lois,
I’m glad you brought this up. Many people misunderstand the role airlocks play in home winemaking. Now is just as good as time as any to clear things up.
An airlock is basically a water trap that you attach to the neck of a jug with the aid of a rubber stopper.  It cannot be attached to an open vessel such as the stone crock you are using. It needs a neck of some kind. You put the rubber stopper in the opening and then insert the airlock into a hole that is in the rubber stopper.
You fill the airlock halfway with water. As the gas comes off the fermentation, it bubbles through the water within the airlock and then out of the container. At the same time this water keeps outside contaminants and bugs from getting into the wine. This helps keep the wine free from spoilage.
The first thing I would like to point out about an airlock is that it has nothing to do with the quality of the wine you make. It will not make a good wine great or an average wine good. It does nothing of the kind.
What an airlock does is reduce your chances of having a wine spoil. It keeps your wine protected from infection during and after the fermentation. It does so by creating this barrier between the fermentation and airborne molds and bacteria. Allowing these little nasties to get into your wine and then giving them a chance to grow is the essence of spoilage.
If the wine is fermenting and foaming like it normally should, all these foreign intruders do not really have a chance to take over a wine. There is CO2 gas coming off the fermentation, keeping fallout from landing directly into your wine must.
So just getting to the wine is a big challenge for these little spoilers. But beyond this, if they are able to get into the wine, having an opportunity to grow is very slim for them. All the yeast activity from the fermentation keeps them in their place and even destroys them in most cases.
What all this means for you, Lois, is that using your stone crock for fermenting your wine is fine up to this point. The wine is fermenting strong and spoilage is close to impossible during this time.
It is when the fermentation begins to slow down that you could have some issues with spoilage. Fermentations do not typically stop all at once. They usually taper off over the course of a few days. As the fermentation becomes less and less active, the window of opportunity becomes larger and larger for contaminants to get to the wine and spoil it. It is in this context that the airlock becomes valuable and in my view a necessity.
Happy Wine Making
Customer Service
———————————————————————————————————
Ed Kraus is a 3rd generation home brewer/winemaker and has been an owner of E. C. Kraus since 1999. He has been helping individuals make better wine and beer for over 25 years.
Great News! More Wine Making Juices To Choose From!

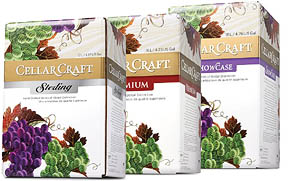
Cellar Craft Wine KitsWe’ve got some great news that we can’t wait to pass along! The new wine making juices are here! We are very excited to announce that we have added a new brand of a wine making juice to our already extensive selection of wine making juices.
The new brand is Cellar Craft. They have 55 different wine making ingredient kits spread across 4 different lines: Sterling, Premium, Showcase, and Specialty. Some examples of the wine making juices they offer are: White Merlot Washington Reserve, Pinot Grigio Italian Riserva, and Cabernet Red Mountain.
Each of Cellar Craft’s 4 different brands offers a different range of wine in terms of price and quality. Long story short, Cellar Craft has something for everyone.
Without question, the new choices Cellar Craft brings to the table, combined with the solid listing we already carry, creates the most diverse and broad selection of wine making kits you will find anywhere. We now offer a staggering 230 wine making ingredient kits from which to choose. So dig in and find out which ones wets your palate!
———-
DON’T KNOW WHICH WINE TO MAKE?
We realize that having so many wine making juices to pick from can be overwhelming. That’s why we created the Wine Selector Tool. This makes picking out a wine making ingredient kit you will like, simple.
Just go to the Wine Selector Tool, make some basic selections, and the Wine Selector Tool will narrow down the field of wine juices for you. Give it a whirl and see what you come up with!
———————————————————————————————————
Ed Kraus is a 3rd generation home brewer/winemaker and has been an owner of E. C. Kraus since 1999. He has been helping individuals make better wine and beer for over 25 years.

Accidental Blueberry Port

I’ve been your customer since I was 16 (over 30 years), and have been making wines off and on all those years. Since a number of farms in our region are growing wine grapes, I’m making wine more seriously than ever before. I grow my own blueberries, and since I grew up making fruit wines, I always have at least one fruit or mead wine processing. 4 years ago the first blueberry wine I ever tried turned out fabulous, so the next year I tried to repeat my success . . . but it was not to be the same. The specific gravity would not reduce enough to my liking, and I had started the wine 13 months earlier. I cultured a champagne yeast and slowing added wine to it, until I had a gallon fermenting nicely, then added it to the remaining 4 gallons of sweet blueberry wine. The specific gravity lowered further, but, at that point (it was now 20 months since I started the wine!), I considered taking it further to a port. It was about 14% alcohol, so I added very good, neutral grain vodka (not potato vodka because I have an allergy to potatoes) to raise the alcohol content to about 18% at bottling. I bottled in tall cobalt bottles and dipped the corked tops in blue wax. Because I had oaked the port in the carboy after the champagne yeast ferment had quieted, I also put a toasted oak chips in each bottle to continue the deepening of the flavor. Though it took about 20 months from start to bottle, the port because a delicious “accident!”
Name: Jenny (Hoag) Young
State: Illinois

________________________________________________________

Read More Customer Stories And About Other Winemaking Topics,
FREE  EMAIL NEWSLETTER:


________________________________________________________

THE SYNTHETIC CORK SERIES Part II: Synthetic Corks To The Rescue!

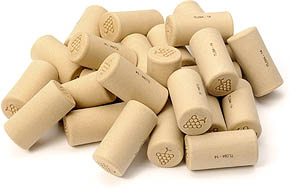
Pile Of Synthetic CorksThis is part 2 of a 4 part series. In the previous post (part 1), we went over how the cork supply and demand became out of balance over the previous decades. In this post we cover how this lack of balance spawned the emergence of synthetic corks.
As natural cork became shorter and shorter in supply, and the prices began to rise to unprecedented levels, the situation the wineries found themselves in became more and more urgent. Finding quality cork bottle stoppers that were good enough to seal a wine bottle at an affordable price was becoming a real issue.
Fortunately, ‘necessity is the mother of invention’ and the wine industry was about to get it’s little share of proverbial ingenuity. With such a large market in play, many innovative companies began coming up with their own version of a ‘reasonable alternative’ to the cork bottle stopper. It was within this rally of new ideas that the synthetic cork was born.
In the beginning synthetic corks were met with great resistance. The wineries handily slapped them down, not because synthetic corks were a bad idea or that they were bad for the wine, but because the wineries were concerned about how their customers would react to such an untraditional method of corking a wine bottle.
A lot of romance goes into the presentation of a bottle of wine; all the way from the sexy label; to the color and shape of the neck decoration, and don’t forget the seductive word-smithing crafted on the back label. To take something so artificial as a synthetic cork and put it in place of a natural cork stopper almost seemed blasphemous.
But eventually the wineries had to wake up to the reality that changes had to be made. They slowly began to accept the synthetic cork.
While the more expensive wines could afford to splurge on the high prices of the dwindling supply of natural cork stoppers, the everyday wines had to start moving toward synthetic corks. And with every year that went by we as consumers began to see more and more wines being closed with synthetic corks.
In part 3 of this 4 part series we will take a look at the advantages synthetic corks bring to the table.
———————————————————————————————————
Ed Kraus is a 3rd generation home brewer/winemaker and has been an owner of E. C. Kraus since 1999. He has been helping individuals make better wine and beer for over 25 years.

Wine That Bubbles Like Champaign

I made some wine with wild honey and fresh cherries. I let it ferment for 6 months, racking every month until May of this year. All wine was a very clear cherry color and no sign of fermentation. At bottling time I added wine conditioner and 5 campden tablets. Today I opened a bottle and it blew like Champaign. My question is what in the world happened and can I take the wine out of the bottles and put it back in a fermenter or what should I do? I am afraid that the bottles are going to blow up. The wine is in flip top bottles.
Name: Red Gordon
State: Texas