
 I’ve read that you have to add a campden tablet to cider 24 hours before you add the yeast…..I’ve not done this and my cider is now fermenting away. Can I add the correct amount of tablets per gallon once I have strained the sediment off – 2/3 times – 24 hours before I bottle the cider…….am worried that the cider will not be safe to drink!
Name: Fiona
State: Nova Scotia
—–
Hello Fiona,
You didn’t add Campden tablets to the cider, and that’s okay. Since your fermentation is active, the cider should be fine. The fact that it is active means that the cider yeast has successfully multiplied into a full colony and will be able to protect the cider from the growth of any mold or bacteria that may be in the juice.
The reason Campden tablets are called for in a cider recipe before adding yeast is to destroy any trace amounts of mold spores or bacteria that may be in the juice. Any small amounts can multiply into a full-blown spoilage if the yeast doesn’t happen to grow and take over the juice first.
In your case the yeast did take over, so spoilage did not have any chance to take place — no harm, no foul.
I would like to point out that when you do add Campden tablets to cider before a fermentation, it is important that you wait 24 hours before adding the yeast. And, it is important that the cider not be sealed up during the 24 hours. Just cover it with a thin towel. This is because the gas from the Campden tablets need to escape from the cider before you add the yeast, otherwise the Campden tablets can destroy some of the yeast in the cider, as well.
This is not the only time you add Campden tablets to the cider, either. You should add them again after the fermentation has completed (the should be verified with a hydrometer). And, you should also add Campden tablets to the cider, again, right before bottling.
Also, please realize that if you plan to back sweeten the cider, the Campden tablets will not eliminate a chance of a re-fermentation in the bottle. For this you will need to also add potassium sorbate along with the Campden tablets.
Happy Winemaking,
Ed Kraus
———————————————————————————————————–
Ed Kraus is a 3rd generation home brewer/winemaker and has been an owner of E. C. Kraus since 1999. He has been helping individuals make better wine and beer for over 25 years.
Category Archives: Wine
Making Wine From Grapes At Home
 Can you furnish a grape wine recipe for 5 gallons of Cynthiana grape wine?
Name: Dennis T.
State: GA
Hello Dennis,
Making wine from grapes is more of a process than a recipe. This is true regardless if you are a winery or just an individual making grape wine at home. It’s different than making wine from a fruits like blueberries or peaches where you can follow a wine recipe to make the wine.
The primary reason for this difference is that when you are making wine from grapes you are using 100% grape juice. No water is being add to the grape juice. This means that a change in sweetness or acidity from one season to the next affects what’s needed in the grape wine recipe, dramatically.
This is not so much the case when making a batch of raspberry wine, for example. The actual raspberry juice may only represent about a fifth of the liquid that’s in the wine. The rest is water, so the amount of ingredients such as Acid Blend, sugar, etc. are somewhat predictable, regardless of how sweet or acidic the raspberries are. These amounts can be packaged up neatly and put into a wine recipe.
So what does this mean for the person making wine from grapes at home? It means that they will need to test the grapes they have at hand to know how much of the wine ingredients to add.
Some wine ingredients will be constant regardless of the grapes. This applies to yeast nutrient, pectic enzyme, potassium metabisulfite and wine yeast. With each of these items simply follow the amounts called for on the containers they came in.
But with sugar, Acid Blend and wine tannin, the amounts will vary based on tests you will give the grape juice. For sugar you will take a hydrometer reading; for Acid Blend you will take an acid test reading; and for tannin you will take a litmus reading with pH papers.
Dennis, we have a great article on our website that covers making wine with grapes. This info will help you to add the correct wine ingredients in the correct amounts so that you can come up with the best Cynthiana grape wine possible.
Happy Winemaking,
Ed Kraus
———————————————————————————————————–
Ed Kraus is a 3rd generation home brewer/winemaker and has been an owner of E. C. Kraus since 1999. He has been helping individuals make better wine and beer for over 25 years.
Making Wine With Eating Grapes
 Our local supermarket has grapes on sale, with and without seeds. Can I crush these to make wine?
Name: John
State: New York
Hello John,
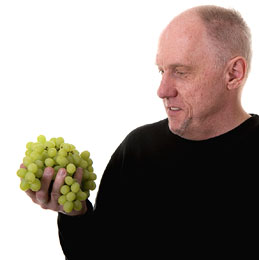
Yes, you can make wine with eating grapes, but realize they are not intended for making wine.
They have been bred for eating. This means that the sweetness and acidity are both lower than what you’d expect from an actual wine grape. The flesh is thicker and firmer with an eating grape than that of a wine making grape. People like the grape to snap when they bite into it. This firmness also makes the eating grape better equipped for transporting across the country.
None of this helps the winemaker. Firmer means more effort is need to crush and/or press the grape. Firmer also means that there will be less juice per pound of grape with an eating grape than with a wine grape. All these things mean making wine with eating grapes is more work.
Also, the breeding has also been done at the expense of the grapes inherent flavor. While the sweetness, acidity and firmness of the eating grape are optimal for popping in your mouth, if you ferment the sweetness away, the flavor that is left behind is not all that flavorful. Not much consideration is given to this aspect of the eating grape when being bred eating.
Having said this, I don’t want to discourage you from giving it a try. Making wine with eating grapes grapes is fine if you want to have some fun learning about the wine making process. This process is exactly the same either way. It’s just that you should not expect too much as a final result. The wine will be very drinkable, but lack flavor and character.
You can find more info on this matter in the blog post: Table Grapes Vs. Wine Grapes. You can also find a Thompson grape wine recipe on our website. Thompson grapes are a classic eating grape, so this wine recipe should work fine for any eating grape you come across.
Happy Winemaking,
Ed Kraus
———————————————————————————————————–
Ed Kraus is a 3rd generation home brewer/winemaker and has been an owner of E. C. Kraus since 1999. He has been helping individuals make better wine and beer for over 25 years.
Winemaking Terms You Should Know: Part 2
 In an earlier post, we introduced a few home winemaking terms that you may or may not be familiar with. There are many terms to learn in home winemaking, and this post, like the previous post, will give you a brief introduction into just a few of those terms to help you get started in home winemaking, or perhaps brush up on some of the terms you may not have seen in a while.
- Piquant: This term is French in origin, and can be used to describe different aspects of the home winemaking process. First, piquant is a term used to describe the tactile sensation noticed when the wine hits your mouth. Also, piquant can be used to describe a wine that has a slight chance of turning to vinegar. Finally, is can also be used to describe a wine that is about to undergo a secondary fermentation.
- Punch Down: In red winemaking, the skins and seeds of the grapes are left in contact with the juice for a period of time. What happens is that these solid pieces stick together and form a “cap”, which floats to the top of the juice. If left alone, this cap will completely cut off the fermenting wine from oxygen, resulting in significant reductive characteristics, and other negative consequences related to poor or failed fermentation. The act of pushing and stirring (i.e. punching down) this cap will allow the solids to contribute even more complex flavors and aromas into the wine, which would not happen had the cap not been punched down.
- Still Wine: This one is easy to remember if you think in terms of water. What’s the difference between still and sparkling water? Bubbles! What’s the difference between still and sparkling wine? Bubbles! A still wine is the finished wine that does not contain bubbles.
- Fixed Acids: Fixed acids describe any acid compound that is found naturally in the grapes or wine, acid that is added to the fermenting wine, or those acids that are created during the fermentation process. Specifically, fixed acids are stable compounds that are not intermediates to another compound. In other words, these are “stable” or “fixed” acids that aren’t in the middle of turning into something else.
- Hydrolysis: This term describes the chemical reaction of decomposition between some compound(s) and water. “Hydro” means “water”, and “lysis” means “to break down”: putting the two together, you have the breakdown by water. One example of hydrolysis in home winemaking is the catalytic conversion from starch to glucose. In wine, hydrolysis is a process that is catalyzed by certain enzymes that can either be added into the must, or enzymes that are created by the yeasts themselves.
———————————————————————————————————
Ed Kraus is a 3rd generation home brewer/winemaker and has been an owner of E. C. Kraus since 1999. He has been helping individuals make better wine and beer for over 25 years.
Off-Odors Coming From My Wine!
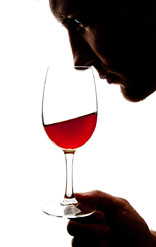 I have been making homemade wine now for about 7 years with great success. My wine making has always been from fresh juice or kits. My question is…whenever I open a bottle of wine, no matter its age, it initially has a somewhat homemade odor (tough to describe and not necessarily offensive) that I do not notice in commercial wines. I find that after uncorking a bottle, it almost always smells and tastes better on day two. This seems to ring true no matter what type of wine juice is used. I am assuming something is precipitating out of the wine after it is uncorked, but don’t understand what or why. Can you shed any light on what is happening here? Name: Bob D.
State: Massachusetts
Hello Bob,
I’m not sure how to answer your question. This is not a normal thing to experience, and the fact that you are experiencing it with all homemade wines tells me that there may be some fundamental flaw going on in the wine making process.
If you could describe the odor more clearly and specifically we might be able to hone in on it a little better, but at this point all I can do is try to speculate. Things that come to mind are:
- Squeezing a wet cork over the wine bottle when bottling and allowing the liquid to drip into the wine.
- Too much sulfite such as sodium metabisulfite or Campden tablets being used throughout the wine making process.
- Bottling the wine to soon and trapping off-gases from the wine yeasts’ fermentation.
- Fermenting at too warm of a temperature. 78°F and above can be a problem.
I’m not saying that any of these things are going on. They are only guesses to give you an idea of what types of things to consider. In reality if could be one of a hundred things. Just review what you do and see what you can come up with.
If it turns out you still have no idea, here’s what I would focus on with your next batch. After the fermentation has completed, give the wine plenty of time to clear, more so than with your past batches. Once you get to the point of bottling the wine, degas it thoroughly. This can be done through shaking and agitation, but I have found that the safest, most efficient and most thorough way to degas a wine is to use a degassing/mixing paddle.
A degassing/mixing paddle will not splash the wine. Splashing is something you want to avoid because it saturates oxygen into the wine and promote wine oxidation.
The hope here is to try some simple things first that may have some affect on the aroma of the wine. Time will tell if this is a solution. If you still get the same results, then you will need to move on to something else, such as fermentation temperature, etc.
Best Wishes,
Customer Service at E. C. Kraus
———————————————————————————————————
Ed Kraus is a 3rd generation home brewer/winemaker and has been an owner of E. C. Kraus since 1999. He has been helping individuals make better wine and beer for over 25 years.
———————————————————————————————————
Ed Kraus is a 3rd generation home brewer/winemaker and has been an owner of E. C. Kraus since 1999. He has been helping individuals make better wine and beer for over 25 years.
Winemaking Terms You Should Know
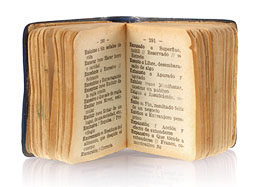
 If you’re new to home winemaking, some of the language used in the wine making books and wine recipes can be very intimidating. But after you’ve done some research and have been practicing for a little while, you’ll wonder why you were ever confused to begin with!
There are many terms to learn in home winemaking, and this post will give you a brief introduction into just a few of those terms to help you get started in home winemaking, or perhaps brush up on some of the terms you may not have seen in a while.
- Acidity: You can measure acidity in grapes, must, or wine, and is an important thing to measure throughout the home winemaking process. If you don’t have enough acid in the must, you’ll have a hard time with fermentation, and the finished wine will have a sort of medicinal flavor. You can use an acid testing kit to determine the acidity level in the must or wine, and if it looks like these levels are too low, you can add tartaric acid, malic acid, or citrus acid in order to achieve the proper acidity level for good fermentation and desirable aromas and flavors.
- Bentonite: Bentonite is a fine clay substance that is used either as a clarifying or stabilizing agent in wine. Basically, it functions to remove excess proteins in the wine, including yeast, as well as removing other fining agents or helping to achieve heat stabilization.
- Stabilization: A wine is considered to be stable or have been stabilized when the fermentation is complete. Stabilization can occur naturally, or through additives like Wine Stabilizer.
- Inoculation: To inoculate a wine is just a fancy way of describing the act of adding active wine yeast to the must or wine. Additionally, you can inoculate a wine with malolactic bacteria if you’re planning on having your wine go through malolactic fermentation.
- Lees: Lees are basically dead wine yeast plus other solids that are formed during the winemaking process. In order to remove this sediment from the wine, you can perform as few or as many rounds of racking as needed. For some wines, leaving the lees in contact with the juice for a period of time may be desirable, as this contact incorporates more complex flavors and aromas into the wine than if they were immediately removed and discarded.
- Oxidation: In very basic terms, oxidation occurs as a reaction between wine and the oxygen in the air. You want some oxidation in your wine in order to help in the development and maturation process, however, too much oxygen exposure can result in a wine that is known as being “oxidized”, which possesses undesirable flavors and aromas, as well as a browning in color.
———————————————————————————————————
Ed Kraus is a 3rd generation home brewer/winemaker and has been an owner of E. C. Kraus since 1999. He has been helping individuals make better wine and beer for over 25 years.
Should I Bottle My Wine? My Carboys Are Popping Corks
 Our wine is still blowing the corks off the carboys. The SG has stopped going down-the wine tastes GREAT-the clarity is great-but, I am a little iffy on going ahead and bottling the wine. Do I need to keep racking our wine to get all the sediment out? What else can we do, to make our wine safe to bottle? These are all really GREAT tasting wines! Some of the wine jugs still have the air-locks in place. Sharyl Name: Sharyl R.
State: KANSAS
—–
Hello Sharyl,
You want to do everything you can to get the hydrometer’s specific gravity reading down to .998 or less. If your wine is currently at a higher hydrometer reading than this, you may want to take a look at The Top 10 Reasons For Fermentation Failure. By going over these reasons you my discover something you can do differently to get the fermentation to complete all the way to an S.G. of .998. If you are already at a reading of .998 or less, then your wine is safe to bottle.
One reason corks can pop off a carboy after the fermentation has completed is because of temperature change. If the wine in the carboy warms up a few degrees it can cause the wine to expand just enough to push an air-tight cork out of the carboy’s opening.
As always, you should rack the wine off the sediment before bottling. You should also add sulfites to the wine just right before bottling. This could either be in the form of: Campden tablets, potassium metabisulfite or sodium metabisulfite.
Also, if the fermentation did not get below a specific gravity reading of .998 and you still insist on bottling it anyway, I would strongly recommend adding potassium sorbate (wine stabilizer). This will help to eliminate the chance of a refermentation while in the wine bottles. Potassium sorbate will not destroy the wine yeast, but it will keep it from multiplying and regenerating the size of its colony.
Hope this information helps you out.
Happy Winemaking,
Ed Kraus
———————————————————————————————————
Ed Kraus is a 3rd generation home brewer/winemaker and has been an owner of E. C. Kraus since 1999. He has been helping individuals make better wine and beer for over 25 years.
———————————————————————————————————
Ed Kraus is a 3rd generation home brewer/winemaker and has been an owner of E. C. Kraus since 1999. He has been helping individuals make better wine and beer for over 25 years.
Bottling Wine Before The Fermentation Is Complete
 Hi Ed,
I made my first batch of orange wine from scratch on March 2nd, 2013. My first SG reading was 1.155 for the must. The wine yeast that I had ordered ended up on back order (of course after I started) I went to a local brew shop to get yeast and they only had beer yeast. I tried Cry Havoc. He told me to give it a week. Nothing happened. On the 9th, I added London Ale yeast because it still hadn’t come. The SG was 1.170. I called the supply place and found out the wine yeast wouldn’t be here until the 14th. I was afraid it was spoiling with out the proper yeast, so they told me to add 1/4 teaspoon of potassium metabisulfite (to 5 gal) so I did. On the 14th I strained the fruit out and added Montrachet yeast. It did work! I racked it into a car boy on the 21st. On April 25 the SG was 1.018. On May 5 it was 1.016. On July 13th it was still 1.016. It is very clear and clingy, and it tastes like port. It’s really good! Is it finished, or is the SG too high?
Name: Lori H.
State: CA
State: CA
Hello Lori,
With the readings you gave, that would mean that your wine now has 22% alcohol. This is beyond the capabilities of the Montrachet wine yeast. With that being said, I do not do doubt that your wine is high in alcohol, but probably closer to 16% to 18%. This is the absolute upward limits of the Montrachet yeast, and is seldom reached with a typical fermentation.
Regardless, you would like to have your final gravity reading be down to .998 or lower. A reading of 1.016 is still quite high for an ending reading. Bottling at this point would give you a strong likelihood of a re-fermentation in the wine bottles. This will cause pressure to build in the bottles and a result of either one of two things: corks popping or wine bottles exploding.
Sometimes all it takes is a little patients. If you see the wine hydrometer reading continuing to go down a little every week, just wait it out. If a couple of weeks go by with no change in the hydrometer reading, then you may want to add some yeast nutrient to the wine must. Whatever you do, do not add more wine yeast or sugar. This will only make matters worse.
If you are determined to bottle your wine at the current reading, then you need to get all the wine yeast out of the wine. Then get the wine stabilized. For this I would take the following steps:
- Rack the wine off of any sediment that currently lies at the bottom.
- Add a standard dose of bentonite as directed on our container.
- Cool the wine down to at least 45°F or cooler for one week, but do not freeze.
- Rack the wine off any sediment, again.
- Allow the wine to warm up. (This could take a day or so for 5 gallons)
- As soon as the wine makes it to room temperature add potassium sorbate at the rate of 1/2 teaspoon per gallon.
- Add 1/16 teaspoon per gallon of wine of either sodium metabisulfite or potassium metabisulfte.
- Bottle right away.
The idea with these steps are to get every last bit of wine yeast out of the wine — even the wine that you can not see with the naked eye. Realize that wine yeast is finer than flour. After that, render any wine yeast you missed as harmless with the stabilizers. Here’s another blog post with more on this subject, How To Stop A Wine Fermentation .
Happy Winemaking,
Ed Kraus
———————————————————————————————————
Ed Kraus is a 3rd generation home brewer/winemaker and has been an owner of E. C. Kraus since 1999. He has been helping individuals make better wine and beer for over 25 years.
———————————————————————————————————
Ed Kraus is a 3rd generation home brewer/winemaker and has been an owner of E. C. Kraus since 1999. He has been helping individuals make better wine and beer for over 25 years.
Crush Grapes Better Than The Big Boys!
 Commercial wineries spend thousands of dollars or more in order to produce high quality wines. If it costs that much for commercial wineries to produce a stellar wine, is there any hope for the home winemaker? Can the home winemaker produce a similar high quality wine? The answer is yes! Of course! Making great wine isn’t just for those that can afford to produce thousands of cases of wine. With the right technique, you can produce some stellar wines that could rival the “big boys”!
What are some ways that the home winemaker can do to produce a wine that rivals in quality to the big commercial wineries? There are many things you can do, however, today we will focus on the crushing stage.
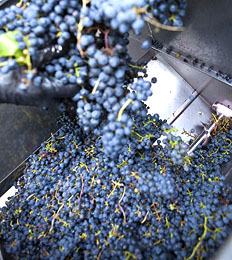
Commercial wineries often use very large and expensive pieces of equipment to crush their grapes. Technology has come a long way and there are a lot of crushers out there that delicately crush the grapes and allow commercial wineries to process large amounts of grapes in a relatively short period of time. You can sometimes rent this equipment, so if you have a custom-crush winery or another winery that rents out their equipment, you might want to check with them about costs.
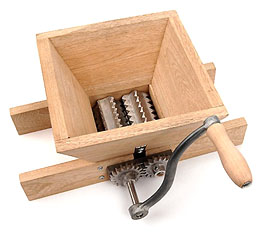
The key to crushing grapes is to be gentle! It doesn’t actually matter what type of equipment you end up using, as long as you are gentle and approach the crushing process in a very delicate manner. Commercial wineries have their equipment set up so that it is gentle enough to remove a certain amount of juice without extracting all the more harsh flavors and aromas by crushing the seeds and stems. A gentle pressing to extract the free flow juice from the grapes will put you on the right track toward making a high-quality wine that is just as delicious as the commercial wines you see at the wine shop.
If you don’t have access to any fancy crushers, what can you do? Well, being a home winemaker, you’re probably better apt to gently crush the grapes than a commercial winery using large mechanized equipment, so don’t give up just yet! You can purchase small-scale crushers and destemmers.
Make sure you thoroughly wash and sterilize the equipment so you don’t introduce any contaminants into your grapes that could ruin your wine. Just be gentle with your crush and you’ll be off on a great start toward making a high quality wine!
———————————————————————————————————
Ed Kraus is a 3rd generation home brewer/winemaker and has been an owner of E. C. Kraus since 1999. He has been helping individuals make better wine and beer for over 25 years.
4 Tips For Adding Flavorings To Your Wine
 We have been purchasing a peach flavored wine. Is there a way to take a white wine and add a peach flavoring to it to replicate a peach wine?Name: Mack T.
State: TN
Hello Mack,
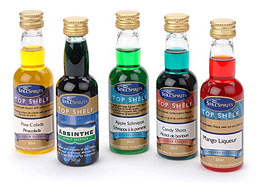
Glad you asked! It just so happens we have liqueur flavorings that many home winemakers have been using with some success. I say some because you do need to play around with it to get it tasting its best — no differently than coming up with a brand-new wine recipe on your own.
These liqueur flavors were originally intended for making different flavored alcoholic mixers… everything from Frangelico/Hazelnut to Grand Marnier/Orange Brandy. But, by adding them to a wine you can enhance it’s flavor. In your case you would play around with the Peach Schnapps liqueur flavoring.
Here’s what I’ve learned over the years of toying with them:
- Don’t go overboard. One bottle to 5 or 6 gallons of wine is plenty. These little bottles have a lot of flavor packed in them. You can experiment with using a second bottle, but be very cautious. I would never add more than two bottles. The result can be a wine with a lightly bitter finish.
- Give the wine some time. Once you have added a bottle, let the wine sit for a day or more before tasting it. These flavorings seem to take time to mingle with wine. With a little time given, you will notice more fruity aroma and cleaner finish.
- Get sweet with your wine. When adding an actual fruit flavor, such as the case with your peach, you will usually need to sweeten up the wine slightly to get the effect you want. Extremely dry wines are not capable of giving strong fruity impressions. Take the dry edge off with some sweetening, and you should experience the fruitiness start to open up. If you are dealing with a 5 or 6 gallons batch, maybe start by adding one or two cups of a sugar syrup mixture and go from there.
- Work with a sample. If you are just not sure about how much flavoring or sweetening to add, you may experiment on a gallon of the wine first. Add measured amounts to the gallon to establish a dosage for the rest of the batch. If you do take the gallon sample too far, you can add it to the rest of the batch and start all over. If you really messed it up, you can dump it and start all over.
Additional Notes:
- The sugar syrup mixture can be made by adding 2 parts sugar and 1 part water in a sauce pan and gently heating until it becomes clear. Allow to cool before adding to the wine.
- Remember: always add potassium sorbate when sweetening a wine to eliminate the chance of a re-fermentation.
Hope this helps you out,
Ed Kraus
———————————————————————————————————
Ed Kraus is a 3rd generation home brewer/winemaker and has been an owner of E. C. Kraus since 1999. He has been helping individuals make better wine and beer for over 25 years.
———————————————————————————————————
Ed Kraus is a 3rd generation home brewer/winemaker and has been an owner of E. C. Kraus since 1999. He has been helping individuals make better wine and beer for over 25 years.