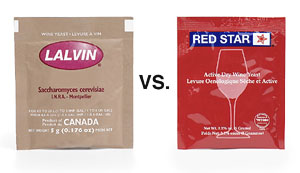
 In your article about making wine from Welches grape juice you listed Red Star Montrachet yeast. I commonly use Lalvin…….at the advice of my local wine shop. You are the expert without the profit margin and I as well as others would likely appreciate your insight on yeast. Are all yeasts equal? What is the best way to select yeast? Thank you.
Name: Blaine
State: Washington
Hello Blaine,
Not all wine yeast are the same. This does not mean that one is better than the other. It simply means each type of wine yeast exerts a slightly different character onto the wine. Whether or not that character is good depends on the type of wine being made and the personal taste of the person drinking the wine.
You mentioned Red Star and Lalvin. These are two different brands of wine yeast, each having several different strains from which to choose. So when you say that your local wine shop recommends Lalvin, it is also just as important to know the particular strain of Lalvin that is being recommended.
We carry both brands, but for the Welch’s grape juice wine we recommend Red Star: Montrachet. This strain is considered an “all-purpose” wine yeast. Its flavor characteristics are fairly well muted and it works very well in many fermenting situations. It has also been consider the go-to strain when fermenting Concord grapes (Welch’s grape juice is made from Concords). This is evidenced by the majority of Concord wine recipes you will find that call for it, both in winemaking books and on the web.
Lalvin wine yeast also has a strain that is similar to the Red Star: Montrachet. The Lalvin: K1V-1116 would work just as well as a substitute in this wine recipe. I would not hesitate to use it if I were making this wine.
If your local wine shop is recommending a different strain of Lalvin than this, then I would suggest that you take a look at the Lalvin wine yeast profile chart on our website to see if you feel their recommendation is suitable to your tastes. As an additional note we also have a profile chart for Red Star wine yeast that may be of interest to you.
I hope this information helps you out. Just realize that there is no one particular right answer when it comes to wine yeast. It’s more of a matter of personal taste.
Happy Winemaking,
Ed Kraus
———————————————————————————————————
Ed Kraus is a 3rd generation home brewer/winemaker and has been an owner of E. C. Kraus since 1999. He has been helping individuals make better wine and beer for over 25 years.
Category Archives: Q&A
There's White Scum On My Wine. What Should I Do?
 I bought table grapes at a farmer’s market, very sweet, reddish grapes for my wine. I had success with the fermentation and put it in a carboy. It made 4 gallons and I put it in a 5-gallon carboy with an air lock, thinking the CO2 would force the oxygen out. It continued fermenting and I assume no oxygen got in.
Ten months later there is a thin, white-ish particulate on surface. When I moved the carboy to a tabletop, the particulate began to filter down to the bottom very slowly, pretty much dissolving as it sank. Some of the particulate remained on the surface undisturbed.
What should I do? Should I stir the carboy a bit to make the ALL the particulate sink? Should I bottle it now?
Name: Chris
State: South Carolina
—–
Hello Chris,
For whatever reason, it sounds like a thin layer of bacteria has formed on your wine. Winemakers refer to this as flowers or flowers of wine. More specifically, it is known as mycoderma bacteria. It slowly degrades the wine and ferments some of the alcohol off the wine. It’s similar to a wine turning to vinegar, but not quite as severe.
The biggest question at this point is: how far along is this infection? Does the wine still taste fine? If not, there is not much you can do to reverse the effects. But, if the wine still taste okay, there is a lot you can do to save it!
First of all, since the wine is done fermenting, rack it into four 1 gallon glass jugs. This will eliminate any air-space from the wine. Point the end of the siphon hose at the center of the wine — away from both the bottom and the top. This will help to reduce the collection of the particles into your gallon jugs. If some make it, so be it. Just do the best you can.
Once in the glass gallon jugs, you will need to add sulfites to the wine. This could be either: Campden tablets, potassium metabisulfite or sodium metabisulfite. Your choice. Add a single dose as directed on the package in which the sulfite came.
The sulfites will do two important things for the wine:
- It will easily destroy the bacteria that is causing this issue and save your wine from getting any worse.
- It will help to drive out any off-odors you may have noticed in the wine. This would be from volatile gases produced by the bacteria.
After you add the sulfites, attach air locks to each of the jugs. We have air-lock adapter screw-caps that work well for this purpose. Let the wine sit for a few weeks or until you feel that any particles have had time to completely settled to the bottom. Rack the wine again and add another dose of sulfites and bottle.
The number one reason for this occurring is having air in the head-space of the carboy. If the air-lock was taken off, even once, or the air-lock went dry for even just a few hours, this was most likely the cause. If you are sure the carboy had an absolute seal the entire time, than the second most common reason is not treating the wine must with sulfites before fermentation.
Best Wishes,
Ed Kraus
———————————————————————————————————
Ed Kraus is a 3rd generation home brewer/winemaker and has been an owner of E. C. Kraus since 1999. He has been helping individuals make better wine and beer for over 25 years.
Can I Add Boiling Water To Winemaking Ingredients?
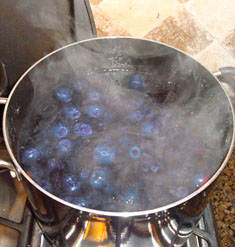 I’m making your Blueberry wine and my question is this. Can I add boiling water to the winemaking ingredients or should I wait for the water to cool first? Thank you
Name: Bill D.
State: Maine
Hello Bill,
The only winemaking ingredients I can think of that should ever touch boiling or hot water are: botanicals and sugar.
- Botanicals: Whenever making wines from herb, flowers, roots, it is normal to blanch them with boiling water. This creates kind of a tea of sorts before going on to the process of actually making the wine.
- Sugar: When adding sugar to a wine must, it is very helpful to pre-dissolve the sugar in hot water, first. By doing this you can be sure the sugar is dissolved. This also makes it much easier to mix the sugar evenly throughout the must.
In both of these instances it is critical that the mix be allowed to cool down to 80°F. or less before continuing on with adding other winemaking ingredients.
Here are how some common wine ingredients affected by hot or boiling water:
- Wine Yeast: Some of the yeast cells will start to die at about 90°F. A lot of the yeast cells will die at around 120°F.
- Yeast Nutrient: also known as diammonium phosphate. Depending on the pH of the wine, when heated up to around 150°F or higher, the yeast nutrient will begin to partially decompose into ammonia.
- Pectic Enzyme: starting at about 125°F will start to denature, which simply means become permanently inactive or ineffective.
- Wine Tannin: is unable to dissolve and saturate into the wine must at wamer temperatures. Instead, it will drop out as a sediment.
- Sulfites: this includes winemaking ingredients such as: Campden tablets, sodium metabisulfite and potassium metabisulfite. Liquids that are heated are not able to hold sulfites for any length of time. This means if you added a sulfite while the liquid was hot, you will need to add it again after the liquid as cooled.
- Fruit Acids: this includes acid blend, citric acid, tartaric acid and malic acid. These are the only common wine making ingredients that are not affected by hot or boiling water.
As an additional note, if you are blanching your blueberries with boiling water, I would not recommend this. This will tend to separate the tannins and color out of the fruit. This is not something you want to happen at this stage. The best way to treat the fruit is to lightly crush them or chop them. Once you have all the wine making ingredients mixed together, treat the entire wine must with one of the sulfites mentioned earlier.
Bill, you can find more information about the basic winemaking process on our website. This may help you out, as well.
Happy Winemaking,
Ed Kraus
———————————————————————————————————
Ed Kraus is a 3rd generation home brewer/winemaker and has been an owner of E. C. Kraus since 1999. He has been helping individuals make better wine and beer for over 25 years.
Does My Fermentation Have Too Much Sugar?
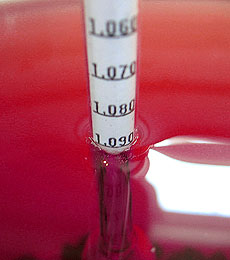 I have been making wine for years and never had any trouble, but I tried a new wine recipe and made a six gallon batch. I’m afraid the specific gravity of the must was too high-1.1200 + and it has stalled out at about 1.100–too sweet. We will not drink wine that sweet. Is there any way I can salvage the 6 gallons by blending or trying to restart fermentation?
Name: John S.
State: Kansas
Hello John,
Your starting Specific Gravity on your wine hydrometer is a little high. We normally don’t recommend starting a fermentation any higher than 1.100. At an S.G. of 1.120 the potential alcohol for the fermentation is right at 15%. That’s just a little too high to shoot for and not have a potential for a stuck fermentation. The higher sugar concentration starts to act as a preservative, inhibiting the wine yeast activity.
Having said this, there is something that is a little puzzling. You say that the fermentation started and moved 20 points down to a Specific Gravity of 1.100. If the sugar level of the wine must was the issue at hand, typically the fermentation would not start at all. The fact that it did start tells me that the sugar concentration of the must is not what’s causing the stuck fermentation. Or at least, it is not the main contributing factor.
Now the obvious question is: If it’s not the sugar level that’s holding the fermentation up, what is?
This could be one of an array of issues. It could also be a combination of two or more issues. While there may be something else causing the stuck fermentation, the higher sugar concentration level could be a contributing factor. It could be the jab to the upper-cut.
We could go through all the reasons why here, but that would not be very productive, and it would require me to go through a back-and-forth of questions and answers with you to get to the bottom of things. But here’s what we can do. On our website, we have put together The Top 10 Reasons For Fermentation Failure. This is a list of what we have discovered to be the top reasons why a wine must is not fermenting.
This list has been compiled through many years of experience with helping home winemakers through their more challenging moments. It is my feeling that this list covers well over 95% of the issues we run across. By going through them I’m fairly confident that we can solve your stuck fermentation riddle.
Going back to your sugar concentration, I wanted to bring up something real quick. I don’ t believe it to be the primary problem, currently, but as the fermentation continues and the alcohol level rises, it could indirectly cause a problem with the fermentation being able to finish completely. Just as too much sugar can interfere with a fermentation, so to can too much alcohol.
Happy Winemaking,
Ed Kraus
———————————————————————————————————
Ed Kraus is a 3rd generation home brewer/winemaker and has been an owner of E. C. Kraus since 1999. He has been helping individuals make better wine and beer for over 25 years.
Problems With Siphoning A Gassy Wine
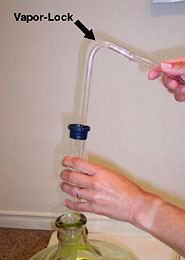 When I do my first racking, there is a lot of carbonation in the wine, and it does not siphon well at all. How should I handle this?
Name: Bryan P.
State: GA
Hello Bryan,
Yes, this can be quite a problem. For the readers out there who don’ t understand what Bryan is talking about, let me explain a little bit.
During a fermentation, CO2 gas is created by the wine yeast. This is the same stuff that creates the fizzy in beer and soda pop. This CO2 gas is saturated into the wine must.
When Bryan is racking [siphoning] his wine must from his primary fermenter to his secondary fermenter, the gas starts to release from the liquid within the siphon hose. This is because the liquid is being agitated, much like shaking a bottle of soda pop. The gas collects and rises to the highest point of the siphon hose and forms a gas pocket, which eventually breaks off the siphon and stops the flow of the liquid. This is known as a vapor-lock.
One thing I have done in the past, is raise the exit-end of the siphon hose as high as I can to get the gas pocket to rise and release out the end of the hose and then start the siphon again, but this is a very annoying process and may be required more than once during a 5 gallon racking. It is also very hard to do if you are employing a curved racking cane in the siphon process. The rigid curve in the racking cane requires you to turn the cane completely upside-down to get the gas to release.
Siphoning without a racking cane is no good either. This is because a loose hose in the bottom of a fermenter will do nothing but sabotage your racking efforts by stirring up the sediment that has collected at the bottom. The rigid tube of the racking cane allows you to keep the end of the siphon under control a not sloshing all around, sort of like a wand.
The only way I’ve been able to get completely around the vapor-lock issue is to use fermenters that have spigots at the bottom. You attach the siphon hose directly onto the spigot . Then you can depend completely on gravity to start the flow. By siphoning in this way there is no opportunity for a CO2 gas pocket to develop. There is no rising curve coming up and out of the top of the fermenter as with a regular siphon.
All the primary fermenters we offer have spigots at the bottom that will accept a 3/8″ I.D. vinyl siphon hose. The spigots are strategically placed away from the bottom so that sediment will not be drawn. As you get towards the end of the siphon, gently tilt the fermenter towards the faucet-side to round up the last bit of liquid.
Last year we also introduced secondary fermenters that have the same faucet at the bottom. They are plastic carboys of varying sizes: 3, 5 and 6 gallon. They are all made out of the same exact plastic that is used to 2 liter soda pop bottles, only thicker.
By using these types of fermenters you can avoid the vapor-lock issue all together. Also, you are not sticking anything into the fermenter that can potentially stir up the sediment. The sediment stays at the bottom quiet and undisturbed through the entire racking.
Happy Winemaking,
Ed Kraus
———————————————————————————————————
Ed Kraus is a 3rd generation home brewer/winemaker and has been an owner of E. C. Kraus since 1999. He has been helping individuals make better wine and beer for over 25 years.
My Wine Formed Sediment After I Bottled It!
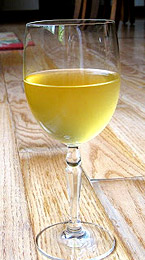 I racked and filtered my Pinot Grigio and it was crystal clear when I bottled it. Now, some bottles (but not all) have a white almost milky sediment in the bottom of the bottles and it has a slightly “dirty sock” aftertaste. I’ve been told it was a protein and I might be able to remove it with Sparkolloid but have not tried it yet. Any suggestions?
Name: Neal C.
State: CA
Hello Neal,
Normally, when someone tells me they have a milky/dusty/silty substance at the bottom of their wine bottles, I tell them that they either bottled their wine too soon — before everything had a chance to clear out completely — or that the wine started slightly fermenting again while in the bottle.
But something you have explained has changed this whole scenario: that is the fact that you have filtered the wine. I’m assuming that when you say filtered, you mean that you put the wine through an actual wine filter and didn’t just strain it through some cheesecloth or similar.
Filtering the wine would have taken out anything that could have caused a visible sediment later, so having the sediment caused by particles that were still suspended in the wine at bottling is out of the question. Filtering would have also taken out a huge chunk of the yeast cells that may have remained in the wine, so a re-fermentation is highly unlikely, as well.
What this means is that what you are seeing is something that was created after the wine was bottled. It wasn’t from microscopic particles still in the wine. It wasn’t from a re-growth of yeast cells. It was from something that was precipitated out of the wine while in the wine bottle.
Precipitation occurs when there is more of a particular compound in a liquid than the liquid can hold. Instead of staying dissolved or saturated within the liquid, it releases as a solid substance.
By far, the two most common substances to precipitate from a wine are tartaric acid and tannin. Tartaric acid will precipitate as little crystals, about the size of popcorn salt or smaller. It may look white, but is more likely to be beige in color. Tannin precipitates as a powdery substance, about the consistency of flour. It can be white in color, but it is more likely to be beige, or in the case of a red wine, rose colored.
Based on your description I would say that you have a tannin precipitation problem. I would also like to point out that the person that said it was protein was correct. That’s because tannin is a protein. And like that person said, I would also recommend putting the wine back into a common vessel and treating it with Sparkolloid, with only one difference. I would also treat the wine with Bentonite, beforehand. Both are fining agents.
One other thing I would recommend is that after pouring the bottles of wine back into a fermenter you should immediately treat the wine with sulfites such as sodium metabisulfite. This will drive the oxygen out of the wine that was just introduced through the splashing. Once the wine has been successfully treated with the Bentonite and then the Sparkolloid, you will want to treat the wine again with sulfites and bottle right away.
Finally, you may want to take a look at the following article that is listed on our website: Maintaining Temperature Stability In Your Wine. This article goes over the precipitation issue in much great detail than I can here: how to determine it; how to prevent it.
Happy Winemaking,
Ed Kraus
———————————————————————————————————
Ed Kraus is a 3rd generation home brewer/winemaker and has been an owner of E. C. Kraus since 1999. He has been helping individuals make better wine and beer for over 25 years.
There's A Plastic Taste And Smell In My Wine
 Hi, I was told by a local winemaker, that if you add vanilla bean to a racking of chardonnay, it gives it a subtle nice flavor. Well, we put just half a vanilla bean in and racked it for a month. We just racked again and took the vanilla bean out. The wine has a weird plastic-like taste and smell to it that is rather unpleasant. We are so disappointed because we were so looking forward to this batch of chardonnay! Is this smell and taste because of the vanilla bean? Did we leave it in too long? And, how do we salvage this batch of chardonnay? Help!
Name: Mary A.
State: MA
Hello Mary,
Adding vanilla bean to a wine recipe is one of those tricks that many home winemakers try out from time to time. I have not used vanilla beans, myself, but I have tasted wines with their addition and observed no negative effects — certainly, nothing like you are describing. I’ve also had lots of other winemakers describe to me their use with varying degrees of success, but I’ve never had someone come to me with a bad experience from its use. So, I think it is highly unlikely that the vanilla bean is the root of your problems.
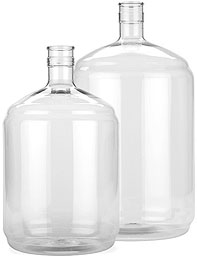
By far the most common reason for having a plastic taste or smell in your wine is using fermenters that are not made of a food-grade plastic. It is very important to verify that any plastic vessel that comes in long-term contact with the wine be food-grade. Plastics that are deemed food-grade are made from a plastic that is more pure, with no dyes or other additional chemicals that can leach out into the wine. They are also mostly made from non-recycled plastic.
Any container you that get from a food supplier or that is being sold for the purpose of holding consumables, should work just fine. Stay away from containers that you find at the hardware store and other such places. The only exception to this is if the container is being sold specifically for food use or actually says “food-grade” on it.
One common misconception is that you can tell if a plastic container is food-grade by the recycling symbol that is stamped onto the container. The recycling symbol is the arrowed triangle that’s seen on plastic containers. It will have a number in the center of the triangle ranging from 1 through 7. These numbers denote the type or class of plastic from which the container is made. These symbols are used so like-plastics can be easily sorted together for recycling.
But one thing these symbols do not do is tell you if the plastic is food-grade or not. While only certain types of plastics are capable of being food-grade for liquids (numbers 1, 2, 4 and 5), not all containers made from those plastics are food-grade. What makes them food-grade is how pure of plastic is being used. Is it made mostly from recycled plastic or not? Does it have dyes and other chemicals that can release from the plastic.
Mary, hopefully this is not what’s going on with your wine, but based on your description, that’s what it sounds like. I know of no effective way to reverse these types of defects. You may get some marginal benefit from fining the wine with gelatin. You may also notice a reduction of the odor with the addition of a sulfite such as Campden tablets or potassium metabisulfite. Time may also reduce these effects. But beyond this there is not much else you can do.
Best Wishes,
Ed Kraus
———————————————————————————————————
Ed Kraus is a 3rd generation home brewer/winemaker and has been an owner of E. C. Kraus since 1999. He has been helping individuals make better wine and beer for over 25 years.
Keeping Your Winemaking Area Sanitary
 There appears to be plenty of information on equipment and supplies, cleaning/sanitation/sterilization, yet I”m having a difficult time of locating a protocol specifically related to maintaining a production area for a home winemaker (counters, floor, fixtures, sinks, drains, walls, etc.). I currently clean up splashes as they occur and monthly I do a fairly thorough wipe down of all surfaces with a B-brite dilution and spray with a kms [potassium metabisulfite]/citric solution. Hope you can provide some guidance.
Name: Roy R.
State: North Carolina
Hello Roy,
You are absolutely correct. There is not much information out there in regards to sanitizing a winemaking area. You can find some mention of it in several winemaking books, but not much more than a paragraph.
I have to tell you that what you are doing is pretty much what I do, however there are some differences in how I approach it.
- The first main difference is that I do not clean on a monthly schedule. I clean and sanitize right before I plan to use the area. These mean I sanitize anytime I plan on exposing the wine or wine must.
- The second difference is that I do not use B-Brite as a wipe-down solution. This product works well for sanitizing wine bottles, fermenters, stirring paddles, etc, but I have found Five Star: Star San to be better for wiping-down counters. It has a slight foaming action to it that helps get into corners an crevasse. After this, I spray everything down with a solution of sodium metabisulfite and citric acid, just as you do.
- The last difference is, that since I do my winemaking in a basement area that has exposed floor joists, etc., I feel it is necessary to spray the joist and sub-flooring that is immediately over the winemaking area. I do not do this every time, but only on occasion. I use the same sodium metabisulfite/citric acid mix that I use to spray the counter, faucets, etc.
One additional thing I do is anytime I’m checking on the wine, or just down there, I will spray the sulfite solution on to the air locks and around the neck area of any carboys.
Having said all of this, one thing I would like to make clear is that most of the spoiled wines we run across do not become infected because of an unsanitary work area, but rather, because of unsanitary wine making equipment. So while it is always good to keep your winemaking area sanitary, it is critical that you keep your wine making equipment sterile.
Happy Winemaking,
Ed Kraus
———————————————————————————————————
Ed Kraus is a 3rd generation home brewer/winemaker and has been an owner of E. C. Kraus since 1999. He has been helping individuals make better wine and beer for over 25 years.
Can You Have Head-Space In Your Secondary Fermenters?
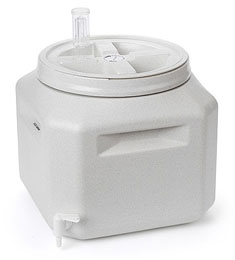 I have purchased 2 of your 9 gallon Tuff-Tanks and planned to use as both the primary and secondary fermenters. I read your article re: vinegar issues and you indicated air exposure can be an issue. Is using the 9 gallon tuff tank an issue for secondary fermentation? I find the tuff tanks an easy apparatus to use for transferring and racking as gravity flow works well and sediment separation is manageable. Should I use a carboy vs the tuff tank?
Name: Al
State: Maine
Hello Al,
Thanks for the great question. There always seems to be some confusion surrounding primary fermenters, secondary fermenters and head-space, so it’s great to have this opportunity to clear it up a little.
The important thing to understand is that air-exposure can only become an issue after the fermentation has stopped. During the fermentation there is plenty of CO2 gas coming off the liquid to keep the wine must protected from any foreign, airborne contaminants and to keep the air from getting to the wine and breathing life into the few bacterial cells that may be in it already.
The CO2 gas coming off the fermentation is heavier than air. This means that if the Tuff-Tank is left undisturbed, the CO2 gas will have to be force out with more gas. It will not simply float away on its own. This is an important point. This means that as long as you leave the lid and air-lock on the Tuff-Tank, there is no way for air to get into its head-space. This is true for any primary fermenter. There is nothing but CO2 gas in the head-space. It is only after the fermentation has ceased and you take the lid or air-lock off, that the air-exposure will actually have an opportunity to begin.
Typically, having air in with the wine for a few days is not going to matter that much. And the fact that you should be adding sulfites to the wine at this point, such as Campden tablets or sodium metabisulfite, also helps to protect the wine from any type of spoilage. The the sulfite gas will form a protective layer in the fermenter as well. So there is no great urgency in any of this, however once you take the lid off the fermenter and determine that the fermentation is complete you will want to make plans to get the wine clear and bottle it. If you can not get it bottled in a matter of days, then you should consider putting the wine in a carboy or something similar that will not allow for head-space until you do have time.
I hope this clears if up some. In short, as long as you have CO2 gas from the fermentation in your Tuff-Tanks there is nothing to be concerned about. It is only after you the fermentation has completed and you have taken the lid or air-lock that you have to take some form of action: either bottling the wine in a few days or move the wine to a carboy or similar.
Happy Winemaking,
Ed Kraus
———————————————————————————————————
Ed Kraus is a 3rd generation home brewer/winemaker and has been an owner of E. C. Kraus since 1999. He has been helping individuals make better wine and beer for over 25 years.
Can You Help Me Clear My Red Wine?
 My red wines have been coming out great, but are not clear even after many rackings. Is there anything to add to reds wines to prevent this?
Name: Bruce K.
State: CA
Hello Bruce,
Anytime a wine is not clearing the first thing you have to ask yourself is: “has the wine completed its fermentation?” The number one reason a wine does not to clear is because the fermentation is still continuing very slowly. The slightest amount of fermentation can cause a significant amount of cloudiness in a wine.
For this reason it is important that you check your wine with a hydrometer to verify that the fermentation has finished. You should expect to find a reading of .998 or less on the Specific Gravity scale. If your reading is higher than this, then your problem is getting the fermentation to finish, not clearing the wine. Going over the article, Top 10 Reasons For Fermentation Failure should help you in this regard.
If your fermentation is complete, then yes, there are some things you can do to help speed the clearing along. Winemakers use what’s called fining agents to help clear a wine. There are several different types of fining agents. Each will clear a wine in its own way. Often, more than one type of fining agent will be used in the same wine.
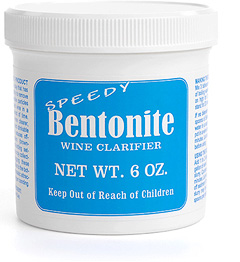
If it seems that the cloudiness is not minor, but significant, then you’ll want to start off by adding a dose of Bentonite. We offer it as Speedy Bentonite and it comes complete with its own directions. Bentonite is good for clearing out yeast cells and other proteins that are causing a significant haze.
What bentonite is not good at is giving a brilliant polish to the wine. For this you will want to follow up with either Isinglass or Kitosol 40. Each of these are good at giving your wine a illuminating polish, but they should not be used until the bentonite has had ample time to remove the bulk of the cloudiness, first. This can happen as quickly as 24 hours, but can take up to 3 days. After each of these treatments you will want to rack the wine off the resulting sediment.
Happy Winemaking,
Ed Kraus
———————————————————————————————————
Ed Kraus is a 3rd generation home brewer/winemaker and has been an owner of E. C. Kraus since 1999. He has been helping individuals make better wine and beer for over 25 years.
