Now Offering: More Malted Brewing Grains

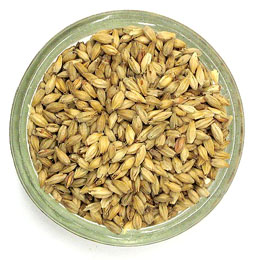
bowl of malted barleyAdventures in Homebrewing is proud to announce an expanded offering of malted brewing grains. We now carry nearly 100 different malts and specialty grains to add to your homebrewing arsenal. We have grain products from some of the best malt producers the world has to offer, including Briess, Weyermann, Crisp, and more. Want to brew an authentic German, Belgian, or English ale? Now you can build your beer recipe around malt from the region where your favorite beer is traditionally brewed.

Adventures in Homebrewing offers malted brewing grains from the following malt houses:

  • Briess – Briess is the largest maltster in America. We carry a variety of Briess 6-row and 2-row base malts, a complete range of Briess caramel malts, and several specialty malts, including chocolate malt, Vienna malt, smoked malt, and Carapils, just to name a few.
  • Dingeman’s – Mouterij Dingeman’s is a Belgian maltster producing some of the specialty malts you’ll need for your favorite Belgian beer recipes. Use Belgian biscuit malt, special B malt, and aromatic malt to bring authenticity to your Belgian beer recipes, or add them to other recipes for a touch of complexity.
  • Gambrinus – Canadian maltster Gambrinus is famous for its honey malt, also known as “Brumalt”. As the name implies, honey malt can lend a pleasing sweetness to just about any beer. It worked great in my Flower Power IPA!
  • Weyermann – Germany’s Weyermann is one of the most well-respected maltsters in the world. We now carry 31 malts from Weyermann, from their Bohemian pilsner and pale wheat, to a chocolate rye malt and Carafa Type I, Type II and Type III. Weyermann malts can be used in any style of beer, but will really excel when recreating the traditional beers of Germany.

Our expanded of malted and unmalted grains now give the homebrewer even more control and versatility over the beers they make. Whether you brew all-grain or extract, these grains can help bring a range of character and flavor to your homemade beer.
What are some of your favorite malts for homebrewing?
———————————————————————-
David Ackley is a beer writer, homebrewer, and self-described “craft beer crusader.” He holds a General Certificate in Brewing from the Institute of Brewing and Distilling and is founder of the Local Beer Blog.

Basic Water Management for Extract Brewing: Part 3

Guest blogger Matt Chrispen shares the impact that various minerals can have on different styles of beer. To get the whole story start at Part 1 of this 3 part series.water splashed on bottle of beer
There is no hard and fast rule in the application of brewing minerals. Every person’s tastes differ. As such, we are exploring the art of “seasoning” the finished beer, like adding a little salt and pepper to your favorite dish. A little may be good, but too much could ruin the batch.
Below are some starting points for 5 gallons of extract beer. Some minerals are already concentrated in the malt extract, so we recommend using reverse osmosis (RO) or distilled (DI) water. When using tap or spring water, reduce the recommendations to taste. Fully dissolve mineral salts in water before the extract is added to boil.
Mineral Recommendations for Different Beer Styles

  • Lagers are historically brewed with soft water.
    • No mineral additions recommended.
  • Malty, Roasty Ales include browns, porters and stouts where malt flavors and sweetness are expected.
    • Add ½ tsp (~2 grams) of calcium chloride.
  • Hoppy Ales include most American pale ales, hoppy ambers, and IPAs.
    • Add ½ tsp (2 grams) to 1 tsp (4 grams) gypsum.
  • Mineral-Rich Ales include English bitters or Burton ales.

Personalizing Additions:
To determine how much mineral(s) might influence your beer, try the procedure below.

  1. Fill a clean 1-liter bottle or flask with RO water, and dissolving 2 grams of gypsum or calcium chloride. Shake to dissolve completely, creating a 2000 ppm solution of the salt.
  2. Pick a homebrew and split into four 3-ounce (89 ml) servings. Use gypsum for hoppy or calcium chloride for malty beers.
  3. Using a calibrated pipette or eyedropper, add 1 milliliter of solution into the first serving, 2 into the second, and so forth. Start with the first serving and work toward the fourth, taking notes.
  4. Decide which serving you prefer. Mark that down. If you preferred serving #4, open another beer and continue the process.
  5. Take the serving number (with equivalent number of additions) and do the math:
    1. The 1 milliliter dose equals 2 milligrams of the salt
    2. Multiply the preferred dose by 2, yielding the milligrams of salt added
    3. There are roughly 43 three-ounce samples in 5 gallons
    4. Multiply the milligrams dosed by 43, yielding milligrams needed for 5 gallons, and divide by 1000 to yield grams. 1 tsp = roughly 2 grams of gypsum or calcium chloride
    5. Use this amount of mineral salt in your next brew of that recipe!

What changes to you typically make to your brewing water?
———————————————————————-
Series: Part 1 | Part 2 | Part 3
———————————————————————-
Matt Chrispen is a passionate, experienced home brewer, craft beer fanatic, and collector of brewing gear. He also maintains a blog on advanced brewing topics at Accidentalis.com.
———————————————————————-
Sources:
A Brewing Water Chemistry Primer, Homebrewtalk.com, AJ DeLange
Water Treatment for Extract Brewers, Beerandwinejournal.com, C Colby
Water Adjustment in Highly Hopped Beers, Homebrewtalk.com, M Brungard
Calibration Series: Personalized Sulfate and Chloride in Beer, Accidentalis.com, M Chrispen
Bru’n Water, Water Knowledge, M Brungard
How to Brew, John Palmer

Basic Water Management for Extract Brewing: Part 2

water splashed on bottle of beerGuest blogger Matt Chrispen shares some tips for adjusting water chemistry when brewing with partial mash recipes. This is part 2 of a 3 part series. To get the whole story start with Part 1.

Dry Malt Extract (DME) and Liquid Malt Extract (LME) products contain minerals from the mashing process. These minerals provide flavor nuances to the beer and the specific concentrations are proprietary to the maltster, but they directly influence the flavor and mouthfeel of recipe. Extract brewers can further enhance their recipes with additional minerals.
Introduction to Minerals for Brewing
Since the extract brewer is not mashing grain, we can focus solely on flavor components. Ion concentrations of sulfate, chloride, magnesium, and sodium influence perceived flavors and mouthfeel.

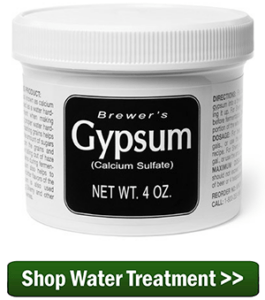
  • Gypsum or Calcium Sulfate increases calcium and sulfate ions levels. Sulfates generally enhance dryness and increase the sharpness and bitterness of hops.
  • Calcium Chloride increases calcium and chloride ion levels. Chlorides tend to round out and enrich mouthfeel and enhance malt characteristics.
  • Sea/Kosher Salts or Sodium Chloride (without iodine) increases sodium and chloride ions, and like calcium chloride can enhance sweeter malt forward beers. Not recommended for an extract brewer, except in very traditionally salty styles, such as a gose.
  • Magnesium Sulfate increases both magnesium and sulfate ions. Malt extract should contain sufficient magnesium to support healthy fermentation. Only in specific cases is magnesium sulfate useful to an extract brewer.

Water choice is important. Hard water (already rich in minerals) will add minerals into the beer in unknown amounts in addition to the extract’s contribution. By using reverse osmosis (RO) or distilled water, we can exert more control without risking off-flavors, providing a clean starting point for mineral additions.
To keep things simple, we can rely on gypsum and calcium chloride for “seasoning” our homebrew, and the resulting sulfate, chloride, and calcium ion contributions. As mentioned above:

  • Shop Water TreatmentSulfates enhance perceived dryness. Increases perceived hop bitterness and sharpness. Pale Ales and IPAs often have elevated levels of sulfates, but large amounts can be off putting.
  • Chlorides enrich perceived mouth feel and malt flavors. Many darker, malt-driven beers benefit from a small amount of chloride.
  • Calcium is beneficial in lowering the boil pH and precipitating proteins (hot and cold break). While there is no direct flavor impact, the resulting wort is clearer and more stable.

These flavors are recipe driven, and should be used appropriately and in moderation. A hoppy pale ale may need a little gypsum where a malty porter might benefit from calcium chloride.
In Part 3, we look specifically at applying these minerals to general beer styles.
———————————————————————-
Series: Part 1 | Part 2 | Part 3
———————————————————————-
Matt Chrispen is a passionate, experienced home brewer, craft beer fanatic, and collector of brewing gear. He also maintains a blog on advanced brewing topics at Accidentalis.com.

Basic Water Management for Extract Brewing: Part 1

water for brewing beerMatt Chrispen, a blogger at Accidentalis.com, shares some of his advice about water management for extract brewing. The first step: choosing the right water source.
There is a myth that good tasting water makes good tasting beer… this is just not true. With many good water sources, you need to decide which will make the best beer. Water chemistry has less impact on the extract brewer, but starting with the right water will help you have the best chance at a great beer.
Tap Water: Tap water contains either chlorine or chloramines to deliver safe water to your home. These chemicals must be removed or will cause off-flavors to form in the beer that taste strongly of chemical plastics, vinyl, or iodine. Filtering slowly with active charcoal, letting the water stand, or boiling the water will remove chlorine, but treatment with potassium metabisulfite or Campden tablets will fully eliminate both chemicals. Often it is best to both filter and use Campden tablets. Tap water quality can also fluctuate due to seasonal issues.

  • Using Campden Tablets: For brewing, use ¼ tablet per 5 gallons of brewing liquor. Crush the tablet and vigorously stir it into the bucket of water. The reaction is fairly immediate, and you may smell a bit of sulfur.

If you have a water softener, use the water tap before the softener to avoid excessive levels of sodium or potassium in the water.
Well Water: Professional tests should be run to ensure that organic, metallic, or chemical contamination is not present such as iron or fertilizer residue. If the water is safe, then evaluate its hardness. Low to moderately hard water, low in alkalinity is preferred for brewing.
Store Bought Spring Water: Most bottled spring waters are filtered (the treatment varies) and have re-mineralized the water ensuring a good taste. You can also purchase these in convenient 5-gallon carboys. The mineral concentration will be added to the minerals in the extract. However, the consistency of bottled spring water is preferable to seasonable quality changes that often affect tap water.
Shop Water TreatmentTap, well and Spring Waters contain dissolved minerals that impart flavor and mouth feel to your beer. Be careful adding minerals, which might, in concert with minerals already in the extract, create strong mineral or metallic flavors. Experiment for the best results.
Reverse Osmosis (RO), De-Ionized (DI) and Distilled Water: Some stores offer filtered water products in bulk. In addition, home RO or RO/DI filters have become quite common and inexpensive. Distilled water is also a good choice. These water sources are really ideal for extract brewing, and offer the best basis for adding minerals as part of your beer recipe.
Water is the fundamental ingredient (up to 97%) in beer. Your tap water may make good beer, but try an alternative source and see if things improve. Choosing the best quality water will ensure your extract recipes have the best chance of becoming great beers!
In Part Two, we will explore the use of common mineral additions to enhance and tweak your extract and partial mash recipes.
———————————————————————-
Series: Part 1 | Part 2 | Part 3
———————————————————————-
Matt Chrispen is a passionate, experienced home brewer, craft beer fanatic, and collector of brewing gear. He also maintains a blog on advanced brewing topics at Accidentalis.com.

Why is Sugar Necessary in My Home Brew Process?

Quick – name something intriguing and sweet that also produces beer and liquor. No, not your favorite bartender – it’s sugar. This complex ingredient is not only a vital component in the creation of home brew products, it’s also a large part of the taste profile that gives various liquids their drinkable personalities. While some sugars are simply added during the initial brewing process, others contribute simply by existing in ingredients such as fruits for wines. Sugar isn’t simply a one-note contributor, either; while the overall level of sugar used in a home brew needs to be monitored, blends of different types of sugars can produce a full-bodied and delicious spirit.
Feeding The Yeast
For something so small, yeast packs a big punch. This one-celled organism is responsible for the fermentation, otherwise known as breaking down sugars to turn them into alcohol, process of home brewing. According to popular how-to site HowStuffWorks, “yeasts obtain food from fructose, glucose, and other monosaccharaides (simple sugars), which are found in most fruits.” This means that without the addition of some sort of sugar in sufficient quantities during the brewing process, you’ll end up with an old bottle of yeast-filled grape juice instead of a smooth wine. Feeding yeast sugar also produces carbonation, a necessary component to satisfying home-brewed beers.
Adjusting To Your Taste
When it comes to sugar, these sweet powerhouses aren’t just workhorses. Beyond the fermentation process, sugar also makes a finished spirit palatable, helping to balance stronger flavors like hops or slightly bitter flavors like herbal additives. Sugar can also be a final flourish during bottling, as well. A recent article from the San Antonio Current follows home brewer Jerry Lockey as he adds extra sugar prior to siphoning his latest project into bottles. In the article, Lockey explains to the Current that this last dash of sugar helps further ferment the new beer as it ages.
Sugar comes in several different varieties for home brewing projects, such as corn sugar and light and dark candied sugar for brewing various types of ales. Stumped for what sugars will work best with your brew? With a full range of articles, advice, and helpful customer service agents, the Adventures in Homebrewing website has all the “sweet” knowledge you’ll need to bottle a sensational spirit. Once you find the right sugars for your project, ferment something fantastic and you’ll discover just how impressive a single home brewing ingredient can be.

What Should I Know About Home Brewing with Raw Honey?

When making alcoholic beverages using honey, mead is generally the go-to by-product. In fact, you can find a wide variety of meads on the market that blend honey with inventive ingredients and flavor profiles into their drink. However, that’s far from the end of the line when it comes to brewing and fermenting with honey. Whether you homebrew wine, beer, or cider, you can incorporate honey for a fun, exciting twist in your brew.
Honey is highly fermentable, which makes it a great ingredient in alcoholic beverages. When you’re using raw honey though, you need to be mindful of a few variables and considerations that could affect your end product. Here’s a quick guide to help you make the most of this fantastic ingredient.
Honey’s flavor ferments out if you aren’t careful.
Honey is composed of dense carbohydrates, but the fermentation process can eat up its character. If you simply add honey to the fermentation process you’ll likely end up with very little honey character, if it’s noticeable at all. That’s fine if you simply want a lighter body and higher alcohol content, but raw honey typically isn’t used for that purpose. To retain the character of the honey you need to add diluted, heat-treated honey to the primary fermenter.
Enzymes and wild yeast need to be taken care of.
According to Brew Your Own, raw honey features wild yeast and other enzymes that could negatively affect the quality of your fermented beverage. There are two ways to handle these organisms before they have a chance to ruin your brew. The simplest method is adding honey into a long, roiling boil right at the start of the cooking process. This will denature enzymes, kill any yeast, and remove any beeswax still present in the honey. The downside to this harsh process is that the high, immediate heat can hurt the natural smells and flavors of the honey, impacting the end product.
By contrast, you could attempt home pasteurization. This process will preserve the qualities of the honey character, but it’s a fairly involved process that only experienced brewers should attempt.
Add honey based on your desired end product.
It comes as no surprise that different amounts of raw honey produce different results. When deciding how much to add, measure your honey as a percentage of total fermentables in the brew. Anything below 10 percent is intended to provide light notes and flavors of honey to the brew. If your brew is between 11 and 30 percent you should expect a strong honey flavor. This can be balanced out by stronger flavors in other ingredients, as well as dark specialty malts.
It may take a little trial and error, but raw honey can be a fantastic addition to your brewing arsenal, whether it’s cider, beer or wine. Try out some different recipes and see what works best for you.
 

How Will I Know When to Use Stabilizer?

Brewing wine or beer at home requires some basic knowledge about the different stabilizers that are used. Although the stabilizers for wine and beer differ, determining when to use the stabilizing agent has certain similarities.
Increasing the Shelf-Life
The most common use of a stabilizer for beer or wine is related to the shelf life of the final product. A stabilizing agent is added after brewing the beer or wine to keep the final product good for a longer period of time.
In the case of beer, stabilizing agents are used to slow the development of haziness. When haziness develops, beer is no longer good. A stabilizing agent for beer can work in one of two ways: it will either degrade the proteins that cause haziness or it will bond to the proteins so that the beer lasts longer in storage.
When it comes to wine, stabilizing agents are added to increase the shelf life and prevent re-fermentation from occurring. When a stabilizer is added to wine, it will last longer even if it is not possible to store it in a cellar or fridge.
Adding for Flavor Maintenance
Although the primary purpose of a stabilizer for both wine and beer is increasing the shelf life of the brew, it can also help maintain flavor in particular situations.
A stabilizer is always added to sweet wines because it is possible for re-fermentation to occur. The stabilizer maintains the flavor of the wine by preventing it from starting to ferment a second time. Although it is appropriate to prevent re-fermentation in sweet wines, it is not necessary to add the stabilizer to a dry wine. Dry wines do not have room for more fermentation.
Stabilizers do not have much impact on the flavor of beers except as it relates to shelf life. If a beer does not have excellent taste before adding a stabilizer, it will not improve when the stabilizer is added.
Equipment Considerations
A stabilizing agent is not useful when the wine or beer has a poor flavor. When brews are consistently coming out with a poor flavor, it is best to look at the cleanliness and sanitation of the equipment or the filtration system. Poor taste is more often the result of equipment problems or minerals in the water than the wine or beer going bad in a short period of time.
The decision to add a stabilizer to wine or beer is a personal choice. Stabilizers can help increase the shelf life and maintain a good flavor, but it does not help if the original flavor was not good. Deciding when to add stabilizers will depend on personal goals and the type of brew.

Spring Beer Guide: 5 Beers You Won’t Want to Miss

Spring is in the air! For many of us that means our favorite frosty brews are finally available. Here are some we suggest not skipping this spring; grab yours while it’s cold and still available. Even better, use these beers as inspiration for your next batch of home brewed beer.

Port Brewing Company: Hot Rocks Lager

This lager is a deep ruby brown with an aroma of dark caramel, chocolate, and toffee. In the early days of home brewing hot rocks were used because of their ability to conduct heat and boil water. Hot Rocks Lager’s smoky caramel flavor is said to remain present because of this old fashioned way of brewing. Get yours today – out in early spring!

Gordon Biersch: Maibock

Translated from German Maibock means the rock beer of May. This brew is available seasonally from February through April only. The caramelized Munich malt combines with the perfect level of bitterness to create the perfect flavor. With a 7.3% alcohol volume (standard for many craft beers) so when enjoyed in moderation the effects might just creep up on you. Gordon Biersch’s Maibock is brewed with a Weihenstephan 34/70 yeast strain similar to our Fermentis Beer Yeast, Salfager W-34/70.

Rogue: Morimoto Soba Ale

Morimoto Soba Ale is a specialty beer that Rogue started brewing in 2003 and with internationally known Chef Masaharu Morimoto – a James Beard awarded chef. Soba, known as buckwheat, is a member of the rhubarb family giving this Ale its fruity flavor. Morimoto Soba ale is made with no chemicals, additives or preservatives and only 8 ingredients.

Dogfish Head: Aprihop

Aprihop, an American IPA, is a seasonal fruity beer for “hopheads”. Brewed with Pilsner and Crystal malts gives this beer its especially hoppy taste. Along with its hoppy taste is a nice addition of apricots to finish it off with a fruity flavor. This is one of Dogfish’s most popular seasonal beers and is only available from March through May.

Heavy Seas Beer: Loose Cannon

While not a true seasonal beer, this IPA is said to win people over upon first smell. Its fragrant smells of grapefruit, herbs, and pine make this beer especially perfect for spring. Similar to Dogfish’s, Airhop, Loose Cannon is also a hoppy beer. Loose Cannon is hopped in three ways: kettle, hop back, and dry hopped.
We’re hoping this was enough inspiration to pull out your dusty home brew kit and start brewing your own spring or summer beer. We suggest starting with something easy like a pilsner. Try making your own home brewed Pilsner with our beginners Brewers Best Beer Recipe kit.

What Are Noble Hops?

Beer HopsThe term ‘noble hops’ is very frequently used in beer making and refers to four varieties of hops that were originally cultivated in Central Europe. These four varieties share a set of common characteristics as they are highly aromatic and have very low alpha bitterness. Humelene or hop oil is abundant in these hops. This humelene is often used in the production of perfumes as it gives a woody, herbal, and robust aroma. However, it is extremely susceptible to breakdown due to heat, light, and oxidation, and hence beers containing noble hops must be properly stored.
Because the alpha acids are very low in noble hops, they make the brew bitter and add an aroma, but at the same time they do not make it harsh. They have very low amounts of acids that are harsher in taste such as beta acids. Conditions and soil during growth lend their characteristic properties to theses hops, hence only hops grown in a particular region are known as noble hops.
There are basically four varieties of noble hops:

  1. Tettnanger/Tettnang–These are originally from a small town located in South Germany called Tettnang. It comes with slightly spicy and mildly floral characteristics. They are used for flavor as well as aroma and are commonly used in the production of French Ales, Bocks, Belgian ales, Pilsners etc.
  2. Saaz – It is from Bohemia and the present Czech Republic and is responsible for almost two thirds of the hop produced in this region. The flavor is mild, earthy, and at the same time spicy. It is mainly used in Budvar and Pilsner Urquell.
  3. Spalt – It is from the Spalter region in Germany. It’s hard to obtain as its production is limited to a small area. With a strong aroma and a mild spicy flavor, it is used for making ales, lagers, and bocks etc.
  4. Halltertau – It derives its name from its region of origin called Hallertau in central Bavaria. This hop lacks the spicy character and is floral and slightly earthy.

All these four noble hops are rich in aroma.  What is your favorite variety of noble hops?  What do you use for your homebrew recipes?