
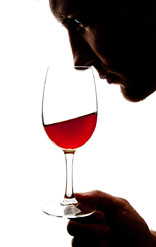
 Hi, I have a question. This is day 5 of fermentation for my apple wine. It’s been in plastic fermenters. I just siphoned it into a couple of glass jugs and put the air-locks on. How long should it take for the air-locks to start peculating. I do not see any signs of the wine brewing. If it doesn’t start in 24 hours does that mean my wine is bad?
Thanks, Bill__________
Hello Bill,
Before we can really answer your question we need to get a hydrometer reading of the wine must. It is very possible that the apple wine has already completed its fermentation, and there is no more bubbling to be done. We have had fermentations done here in as little as three days.
If the gravity hydrometer shows a specific gravity reading of .998 or less, this means the fermentation has completed. The only thing you would need to do in this instance would be to continue on with any recipe directions you may be following. No bubbling would be expected with such a specific gravity reading.
If the gravity hydrometer shows a specific gravity reading above .998, this means that you should see some bubbling, and you say you are not. This does not mean the apple wine is bad. It just means that the fermentation as stop prematurely, and we need to figure out why.
I would suggest going over the Top 10 Reasons For Fermentation Failure. These 10 reasons cover well over 95% of the stuck fermentations we have dealt with. See if any of these reasons could be a candidate for your issue.
Happy Wine Making
Customer Service
———————————————————————————————————
Ed Kraus is a 3rd generation home brewer/winemaker and has been an owner of E. C. Kraus since 1999. He has been helping individuals make better wine and beer for over 25 years.
Thanksgiving Is About Togetherness… And A Bottle Of Wine.
 In my own humble opinion, nothing describes Thanksgiving better than the word togetherness. Whether it be with family, friends, co-workers or someone you just met, being together is what seems to make Thanksgiving work. Togetherness is what makes Thanksgiving worth celebrating.
It is my deepest wish that where ever you may be this Thanksgiving holiday, that you my find and share some togetherness with others. Break out some homemade wine. Maybe even pass a few bottles out as personalized wine gifts, and experience the joy that Thanksgiving was meant to bring.
I personally like to make a red Zinfandel for Thanksgiving. It’s big, jammy flavors seem to couple well with the turkey and stuffing. Plus, it’s not a complicated wine that’s difficult to like. Even non wine drinkers will appreciate the life and compliment it brings to the meal.
I serve a couple of bottles at dinner and also pass out bottles as personal wine making gifts. Last year I didn’t, but you can put custom wine bottle labels on the bottles that say something nice about Thanksgiving, etc. It’s a terrific way to come together and share during the holiday season.
I hope you have a pleasant and enjoyable Thanksgiving holiday this year. Relax, share some wine with family and friends, and be together.
Happy Wine Making,
Customer Service
———————————————————————————————————
Ed Kraus is a 3rd generation home brewer/winemaker and has been an owner of E. C. Kraus since 1999. He has been helping individuals make better wine and beer for over 25 years.
Six Days Of Fermentation, And I Only Have 1% Alcohol…
 Doing the 7 easy steps from your website – did before – did everything the way it said. With the must, put campden tablets in, etc… day 6 discarded the pulp, put in secondary fermentor, put airlock on, wine brewing very slow, airlock hardly bubbling. Took a test with hydrometer, almost no alcohol. The alcohol scale says about 1% content, not really bubbling the way it should, what should I do??
Thank you, Bill R.__________
Hello Bill,
It actually sounds like everything is going good. I just think there may be some confusion going on in terms of understanding the gravity hydrometer. Out of all the wine making materials and equipment we offer, the hydrometer seems to throw people for a loop more than any other.
At this stage of the fermentation it is normal to expect the fermentation to be slowing down. As the fermentation progresses and the alcohol level rises the fermentation becomes slower and slower. Don’t worry about this.
This real issue is with your gravity hydrometer’s reading of 1% alcohol content. What has to be understood is that the hydrometer can not read alcohol, it can only read the sugar that is to be fermented into alcohol. The alcohol scale you are referring to is actually called potential alcohol on the gravity hydrometer. What it is telling you is how much more alcohol can be made by the wine brewing, not how much alcohol is currently in the wine must.
This is the reason we tell people that they need a beginning hydrometer reading — one taken before the fermentation starts — to determine how much alcohol their wine will have later on.
Going back to your 1% reading on your hydrometer, what it is telling you is that almost all of the sugars that were originally in the wine must have been turned into alcohol. The wine must now has only enough sugar left to produce one more percent of alcohol.
If you want to know how much alcohol your wine currently has, you need to have an initial reading. If your must started with a potential alcohol reading of 12% and and it is currently at 1%, this means the must currently has 11% alcohol [12% – 1%=11%].
If you need more information about the use of the gravity hydrometer, the book First Steps In Wine Making has a great section on this subject.
Happy Wine Making,
Customer Service
———————————————————————————————————
Ed Kraus is a 3rd generation home brewer/winemaker and has been an owner of E. C. Kraus since 1999. He has been helping individuals make better wine and beer for over 25 years.
Arrgh! My Wine Is Still Cloudy
 Good Morning,
I recently made some apple wine. It is now in secondary fermentation, and still looks very “milky”. There seems to be a lot of tiny fruit particulate in suspension. Very little seems to be settling out. I will need to rack this wine next weekend, what should I do to clarify the wine?
Ken H.
__________
Hello Ken,
The reason your wine is still milky or cloudy is because it is still fermenting. You will not see any signs of clearing until the fermentation has completed, or its activity has dramatically slowed down.
It would be best if you did not rack your wine at this time, regardless of what your homemade wine instructions say to do. Instead, you need to wait until the fermentation process has completed. You can determine this with a gravity hydrometer reading. Once you notice that the air-lock on your fermenter is no longer bubbling, take a reading with your gravity hydrometer to confirm that the fermentation has actually completed.
Once the fermentation has completed you will notice that it takes just a matter of a few days for the wine to clear up significantly. Using clear glass jugs as a secondary fermenter has an added advantage over opaque plastic fermenter in terms of being able to visually see the wine as it clears up.
If you would like to speed up the clearing of your wine, you can use bentonite as a fining agent. Our Speedy Bentonite comes in a jar with complete directions. Just remember to make sure the wine brewing is complete before adding it to the wine.
Happy Wine Making
Customer Service at E. C. Kraus
———————————————————————————————————
Ed Kraus is a 3rd generation home brewer/winemaker and has been an owner of E. C. Kraus since 1999. He has been helping individuals make better wine and beer for over 25 years.
Can I Make Wine As Good As The Pros? (Part II)
 In part I of this two part series I went over a little history about homemade wine kits. In this part we’ll finish answering the question about how good these homemade wine kits are.
Today, homemade wine making kits have evolved into a practical and enjoyable way to make stupendous wines at home. Hundreds of thousands of home winemakers use these kits every year. The homemade wine instructions that come with them are very easy to follow, and all the additional ingredients you need are included. It’s really a fun way to learn how to make your own wine.
No Big Secret Here. What really makes these kits so great is the quality of the grapes that are used to create them. This is the key that allows the home winemaker to make wines as good, if not better than many of the commercial wines you find at your local wine merchant. A common phrase among the wine industry is, “No wine can be better than the grapes used to make it.” This mantra applies to home wine making as well.
So, Why Did I Tell You This Story?
I could have just said, “Yes, these are great wine kits, and you should get started right now.” But why would you believe me. I think it’s important to understand that these kits were not brought to market like some overnight fad. These kits have evolved through many years of tests and trials into something just short of phenomenal. Home winemakers have been relying on them for years as their main source for wine.
Bench Testing.
Test runs are done to tweak each lot of juice for perfect balance, stability and character. This is an incredible advantage over commercial wineries that have only one shot to get it right each year. The wine kit producers have taken away all these risk variables that the professional wineries have to deal with every year. Just follow the homemade wine instructions and you will end up with very predictable results.
The World At Your Feet. Typically a winery has at their disposal only grapes from their own vineyard, or at least, a vineyard that’s not far away. It’s the only way to keep their costs in line with the commercial wine market. Wine making kit producers have available to them grapes from all over the world. Because of the price you are willing to pay for these kits as a home winemaker, the wine kit producers are able to purchase the grapes, concentrate them, and have them shipped to their packaging facilities from almost any wine region in the world.
I Know It Was A Long-Wind-ed Answer, but one that needed to be said. I absolutely think that if more people understood the quality that was available to them at a fraction of the price of commercial wines, basement wineries would be popping up on every block in our county.
Happy Wine Making,
Customer Service
———————————————————————————————————
Ed Kraus is a 3rd generation home brewer/winemaker and has been an owner of E. C. Kraus since 1999. He has been helping individuals make better wine and beer for over 25 years.
Mesh Bags For Grape Presses
 Greetings:
I saw on your website that you you sell grape presses… thought maybe you could help me. I have a grape press that is fairly old and would like to press some apple cider. I cannot find mesh bags that will fit inside the basket. Do you have any?
Thank You.
Lance S.
__________
Hello Lance,
Unfortunately, we do not carry any type of mesh bag to fit inside our grape presses’ baskets. Short of sewing one up from scratch, finding one to fit your older model may be difficult. There are just too many varying dimensions from one press manufacturer to the next.
It is our recommendation that you do not use a mesh liner in your grape press, anyway. A mesh liner will typically get caught up in the pressing plate unless it is a perfect fit. This can cause undue problems during pressing, slowing down the process.
A better way to go about this is to press the cider without any straining mesh in the basket. Instead, strain the apple cider as it pours off the grape presses’ spout into a plastic fermenter. We have a straining mesh for such a purpose. It is called a Filter Ease.
The Filter Ease is basically a fine nylon mesh with an elastic band–kind of shaped like an over-sized hair net. Just strap it around the brim of your plastic fermenter, and let it strain the apple cider at that point in the process.
As an alternative, we also have what’s called a Jumbo Fermentation Bag. This is a mesh bag with a draw string that is large enough to line the entire inside of a 5 or 6 gallon plastic fermenter. Just fill the plastic fermenter with the apple cider then lift the Jumbo Fermentation Bag out to collect the pulp. If you have a spigot on your fermenter, you can go straight to jugs from there.
Please realize that the amount of pulp that will be coming off the press won’t be that great. Obviously, there will be some but not to the extent that most people expect. It will not be that big of a deal.
I hope this information helps you out. If you have any more questions about making wine or just need a few wine making tips, please let us know. We’ll be more than happy to help you out.
Happy Wine Making
Customer Service
———————————————————————————————————
Ed Kraus is a 3rd generation home brewer/winemaker and has been an owner of E. C. Kraus since 1999. He has been helping individuals make better wine and beer for over 25 years.
Can I Make Wine As Good As The Pros? (Part I)
 Hi…
Hi…
I am seriously looking at making my own wine …my only hesitation is a concern that I can only produce a very mediocre wine .. one that does not come close to commercial wine offerings (I have a 200 bottle cellar and enjoy wines from around the world). So understanding there are no guarantees and I am responsible for making the wine, can one make a comparable wine to mid range commercial offerings? Also, assuming that is my goal, which homemade wine kits would you recommend that could achieve this?
Richard
__________
Hello Richard,
Thank you for the great question… This is a concern that many individuals contemplating making their own wine have. How I would answer your question has changed fairly dramatically over the past 20 years or 30 years to today.
First, A Little Story… Please Bare With Me.
In the 60’s home wine making in America was primarily a way to make good use of the abundant fruit around on the farm. A farmer would pick a bucket of raspberries… He’d look down a the raspberries… Then he’d remember all the of raspberry jam he already had in his cellar… Learning how to make your own wine out of some raspberries seemed to make good sense.
In the 70’s making wine slowly changed from a way to put excess fruit to practical use, to a way to have fun with it as a hobby. Home winemakers could dress up their bottles with wine bottle labels and pass them out to family and friends as a personalized wine gift. There were a couple of companies producing wine concentrates for the home wine making market during this time, but their selections were pretty scant. Most of the wine was still being made from fresh fruits.
In the 80’s home wine making changed in a big way for the United States. Several Canadian wine kit producers that had been dramatically growing their market up north of the boarder (thanks to high Canadian alcohol taxes), decided to expand their markets even further by delving into the U.S. market. This filled a big void for the U.S. home winemaker that desperately need to be filled. Over time the selection and quality of homemade wine kits began to improve. Not only were there country winemakers making their fruit wines, but now there were a lot of wine lovers and wine enthusiasts coming on to the home wine making scene.
In the 90’s it was more of the same. Different Canadian wine kit producers fought for market share in both Canada and the U.S. Some companies fought harder than others, and as a result there was some consolidation among the industry. The producers that remained standing began focusing on how they could make their product better than their competitors’.
By 2000 the quality of concentrates had risen to a point of excellence. Wine kit producers not only improved their production methods, but they were also seeking higher quality grapes from different parts of the world. During this decade a wider breadth of quality became readily available to the home winemaker. You could spend anywhere from $30 to $200 for the concentrated grape juice to make five or six gallons of wine.
This is the end of part I of this two part series. In part II we’ll finish answering the question about how good these homemade wine kits are.
———————————————————————————————————
Ed Kraus is a 3rd generation home brewer/winemaker and has been an owner of E. C. Kraus since 1999. He has been helping individuals make better wine and beer for over 25 years.
Wine Making With A Power Juicer…
 ECKraus,
If a recipe calls for 4 or 5 pounds of pears for instance, will the amount of juice (run through a power juicer) be enough to make this recipe? Are there recipes available for someone wanting to use a power juicer? Thank you for any information.
Gary
__________
Dear Gary,
A power juicer can play a role in wine making, but a very limited one. The main issue is that the color and body of the resulting wine will be lacking. For this reason you will not find much, if any, information on learning how to make your own wine with a power juicer or power juicer wine recipes.
When making a red wine, whether it be from red grapes or red raspberries, the color and body comes mostly from the pulp and skin. These wines must be fermented along with the crushed pulp for several days for them to be red and have significant body. Without the pulp in the fermentation these wines would only be pink or blush in color.
Since the power juicer separates the pulp and skins from the juice, it is not a very good choice for making red wines. For red wines you are much better off using the traditional fruit crushers and grape presses.
Having said this, a power juicer would work when making white fruit wines. The pulp and skin are not needed when making these wines, so the power juicer may be of some value when learning how to make white wine.
My main concern when making these wines would be the speed of a power juicer. They are fast enough for making a few glasses of juice, but if you are needing 5 gallons of apple juice this would take some time.
Happy Wine Making
Customer Service at E. C. Kraus
———————————————————————————————————
Ed Kraus is a 3rd generation home brewer/winemaker and has been an owner of E. C. Kraus since 1999. He has been helping individuals make better wine and beer for over 25 years.
What's The Best Way To Sanitize My Equipment?
 Hello:
I am getting ready to start my first batch of wine from concentrate. I am a little confused about the sanitizing process for large pieces of equipment. The directions say to dissolve so much sanitizing stuff to one gallon of water. Does this mean a gallon will do the job? With a 6 gallon tuft tank or a 6 gallon glass carboy, for example, do you pour the gallon in the container and slosh it around? If so for how long? Directions say to soak corks from 5 to 10 minutes. Small items such as hydrometers can be submerged, but I am a little vague on doing the big items and some of the other details?
Thanks
Mike H.
———-
Hello Mike,
Thanks for the great question… It is important to understand that all the equipment that comes into contact with the wine should be sanitized. This includes wine making equipment you may have gotten from us, as well as any stirring spoons, hoses and pans you may be using from around the house.
Before sanitizing you need to make sure that all items are soapy clean and void of organic grime from previous uses. This process is no different than washing dishes. After everything is soap-clean, then it can be sanitized.
These three items: sodium metabisulfite, potassium metabisulfite, and Campden tablets can all be used in the same way. Mixed with water they make a very good sulfite sanitizer. Just use one teaspoon per gallon, or in the case of the Campden tablets, use 16 tablets per gallon.
Not only does direct contact with these solutions sanitize, but their vapor will sanitize as well. What I will typically do is put all my hoses, gravity hydrometer, rubber stoppers and other smaller wine making products in my plastic fermenter bucket. Then pour in 2″ or 3″ of the solution. Place the lid over the top and let it sit for about 20 or 30 minutes. Longer times do not hurt. This will sanitize your smaller equipment as well as the inside of your plastic fermenter.
You can sanitize the inside of glass jugs and wine bottles in the same way. Just pour in an inch or two of the sulfite solution, and let stand for 20 or 30 minutes. Lightly drain the jugs or bottles, and they are ready to be filled with wine.
With larger wine making products that will not fit in the fermenter, a contact sanitizer such as our CleanPro SDH or One Step No-Rinse Cleanser should be used. Unlike the sulfite solutions, these sanitizers require actual contact time. You can use your kitchen sink, however it should be soap-clean and sanitized first. To sanitize just fill the sink with a gallon of the sanitizing solution. Use this solution, liberally, with a clean rag to wipe down all the sink’s surfaces and any counter-top areas you plan on using.
Now you are ready to sanitize your wine making equipment. Drain the sink and mix up a fresh batch of sanitizer in the sink, again use a clean rag to wipe down the equipment. Keep submerging different parts of the equipment while wiping down exposed parts with the rag. Do this for 15 to 20 minutes and it will be ready for use.
Happy Wine Making,
Customer Service
———————————————————————————————————
Ed Kraus is a 3rd generation home brewer/winemaker and has been an owner of E. C. Kraus since 1999. He has been helping individuals make better wine and beer for over 25 years.
Do Wines Made From Concentrates Need To Be Filtered?
 Hi there,
I am a recent homebrewer turned winemaker. I was wondering if it was appropriate to filter the wine before bottling. I am making a European Select Verdicchio at the moment. I have a 10 inch sediment filter unit with either a 0.5 or 1.0 micron filter. Can I put wine through this and is it worth it? Thanks, any help would be great.
Regards,
Dean R.
————
Dear Dean,
There are many advantages to making wine using our concentrated juices such as the European Select you are using. One of the more significant ones is that all of the solid particles in these juices have been removed. What this means for you, as a home winemaker, is that the only sediment that you will need to deal with is what is created by the yeast.
If given enough time, these yeast cells will settle to the bottom of the fermenter with the additional aid of some clarifiers that are included in these juice kits. So, filtering is not necessary just as long as the wine is not rushed along and given enough time to clear on its own. This is easily accomplished by following the time-table provided in the directions that come with these juices.
Where wine filtering can play a real beneficial role for concentrate wines is in the visual aspects of the wine. While these finished wines will look completely clear and beautiful as is, running them through a wine filter will add a polish or luster that almost seem illuminating.
I personally do not filter all my wines, but I do make sure that any wine I plan on passing out as a personalized wine gift is filtered. I put custom wine bottle labels on them and they are ready to pass out and impress.
To sum this up, when it comes to learning how to make your own wine, filtering is not on the top of the list, and a wine filter will probably not be the first piece of homemade wine equipment you should purchase, but you will certainly want to consider filtering your wines, eventually, particularly if you plan on sharing them as wine making gifts with decorative wine bottle labels and such.
Happy Wine Making,
Customer Service
———————————————————————————————————
Ed Kraus is a 3rd generation home brewer/winemaker and has been an owner of E. C. Kraus since 1999. He has been helping individuals make better wine and beer for over 25 years.