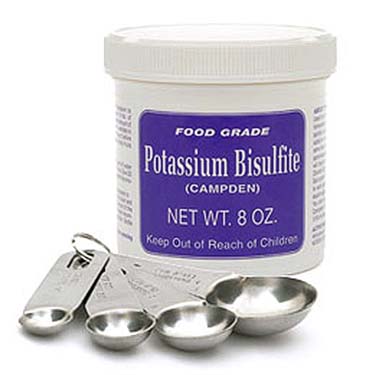
 How do I know when Potassium Metabisulfite is old?
Name: Mike R.
State: PA
—–
Hello Mike,
This is a simple but important question. Mainly because potassium metabisulfite is responsible for doing so much throughout the wine making process. A home winemaker relies on it heavily. If you are blindsided with some potassium metabisulfite that is old, it could cost you a batch of you precious wine.
The problem with old potassium metabisulfite is not that it will directly ruin the wine. It doesn’t change into something that is harmful. It just loses its sanitizing power. It becomes weaker and weaker as time passes on. Eventually, it will come to a point that it is not doing it’s job successfully.
Unfortunately, there is no practical way to tell if the potassium metabisulfite you have is old or not other than by age. You can try smelling the granules to see if you can smell any sulfur coming off, but this won’t even tell you if it is strong enough to protect your wine. Time or age is the best predictor.
If you purchased the potassium metabisulfite within the past 12 months, it should be fine. The only exception would be if humidity or moisture got to it. This would cause sulfites to leave the potassium metabisulfite as a SO2 gas, leaving you with a weaker powder. If the potassium metabisulfite has become hard, this could be the case.
If it is older than one year, you should be cautious, but it is most likely to still be okay to use, especially if it was stored in a cool, dry place. If you purchased it more than 3 years ago, then without question, throw it away. It’s not worth even trying or taking the risk.
If you are not sure when you purchased the potassium metabisulfite and you got it from us, you can call and we will be able to tell you when you purchased the potassium metabisulfite. We keep all your purchases on file.
The ultimate way to know the strength of your potassium metabisulfite is to test it with an SO2 testing kit. By doing this you can know the exact strength of your sulfite. There are certain situation where this may be necessary.
My thought on this is the cost of buying fresh potassium metabisulfite is nothing compared to loosing a batch of homemade wine. Your time along with the cost of other the ingredients being on the line, I say just keep the potassium metabisulfite fresh.
Happy Winemaking,
Ed Kraus
————————————
Ed Kraus is a 3rd generation home brewer/winemaker and has been an owner of E. C. Kraus since 1999. He has been helping individuals make better wine and beer for over 25 years.
Category Archives: Wine Making Ingredients
Leigh Erwin: What's The Best Temperature For Wine Yeast?
 Hi all!
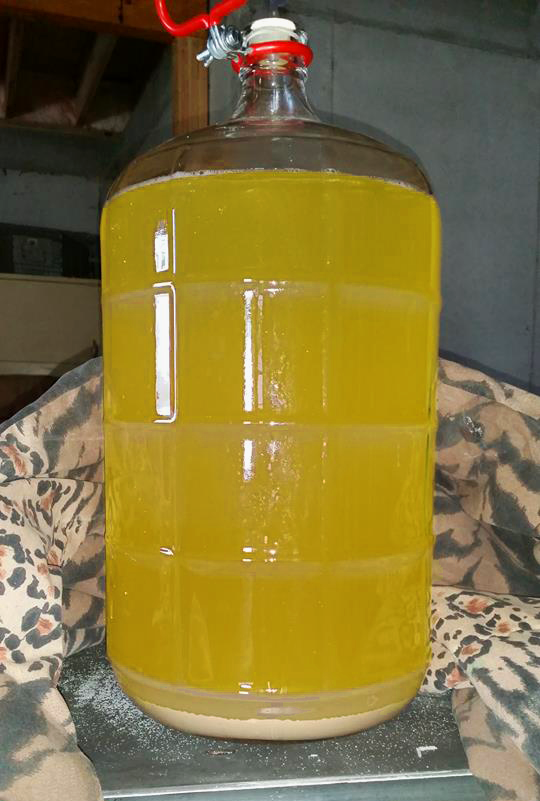
I just wanted to follow up a little bit more on the fermentation temperature “issue” I had noted in my last post. If you recall, the instructions for primary fermentation for my Chardonnay wine had a recommended maximum of 75oF, however, the heating pad I was using (that’s built specifically for winemaking) kept the wine at around 78oF. I was basically wondering if 3oF would really make that big a difference, and if it’s still feasible to ferment my wine at that temperature without any problems. Is staying below 75°F the best temperature for wine yeast?
Reading around the message boards and other sites, it appears as though there are a lot of people who have no trouble fermenting their wines at 78oF. The big thing to note here, however, is that it all depends on which specific wine yeast you are using. Some wine yeasts only function in certain temperature ranges, while others function at different temperature ranges. If I’m using yeast that’s still good through 78oF, regardless of what the range the kit instructions recommended it should still be fine.
So, what is the best temperature for the wine yeast I was using? I threw out the yeast packaging right after I used it and couldn’t find that information anywhere on the instructions or online, so I’ll have to just make a guess. I know I have used the yeast strain EC-1118 in the past, so I’m going to assume that’s the same one I used for this particular wine and go from there. Doing a quick online search, it turns out that the appropriate temperature range for EC-1118 is 50oF to 86oF. That leaves me plenty of wiggle room and my 78oF seems like it should work just fine for this particular wine and temperature combination.
For fun, I decided to look up the yeast profile chart on the Adventures in Homebrewing website to see what the temperature ranges for the other yeast types available are. Some wine yeasts are better for making dry white wines than others, and if I’m reading this chart correctly, it appears as though these are the yeast strains listed best to worst for making dry white wines: ICV D-47, EC-1118, K1V-1116, 71B-1122, and RC212. After a quick search for appropriate temperature ranges for each of these five yeasts, this is what I came up with:
According to what I found, most of the wine yeasts available from the yeast profile chart on the Adventures in Homebrewing website have incredibly wide ranges of temperatures at which they can survive. As long as I wasn’t using the ICV D-47 yeast, the temperature that my heating pad made my wine (78oF) should be just fine.
It kind of makes me wonder though, why do the kit instructions say to ferment no higher than 75oF? Could they be assuming the winemaker might be using any number of wine yeasts and this is just the average high temperature that is appropriate? I suppose perhaps at the higher (or lower) temperatures you can still make the wine just fine, though the specific dates for each step will change depending upon that bit of information. Keeping it no higher than 75oF probably maximizes the likelihood that the wine will progress in the time frame specified by the instructions.
Does anyone else have any insights for the best temperature for wine yeast?
———————————–
 My name is Leigh Erwin, and I am a brand-spankin’ new home winemaker! E. C. Kraus has asked me to share with you my journey from a first-time dabbler to an accomplished home winemaker. From time to time I’ll be checking in with this blog and reporting my experience with you: the good, bad – and the ugly.
Can You Add More Yeast To Wine?
 One of my wine making kits seem to be slow in starting & after a few days, we added another yeast pkg. to the wine……which finally begin activity. With 2 wine yeast pkg. Was it OK to add another package? Can you add more yeast to a wine? Will the wine have a yeast taste?
Thank you
Chris D.
—–
Hello Chris,
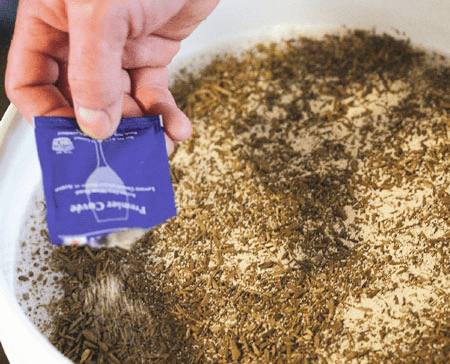
Whether you use one, two or even three packets of wine yeast, it will not have a direct impact on the flavor of the wine.
The reason for this is when a single packet of wine yeast starts to ferment, it first goes through what is know as an aerobic stage. This is when the yeast begin to multiply themselves into larger numbers. This aerobic phase will typically increase the cell count of a single packet by about 150 to 200 times.
This explosive growth of yeast cells is what eventually causes a significant amount of the sediment you typically see at the bottom of your carboys.
If two packets of wine yeast are added, it will not cause double-the-volume of yeast, but it will make a little more than one packet would, but only marginally so. In either case, the yeast cells will all drop out when they are finished fermenting. If the fermentation goes correctly, all the yeast will eventually be removed, regardless.
But having said this, you should have only needed one packet of yeast in the first place. The fact that a second packet caused the fermentation to take off would be an indication of one of three things:
- The water used in making the wine was too cold when it came out of the tap, but eventually warmed up enough to allow a fermentation. This is usually around 24 to 36 hours after being drawn – about the same time you added the second pack of wine yeast. Something we see sometimes in the colder months.
- You re-hydrated the first pack of yeast in warm water, just as the packet directs you to, but you did not actually control the temperature of the warm water by taking a temperature reading and/or you did not leave the wine yeast in the warm water for the exact amount of time called for in the directions – usually 10 or 15 minutes. In either of these cases, the wine yeast could have been destroyed during the re-hydration process.
Number 3 is by far the most common reason we see a fermentation not starting. Regardless of the reason, its always okay to add more yeast. You can add more yeast to the wine without causing unwanted results. Just realize that it is not usually a solution to the problem. You also have to be aware of other factors that can interfere.
One thing you could do when a fermentation is not starting as planned is to run through the, Top 10 Reason For Fermentation Failure. These 10 reasons cover over 95% of the stuck fermentations we see.
So as you can start to see, you can add more yeast to a wine; the point is, you shouldn’t have to!
Happy Wine Making,
Ed Kraus
———————————–
Ed Kraus is a 3rd generation home brewer/winemaker and has been an owner of E. C. Kraus since 1999. He has been helping individuals make better wine and beer for over 25 years.
Leigh Erwin: Can I Use Tap Water For Winemaking?
 Hi everyone!
I wanted to take a moment to chat with you all about water in home winemaking. What I mean is basically what kind of water is best to use in home winemaking. The instructions on some of the wine kits that I have been using have said that if you’re using tap water to draw it off the day before you actually want to use it, to give the chlorine a chance to “burn off”. However, other instructions I’ve used have not said anything like that at all.
It made me wonder: is my tap water OK for winemaking?
I actually had been delaying the start of my most recent batch of wine because I had kept forgetting to draw off some tap water the night before. One day, however, I found a short article that said if you can drink the water from your tap and you don’t notice any chlorine or other off-flavors or aromas, it’s probably just fine to use for home winemaking.
If you get your water from your city or municipality, they most likely treat the water with chlorine to get rid of bacteria that might be present. This same chlorine, however, is bad news bears for your wine if it’s at levels high enough to smell it in the water, so if you can smell chlorine, you probably want to go elsewhere for your water or boil it, draw it off the day before, or treat it with activated charcoal.
If you get your water from a well, there could be all sorts of bacteria or other harmful things in there since it has not been treated like city water has. It’s probably a good idea in general for you to have your water tested anyway, so now might be a good time to do that if you haven’t done so already. Once you know what’s in your water, you can go ahead and start determining how to treat it.
Distilled water is often not recommended for winemaking, as the distillation process basically removes everything from the water, including minerals that yeasts like to use as nutrition.
 Spring water is usually the best way to go, in place of tap water as it’s typically very clean and has enough trace minerals to keep the yeasts happy. You can find spring water bottled in grocery stores. In general, any bottled water you find at the grocery store for drinking will be just fine to use, as long as it’s not distilled.
For me this time around, I decided to play my cards a little bit a use the water from my tap for making my next batch of wine. My husband and I drink it on a regular basis and I do not smell any chlorine or anything else in the water. Now that I think about it, I did make at least one batch early on with tap water not drawn off the night before, and the wine turned out just fine. We’ll see if I made the right decision this time.
———————————–
 My name is Leigh Erwin, and I am a brand-spankin’ new home winemaker! E. C. Kraus has asked me to share with you my journey from a first-time dabbler to an accomplished home winemaker. From time to time I’ll be checking in with this blog and reporting my experience with you: the good, bad – and the ugly.
How To Tell If Your Wine Yeast Is Working
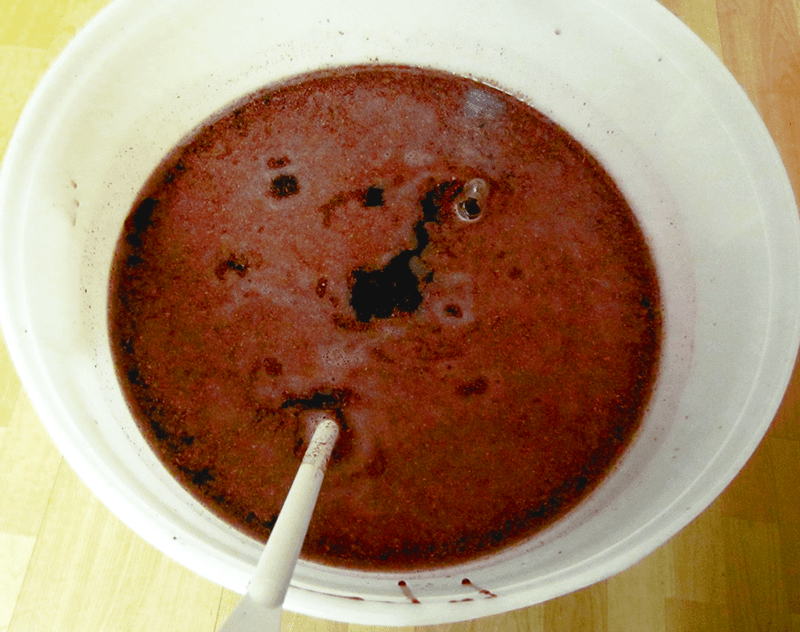 How do you know if the wine yeast is working, I prepared the yeast per the instructions that were on the packet and when set to ferment the air-lock is not popping. Did I do something wrong, What would cause this to happen?
Thank you for your help,
Albert the beginner
—–
Good Morning Albert (the beginner),
Let’s see if we can’t figure out what’s going on…
First, it’s important to understand that it can take a wine yeast up to 36 hours to start showing signs of fermentation. On average, it takes a yeast about 8 hours, so if it hasn’t been this long, you may need to wait.
How long a fermentation actually takes to begin depends on a whole host of factors: temperature being the most critical. You want the wine must to be between 70° and 75°F. for a timely fermentation. You can find other factors by reviewing, The Top 10 Reasons for Fermentation Failure.
You will notice the first signs of fermentation activity as little patches of fine bubbles on the surface of the wine must. These patches will eventually grow into a thin layer of fine bubbles across the entire surface. You are likely to notice this before you will see any activity in the air-lock.
Here are a couple of issues I would like to bring up briefly that are indirectly related to your question but may bring some light to it:
Yeast Preparation
The directions on a typical packet of wine yeast will state to put the wine yeast in water that is at such-and-such temperature for so-many minutes before adding to the wine must. It is perfectly fine to follow these directions, but only if you actually follow them. This means using a thermometer to track temperature and a watch to track time. Following such directions in a haphazardly way will lead to the destruction of the wine yeast and a fermentation that has no chance of starting.
 If you are not willing to monitor the process precisely, you are much better off just sprinkling the yeast on to of the wine must. The must will start fermenting, but it may take a little more time to get going.
Using The Air-Lock
You stated that you are watching the air-lock for signs of activity. In spite of what many wine making instructions may say, we do not recommend using an air-lock during the first few days of a fermentation (primary fermentation).
Yeast needs air to successfully multiply into a larger colony. By using an air-lock, the air is being kept away from the yeast. For this reason, we recommend that you do not use an air-lock during the primary fermentation. Instead, take the lid off and cover the fermenter with a thin cloth towel or something similar.
If you are concerned about leaving a fermentation exposed to the elements, rest assured that as long as you have an active fermentation starting up as scheduled, your wine must will be safe from any airborne contaminants. The positive flow of CO2 gas from the fermentation will help protect against this.
Another Wine Making Tip…
One think I like to do is put the air-lock on the fermenter for just the first few hours – just long enough to determine that the yeast is going to start. Once I see the first signs of fermentation, I then take the lid and air-lock off and cover with a thin cloth towel. This give the wine protection when it is most vulnerable and oxygen when the wine yeast most need it.
Happy Wine Making,
Ed Kraus
———————————–
Ed Kraus is a 3rd generation home brewer/winemaker and has been an owner of E. C. Kraus since 1999. He has been helping individuals make better wine and beer for over 25 years.
Leigh Erwin: Making a Gewurztraminer
 Hi everyone!
Time for a Day 8 check-in on my Gewurztraminer!
Backing up a little bit, I think everything is moving along OK with my new wine. I could tell the wine yeast were starting to do their thing 24 hours or so after adding them into my wine base/water/bentonite solution, though it never was “roaring” by any means.
I kept an eye on the temperature with a liquid crystal thermometer, and I did notice once it was pushing 80°F, so I unplugged the heating pad for a bit. Since it is a little cool down here in our finished basement where my new “winery” is located, I didn’t want to leave it unplugged forever, so I basically ended up unplugging and plugging in the heating pad periodically throughout the week, in an attempt to keep it between 68-77°F per the instructions.
One thing I thought of later was that I probably shouldn’t have left the lid on the primary fermenter with a fermentation lock like I do when I’m in secondary fermentation. I don’t think leaving the lid on is going to hurt it per se, but perhaps that’s why the yeast were never “going crazy” as I would have expected? Oh well, next time I’ll try to remember to leave the top off (but covered with a towel or something similar).
So, Day 8 is supposed to indicate the start of secondary fermentation, but only if the specific gravity is at the target <1.010 level. I was not sure if the fermentation was there yet, as I could still hear the pitter patter of little yeasty feet, but it’s been a while since I’ve actually made any wine, so I could be wrong.
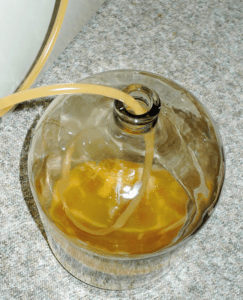
 After sterilizing all the appropriate equipment, I checked the temperature of my wine and it was at about 64.5°F. A little cool for primary fermentation of this Gewurztraminer, so perhaps I shouldn’t have been leaving the heating pad unplugged so much. Anyway, this lower temperature made me think that maybe the wine wouldn’t be quite ready to move on to secondary fermentation yet, as when the temperature is lower, fermentation tends to progress more slowly.
Anyway, I measured the specific gravity of the wine with a hydrometer and it read 1.016 on the specific gravity scale. So close to 1.010, but not close enough. Since it’s been a little on the cool side during primary fermentation, I’m confident that plugging in the heating pad and leaving the wine for another day or two should do the trick.
I’ll check again around the same time tomorrow and see if we’re ready to move forward with secondary fermentation.
————————————————————
 My name is Leigh Erwin, and I am a brand-spankin’ new home winemaker! E. C. Kraus has asked me to share with you my journey from a first-time dabbler to an accomplished home winemaker. From time to time I’ll be checking in with this blog and reporting my experience with you: the good, bad — and the ugly.
I Forgot To Add Campden Tablets To My Wine!
 I started a 5 gallon batch of raspberry wine yesterday and I had to wait until the batch cooled down to add the Campden tablets…and I forgot. I pitched the yeast last night and about an hour later I remembered that I forgot to add the Campden tablets the wine, so I added them at that point. Now this morning I still have no activity from the yeast. Did I kill the yeast? Should I put in more yeast? What can I do at this point?
Richard H. — GA
—–
Hello Richard,
From what you are telling me it seems like you killed most of the wine yeast.
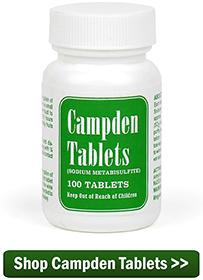
When you add Campden tablets to a wine must it is to add SO2, or sulfur dioxide, to sanitize it. All the wild mold and bacteria are destroyed by the SO2’s presence. Given enough time, the sulfur dioxide will then dissipate out of the wine must as a gas and leave.
Campden tablets are added 24 hours before the wine yeast. This is so the wine yeast will not be destroyed by the Campden tablets, as well. In your case you added the wine yeast at the same time you added the Campden tablets, so it is most likely that some — if not most — the wine yeast was killed. This is the bad news…
The good news is that a remedy is very simple. Add another packet of wine yeast. The wine should start fermenting just fine.
If you have been keeping your primary fermenter sealed up under an airlock, you will want to take them off and allow the wine must to breath for 24 hours before adding the wine yeast. This is to allow the time necessary for the SO2 gas to escape from the wine must. Once you have done this, you can then add the 2nd packet. It will be like nothing ever happened.
Richard, you are not the first person to come to me and say, I forgot to add Campden tablets to my wine and then added them along with the wine yeast. I’ve seen this scenario play out more than once with good results, so I am very confident that your wine will turn out just fine.
Happy Winemaking,
Ed Kraus
—————————————————————————————————————–
Ed Kraus is a 3rd generation home brewer/winemaker and has been an owner of E. C. Kraus since 1999. He has been helping individuals make better wine and beer for over 25 years.
Do Wine Fining Agents Need To Be Stirred?
 First of all, your wine making articles are great. One answer I have not seen in your posted articles is whether to stir fining or clearing agents multiply times after adding them in wine. Your article on using Bentonite as a wine clarifier states that it should be stirred several times once added. But what about other clearing agents such as Sparkolloid and Kitosol 40?
Kermit G. — LA
—–
Hello Kermit,
Most wine fining agents, such as the Sparkolloid and the Kitosol 40 you mentioned, do not need to be stirred repeatedly to do their job. All one needs to do is when adding these clarifiers is to stir them evenly throughout the wine. That is all that is necessary for them to do their job.
The reason for this is because these wine fining agents are light enough to stay suspended on their own for extended periods of time while in the wine . This gives the fining agents plenty of time to attract or absorb what they need to before settling out. In the case of liquid isinglass, it could stay suspended for weeks if not months. It is not until it actually attracts a group of particles that it will gain mass; lose buoyancy; and settle out. On its own, it’s just lingering.
However, this is not necessarily the case with bentonite. Some of the bentonite will settle out fairly quickly, not giving them enough time to collect as much as they possibly can. By stirring every few hours for the first day or two, you are increasing the clearing power of these heavier bentonite particles by keeping them suspended longer.
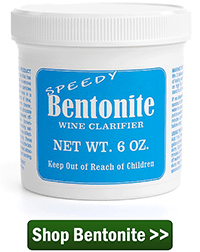 Please realize, that even if you did not stir the bentonite more than once, it will most likely clear the wine just fine. Bentonite is a very effective wine fining agent. It is capable of taking out a lot of the protein solids that are left behind after a fermentation. Any additional stirring would be just for added insurance.
Also realize, that it is possible to over fine a wine. A wine that has been treated over-treated with wine fining agents will start to lose body. The tannin structure of the wine will begin to diminished to some degree. And, in some more drastic cases, the color of the wine can be lightened a shade or two. Not good, if you’re trying to produce a big red wine.
Kermit, I hope this clears things up for you a bit [no pun intended]. In general, you don’t need to worry about stirring wine fining agents. They will do just fine on their own. However, if using bentonite giving it an extra stir or two during the first day or so isn’t a bad idea.
Happy Winemaking,
Ed Kraus
—————————————————————————————————————–
Ed Kraus is a 3rd generation home brewer/winemaker and has been an owner of E. C. Kraus since 1999. He has been helping individuals make better wine and beer for over 25 years.
For the Home Brew Beginner: Wine Ingredient Kits or Fresh Fruit
When you enter the world of home wine making, there are no limits as to the different types of wines you can make. You are free to combine ingredients, add flavors, use locally grown fresh fruit, or berries you grow in your own home garden. You can allow your personal tastes to dictate the dryness or sweetness of your wine, or determine whether you will use fresh fruit or go with commercially available wine ingredient kits for a more traditional wine.
Wine Making Kits and Wine Making Supplies
A wine making kit is a great way to start in the art of home wine making if you are a beginner, because it will introduce you to all the basics of wine making and provide you with the essential wine making supplies and ingredients you need to get started. Once you’re familiar with the process, you may want to make wine with whatever fresh fruits are available at different times of the year.
You will be able to use all of the equipment you got when you purchased any of the different wine kits available on homebrewing.org, and purchase whatever additional supplies you may need to use when making fruit wines. When making fruit wines, the added equipment you need will require additional space, so be sure you understand this before deciding to make fruit wines.
Wine Grape Ingredient Kits
Wine grape ingredient kits allow you to choose from wine grape varieties that come from all over the world. These grape varieties will allow you to make wines from the same grape varieties as the wines you’d typically purchase from wine retailers everywhere. These concentrates give you the ability to make wine from the same grapes that are used to make your favorite European, Californian, or other types of wines that are made elsewhere in the United States or other parts of the world.
The huge range of grape concentrates that are available, and the ease with which you can get them, and the obvious difficulty you’d have in getting comparable fresh grapes means that grape concentrates are probably the best option when it comes to making traditional wines from wine grapes.
Using Fresh Fruit to Make Wine
There is a huge variety of different types of fresh fruit you can use to make your own wine, and it isn’t more difficult to make fruit wine than it is to make wine with grape concentrate. Always make sure you are choosing fruits that are in season at the peak of their ripeness. Consider using strawberries or rhubarb in spring, blueberries, blackberries, apricots, peaches, nectarines or plums in summer, and apples in fall.
When you make wine from fresh fruit, you will have to test the acidity and amount of sugar in your liquid and make adjustments accordingly. You will also need to find out exactly how much fruit you need to use to make a gallon of wine. Home wine making recipes will instruct you as you go through each of the steps in the fruit wine making process.
The decision as to whether to use fresh fruit or wine concentrate is an entirely individual one. When you’re making your own wine you can add anything you want to it to alter the taste. You may want to add dried berries, herbs, or flowers to a grape wine to enhance its flavor, or you may want to use fresh berries to make a sweeter wine. If you are going to use fresh fruit, consider purchasing it from farmers markets because you’ll know that you’re getting it at the peak of freshness and ripeness. Enjoy this fun experience, and invite your family and friends over to savor the taste of your newest creations.
How Sweet it Is: Sugar and Honey in Home Brew Wine
Home brewed wine is a beautiful product that is composed, in essence, of three parts – material selection, method of crafting, and time given for fermentation. With the right wine making supplies, intrepid brewers can elevate their collections beyond store shelf fodder by incorporating their own twists on additives and base ingredients. Wine making kits will come with components such as grape juices, yeasts and brewing containers, but curiosity drives many home brew enthusiasts to think outside the box when it comes to wine kits, researching switches and swaps that make vino truly personal. One of the most common changes is the sugar, or sugar alternative like honey, that is used to feed the yeast that ferments the juice.
Honey: Pros and Cons
Honey is a very complex ingredient all by itself – flower pollens and dozens of sugar compounds like dextrose and maltose are all packed into that thick, sweet syrup we all know and love. The taste of honey can vary widely depending on what flowers the producing hive frequents, giving rise to classic types like wildflower and more exotic varieties like orange flower or elderflower. When incorporated into the ingredients found in wine making kits, honey adds a deep complexity and sweetness to wine that many home brewers find more attractive than sugar, but it comes at a price. Due to the multiple sugars present in honey versus the single compound in traditional wine making sugar, fermentation takes considerably longer. According to home brewing enthusiast and blogger Jack Keller of JackKeller.net, 1.25 pounds of honey can be substituted for a pound of sugar in a given wine recipe, though if all of the sugar is exchanged for honey, you’ll end up brewing a honey wine or mead, rather than a traditional wine.
Sugar: Pros and Cons
Sugar, despite being a relatively simple ingredient, also comes in a wide range of forms that affect the wine it ferments. Traditional table sugar will produce wine that is consistent and familiar, but experimenting with more unique forms such as the blonde turbinado sugar or dark muscavado sugar with its hints of molasses will give your palate plenty to explore. The drawbacks of using sugar is that table varieties may not produce the depth of a finished product that you’d like, and the more exotic forms of sugar may be outside of the price range of beginning brewers. Sugar, however, is an excellent and stable ingredient to stretch your winemaking “legs” with, making it a must-have inclusion in wine kits. Sugar can also be added to a finished wine to sweeten it; rock sugar and bar or caster sugar are the most popular choices for this option due to their respective long and short dissolve times.
If you’re interested in home brewing wine, or are already a fan of the hobby, experimenting with both honey and sugar is the best way to find out which one, or what form of combinations, will work for your needs.

