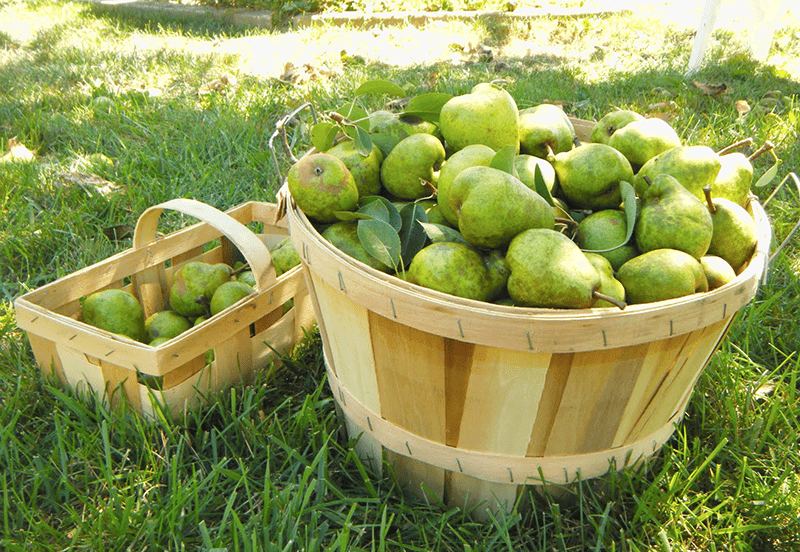
 I have a mature Kieffer pear tree that is producing quite a bit of fruit this year. I can’t can all of the pears, so I have been contemplating making wine with the left-over fruit. I have an electric power juicer and was wondering if it would be appropriate for me to use that to juice the fruit rather than boil and press it out by hand in a strainer bag. If so, is it alright to leave the seeds and skins on the pear? I just want to do this right and not waste the fruit.
Matt — PA
—–
Hello Matt,
In general, it’s not a good idea to make wine with a power juicer. I certainly wouldn’t buy a power juicer for the soul purpose of making wine. There are two very important reasons for this:
Category Archives: Wine
Wine of the Month, Wild Grape Wine
Our wine of the month is wild grape. When it comes to winemaking, grapes are generally classified into three separate groups: wild, wine, and European wine. Wild grape wine can be made with grape varietals such as Muscadine, Fox, and Frost. These grapes are high in acid, low in sugar, and assertive in flavor. We’ve got the lowdown on this delicious recipe! We’ll tell you where to find the grapes, their various health benefits, and which foods they pair best with.
Why should I make wild grape wine?
It comes as a surprise to many that wine can be healthy. When you make wild grape wine, the seeds of the grapes contain polyphenols, which are micronutrients containing anti-inflammatory and anti-oxidant properties. Evidence has proven that polyphenols can help prevent cancer, type 2 diabetes, cardiovascular and neurodegenerative diseases. Wild grapes also contain vitamins B1, B6, C, manganese, and potassium. Check out our wild grape wine recipe to get started!
Recipe:
20lbs of Wild Grapes
10 lbs. of Sugar
2 tbsp. of Yeast Nutrient
¾ tsp. of Pectic Enzyme
½ Wine Tannin
Yeast EC-1118
Wondering why this recipe calls for so much sugar? Keep in mind that because wild grapes contain the lowest amounts of sugar, they will need the most added to make wine. Pressing the wild grapes, however, can be done very quickly because a small tabletop press can crush 50-100 lbs. of grapes (about 15 lbs. a time). This recipe should make at least 5 gallons. If you’re a bit rusty on wine making with grapes, check out our guide to give your memory a refresh.
Where and how can I find wild grapes?
Unlike other grapes that tend to grow in clusters, wild grapes grow as separate berries. These are typically a bit smaller than other grapes, and can be black, purple, or dark blue. Fortunately, wild grapes can be found in almost any climate. Their vines, which grow very quickly and tend to climb and envelop structures, can be found along roads, fences, forests, and riverbanks. In fact, the wild grape is also called the riverbank grape!
What foods does wild grape wine pair best with?
The pungent taste and aroma of wild grape wine pairs especially well with rich dishes and meats. Similar to merlot, malbec, pinot noir, and cabernet sauvignon, this variety compliments beef, steak, game, lamb, pasta entrees, and rich cheeses very well. The bold flavor of this recipe will make your meaty and cheesy dishes that much better.
So next time you venture outside, keep your eyes peeled for the winding vines with the dark grapes- they might just help you make your next batch of wine! For more information on the home winemaking process and the tools you’ll need, check out our winemaking equipment and accessories.
Can You Make Wine In A Plastic Carboy?
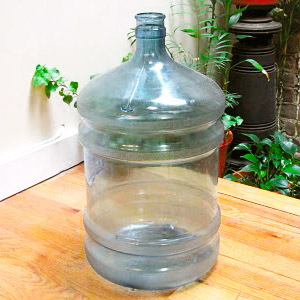 Hi, I ran out of glass carboys. Can you make wine in a plastic carboy? Like a water bottle? Will it change the taste of the wine?
Name: Curtis K.
State: MS
—–
Hello Curtis,
Yes, it is perfectly fine to use plastic carboys to make wine, just as long as you are talking about carboys that are used for holding drinking water. If you are referring to some other type of plastic container, you will want to check to see that it indicates food-grade on it somewhere, or that it was previously used for a product meant for human consumption.
The 5 gallon plastic water bottles – like you see at the grocery store – are made of food-grade plastic. And, as an additional step of assuring that no plastic taste will transfer into your drinking water – or wine – the manufactures blow in a thick layer of Saran to the inside of the plastic carboye as a last step. This is done to create a protective barrier.
Saran is an oxygen barrier plastic. This means that unlike some other plastics, it lets little-to-no air go past it, so you shouldn’t have any concerns about your wine oxidizing. Saran is also a very clean form of plastic, so there is virtually no chance of it putting a plastic taste in your wine.
I also wanted to point out that we have specially produced 3 gallon, 5 gallon and 6 gallon plastic carboys. These plastic carboys are manufactured specifically for home winemakers and beermakers. They are completely made of PET plastic and are BPA free. This is the same exact material used to make 2 liter soda bottles, only thicker. It is the ultimate plastic when it comes to being food-grade and durable. 
As an additional note, you may want to take a look at a previous blog post, There’s A Plastic Taste And Smell In My Wine. It goes a little bit over the different recycle symbols you will find on containers and what they actually mean. These are the little triangle arrows with the numbers in the middle.
So, can you make wine in a plastic carboy? Absolutely. Just know what kind of plastic you are dealing with and have an idea of what was in the container before, if anything.
Happy Winemaking,
Ed Kraus
———————————–
Ed Kraus is a 3rd generation home brewer/winemaker and has been an owner of E. C. Kraus since 1999. He has been helping individuals make better wine and beer for over 25 years.
Our Favorite Wine Memes from Around the Web
Whether your newsfeed is flooded with them on Wine Wednesday or you’re constantly tagging your friends in them on Instagram, wine memes are everywhere. Since we love wine so much, we’ve selected our top ten favorite wine memes for your enjoyment!


Our Favorite DIY Wine Rack Tutorials From Around the Web
What better way to display your last batch of homemade wine than a wine rack? We scoured the web and found our favorite DIY versions from fellow wine lovers. We hope to share some DIY inspiration for showing of the fruits of your labor: Continue reading
Buying The Right Wine Press For The Job
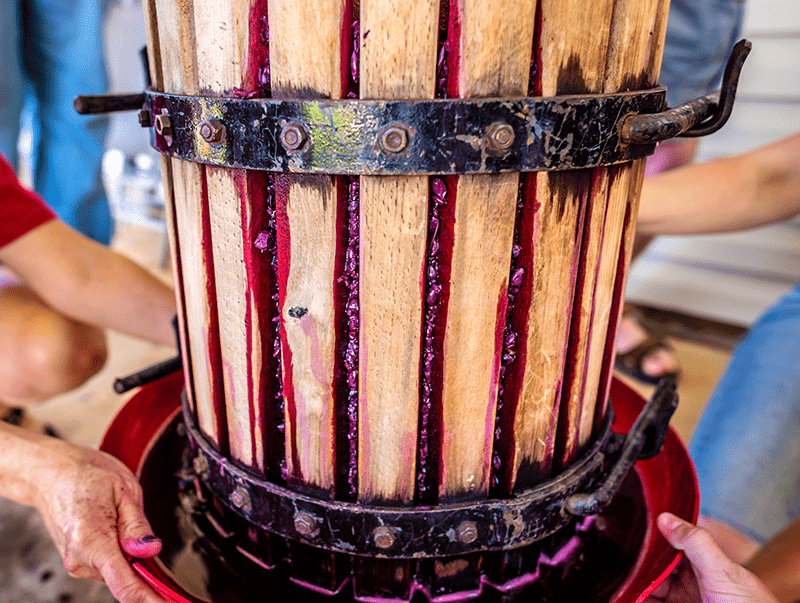 All wine presses pretty much operate the same way. Crushed grapes are dumped into the wine press basket and a pressing plate is forced down against them until they give-up the juice.
Accept for an import or two coming in from China, the quality of all the wine presses I currently see for sale are excellent. They are all produced by companies that specialize in winery equipment, not toys, and any of them will make you a happy owner.
So, what should you be looking for when shopping for a wine press?
The most important consideration is going to be size. Wine presses come in an array of sizes, from very small, all the way up to monstrous in size. You need to pick the size that fits your needs.
If you get a wine press that’s too small, you’ll have an annoying amount of pressings to do per batch of wine. If you get a wine press that’s too big you may be spending more money than necessary.
So out of all the different wine presses for sale, which one is the right size?
Realistically, you want a wine press that will require no more than 12 pressings per batch and no fewer than 3 pressings. Wine presses that don’t fit into this range, based on your batch size will work but should probably not be considered.
For example, we offer 3 different sized presses:
- R-30 Double-Ratchet Press (approximately, 5 gals./pressing)
- R-25 Double-Ratchet Press (approximately, 3 gals./pressing)
- Table-Top Press (approximately, 1 gals./pressing)
 The R-30 press would be good for batches around 15 to 60 gallons, the R-25 would be good for batches around 10 to 35 gallons, and the Table-Top Press would be good for batches around 3 to 12 gallons.
Do you plan on making larger batches of wine in the future?
If so, do you want to hedge you current purchase with a wine press that is larger than you currently need, or you could end up shopping for another wine press in the near future. Only you can really answer this question.
With all the wine press for sale on the market, I hope this clear things up for you a bit. It can be a big decision to make, especially when you consider that an wine press could potentially become a family heirloom.
———————————–
Ed Kraus is a 3rd generation home brewer/winemaker and has been an owner of E. C. Kraus since 1999. He has been helping individuals make better wine and beer for over 25 years.
What Vineyard? You Can Make Wine at Home
In a world where you can DIY just about anything, why not try wine? There’s a good chance you already have some of the household items tucked away in your pantry. With the right tools, ingredients, and environment, you can bottle up a hefty batch of your favorite vino. Here’s how to get started:
How To Tell If Your Potassium Metabisulfite Is Old
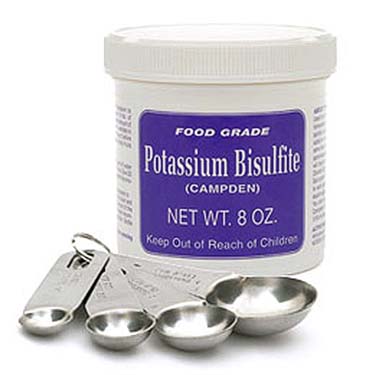 How do I know when Potassium Metabisulfite is old?
Name: Mike R.
State: PA
—–
Hello Mike,
This is a simple but important question. Mainly because potassium metabisulfite is responsible for doing so much throughout the wine making process. A home winemaker relies on it heavily. If you are blindsided with some potassium metabisulfite that is old, it could cost you a batch of you precious wine.
The problem with old potassium metabisulfite is not that it will directly ruin the wine. It doesn’t change into something that is harmful. It just loses its sanitizing power. It becomes weaker and weaker as time passes on. Eventually, it will come to a point that it is not doing it’s job successfully.
Unfortunately, there is no practical way to tell if the potassium metabisulfite you have is old or not other than by age. You can try smelling the granules to see if you can smell any sulfur coming off, but this won’t even tell you if it is strong enough to protect your wine. Time or age is the best predictor.
If you purchased the potassium metabisulfite within the past 12 months, it should be fine. The only exception would be if humidity or moisture got to it. This would cause sulfites to leave the potassium metabisulfite as a SO2 gas, leaving you with a weaker powder. If the potassium metabisulfite has become hard, this could be the case.
If it is older than one year, you should be cautious, but it is most likely to still be okay to use, especially if it was stored in a cool, dry place. If you purchased it more than 3 years ago, then without question, throw it away. It’s not worth even trying or taking the risk.
If you are not sure when you purchased the potassium metabisulfite and you got it from us, you can call and we will be able to tell you when you purchased the potassium metabisulfite. We keep all your purchases on file.
The ultimate way to know the strength of your potassium metabisulfite is to test it with an SO2 testing kit. By doing this you can know the exact strength of your sulfite. There are certain situation where this may be necessary.
My thought on this is the cost of buying fresh potassium metabisulfite is nothing compared to loosing a batch of homemade wine. Your time along with the cost of other the ingredients being on the line, I say just keep the potassium metabisulfite fresh.
Happy Winemaking,
Ed Kraus
————————————
Ed Kraus is a 3rd generation home brewer/winemaker and has been an owner of E. C. Kraus since 1999. He has been helping individuals make better wine and beer for over 25 years.
What Causes A Salty Taste In Wine?
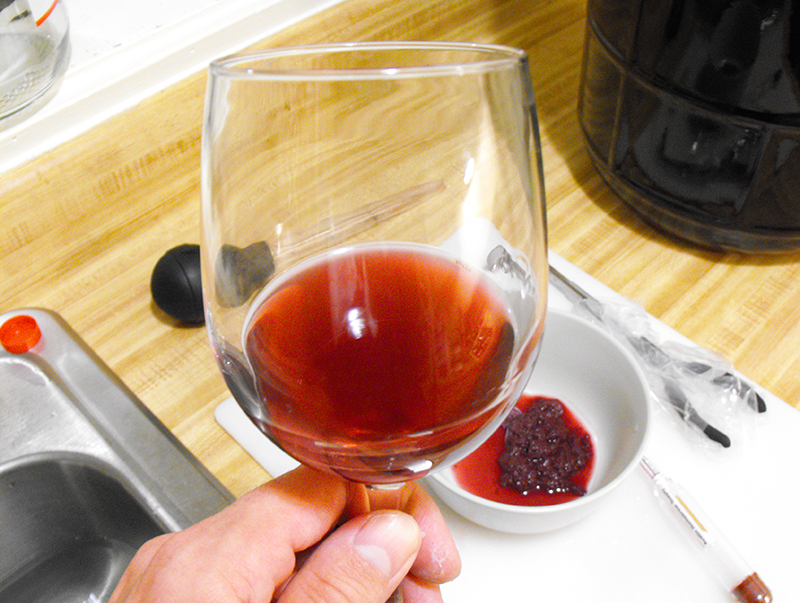 I have been aging my last years batch of wine since late September of last year. I tasted it and there seems to be a salty taste in the wine. I have never ran into this problem before. Do you have any suggestions, or will I have to call this a loss?
Name: Scott
State: CA
—–
Hello Scott,
Having a salty taste in a wine is a very unusual fault to have, but I am going to think out-loud a bit and see what I can come up with.
- My first thought would be that if you are aging in a wooden barrel, the remnant salts from the sodium metabisulfite may have built up over the years through insufficient rinsing or no rinsing at all. But this is very unlikely. If you make any kind of conscious effort to rinse a barrel you would be able to keep up with the trace amount of salts that are left behind with each wine batch.
- My second thought is that a mistake was made in a dosage added to a wine/must. For instance, yeast nutrient (diammonium phosphate) would add what some would call a salty taste to the wine if too much were added, but this would take many times the normal recommend dosage.
- Third would be saltiness from the grapes themselves. This could add a salty taste in wine. This could apply if you made the wine from fresh grapes from a vineyard. The mineral content of the soil is always reflected in the grape’s flavor to some degree. This is one of the reasons a grape’s origin is always noted. If you are making wine for the first time from a particular soil or terroir, then this is what could be going on.
- The fourth thing that comes to mind is a mold infection. The only reason I left this for last is because it is the least likely of the four. This is because by the time the wine has a salty taste from mold, it is already blatantly obvious from a visual inspection that mold as set in. So if you don’t see any patches of dried crust on the surface anywhere, or a rainbow-ed, oil-slick look on the wine’s surface, the salty taste in the wine is not being caused by a mold.

Beyond these things the only thing that comes to mind is accidentally putting salt in the wine. But this is obviously a pretty ridiculous thought considering I can’t even imagine how that could happen – short of a twisted friend playing cruel joke.
One thing I would suggest trying is cold stabilization. Take a sample of the wine, say a gallon, and chill it down in a refrigerator for 1 or 2 weeks. What you are looking for is excess elements in the wine to precipitate out. If you do see something drop out and it improves the flavor of the wine, then you can treat the rest of the batch in the same way.
Besides cold stabilization I doubt there is much you can do to remove the salty taste from the wine. You could try a fining agent such as bentonite, but I do not feel that this is like to help.
Best Wishes,
Ed Kraus
———————————–
Ed Kraus is a 3rd generation home brewer/winemaker and has been an owner of E. C. Kraus since 1999. He has been helping individuals make better wine and beer for over 25 years.
Leigh Erwin: Starting A Black Current Wine Ingredient Kit
Hey everybody!
Now that the Cellar Craft Sterling California Chardonnay has been bottled and put to bed (well, those few bottles that manage to escape my husbands’ clutches), I can finally move onto another wine ingredient kit! I’m going for a red this time, and actually to be a little more specific, I’m going for a red dessert wine. I ended up purchasing the Cellar Craft Specialty Black Current Dessert wine ingredient kit from E. C. Kraus.
Right off the bat, I thought “whoa, this is going to be really different”. The only wines I’ve made so far have been table wines, so making a dessert wine is new to me for the simple fact that it’s a sweeter wine with higher alcohol, and also for the fact that the instructions that came with the wine ingredient kit are a bit different than they have been for the table wines I’ve made so far.
First big difference I noticed for this Black Currant dessert wine is the preparation of the wine yeasts. For all the other wine kits, I could just sprinkle the dry yeast right on top of the juice/must and that was it. For this dessert wine, I had to take a little bit of the juice plus some hot water and create a sort of “fermentation juice solution” with those liquids and the yeasts prior to adding to the wine. I did as instructed and mixed the hot water and juice, then added the yeasts on top and left to sit for 20 minutes.
The instructions did not say to stir the yeasts or anything, so I just let it sit there. Turns out that the 20 minutes was a perfect amount of time for the yeasts to fall into the solution on their own and get cracking on making that alcohol!
One thing I already did “wrong” at least as far as this wine ingredient kit goes is that I added the juice to the fermenter before I added the bentonite. I was supposed to prepare the bentonite in the bottom of the fermenter first, but since I had already opened the bag of juice for the yeast preparation I just went ahead and poured it all in before the bentonite step. The bag is very heavy (at least by my standards) and I was concerned I’d spill the juice if I left it opened while I tended to the bentonite, so in the carboy it went.
What I did instead was I prepared the bentonite with the hot water exactly as the instructions for this wine ingredient kit said except I did it all in a clean, sterilized bowl and then added it to the juice that was in the carboy after it was well mixed. I’m hoping that this will still work out OK. There was no bentonite left in the bowl when I was done, so it still got in there!
Once the bentonite was added and mixed into the juice, I checked the starting specific gravity with my wine hydrometer, then added the oak chips packet and mixed. Finally, the prepared yeast fermentation juice solution was added and mixed into the juice, covered, and fingers crossed for fermentation to actually get started! So far, everything is going great with this wine ingredient kit.
———————————–
 My name is Leigh Erwin, and I am a brand-spankin’ new home winemaker! E. C. Kraus has asked me to share with you my journey from a first-time dabbler to an accomplished home winemaker. From time to time I’ll be checking in with this blog and reporting my experience with you: the good, bad – and the ugly.