It is essential to understand where you should and shouldn’t be making wine in your home. The difference between a good and bad batch of wine is dependent on the environment that it ferments in. Wine can be made in any home, but you must be able to find the best possible environment to achieve winemaking success. Continue reading
Category Archives: Home Wine Making
Ready to Make Your Own Wine? Make Sure You Do These 3 Things Before You Start
Making wine for the first time can often make you feel like a mad scientist. Even when following a recipe step-by-step, uncertainty about the finished product remains. Will it taste good? Did I add enough yeast? How long is too long for fermentation? These are all questions you may ask yourself the first time you make wine.
Perfecting the art of making wine takes practice and several batches. However, there are a few things you can do to make sure your first batch doesn’t leave you with a bad taste in your mouth. Continue reading
What Vineyard? You Can Make Wine at Home
In a world where you can DIY just about anything, why not try wine? There’s a good chance you already have some of the household items tucked away in your pantry. With the right tools, ingredients, and environment, you can bottle up a hefty batch of your favorite vino. Here’s how to get started:
Leigh Erwin: Making A California Chardonnay Wine Kit
 Hi everyone!
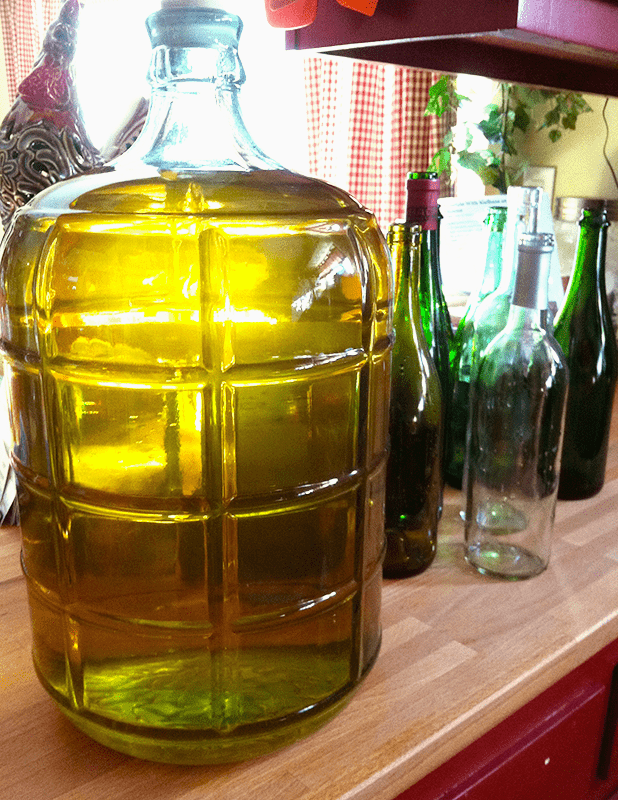
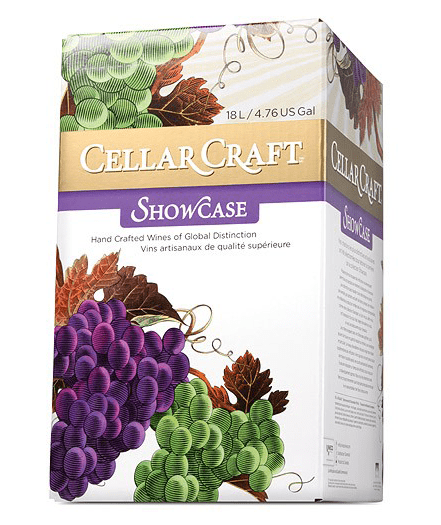
I’m excited to finally be making a new batch of wine after a couple of weeks hiatus. I’m partially nervous, though, because I’m making the Cellar Craft Sterling California Chardonnay wine kit again, and if you recall last time I tried to do that, I messed up big time in regards to the fermentation temperature.
This time, however, I am prepared! I have the heating pad all set up and am not going to touch it at all until fermentation is complete.
To start the Chardonnay wine kit off, I ended up using tap water as if you recall from an earlier post I wrote, the tap water here where I live doesn’t give off any sort of chlorine smell and I’m pretty positive it’s winemaking worthy. I remember making a red wine in the past with straight tap water and it came out just fine, so hopefully the same will be true for this white.
Primary fermentation for this Chardonnay wine kit went very smoothly. I followed all instructions that came with the wine kit to the letter and made sure the temperature of the wine was never too low.
Secondary fermentation came right on schedule for this Chardonnay (day 7), though I did notice it still smelled a bit yeasty. Cue flashbacks from the screwed up batch….
Anyway, since there is still yeast doing their thing in there, I was not at all concerned about the yeasty smell and crossed my fingers that it could complete secondary instead of getting stuck like it did last time. Actually, I don’t think it even made it out of primary fermentation last time, but I digress…
The end of secondary fermentation, however, did not come exactly on time as the instructions suggested it probably would. Instead of finishing up on Day 20 as the instructions indicated, I didn’t move on to the degassing stage until Day 24. I actually think I may have made a slight mistake at this point though, as I think I stopped secondary 0.002 specific gravity points too soon, according to my wine hydrometer.
See, the instructions said: “Targets: Sterling Reds, Showcase Reds & Whites: <0.998 or Sterling Whites: <0.996.” The specific gravity I noted on Day 24 was 0.998, so quickly looking at the Target values, I thought I had been working with the Showcase White and that 0.998 was correct. Well, turns out I read it a little too quickly and had forgotten that I was actually working with the Sterling White, so I shouldn’t have moved onto the next step until the specific gravity was 0.996. Oopsie. I hope that doesn’t come back to bite me.
The wine didn’t smell nearly as yeasty any more, though I thought I might still be able to smell a little bit. I should note: my sense of smell might be a little heightened right now since I am pregnant (surprise!), so I’m hoping it’s still going to be OK and whatever yeasts might still be in there will fall out during the clearing stage.
———————————–
 My name is Leigh Erwin, and I am a brand-spankin’ new home winemaker! E. C. Kraus has asked me to share with you my journey from a first-time dabbler to an accomplished home winemaker. From time to time I’ll be checking in with this blog and reporting my experience with you: the good, bad – and the ugly.
Leigh Erwin: My Stuck Fermentation
 Hello fellow home winemakers!
In case you haven’t been following my posts, my latest issue in my home winemaking adventures is a seemingly slow or stuck fermentation with my Cellar Craft Sterling Chardonnay. I had set up the primary fermentation according to the letter, but six days later, the specific gravity had gone from a 1.100 to a pathetic 1.080. Just as the name sounds a stuck fermentation is a fermentation that is not doing anything when it should.
I had mentioned to you that I’d been using the air conditioning a bit more during this time and had not closed the vent to the winery room, making the room a lot colder than it had been previously.
In a panic, I tossed in some yeast nutrient and yeast energizer, stirred it up, and then got out my heating pad. I plugged that in and set it under the fermenter, then crossed my fingers and went straight to my computer to ask the pros at E. C. Kraus to see if they could tell my why I had a stuck fermentation.
Here was their response:
“When I see this happening in this way with a wine ingredient kit, it normally points to one of two things:
1) Either the room temperature is too cold — which I’m sure you know, already;
2) Or, some of the yeast cells were killed through the rehydration process. See this article:
“Pros And Cons Of Yeast Rehydration”
It doesn’t hurt to add more nutrients, but I doubt if this will help. Wine ingredient kits, in general, are packed with a lot of nutrients, already. I would go ahead and add another pack of yeast to the wine must. Be sure to just sprinkle the granules directly on top. They will soak in and dissolve on their own.”
So, it sounds like I may have wasted some yeast nutrient and energizer in my little panic, since wine kits usually contain plenty of nutrients themselves, but that’s OK. I suppose it shouldn’t hurt the wine.
I did add some new yeast to the mix, though I decided to try and rehydrate them first instead of just sprinkling them on top. I don’t really know why I did this – in retrospect, this was probably another bad decision on my part, but I was in a slight panic and wasn’t thinking totally straight.
After a bit of waiting, I FINALLY hit 1.000 on the wine hydrometer 19 days after starting fermentation. I have no idea how having a stuck fermentation affects the quality of the finished wine, but so far the wine looks OK and smells OK. I’m not going to keep my hopes up with this wine, but I think it might still be salvageable.
A couple things I learned this time around: 1) check on the wine every day or two instead of waiting so long (I waited 6 days instead of peaking my head in to see if things were moving) and 2) always monitor the temperature of the wine with a thermometer, particularly when the weather outside is in flux and the heat or air conditioning is being used differently than it had been previously. Doing these two things would have helped to keep my wine from being prey of a stuck fermentation.
———————————–
My name is Leigh Erwin, and I am a brand-spankin’ new home winemaker! E. C. Kraus has asked me to share with you my journey from a first-time dabbler to an accomplished home winemaker. From time to time I’ll be checking in with this blog and reporting my experience with you: the good, bad — and the ugly.
Other Ways To Seal Wine Bottles
 Many beginning winemakers will be happy to know that you do not have to buy a corker to seal your wine bottles. We have other ways to seal wine bottles during the wine making process. Consider the alternatives listed below for your next batch!
When you go to buy wine corks for your wine bottles you will find that most of them require a corker to press the cork into the wine bottle. This is because a new cork starts out much fatter than what you are used to seeing coming out of the wine bottle when decanting.
These are the type of wine corks we recommend using, particularly if you know you’re going to continue to make more wine into the future. But, if you are not sure if you’ll be making more wine, or you just don’t feel like buying a corker, just yet, there are other ways to seal your wine bottles.
Mushroom corks are an easy way to seal your wine bottles without using a corker. They are basically a cork with a plastic grip top. They come both in natural cork and synthetic cork. With some force they can be pushed in by hand to create a tight seal. While they do not seal quite as tight as traditional corks being pressed in, they are more than sufficient for any wine that will be consumed within 12 months.
Another way to seal your wine bottles that does not require a corker is our reusable wine bottle stoppers. Just like the mushroom corks, these stoppers can be put in by hand as well. Their unique design of ridges creates a series of chambers to produce a seal. While these stoppers are not all that attractive for passing out as wine making gifts, they can be covered up with decorative heat shrink capsules to give them a professional look.
And yes, you can always use screw cap wine bottles. By using screw caps you will be sealing the wine bottle air-tight, however you must have the right screw cap on the right bottle. Not any wine bottle can take a screw cap; it must specifically be a screw cap wine bottle. And, the screw caps you are using must be the correct size with matching threads. Not all threads are the same.
In summary, you do not have to buy a corker. There are other ways to seal a wine bottle. But, if you plan to continue making wine corks and a corker are your best long-term option.
Happy Wine Making,
Ed Kraus
———————————–
Ed Kraus is a 3rd generation home brewer/winemaker and has been an owner of E. C. Kraus since 1999. He has been helping individuals make better wine and beer for over 25 years.
Lowering The Alcohol Level Of Wine With Water
 Can you tell me when to add water to my wine, is it during fermentation or after? I make wine using Cabernet Sauvignon and Zinfandel grapes mixing 50 /50, but it always comes out very strong, I like that smooth taste, any suggestion?
Thanks Joe,
—–
Good Morning Joe,
Both of the grapes you mentioned are normally made using 100% grape — no water added. This isn’t the case with all grapes, just with wine varietals such as these. They will produce a wine anywhere from 11% to 13% depending on how the growing season went that particular year.
If you want to lower the alcohol level of your wine with water, the optimal time to add it would be before bottling. The wine is clear and stable and can easily be blended with water.
It is important that you use distilled water at this stage of the winemaking process. Tap or bottled drinking water has oxygen saturated in it. The oxygen in this water can promote oxidation in the wine if it is added.
How much distilled water you add is entirely up to you, but I would suggest that you keep the wine at an alcohol level of 8% or above. Wines below this have a harder time protecting themselves from spoilage. For the same reason, I would also urge you to add sulfites to the wine before bottling. This could either be by way of Campden tablets or potassium metabisulfite. Either of these will help to protect the wine.
The only way to know with certainty how much distilled water to add and still keep the wine above 8% alcohol, is to start by knowing how much alcohol is in the finished wine. This will require the use of a wine hydrometer. The hydrometer will allow you to determine how much alcohol is in your wine. You will need a reading taken before the fermentation and another one after the fermentation. By comparing the two hydrometer readings you can calculate the alcohol level of your wine.
To know how much distilled water to add to get from your finished alcohol level to the one you desire. I would suggest you use a tool called the Pearson Square. It is a method of calculating ratios when blending two different wines. In your case you are blending wine and water. Use the Pearson Square in this way. The distilled water is 0% alcohol.
Lowering the alcohol level of a wine with water is something that is not typically done, however rested assured that if you use the methods above you will have no problems with getting your wine safely to an alcohol level you prefer.
Happy Winemaking,
Ed Kraus
———————————————————————-
Ed Kraus is a 3rd generation home brewer/winemaker and has been an owner of E. C. Kraus since 1999. He has been helping individuals make better wine and beer for over 25 years.
Can I Legally Make Wine At Home?
When my grandfather started E. C. Kraus back in 1966, wine making at home was illegal, so was home brewing. The truth of the matter was, he was selling supplies for the purpose of making an illegal substance. Never thought of it that way until just now, but that’s how it was.
But all that changed when legislation was carried into Congress by Senator Alan Cranston of California. This legislation would make it legal for both home winemakers and home brewers to make their delectable beverages. It was signed into law with little fuss by President Jimmy Carter and became law on February 1, 1979.
The bill made it Federally legal for a single adult household to make up to 100 gallons of wine and beer each year, and up to 200 gallons for a households with two or more adults. This law still remains in effect to this day.
Here are some things you should know:
- It is still very illegal to distill alcohol at home. Distilling is very different from wine or beer making and was not covered in the new legislation in any way.
- The bill does not allow for the sale of homemade wine or beer. So don’t think this gives you a green light to set up shop.
 While this legislation made in okay to ferment alcohol at a Federal level, at the time of the signing there where laws in many States that still made it a crime to produce alcohol. It wasn’t until 2013 that the last states made legal to make beer or wine in some capacity. Some States do have varying restrictions.
Even with these few caveats, it’s still great to know that you can legally make wine at home without fear of prosecution of some sort. So get some cookin’ invite some friends over an share and have comfort knowing are doing it legally.
Thanks Senator Cranston!
———————————————————————-
Ed Kraus is a 3rd generation home brewer/winemaker and has been an owner of E. C. Kraus since 1999. He has been helping individuals make better wine and beer for over 25 years.
Leigh Erwin: What's In Store
 Hi all!
Ah the drama of finding a new home never ends! We haven’t moved yet, but we’re oh so close!
That being said, I’m still in a holding pattern when it comes to my home winemaking. I thought I would take time today to figure out my next steps in terms of what wine I would like to make next, and what equipment I should get based on what I have already and what I feel would be really beneficial for me to have based on my experiences so far with home winemaking.
I’ve only made one red wine so far (recall: the Carmenere). This one actually came out pretty well, and we actually served some of it at our wedding (and people liked it!!). So far, it’s been my favorite of my homemade wines, so I think I’ll try my hand at another red to see what happens!
I’ll probably do another wine ingredient kit this time, rather than purchasing separate ingredients. It’s just easier that way, and while we’re settling into our new house (wherever that may be), it’ll just be more straightforward and simple.
In addition to the wine ingredient kit, there are a few pieces of equipment I would like to get, partially to help monitor my wines more closely as the process moves along, and also partially to start building up my own mini home winemaking empire (in my dreams, right?).
First of all, I really need a digital pH meter. I did buy that acid test kit, which will come in very handy, but I think having a pH meter will be equally, if not more, telling when I’m testing my wine for acid levels. I think more information is always better, so it wouldn’t hurt to have both. Besides, if I decide to make mead again, the acid test kit I bought is pretty much useless anyway, so I’ll definitely want the pH meter at that point.
If I’m going to be starting my wine from fruit in the near future, I’ll probably want a scale in the house as well. I suppose having a scale would be useful in the kitchen in general, so it’s really a solid investment. I like the look of the Escali:Mercado Dial Scale that I spotted on the ECKraus website, as it measures just about anything (grains,fruits, sugar, etc) and is affordable at just under $40.
Finally, one day I’d like to get a stainless steel fermenter. I’ll definitely want to be making wine on a more regular basis in order to convince my husband to let me get one of these, but I don’t particularly care for the plastic fermenter and would like to upgrade eventually.
All these things will come in due time, but for now I am going to focus on my next wine ingredient kit.
————————————————————
My name is Leigh Erwin, and I am a brand-spankin’ new home winemaker! E. C. Kraus has asked me to share with you my journey from a first-time dabbler to an accomplished home winemaker. From time to time I’ll be checking in with this blog and reporting my experience with you: the good, bad — and the ugly.
10 Things to Know Before Brewing Your Own Hard Cider
If you’ve made hot apple cider on the stove, you’ve had a simple introduction to the cider-making process. However, hard cider is a different animal. There are a lot of variables that can affect the quality of the beverage.
Before you dive into your first batch of hard cider, read these 10 tips on how to brew a great batch. Continue reading