 One could easily write a book on this subject and still not have a complete answer to this question. Belgium has a very long, creative, and artisanal brewing tradition that makes it difficult to lump all Belgian beers into a single category. Whereas in Germany, the Reinheitsgebot required brewers to only use barley, water, and hops, there was no such law in Belgium. Brewers in Belgium were allowed to experiment and continue to do so. As a result, there is a huge variety of beers being made in Belgium, and essentially no restrictions on what can go into them.
That said, there are a few broad characteristics of Belgian beers:
• Belgian yeast strains – Though some Belgian beers (such as Lambics and Saisons) are fermented using spontaneous or “wild” fermentation, most Belgian beers are brewed using very specific yeast strains. Belgian brewers will often ferment these beers at higher temperatures to encourage spicy, fruity, or phenolic flavors and aromas that are produced by stressing the yeasts.
• More malty than hoppy – You’re not likely to find a hop bomb in Belgium (the Belgian IPA is an entirely American construction). Belgian beers are traditionally brewed featuring combinations of wheat, barley, spelt, oats, and other grains.
• Use of spices and herbs – Prior to the widespread use of hops, beers were commonly flavored with a blend of herbs and spices called a gruit. Many of these ingredients survive to this day, the most popular being the coriander/orange peel combination in Witbiers. Saisons also frequently use a variety of spices and herbs.
• Bottle conditioned – Many Belgian beers go through a secondary fermentation in the bottle, which carbonates the beer. As a result, bottled Belgian beers will often have yeast sediment at the bottom. Generally speaking, it’s preferable to leave that sediment behind (despite what Hoegaarden recommends).
Want to brew Belgian beer at home? Try some of these ingredients and brew kits to make your own authentic Belgian-style ales:
Ingredient kits:
• Brewcraft Belgian Wit (White) Bier Recipe Kit – All ingredients are pre-measured and included for brewing this iconic style. Belgian Witbiers are cloudy, pale in color, and flavored with coriander and orange peel.
• Brewcraft Belgian Tripel Recipe Kit – Belgian candi sugar helps raise the alcohol content of this Belgian ale. Look for complex flavors of banana and citrus with a touch of spice.
Yeasts:
• Wyeast 1388: Belgian Strong Ale Yeast – Wyeast 1388 is ideal for strong golden ales. It’s very alcohol-tolerant and finishes dry, fruity, and somewhat acidic.
• Wyeast 3787: Trappist High Gravity Yeast – This yeast is a good all around Belgian yeast strain, featuring a fruity flavor and aroma. This is a very active yeast, so be prepared for high krausen. Tolerant up to about 12% ABV.
Adjuncts and Additives:
• Dark Candi Sugar – This is an invert sugar that helps raise the alcohol content of Belgian ales without adding malt character or body. Also contributes some color. (275º Lovibond)
• Light Candi Sugar – Light candi sugar helps to raise the alcohol content of Belgian ales without adding malt character or body. Unlike the Dark Candi Sugar, this will not add color to your beer.
Winemaking Equipment Guide: Heating Pad, Transfer Pump & Steam Juicer
 There are so many more pieces of homemade wine equipment than can be described in one post. It’s important to understand each piece of homemade wine equipment, how it functions, and whether or not a particular piece of equipment is needed in your home winemaking practice. Today, you’ll be introduced to three important pieces of equipment: the Copper Tun Heating Pad, the Transfer Pump, and the Steam Juicer.
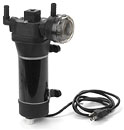
Copper Tun Heating Pad:
The Copper Tun Heating Pad, while not a required piece of homemade wine equipment, is a piece of equipment that once you try, you’ll wonder why you hadn’t used it before. This piece of homemade wine equipment is fantastic for those that don’t have good regulation of heat within their work space, and who often run into trouble with stuck or slowed fermentations due working in temperatures too low for the yeasts to perform efficiently. The Copper Tun Heating Pad keeps the must at an appropriately warm temperature without overheating the wine yeasts. This device works with both plastic and glass fermenters and has the ability to heat musts from between 10 and 20 degrees F.
 Transfer Pump:
The Transfer Pump is a highly efficient piece of homemade wine equipment that will make the racking of your wine significantly easier than doing it by hand. This piece of homemade wine equipment runs on electricity, and has the ability to transfer between 1 to 3 gallons of wine every minute. Another nice feature of this piece of homemade wine equipment is that there is both an on/off switch and a variable flow adjustment dial to allow you to have more control over how fast you rack your wine from one vessel to another.
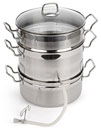 Steam Juicer:
The last piece of homemade wine equipment for today is the Steam Juicer. This piece is not as common in home winemaking, but those that use it claim that it has contributed significantly to their home winemaking practice. Basically, the Steam Juicer is a mechanism for extracting the juices out of fruits or vegetables. Many, if not all, of you are familiar with extracting juice from fruits or vegetables using the press, and the Steam Juicer is just another way to achieve the same end result.
The Steam Juicer acts similar to a steamer in your kitchen, by using the power of steam heat to break down the tough skin exterior and release the juice components into a central collector. Different from your standard kitchen steamer, the Steam Juicer has a spout attached to it so that you may drain off the juices in order to proceed with the winemaking process.
Other Winemaking Equipment Guides from the past:
• Winemaking Equipment Guide: Airlocks, Refractometers & Filters
• Winemaking Equipment Guide: Hydrometer, Fermentation Carboys & Bottle Corkers
———————————————————————————————————
Ed Kraus is a 3rd generation home brewer/winemaker and has been an owner of E. C. Kraus since 1999. He has been helping individuals make better wine and beer for over 25 years.
Why Crushing and Destemming is so Important to Winemaking
When looking at the grape crushing process in winemaking one might assume that it’s really just a fancy way of juicing the grapes. In fact, without crushing, that grape juice might never actually turn to wine in the first place. Simply put, crushing and destemming are one of the most important parts of the winemaking process.
The point of crushing is not merely to juice the grapes, but to get the juice running – to get the sugars and the yeasts intermingling by breaking the grape’s skin. This allows the yeast to begin turning the sugar into alcohol and carbon dioxide. In other words, it’s not really going to become wine if you don’t crush the grapes. You can get some great grape juice, but you’re not going to get the fine wine you’re looking for.
You may be surprised to learn that it is actually the grape skin that lends red wine its color, so the winemaker might not divide the wine and the pulp immediately after crushing the grapes. Destemming takes place at this point in time regardless of what sort of wine you’re trying to make, but if you’re after a white wine, you’ll be removing the grape skins right along with the stems. When making red wine, the skin will usually be left in with the juice during the pressing and fermentation process.
There may be some variations to this step of the winemaking process depending on what type of wine is being made and who’s making it, but generally speaking, grapes need to be crushed and destemmed.
Need some help with your crushing and destemming process? Check out our assortment of crushers and destemmers.
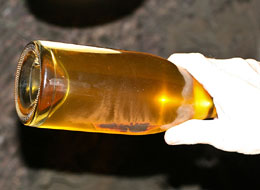
Getting Your Wine Ready For Bottling
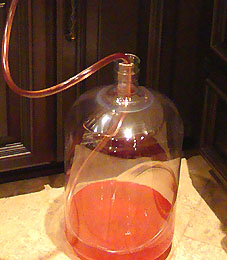 I will be bottling my first batch in the next week or so. Planning it out, I would find it much easier to dispense the wine via the spout on the large fermentation container. However the wine is finishing up its process in the 6 gal carboy. The question is, is it safe to move the wine from the carboy to the fermentation container at the moment I am ready to bottle? I would certainly be sure I minimize oxygenation and everything would be sterile. Thanks for your reply.
Name: Larry
State: NJ
Hello Larry,
Actually, it would be preferable for you to move (rack) your wine from the carboy to a bucket fermenter at this stage of the winemaking process.
The #1 reason for this would be to get the wine off the sediment. You should expect to have more sediment at the bottom of the carboy at this point. You need to get this sediment away from the wine.
Before bottling it is recommended that you add a sulfite such as Campden tablets or sodium metabisulfite to the wine. This will help to preserve it while it is aging in the wine bottle. To do this you will need to stir the sulfite into the wine. If the wine has sediment on the bottom you will be stirring this sediment back up into the wine. That’s a bad thing. It’s also awkward to stir a wine while it’s in a carboy unless you have something like a degassing/mixing paddle.
The #2 reason is the reason you stated: as a matter of convenience. Starting a siphon out of a carboy and maintaining that siphon and controlling its flow all at the same time can be difficult. It is much easier to deal with a spigot that has an on and off and does not require a siphon to be maintained.
A Quick Tip
Just as you stated, you do not want to splash the wine around any more than you have to when racking the wine into the carboy. Keeping the air exposure to a minimum is important. This can easily be done with a siphon hose. Start the siphon and make sure that you fill the bucket fermenter from the bottom-up. In other words, make sure that the siphon hose can reach all the way to the bottom of the fermenter you are filling. By doing this you will be eliminating all the splashing and keeping your wine safe from oxidation.
Happy Winemaking,
Ed Kraus
———————————————————————————————————
Ed Kraus is a 3rd generation home brewer/winemaker and has been an owner of E. C. Kraus since 1999. He has been helping individuals make better wine and beer for over 25 years.
How Can One Organize Your Own Brew Fest?
Forget Octoberfest–this is your fest.
If you’re passionate about beer, home brewing, and everything that has to do with beer sampling and know of others that share the same interests, why not take a shot at organizing and starting your own brew festival tradition? There’s a lot that you’ll need to do and a lot of duties to assign, but if it all comes together, your own brew fest can be a fun, rewarding experience.
So what exactly do you need to do to plan your own beer festival? Here’s a look:
Gauge Interest: The first step in planning any festival– especially if it’s a first festival–is to gauge interest. Do this by putting out feelers to local breweries and pubs in your area to see if they would be interested in attending and maybe even in helping you promote it. Talk with the owners about this. As people who deal with a clientele of beer enthusiasts on a daily basis, they’ll be able to give you a better idea of how successful–from a participation standpoint–a brew fest might be.
Set a Date, Venue, and Logistics: If you’re confident a brew fest will be well attended, then the next step is setting a date, selecting a venue, and working out other various logistics. For instance, if your brew fest is taking place outside, you’ll likely need to look into tents, porta potty rentals, security, and maybe even a rain contingency plan. In line with other logistics you’ll need to work out, consider planning special events and competitions for your brew fest. Taste tests, home brewing competitions and beer pong all make for good events at beer brew festivals. Don’t forget to check for any necessary permits you might need!
Seek Sponsorship: If you can secure any sponsorships for your brew fest you can save organizational costs, and can charge cheaper admission prices. Circle back to the local breweries and pubs you visited when seeing whether or not your brew fest was feasible and ask if they’d be willing to sponsor the event.
Market and Advertise: The final step is to market and advertise your brew fest. See if local businesses will hang flyers in their windows to help spread the word and consider buying ad space in your local newspaper. Create a press release and send it to local media outlets to see if they’ll add the brew fest to their event calendars. Also encourage any sponsors to help promote the event.
It’s a lot of work planning and organizing your own brew fest and a lot more work on the day-of to ensure it goes off successfully. But doing so can be a fun, rewarding experience that may spur a new tradition. Make it even more fun and try to promote your home brewed beer to promote at the festival! You can get everything you’ll need right from our website.
A Simple Guide to Malted Barley
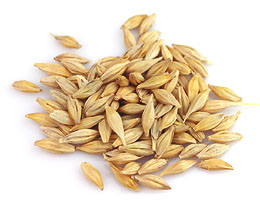 Malted barley is used in brewing beer as it is a good source of sugars (especially maltose). These sugars are fermented during the process of making beer. During the malting process, the grain germinates a bit, which allows the beer to make full use of the nutritional qualities of the seed.
There are certain enzymes that are released during the germination process, and these enzymes break the protein matrix to create simpler carbohydrates that ferment more easily. If the germination process is allowed to continue, a plant will start to grow, and the starch that is required by the beer would be consumed by the plant. Not a good thing. This is why it is important to stop the germination process at precisely the right point.
From the point of view of a brewer, there are two types of malted barley: the one that needs to mashed, and the one that doesn’t. In mashing, barley is soaked in hot water which lets the enzymes grow and convert starch into sugars. There are light colored malts like Pilsner beer malt and pale ale malts that are mashed to convert starch to sugar. Some of these malts are roasted or kilned to add different tastes.
Apart from the light colored malts, there are some malts that don’t need mashing. These are called specialty malts and are used to add unique flavor, color and aroma to the beer. They sometimes go through a special heating process where their starch gets converted to sugar, which is why they have complex sugars that have a caramel like sweet taste. They are sometimes known as caramel malts or crystal malts and they come in various colors and roasts. You can find more information on this in another blog post, What Are The Different Malts Used In A Homebrew Recipe?
Although barley is still the number one choice of most brewers, you can use other grains as well, like flaked rice, flaked corn, flaked oats, and flaked rye. When you are brewing at home, there is a lot to experiment, and the options are practically unlimited.
________________________________________________________
Read More About Malted Barley And Other Beermaking Topics,
FREE EMAIL NEWSLETTER:

________________________________________________________
Will Degassing A Wine Get Rid Of Off Flavors?
 I think I’m obtaining an off-taste with my Muscadine wine because it needs additional degassing. I degas the wine once after the 7 day initial fermentation. Can I also degas again after 30 days and right before the first rack? I understand that the degassing technique may place unwanted oxygen into the wine…..what do you recommend? Thanks
Name: Hermanator
State: Missouri
Hello Hermanator,
I would never recommend degassing the wine more than one time. The later you can wait to do this in the wine making process the better off you will be, preferably close to bottling time.
You are correct in your assumption that degassing could saturate unwanted oxygen into the wine. The oxygen can permanently damage the wine through a process of oxidation, causing the wine to turn amber or orange, and in more advanced cases, giving the wine a raisin flavor. For this reason great care needs to be taken not to splash the wine when you are degassing it.
Splashing the wine is what allows air to be engulfed into the wine. One simple way to degas without splashing is to use a degassing paddle. This is essentially a spinning paddle that goes down into the wine, agitating it from within. Another blog post, Degassing Homemade Wine, has more information on this subject.
The whole purpose of degassing is to cause any lingering CO2 gas from the fermentation to release from the wine and dissipate, but after reading your question I get the feeling that you may be trying to degas something other than CO2. This type of gas is usually not referred to as an off-taste. It simply causes the wine to be fizzy, no different than beer or soda pop. Also there should never be any reason to degas a wine more than once, so I’m wondering what’s going one.
One possibility is that your wine’s fermentation is being dragged out and you are wanting to degas it each time more CO2 gas gets trapped in the wine. But I get the sense that something else might be going on here. Bacterial infections can cause various gases and organic compounds to saturate into the wine. The general effect on the wine in such a situation could be described as an off-taste or odor.
With that being said I would suggest that you treat the wine with a sulfite such as Campden tablets or sodium metabisulfite. This will do two different things for you. First, it will easily destroy any bacteria that may be in your wine. Second, it will help to drive out any gasses that are still in the wine. A two for one. Just follow the directions for a single dose on the container it comes in.
I think it would be helpful to take a hydrometer reading, if you haven’t done so already, to confirm that the fermentation has actually completed and not just puttering along at some undetectable level of activity. You should expect a reading on the Specific Gravity scale between .994 and .998.
If you have never added a sulfite to the wine since the fermentation has completed, then a bacterial infection is very possible. Fortunately, adding sulfite at this time will cause this issue from getting any worse.
Best Wishes,
Ed Kraus
———————————————————————————————————
Ed Kraus is a 3rd generation home brewer/winemaker and has been an owner of E. C. Kraus since 1999. He has been helping individuals make better wine and beer for over 25 years.
Let's Make Some Bottled Sangria!
 My wife has a terrific recipe for red sangria, requiring red wine, brandy and triple sec, as well as fresh fruit. If I make my own red wine (e.g. Island Mist Sangria Zinfandel) as directed, can I add the correct amount of brandy and triple sec at time of bottling so that the beverage is “ready to go” upon opening?
Name: Joe B.
State: MD
Hello Joe,
There is no reason why you couldn’t add both the brandy and Triple Sec to the wine before bottling. This is called fortifying the wine and is commonly done with certain styles of wine. But, I have some things you might want to consider first.
The first is that the Island Mist Sangria Zinfandel Blush already has a significant amount of fruity flavors. There is such a thing as overkill. Adding this to your wife’s Sangria recipe is a totally different beast than adding is to an ordinary red wine.
This particular wine ingredient kit also comes with a flavored sweetening pack. This means that the wine will be sweeter than the wine you probably have been using to make Sangria in the past. You didn’t mention it above, but if your wife’s Sangria recipe calls for sugar, you may need to adjust the amount, down, when using the Sangria Zinfandel Blush as the wine.
Here’s what this all really comes to. You need to bench test it first. What this means is after you make the Sangria Zinfandel Blush, take a wine bottle worth of it and try it out with the brandy and Triple Sec and whatever else your wife’s recipe calls for in correct proportion. Be objective. Does it really taste better with the additions or not?
This is the safest way I can think of going about this. The last thing you want is 30 bottles of something you don’t really ever want to pull out of the wine rack. Or worse yet, 30 bottles of something you can’t even drink.
Bench testing is pretty much the rule-of-thumb when making any kind of alteration to a wine recipe. It cost nothing to do and it keeps the batch of wine isolated from any mistakes or just plain, bad ideas.
Thanks for the great question. I hope this information gave you a better sense of how to handle the Sangria.
Happy Winemaking,
Ed Kraus
———————————————————————————————————
Ed Kraus is a 3rd generation home brewer/winemaker and has been an owner of E. C. Kraus since 1999. He has been helping individuals make better wine and beer for over 25 years.
Save Time! Keg Your Homebrew!
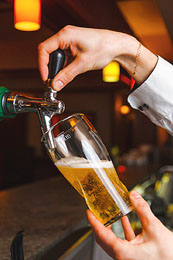 Once you’ve started brewing at home and made your first batch of home brew, you’re going to have to find something to store it in. The two main options are either kegging beer or bottling beer. Many people initially dismiss kegging their own beer, because the concept of having a keg in their house seems a bit much. But just like anything else that goes with making your own brew, bottling or kegging is largely a matter of personal preference.
Kegging does bring its own benefits.
While the equipment needed to keg beer might seem like a lot at first, with the kegs and valves tanks and taps, it’s really not when you consider how much equipment you need to bottle beer. The actual beer bottles are what most home brewers find the most trouble coming up with, either because they simply don’t have any lying around, or because they’ve lost some to damage along the way.
When you use kegs however, no matter when you’re ready to brew and store your beer, you’ll have one on hand. Even if it’s just a matter of emptying the small amount left in it and giving it a quick clean, typically there’s not nearly the running around when you’re kegging as there is when you’re bottling.
Another way kegging your beer can save you time is the simple fact that the entire process is much shorter. You’ll be filling one large container rather than dozens of small ones. Imagine half a day of bottling cut down to half an hour of kegging, and you can see how much more convenient it can be.
Bottling and kegging your own home brew both come with their own benefits, and these are a few that come with kegging your own (aside from the fact that it’s just cool to pull a draft for your friends!) But if kegging your own beer has always seemed like something that was simply too overwhelming, consider the benefits it can bring before you write it off altogether.
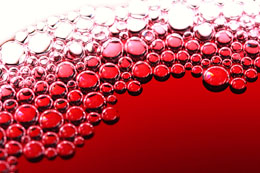
Where Did These Floating Things Come From?
 I bottled a batch of strawberry wine which had cleared up perfectly, but then within a couple months, small light colored particles appeared in the bottles. If the bottle is shaken, some of the particles dissolve, but after an hour or two they reappear. The wine tastes great, but with the floating particles, it’s difficult to share it with others. What could the problem be? I have another 6 gallon carboy to bottle in a month, and I hope I can prevent this from happening again. Thanks for your help!
Name: Gary B.
State: PA
It sounds like you have acid precipitating out of your wine. What you are seeing is acid crystallizing and then drop out.
A wine can only hold so much of any one particular fruit acid in solution. What the wine can’t hold will eventually form as crystals in the wine. This is basically what you’ve described. The amount of acid that can be held is affected by temperature. The cooler the wine, the less acid it can hold and the more likely you will experience these acid crystals.
For the wine that you already have bottled, there is not much you can do that wouldn’t involve re-bottling. Since the flavor of the wine is not affected by this particular wine fault, I would not recommend doing anything to it other than enjoy it.
As for the wine you have yet to bottle, I would take a small sample, maybe a pint or a quart, and let it set in the refrigerator for 2 or 3 days. What you are looking for is to see if these crystals will form under such a cold temperature. If no crystals form, then everything is fine for bottling. If you do see crystals, then you best option you have is to chill the entire batch of wine for a week or two. Then rack (siphon) the wine off the acid crystals that form and settle.
This is a process know as cold stabilization. I would suggest that you read over the article, Maintaining Temperature Stability In Your Wine to gain a better understanding of what’s going on here.
What you can do in the future to prevent this from happening is a couple of things:
First is to always use a blend of fruit acids for adjusting the wine’s acidity. This is the reason why we have Acid Blend. By using a blend, no single acid becomes too abundant and more than the wine can keep saturated.
The second thing you can do is using an acid testing kit to know how much Acid Blend to put into the wine. A wine recipe can only make a good guess as to how much fruit acid is needed to bring the wine into balance. But if your fruit is particularly heavy in acid in a given year, the acid called for may be too much. An acid test kit resolves this problem by telling you how much acid is in the wine must before you add any acid. The directions with the kit also tells you what acid level you are looking for and how much Acid Blend you need to add to get there.
I hope this information helps you out . Acid precipitation is an issues that all wineries have to deal with, so don’t feel like Mother Nature is picking on you. The good news is that on your next batch the solution is simple. Cold stabilize if necessary. And, on future batches you can avoid having this problem all together by using and acid test kit instead of following the guestimation called for in a wine recipe.
Happing Winemaking,
Ed Kraus
———————————————————————————————————
Ed Kraus is a 3rd generation home brewer/winemaker and has been an owner of E. C. Kraus since 1999. He has been helping individuals make better wine and beer for over 25 years.