
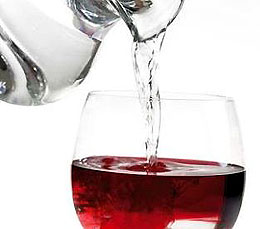
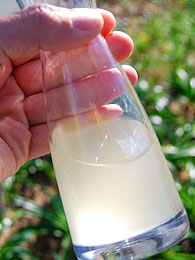
 I made my first 5 gallons of plum wine last fall and it turned out really well. Recently I decided to try making grape wine using frozen grape concentrate. I figured on only doing a gallon to start with before making a larger batch. I used a plastic gallon milk jug for the primary fermentation and after the second day decided to stir the wine. That turned out to be a huge mistake! As soon as I started to stir, there was a violent reaction and grape juice shot about 5 feet up the wall and made a big mess. Before it settled down I lost about a quart of the product and now I am not sure what to do. Can I just go ahead and top it off with water or do I need to start over? Also, what caused the violent reaction in the first place? Thanks for any advice you can provide.
Name: Larry C.
State: Idaho
—–
Hello Larry,
Your best option at this point is to do nothing. You could try to make up for your loss of wine, but you would need to do it at the same ratio of the original wine recipe you are using… not too practical.
Your best bet is to let the fermentation finish. After that you need to find a container that matches the size of the your remaining batch to keep it in while it’s clearing. You want to eliminate head-space in the container while the wine is clearing and waiting to go into wine bottles.
The reason stirring your wine resulted in an eruption of sorts was something called nucleation. Nucleation is the same exact principal that causes a 2 liter bottle of soda pop to spew when a Mentos candy is drop into it. A Mentos has millions of pores on its surface that cause the CO2 molecules in the soda pop to come together and form gas bubbles.
During a fermentation the yeast produces CO2 gas (carbon dioxide) along with the alcohol. This is what you see coming through the air-lock. But in addition to what goes through the air-lock is much more still saturated in the wine. The wine holds as much as it can until it is disturbed, much like carbonated soda pop.
Stirring the wine started a chain reaction of liquid CO2 expanding and releasing from the wine as a gas. The CO2 expands rapidly causing the wine to gush or spew.
What you used to stir the wine makes a difference as to how fast or violent the CO2 gas will erupt. The more porous the surface of the stirring device, the faster the eruption will occur. As an example, if you are stirring the wine with a glass spoon, you would get little to no reaction because of its smooth surface; if you are stirring the wine with a wooden spoon you would get a significantly larger reaction because of its porousness. The surface of a Mentos is so porous that all you have to do is drop it into the wine/soda pop to get the reaction you experienced.
In addition, the inner walls of the milk jug was probably working in concert with the stirring motion to cause this to occur. At least, that is my suspicion. The plastic used to produce milk jugs is porous, as well. Sloshing the wine against the inner walls of the jugs would help to cause the CO2 gas to release. In fact, it may have not even mattered what you stirred with. It could have been the inner walls of the jug that did it all. All it took was stirring the wine in any fashion to ignite the eruption.
Happy Winemaking,
Ed Kraus
———————————————————————————————————
Ed Kraus is a 3rd generation home brewer/winemaker and has been an owner of E. C. Kraus since 1999. He has been helping individuals make better wine and beer for over 25 years.
Category Archives: Wine
Can I Make Wine From Grape Juice That Was Diluted With Water?
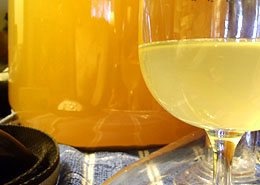
 I purchased a winemaking kit that came with fresh juice from a local winery. The process was not explained well in the class, and it turns out I added water to the fresh juice in error (instructions did not differentiate between fresh and concentrated juice). The juice does contain 50% water, and has been in the refrigerator since (about 2 months). Is this juice still usable to make a batch of wine? If so, is it worth it since it is watered down? I don’t even know if adding water to the fresh juice is okay to produce an okay wine? Thanks for any and all help!
Name: Keith S.
State: NY
—–
Hello Keith,
Yes, you can make wine from grape juice that has been diluted with water. It will just have a lighter-bodied wine..
The bigger issue is putting together a wine recipe that will work with grape juice and water. Along with the grape flavor, the acid was cut in half; the nutrients were cut in half; and the sugar was cut in half. These deficiencies will need to be compensated for within a new, adjusted wine recipe.
Acidity or tartness is a major flavor component of any wine. If the wine’s acidity is too low, it will directly result in the flavor of the wine. The wine will taste flat and insipid.
Lack of nutrients can effect how vigorous the fermentation will be — not enough nutrients, you can have fermentation that slowly drags on forever.
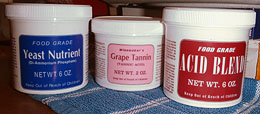
With this in mind, what I would suggest doing is adding 4.5 teaspoons of Acid Blend for every gallon of water in the juice. This should get the acidity level back up to a reasonable range. Alternatively, you can use an Acid Test Kit to measure your wine must’s acidity level and know exactly how much Acid Blend you will need to add to get to an optimal level.
You will also need to add 1 teaspoon of Yeast Nutrient for each gallon of water added. The Yeast Nutrient will work along side the nutrient from the grape juice to supply a rich form of nitrogen to the fermentation and help it to go faster.
The addition of Wine Tannin is optional, but I would suggest 1/4 teaspoon for each gallon of water that was added to the wine must. This will help with the body and pH balance of the wine. It will also help with the clarification of the proteins from the grapes after the fermentation has completed.
Finally, you will need to add sugar to the wine must. Sugar is what the wine yeast consume to produce alcohol. The simple math is that the less sugar you have in the fermentation, the lower your resulting alcohol will be. In general, a grape juice will have enough sugars in it to produce around 10% to 14% alcohol. Since your grape juice is diluted with water by half, it will only produce 5% to 7%, as is. This is why you will need to add sugar to the wine.
A simple calculation is to add 2 pounds of cane sugar (4 Cups) for every gallon of water that was added to the grape juice. This could be pushed up to 2-1/2 pounds (5 Cups) but no more.
It is important to point out that even though the grape juice was diluted with water by half, the flavor was not cut in half. This is because of the way we humans perceive things. According to our taste-buds, the flavor of the wine will be weaker, but only marginally. So don’t feel like you will have an inferior wine simply because the grape juice was diluted with water. Many lighter-bodied wines taste wonderful.
Happy Winemaking,
Customer Service at E. C. Kraus
———————————————————————————————————
Ed Kraus is a 3rd generation home brewer/winemaker and has been an owner of E. C. Kraus since 1999. He has been helping individuals make better wine and beer for over 25 years.
Leigh Erwin: A Beginner's Wine Making Journey: Part 16
 Hey everybody! Leigh here! Just checking in with you all to update you on how everything is going in “new home winemaker land” over here!
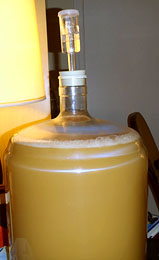
Last time I caught up with you, my “Pinot Chardonnay” had just finished its primary fermentation, and I was to leave it alone, completely cut off from air, for 2 weeks while it finished up the remaining 30% or so of secondary fermentation that was left to complete.
Well, it was clear to me from looking at the carboy every day that fermentation was progressing along slower and slower, until it didn’t appear to be doing much at all anymore 2 weeks later. Technically, the fermentation has been extremely slow for a few days prior, but I still wanted to wait the recommended 2 weeks just in case. Due to my schedule, I wasn’t able to rack the wine exactly at the 2 week mark, so I just waited until the next day and racked it on Day 15 instead!
Before getting down to business, I wanted to check the specific gravity of the wine to see where we were at. I didn’t adjust for temperature this time, but the reading on the wine hydrometer was 0.995. I recall a similar reading last time I made the Pinot Grigio wine, so I was confident the fermentation had finished up and so I didn’t bother correcting for temperature for this mid-point reading.
Even though I’ve only made one other homemade wine before, this next step felt so easy to me this time around. I was not as worried as I was last time about “messing things up” and had confidence that I could rack the wine without too much trouble. I did learn my lesson from last time—I triple checked that the spigot with in the OFF position before I started siphoning 6 gallons of wine into the vessel. No losses! Yes! I technically ended up racking the wine twice, as if you recall, I currently only have one carboy. First, I had to rack the wine into the sterilized primary fermenter, then I had to thoroughly clean and sterilize the carboy and rack the wine back into that from the primary fermenter. It was all pretty easy, and I didn’t lose any wine this time!
Now, according to the instructions on the can, I wait 2 months before racking the wine again! At that time, I may add some clarifying agents if the wine is still not clear enough, but I’ll just play that by ear!
So, what am I going to do while I wait for my homemade wine to do its thing for the next 2 months? Why, start another batch of wine, of course!
Not wanting to wait 2 months to do something with my wine, I decided to go ahead and buy another winemaking kit and some more equipment and jump right into a new batch of homemade wine!
So, I placed a new order with Homebrewing.org, and lo and behold, it’s being shipped out to me already! Same day! Love the fast service!
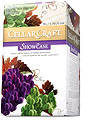 Anyway, this time, I purchased the Cellar Craft Showcase Collection: Carmenere Chilean. So far I’m 3 for 3 in terms of testing out different juices/kits, which is pretty fun if you ask me! This is going to be the first time I made a red wine, so I’m excited yet a little nervous. A red? That’s like, way more steps that I could possibly screw up 😉 haha. Actually, in all honesty, I’m really excited to make a red wine at home for the first time, and you can count on me sharing every bit of that experience once I get the equipment and start her up.
I also purchased a Liquid Crystal Thermometer, because let’s face it, I’m tired of guessing the temperature of the wine. True, since it’s in the same location all the time and we keep the ambient temperature relatively constant, the temperature of the room is likely the same temperature of the wine. However, I like the idea of having that added bit of confidence knowing exactly what temperature my must/wine is at any given time. I just bought a simple model thermometer for now, but once I upgrade equipment in a few months, I’ll likely get something a little more robust.
Finally, since I only have one carboy and my Pinot Chardonnay is taking up residence in that vessel for the next two months, I obviously need to buy another one! I do want to upgrade to glass eventually, but with the prospect of moving in a few months (maybe even across country), the lighter my wine making equipment is now, the better. So, 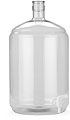 this time I purchased another plastic carboy, though I upgraded slightly to the 6 Gallon Carboy with Barbed Faucet. I really like the idea of siphoning and bottling from the carboy’s faucet, as I think it may be a little cleaner and easier, and it’ll also help me when it comes time to decide what type of wine making equipment I’d like to upgrade to in a few months.
Stay tuned for more new home winemaker adventures, and please feel free to comment if you have suggestions for me, or questions that we can hopefully figure out together! Cheers!
————————————————————————————————————-
 My name is Leigh Erwin, and I am a brand-spankin’ new home winemaker! E. C. Kraus has asked me to share with you my journey from a first-time dabbler to an accomplished home winemaker. From time to time I’ll be checking in with this blog and reporting my experience with you: the good, bad — and the ugly.
Winemaking Terms You Should Know: Part 8
 In several earlier posts, we introduced a few home winemaking terms that you may or may not be familiar with. There are many terms to learn in home winemaking, and this post, like all the previous posts, gives you a short introduction to a few of those terms to help you get started in home winemaking, or perhaps brush up on some of the terms you may not have seen in a while.
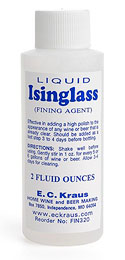
- Isinglass: Isinglass is a commonly used fining agent in winemaking, and originates from gelatin isolated from fish. As long as you aren’t trying to make vegan wine, Isinglass is an animal protein-based clarifier that has been used over and over again in the wine industry, both in commercial and home winemaking settings. It is argued by many winemakers to have a more gentle effect on the color of your wine, thus ideal for white or lightly colored rosé wines.
- Beaujolais: Beaujolais is a wine making region in France located south of Burgundy. Wines made in this region are referred to as “Beaujolais”, and not referred to by the grapes that make up the blend (as is the case in all of France and other parts of Europe). Even though this name refers to a region in France, you can still create your own Beaujolais-style wine in your very own home, no matter where you are in the world. Beaujolais wines tend to be fresh and fruity wines, made up primarily of the Gamay grape. Thus, a Beaujolais-style wine would be something made in a very similar manner.
- Jammy: Though you sometimes think of jam when you imagine a ripe, plump grape, that’s not what we’re going for with this winemaking term. “Jammy” is a sensory quality or taste of a wine that is reminiscent of baked, cooked, or stewed fruit. You tend to run into “jammy” wines in regions where the climate is much too warm for the particular grape variety that is being grown. “Jammy” is typically a negative tasting term, though in all honesty, if you like your wines “Jammy”, then make them as “Jammy” as you darn well please and enjoy it!
- MW: Why do some people have an MW after their names? Well, just like M.A., M.S., M.D., J.D., or Ph.D., etc, M.W. stands for someone who has successfully completed a particular educational program and the rigorous tests required of them. In this case, MW stands for “Master of Wine”. It is an extremely difficult qualification to attain, and is only held by a few hundred people throughout the entire world. If you see MW after someone’s name, it indicates they know nearly everything there is to know about wine, and passed the insanely difficult tests to prove it.
———————————————————————————————————
Ed Kraus is a 3rd generation home brewer/winemaker and has been an owner of E. C. Kraus since 1999. He has been helping individuals make better wine and beer for over 25 years.
Leigh Erwin: A Beginner's Wine Making Journey: Part 15
 Hi there, folks! Leigh here!
I have finally started batch #2 of homemade wine from Homebrewing.org and I wanted to share with you all my/its progress!
As I mentioned in an earlier post, this time I wanted to try making the wine using individual wine making ingredients instead of a wine making kit, to see if 1) I could do it without that much instruction and 2) it was better or worse in the end than making the wine with a kit. I think there are positive points either way, so really there is no right or wrong answer, but I thought it would be fun to experiment anyway!
Last time I left you with a progress update, I had just finished sterilizing all the wine making equipment and mixing together all the ingredients and wine yeast at the proper temperature and said I was going to let it sit for 5 days.
So, where is everything at now?
Well, on Day 5 of the fermentation, I actually had a relatively last-minute meeting to attend, so I decided to put off the next step (the first racking) until the next day, Day 6. I figured one extra day in primary fermentation shouldn’t hurt, right?
So, on Day 6 I first took a specific gravity measurement wine my hydrometer before launching into the next phase. I remembered the instructions I had with the first batch of wine using the wine making kit, it told me a certain specific gravity reading to shoot for to know that primary fermentation was just about finished. However, there was no such number listed on the SunCal grape concentrate wine making instructions, so I wasn’t sure exactly what to do.
Well, ask the internet and you’ll come up with an answer! I checked out some information on various websites, including wine making articles on Homebrewing.org (Wine Fermentation 101), and the general consensus was that if the wine’s specific gravity was at or below 1.030. Low and behold, the specific gravity of my second batch of wine was 1.011 with the temperature correction, which was definitely below the cut off of 1.030. Considering I let the wine sit for 6 days instead of 5, I’m not too surprised at the difference. There was plenty of foam/bubbling going on still at this time, so I’m glad I had a solid number reference I could use to know for sure it wine was ready for the next wine making step!
Satisfied that primary fermentation was complete, I then siphoned the wine into a sterilized carboy per the instructions. I used the fill-up-the-tubing-with-wine-first method of siphoning, and it worked like a charm for me. I didn’t lose any yield this time, and the wine filled up close to the top of the carboy very nicely. I then sealed everything up with a rubber stopper and air lock, and then let the wine sit and rest for a while!
The wine making instructions want me to rack the wine after 2 weeks and again after 2 months, the latter of which I’m not sure I’ll follow exactly. I do plan on racking the wine at 2 weeks, but I haven’t decided if I’m going to treat the wine with stabilizing and/or clarification agents, or if I’m just going to let it sit alone for two months. I think I may end up adding something to the wine to help clarify it a little quicker, but I think I’ll do some more research and ask a few more questions first!
————————————————————————————————————-
My name is Leigh Erwin, and I am a brand-spankin’ new home winemaker! E. C. Kraus has asked me to share with you my journey from a first-time dabbler to an accomplished home winemaker. From time to time I’ll be checking in with this blog and reporting my experience with you: the good, bad — and the ugly.
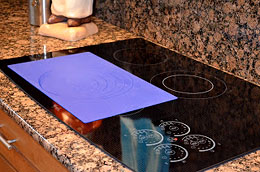
Winemaking Tip: Protect the Counters
 It’s been about 14 months since I started making wine (one of the best hobbies ever!). In that time I made about 70 gallons or a little over 360 bottles. And saved a lot of money too!
We live in Florida (the land with no cellars/basements and almost everyone uses salt-water softeners), so my wine making production line gets hauled into and out of the kitchen almost weekly.
One wine making tip/trick I can share that my wife “taught” me was to protect her kitchen counters and floor for that matter. After scratching her non-scratchable counters up pretty good, she suggested I use those rubber type mats you might put in your kitchen drawers or cabinets!! No more unhappy wife.
Also, while in my early learning stages I really spilled quite of bit until she threw down some old worn out “pool” towels. Yes, I now know the difference between “pool” towels and “guest” towels.
In closing, I was surprised to read many negative comments on the website on using distilled water. Using our tap water, again which is water-softened, is definitely NOT recommended; I only use distilled water and I airlock my primaries 100% of the time. I never had a slow/stuck fermentation or had any issues with using distilled water. I always use yeast nutrients and/or energizers, and primaries with at LEAST 20-25% head room plus I stir, stir, stir during primary and aerate when racking secondary. My fermentation temps are always between 68-78F.
Thanks for your great store, website and tips.
Name: Matt S.
State: Florida
Leigh Erwin: A Beginner's Wine Making Journey: Part 14
 Hi Everyone! I hope you all are staying safe and warm with all this ridiculously cold arctic air that’s been hanging around much of the continental US this winter! All these cold temperatures got me thinking about how you all were handling the extremes in your home, and in particular pertaining to your fermentations and wine storage. Thankfully, we never lost electricity for any reason (not yet anyway), and we have a pretty decent heating system, so my little fermentation is still just happily going along just fine in lower 70s!
As far as storage is concerned, I don’t really have any storage space other than the floor of the guest bedroom (seems to be the coolest room in the house). It’s not ideal storage, but let’s be honest, I’m not aging my first batch of wine long enough for it to cause a problem! I’ve got my bottles laying on their sides and they are on the floor where it is coolest.
I wonder how others have been handling their storage conditions in, for example,
freezing cold cellars?
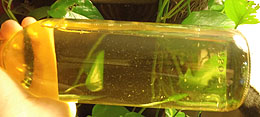
Speaking of waiting for wine to age, it’s kinda like waiting for paint to dry, no? I suppose it has been a little while since I checked in with my first batch of homemade wine (the Pinot Grigio). It’s been a little over a month now since bottling, so I figured now is as good a time as any to check up on her! I did notice that the bottles seem to have little white “specks” that have floated to the bottom, and when agitated, float around in the wine and eventually settle back down. As far as I could guess, this is probably something that naturally occurs if one does not filter the wine, or if the clarification process wasn’t enough? Even though the instructions recommended filtering the wine, I didn’t have the proper wine filtering equipment with me at the time, so mine went unfiltered.
Have any of you noticed this sort of
precipitate in your wine?
Not going to be deterred, I still wanted to try the wine!
On the nose: I still feel like I can smell “plastic”, but I think that could be a bias that I have. What I really need to do is have an unbiased nose smell it to see if what I’m smelling is real, or if I’m just crazy!
When I taste the wine, I was pleasantly surprised with how it has progressed so far. Granted, it’s only been a month so it’s not that different than it was 4 weeks ago, but I have to say it seems a little more round to me, with the citrus fruit notes starting to become more integrated and balanced with the acidity of the wine. Previously, I noted that the wine would be much better with food than alone, but now it’s starting to come in on its own and a teeny bit more complex by itself.
I’m happy with the progress so far, and am looking forward to enjoying more of it!
Cheers!
————————————————————————————————————-
My name is Leigh Erwin, and I am a brand-spankin’ new home winemaker! E. C. Kraus has asked me to share with you my journey from a first-time dabbler to an accomplished home winemaker. From time to time I’ll be checking in with this blog and reporting my experience with you: the good, bad — and the ugly.
Why Won't My Sugar Water Ferment?
 I typically make really high octane wine. I mean I like to make wines that are just short of whiskey. (Because not allowed to distill). But, when trying a new one I ran into a interesting problem. This particular one mostly water and sugar (trying for more of a vodka style) but it doesn’t seem to want to ferment at all. Never had one not ferment at all before. Go bad yes but not at all…. even tried a different yeast in case I killed the first one but still nothing?
Name: Jerry
State: MO
—–
Hello Jerry,
Fermenting sugar water is something that will not work, straight up. This is for a couple of reasons:
- The wine yeast needs nutrients
- The wine yeast needs acidity (lower pH)
Both of these things are normally supplied naturally by the fruit in a wine recipe.
It is possible to substitute these items artificially for fermenting sugar water, but not in the well-rounded, holistic way that the yeast expect. The yeast will struggle along slowly with its fermentation under a lot of stress. The result will be an alcohol beverage that has many repulsive, off-flavors — nothing pleasant to drink.
The reason for this is that as the yeast struggle they put off a lot of nasty tasting enzymes. The enzymes is their effort of trying to break down and consume any nutrients that may be in the wine must. For this reason I would suggest that you abandon the idea of fermenting sugar water.
So that you don’t waste the sugar water you currently have, you can use it in other fruit wine recipes. If you know how much sugar is represented in each gallon of water, you should be able to calculate its use in other recipes you have successfully done before.
If after reading this you still feel like fermenting sugar water, then here is what I would suggest:
- Use Champagne yeast like Red Star Pasteur Champagne or Lalvin EC-1118.
- Make a yeast starter before adding it to the must.
- Add double the recommend dosage of Yeast Energizer.
- Add magnesium sulfate to the must at the rate of 1/4 teaspoon per 5 gallons.
- Keep the fermentation temperature between 70° and 75°F.
- Make sure the water you used is not distilled water.
Even after doing all these things, you still have the issue of low acidity. You could add Acid Blend to the wine must to remedy this, but this would make the final product weirdly tart.
However, if you do all these other things you will have, at minimum, some marginal success at fermenting sugar water, but do not expect it to taste clean, with no off-flavors, and do not expect the fermentation to be able to complete all the way.
Best Wishes,
Ed Kraus
———————————————————————————————————
Ed Kraus is a 3rd generation home brewer/winemaker and has been an owner of E. C. Kraus since 1999. He has been helping individuals make better wine and beer for over 25 years.
Leigh Erwin: A Beginner's Wine Making Journey: Part 13
 Hi everyone! I just finished the first phase of my new batch of homemade wine made from a wine juice concentrate, and I’m very hopeful at the moment for its success! It smells and looks great, so here’s hoping fermentation will start right up and get cranking (though I do realize it could take a day or two to really get moving).
First thing is first—I sterilized the equipment I was going to use today: the primary fermenter, stirring spoon, hydrometer, the cylinder to hold the hydrometer, as well as measuring cups/spoons for the various wine making ingredients I added. I really liked using the sodium bisulfite, as it is a sterilization product that does not require rinsing! One of the things I was most concerned about during my first batch of homemade wine was the fact that my cleaning/sterilizing agent required rinsing, and I could never be 100% sure if I got it all or if I’d left a little bit to ultimately cause hard times or even ruin the wine.
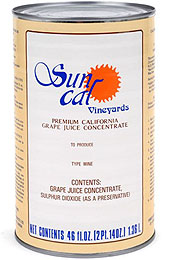 After I sterilized everything, I opened up the can of wine juice concentrate and poured it into the primary fermenter (with the spigot in the CLOSED position!). Next, according to the wine making instructions on the side of the can of wine juice concentrate, I was to add 13 can’s worth of warm water. I had several gallons of room temperature bottled drinking water, but I wasn’t sure if that was warm enough, so I just popped the water in the microwave for a couple of minutes to increase the temperature a couple of degrees. Hopefully that was not a bad idea 😉
Once I added all the water, I proceeded to add 6.5 lbs of sugar, per the instructions. Now, I didn’t have a scale (add that to the list of things to buy), so I just googled ‘how many cups of granulated sugar in a pound’ and got my answer. Apparently, 2 cups of white granulated sugar equals 1 pound, so since the recipe called for 6.5 pounds, that meant I needed 13 cups of sugar. Easy! Done!
I stirred the sugar up for a bit to get it dissolved, then I added the next several ingredients. The can called for this pre-made nutrient mix, but also underneath described the individual components of that mix in case that mix was not available. I had the individual ingredients, but not the mix, so add them one at a time I did! I added 3 ounces of Acid Blend (which I weighted using a simple postage stamp scale), 5 level teaspoons of Yeast Nutrient, and 1 level teaspoon of Grape Tannin. Actually, it said “lvl. tsp” on the can, so hopefully my assumption that “lvl” means “level” was correct.
After I stirred all these ingredients together with my stirring spoon, I went ahead and measured the specific gravity of the must with my hydrometer, which read 1.072. Looking at the instructions on the can of wine juice concentrate, it said the specific gravity should be 1.075. Did I do something wrong? I scratched my head for a minute or two and then had an “ah ha!” moment. My must was somewhere in the upper 70s low 80s F., but the hydrometer I have is calibrated to 60°F! There must be a conversion factor to take differences in temperature into consideration! Low and behold, ask Google, and get the answer, so that I did and I discovered a few sites that adjusts specific gravity based on the temperature of the must and the temperature for which the hydrometer is calibrated.
Now, silly me does yet have a thermometer (yep, add that to the list of things to buy, too), so I just guessed that the temperature of my must was 80°F., since I had microwaved the water a little bit prior to adding it to the primary fermenter. Based on the online specific gravity converter, my must actually has a specific gravity of 1.074 instead of 1.072, which is much closer to the predicted 1.075 on the can. Of course, there is most likely a little error here due to the fact that I randomly guessed the temperature of the must, but it’s close enough for me to be happy and move forward.
After I take a little break to let the temperature of the must come back down to between 70 and 75, I’ll go ahead and add the wine yeast and ferment this bad boy for 5 days. Cross your fingers for me that this all goes well!
——————————————————————————————————–
My name is Leigh Erwin, and I am a brand-spankin’ new home winemaker! E. C. Kraus has asked me to share with you my journey from a first-time dabbler to an accomplished home winemaker. From time to time I’ll be checking in with this blog and reporting my experience with you: the good, bad — and the ugly.
Leigh Erwin: A Beginner's Wine Making Journey: Part 12
 Hi everyone!
I hope everyone is having a great start to 2014 so far! I think I’m finally caught up from all the holiday madness, and am so ready to get back in the groove of my beginner wine making efforts.
Now that I have time to breathe, I think it’s about time to start a new batch of homemade wine, no? If you recall from my last entry, I had ordered a bunch of stuff from Homebrewing.org in order to start batch #2 of homebrewed wine!
Everything came in very quickly, and all in one piece! I’m looking forward to making the “Pinot Chardonnay” that I received, and hope that it tastes better than my first batch of Pinot Grigio. Don’t get me wrong, batch #1 is totally drinkable, I just don’t think it’s anything to write home about (though I am stoked that it’s still crystal clear and still tastes like a Pinot Grigio). I think part of my problem was that I started off with a wine that I like in general, but it’s not my favorite. I love all types and styles of wine, though I also like a variety, so when I’m drinking the same thing over and over again, I tend to tire of it quickly. I suppose I’ll just intersperse my Pinot Grigio batch #1 consumption with other wines from the wine shop for now!
I’m very excited as I write this to you today because this weekend will be the kick-off for starting batch #2 of Leigh’s homemade wine project!
I figured I’d use this entry today to lay out my goals for batch #2, in hopes that it will give me confidence and strength to get through my first batch without the wine kit unscathed.
Goal 1: Sterilize all equipment I plan to use today! I still have a bucket of old sterilization fluid sitting around, but it’s been sitting there for quite a long time (and has been used a lot), so I am just going to dump it out and start fresh. I bought some sodium bisulfite (Campden) from Homebrewing.org this time, so I plan on using that as my sterilization agent instead of the CleanPro SDH that I used last time.
Goal 2: Read through the instructions that are on the side of the Pinot Chardonnay grape juice concentrate and get a solid grasp of what I need to do for today, in the short term future, and longer term future of this beginner wine making project.
Goal 3: Have fun! I certainly don’t need to tell myself that twice—fun may as well be my middle name!
These are some pretty simple goals for today, but then again, simple is better, right? I am just really excited to be making another batch of wine, and am looking forward (albeit, with somewhat baited breath) to allowing myself a little more flexibility in how I create this wine than I did when I used the kit. Of course, you can do whatever you want with or without a beginner wine making kit, but I’m a sucker for instructions and being my first time last time, I didn’t dare stray from those instructions one bit. This time, I have very little by way of instructions, so it’s up to me to not screw it up!
——————————————————————————————————–
My name is Leigh Erwin, and I am a brand-spankin’ new home winemaker! E. C. Kraus has asked me to share with you my journey from a first-time dabbler to an accomplished home winemaker. From time to time I’ll be checking in with this blog and reporting my experience with you: the good, bad — and the ugly.