Why Does My Fermented Wine Have A Sulfur Taste And Smell?

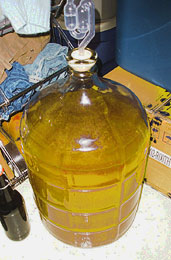
Sulfur Smell Coming From Homemade WineI recently made a Pinot Noir and all was great until just prior to bottling. I tasted throughout the fermenting process and was pleased with the taste, but a sulfur smell/taste developed just prior to bottling! What did I do wrong?
Name: Scott
State: California
—–
Hello Scott,
Sorry you are having such a problem with your wine. I know it can be upsetting when all seemed to be doing so well.
There are a several common issues that can cause your wine to have a sulfur taste and smell after it has fermented. Here are the 3 most common reasons that match up with your situation:

  1. Adding too much sulfite to the wine. This would either be in the form of potassium metabisulfite, sodium metabisulfite or Campden tablets. If normal sulfite dosages are used this is not likely to be the cause, but if too much sulfite is accidentally added, it could be why you are experiencing this taste and smell in your wine. You can use a Titrets and the Titrettor Hand Tool to determine how much free sulfur dioxide is in the wine, but this will not tell you how much bound sulfur dioxide is in the wine. The permanently bound sulfite can build up over the winemaking process if to many doses of sulfites are added to the wine, whereas the free sulfite can leave as a gas if given the opportunity. Here’s some more information free and bound sulfites in your wine. If you used no more than 3 or 4 sulfite doses throughout the winemaking process your wine will not be suffering from this. Most of the time, simply aging the wine will completely rid the wine of this fault, but in some extreme cases aging may not be enough. If you still experience a sulfur taste or smell upon decanting the wine, then pour the wine in a carafe and let is set for an hour or so before drinking. This will greatly help to reduce this wine fault.
  2. Putting the yeast under stress. If the fermentation did not completely ferment all the carbohydrates, it could be a situation where the fermentation started up again due a change in the wine’s environment. This would be something like: new oxygen exposure through racking; warmer liquid temperature —something that made the wine yeast want to come out of their dormant state and start fermenting again with less than optimal conditions. If the fermentation starts up again under stress then excessive amounts of hydrogen sulfide can be the result. There are other stressful situation the wine yeast could have been in during the original fermentation, but if that were the case, you would have noticed the sulfur taste and smell before now.
  3. Wine sat on the sediment to long. The sediment is made up mostly of yeast cells, both dead and dormant. If the sediment stays in the wine too long you can start to experience the effects of autolysis. This is where yeast cell start to consume other yeast cells — a cannibalization of sorts. In advanced cases of autolysis you will experience a sulfide odor and off-taste. This is somewhat related to number 2, above, in the sense that you can have a stressful reawakening of the wine yeast while it lays at the bottom as sediment. If both of these scenarios happen, you are much more likely to have a hydrogen sulfide issue.

If you feel that your wine has experienced either stress or autolysis, then the first step would be to rack the wine into another container in a splashing manner. This will give opportunity for the hydrogen sulfide to the leave the wine as a gas. You can also use a De-gassing/Mixing Paddle to help speed up the process.
If the effects still exist after racking or de-gassing the wine a couple of times, then you may want to rack the wine over some sanitized copper. The copper contact will cause the hydrogen sulfide to leave more readily.
Scott, I hope this information helps you out. Just realize that having a sulfur taste and smell in your wine is a fault from which your fermented homemade wine can recover.
Best Wishes,
Ed Kraus
———————————————————————————————————
Ed Kraus is a 3rd generation home brewer/winemaker and has been an owner of E. C. Kraus since 1999. He has been helping individuals make better wine and beer for over 25 years.


How To Make Sweet Sparkling Wine

Homemade Sweet Sparkling Wine…I decided to try a sparkling wine and to make it sweet. The 5 gallon batch of strawberry from a concentrate was made to about 8-9% PA, and allowed to finish, then I added a syrup of 2-1/4 ounces/gallon and bottled it in the proper bottles. The sparkling part turned out very well, but the taste is anything but sweet. My question is how to make it sparkling and yet to preserve the sweetness? I’m not really equipped to do it the proper way with reopening the bottles and preserving and sweetening at that time. I followed an “easy way” recipe. Is this possible?
Name: Lee C.
State: OH
—–
Hello Lee,
Making a sweet, sparking wine is something that the home winemaker can not do in a practical manner, and in fact, can be dangerous, if attempted and done incorrectly!
The real issue is that the amount of sparkle or CO2 gas in the wine is controlled by how much sugar it has at bottling time. Once bottled, sugars are fermented into more alcohol and CO2 gas. The CO2 gas provides the carbonation — the sparkle. This is why your sparkling wine ended up dry. The sweetness was spent on the sparkle.
If you try to compensate for the sparkle by adding even more sugar, then you’ve entered the danger zone. The yeast can create much more pressure than any Champagne bottle can hold, if given the opportunity. The result can easily be exploding Champagne bottles — something you do not want to be anywhere near when they go off. This is not how to make sweet sparking wine.
This brings up the question then: “Well then, how do the commercial wineries make sweet sparkling wines?” The answer is simple. They start by making a sweet wine. Then they stabilize it through both preservatives and very fine filtration to remove the wine yeast. Then they force-carbonate the wine with CO2 gas under pressure.
Force-carbonating the wine with CO2 gas is done by chilling the wine down to just above freezing. This causes the wine to be able to absorb CO2 gas more readily. Then the CO2 gas is charged or forced into the sweet wine.
The process of how to make a sweet sparkling wine is really no different than how commercial soda or beer is carbonated. They do it the same way, only with these beverages the resulting pressure they are under is about 35 PSI (pounds per square inch) of CO2, whereas a sparkling wine is around 65 to 75 PSI.
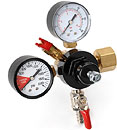
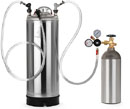
CO2 RegulatorForce-carbonating a sweet wine with CO2 gas is something that can be done by the home winemaker but not without making a sizable investment. First you will need a tank to put the wine in for charging the CO2. A soda canister or corny keg works good for this purpose. Then you will need a CO2 tank and a CO2 regulator. The tank provides the CO2. The regulator allows you to control how much pressure comes out of the tank.
You will need to force-carbonate the sweet wine at 45 PSI on the regulator. Keep the wine under this pressure for a few days, but 2 or 3 weeks would be even better. This will allow time for the CO2 gas to come completely into solution with the wine, making it harder for the gas to escape upon depressurization. The wine will need to be around 30°F. during this time.
Once force-carbonated the sweet wine will need to be filled into Champagne bottles with a counter pressure bottling filling system. This is an apparatus the will fill the Champagne while keeping the bottle under pressure.
Carbonation SystemIt is important to note here that if you are investing in such equipment you may want to forget all about the bottling part and simply serve your sparkling wine on tap. Here is a kegging kit that would allow you to do that. You could also hook it up to a bar with the commercial faucet tap system.
So that’s how to make a sweet sparkling wine. While it is a little bit of an investment it is a lot of fun and does a good job.
Best Wishes,
Ed Kraus
———————————————————————————————————
Ed Kraus is a 3rd generation home brewer/winemaker and has been an owner of E. C. Kraus since 1999. He has been helping individuals make better wine and beer for over 25 years.

My Wine Will Not Start Fermenting

A Wine That Will Not Start FermentingI am still new to winemaking, starting my second batch, my question is: I started my yeast in a separate bottle, started to ferment just fine, added it to my wine base, is not doing anything. I have warmed up my base, has now been @ 48 hours. Do I need to add more yeast? Am I loosing my base, now spoiled? Not sure what else to do to get yeast going.
Name: Andrea
State: Colorado
—–
Hello Andrea,
There are an endless number of reasons why a wine will not start fermenting. Most of them are environmental, meaning, the yeast are not liking the situation in which they have been put.
A lot of times it is simply the temperature of the wine must. You’ve stated that you have warmed the must up, but it is possible to have it too warm for fermentation as it is too cool. Because of this I would start off by suggesting that you actually use a thermometer to take a temperature reading of the wine must to make sure it is in the correct temperature range. This would be somewhere between 70°F. and 75°F.
You had a successful yeast starter. This tells us that the yeast is viable and not old or dead. It also tells us that there is something with the wine must, specifically, and not the wine yeast that is not allowing the wine to ferment.
This is about as far as your clues will take us as to why your wine will not start fermenting. Beyond incorrect temperature and old wine yeast there are many other possibilities.
Fortunately, we have put together a list of the Top 10 Reasons For Fermentation Failure. These are the most common reasons why a wine will not start fermenting. They are in order from the most common reason to the least common reason. This reasons are based on a lot of years of helping individual winemakers that are in the same exact situation you are.
I would suggest going over these top 10 reasons. See if any of the scenarios match up with your situation. It is not until you actually identify the reason why your wine will not start fermenting that you will be able to resolve this issue. Any action you take before then will only be a guess.
Best Wishes,
Ed Kraus
———————————————————————————————————
Ed Kraus is a 3rd generation home brewer/winemaker and has been an owner of E. C. Kraus since 1999. He has been helping individuals make better wine and beer for over 25 years.

Can I Make Wine From Grape Juice That Was Diluted With Water?

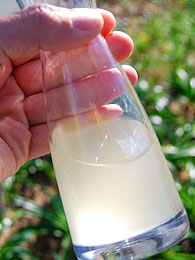
Wine Diluted With WaterI purchased a winemaking kit that came with fresh juice from a local winery. The process was not explained well in the class, and it turns out I added water to the fresh juice in error (instructions did not differentiate between fresh and concentrated juice). The juice does contain 50% water, and has been in the refrigerator since (about 2 months). Is this juice still usable to make a batch of wine? If so, is it worth it since it is watered down? I don’t even know if adding water to the fresh juice is okay to produce an okay wine? Thanks for any and all help!
Name: Keith S.
State: NY
—–
Hello Keith,
Yes, you can make wine from grape juice that has been diluted with water. It will just have a lighter-bodied wine..
The bigger issue is putting together a wine recipe that will work with grape juice and water. Along with the grape flavor, the acid was cut in half; the nutrients were cut in half; and the sugar was cut in half. These deficiencies will need to be compensated for within a new, adjusted wine recipe.
Acidity or tartness is a major flavor component of any wine. If the wine’s acidity is too low, it will directly result in the flavor of the wine. The wine will taste flat and insipid.
Lack of nutrients can effect how vigorous the fermentation will be — not enough nutrients, you can have fermentation that slowly drags on forever.
With this in mind, what I would suggest doing is adding 4.5 teaspoons of Acid Blend for every gallon of water in the juice. This should get the acidity level back up to a reasonable range. Alternatively, you can use an Acid Test Kit to measure your wine must’s acidity level and know exactly how much Acid Blend you will need to add to get to an optimal level.
You will also need to add 1 teaspoon of Yeast Nutrient for each gallon of water added. The Yeast Nutrient will work along side the nutrient from the grape juice to supply a rich form of nitrogen to the fermentation and help it to go faster.
The addition of Wine Tannin is optional, but I would suggest 1/4 teaspoon for each gallon of water that was added to the wine must. This will help with the body and pH balance of the wine. It will also help with the clarification of the proteins from the grapes after the fermentation has completed.
Finally, you will need to add sugar to the wine must. Sugar is what the wine yeast consume to produce alcohol. The simple math is that the less sugar you have in the fermentation, the lower your resulting alcohol will be. In general, a grape juice will have enough sugars in it to produce around 10% to 14% alcohol. Since your grape juice is diluted with water by half, it will only produce 5% to 7%, as is. This is why you will need to add sugar to the wine.
A simple calculation is to add 2 pounds of cane sugar (4 Cups) for every gallon of water that was added to the grape juice. This could be pushed up to 2-1/2 pounds (5 Cups) but no more.
It is important to point out that even though the grape juice was diluted with water by half, the flavor was not cut in half. This is because of the way we humans perceive things. According to our taste-buds, the flavor of the wine will be weaker, but only marginally. So don’t feel like you will have an inferior wine simply because the grape juice was diluted with water. Many lighter-bodied wines taste wonderful.
Happy Winemaking,
Customer Service at E. C. Kraus
———————————————————————————————————
Ed Kraus is a 3rd generation home brewer/winemaker and has been an owner of E. C. Kraus since 1999. He has been helping individuals make better wine and beer for over 25 years.

Why Won't My Sugar Water Ferment?

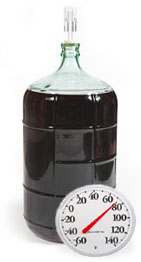
Fermenting Sugar Water With YeastI typically make really high octane wine. I mean I like to make wines that are just short of whiskey. (Because not allowed to distill). But, when trying a new one I ran into a interesting problem. This particular one mostly water and sugar (trying for more of a vodka style) but it doesn’t seem to want to ferment at all. Never had one not ferment at all before. Go bad yes but not at all…. even tried a different yeast in case I killed the first one but still nothing?
Name: Jerry
State: MO
—–
Hello Jerry,
Fermenting sugar water is something that will not work, straight up. This is for a couple of reasons:

  • The wine yeast needs nutrients
  • The wine yeast needs acidity (lower pH)

Both of these things are normally supplied naturally by the fruit in a wine recipe.
It is possible to substitute these items artificially for fermenting sugar water, but not in the well-rounded, holistic way that the yeast expect. The yeast will struggle along slowly with its fermentation under a lot of stress. The result will be an alcohol beverage that has many repulsive, off-flavors — nothing pleasant to drink.
The reason for this is that as the yeast struggle they put off a lot of nasty tasting enzymes. The enzymes is their effort of trying to break down and consume any nutrients that may be in the wine must. For this reason I would suggest that you abandon the idea of fermenting sugar water.
So that you don’t waste the sugar water you currently have, you can use it in other fruit wine recipes. If you know how much sugar is represented in each gallon of water, you should be able to calculate its use in other recipes you have successfully done before.
If after reading this you still feel like fermenting sugar water, then here is what I would suggest:

Even after doing all these things, you still have the issue of low acidity. You could add Acid Blend to the wine must to remedy this, but this would make the final product weirdly tart.
However, if you do all these other things you will have, at minimum, some marginal success at fermenting sugar water, but do not expect it to taste clean, with no off-flavors, and do not expect the fermentation to be able to complete all the way.
Best Wishes,
Ed Kraus
———————————————————————————————————
Ed Kraus is a 3rd generation home brewer/winemaker and has been an owner of E. C. Kraus since 1999. He has been helping individuals make better wine and beer for over 25 years.

Fermentation Temperature Too Low And Used An Airlock On Primary Fermenter

Carboy With Fermentation Temperature Too LowI started out wrong by air-locking my vessel from the start. I have two 5 gallon carboys; one containing Ruby Cabernet and the other French Colombard. The second mistake I made was to allow the juice to get too cold; below 40 degrees. I have since brought the juice home to a warmer atmosphere, where the French Colombard began to produce tiny bubbles, whereby popping at the air gap device; however, the Ruby is lying dormant. How should I proceed from here?
Name: Mark S.
State: PA
—–
Hello Mark,
The first thing that needs to be pointed out is that there is that there is absolutely no way that a wine yeast will ferment at 40°F. The fermentation temperature is too low. This is by far the most critical issue of the two. It will take some time for the carboys to warm up, but by the time you get this message hopefully they will be at a temperature that is more suitable to a fermentation (70°F. – 75°F.). Just realize that this is an absolute. The fermentation will not work at a temperature of 40°F. It’s just too low.
Having an airlock on the primary fermenter can hinder or slow the fermentation, but it is not an absolute. Rarely is using an air-lock during this time the root cause of a stuck fermentation.
Just think of the airlock as the icing-on-the-cake to your stuck fermentation. Both the low fermentation temperature and the airlock are working in concert to keep your fermentation from happening, but the fermentation temperature being too low is the main reason.
At this point you will want to leave the airlocks on both carboys until you do see some fermentation activity as the temperature rises. This is to protect the wine must from spoilage while it is still. Once you see some signs of fermentation, then you can safely take the air-locks off.
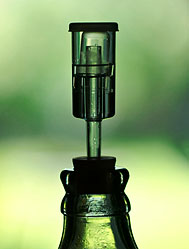
Signs of fermentation would be things like seeing bubbles rise along the side wall of the carboys or little patches of foam on the surface of the wine must. Do not rely on the airlock bubbling as an indicator. Bubbling will occur without the fermentation simply because the liquid is expanding from being warmed up. The expansion is causing the air in the head-space to forced out through the airlock.
In the future I would suggest starting the fermentation in a bucket fermenter as opposed to the carboys you are using for your primary fermentation. While taking the airlocks off the carboys is an improvement, the smaller opening restricts the amount of air that can get to the wine must. You can use the carboys with air-locks, later, after your first racking. This is when you want to minimize head-space with the wine, and carboys are great for doing this. Here’s some more information on why you do not what you use an airlock on a primary fermenter.
Once you do these simple things I do not expect you to have any more problems with getting your fermentation started, but if by chance you do not get one or both of them sufficiently going, I would suggest looking over the Top 10 Reasons For Fermentation Failure. See if any of the other 8 reasons ring a bell. Then take the corrective action.
Thank you for the great question and allowing me to share it with other winemakers. Having a fermentation temperature too low and using an airlock on a primary fermenter are both common beginner mistakes that need to be pointed out from time to time.
Happy Winemaking,
Ed Kraus
———————————————————————————————————
Ed Kraus is a 3rd generation home brewer/winemaker and has been an owner of E. C. Kraus since 1999. He has been helping individuals make better wine and beer for over 25 years.

My Air-Lock Stops Bubbling!

Wine Air Lock BubblingDuring the 2nd racking of the juice. I have had my Senior Air-Lock sometimes just stop working. What cause’s this? I use water in my Air-Lock’s.

Name: Linda H.
State: Nevada
—–
Hello Linda,
I believe what you are saying is that your wine air-lock stops bubbling, then starts up again. There could be a number of reasons for this, but by far the most likely reason is a temperature change of the wine must.
In order for a wine yeast to ferment it needs to be in a particular temperature range. Most wine yeast feel comfortable at 70° to 75° F. Fermentations that are cooler than this become slow and will even stop completely if too cold. For some wine yeast they can even completely stop bubbling at temperatures of 67° or 68° F.
The difference of the rate of fermentation between 70° and 75° can even be quite dramatic. It can mean the difference of an air-lock that bubbles once a minute or once a second.
So what I believe is happening to your fermentation is that the temperature is fluctuating. When the weather gets cooler and the ambient room temperature gets a little cooler, the fermentation slows down, crawls and then stops. When a spot of warmth comes along, the fermentation temperature rises and the fermentation takes off again.
This begs the question of what you are to do when your air-lock stops bubbling. Obviously, you need to stabilize the temperature of the fermentation, but how? The simplest solution is to provide a heat source to the fermenter. This can be done in a number of ways. The important thing to remember is to make it a mild heat source. It is easy to overdo it, which can be just as bad. Having a fermentation too warm could lead to even worse problems such as mold or bacterial growth.

  • I have found that over the years that if an older-style, 100 watt light bulb is place 1 foot off to the side of a 5 or 6 gallon batch of wine, it will warm it up 8° to 10° F. depending on how cold the room is. You can place if farther away or closer for varying effect. What you do have to watch out for with this method is exposing the fermenting wine to the direct light from the light bulb. Excessive light exposure can oxidize the wine over time, so make sure that it is an opaque fermenter or block the light in some fashion.
  • I have not done this, but I have heard of people using an electric blanket to warm up the fermentation. The problem with electric blankets is that they are way, way too hot. But you could conceivably take a corner of one, on a low setting, and stick it under part of the fermenter. The big issue here is that you don’t know how much of the electric blanket to use, so the risk of getting the fermentation too warm is very real. I definitely would not try this without having a thermometer directly tracking the wine must’s temperature.
  • Fermentation Heating Pad MatFortunately, these days there is a product designed specifically for this purpose. It’s called the Copper Tun Heating Pad. Just like the name sounds, it is a pad that you sit the fermenter on to keep it from getting cold. The heating pad will raise the temperature of the wine must between 10° and 20° F. Since this item has came out, I do not use anything else. It is simple to use and effective.

Beyond these methods remember that you always have the option of moving the fermenter to a warmer room or corner of your home. This is often the simplest action to take when your air-lock stops bubbling.
Happy Winemaking,
Ed Kraus
———————————————————————————————————
Ed Kraus is a 3rd generation home brewer/winemaker and has been an owner of E. C. Kraus since 1999. He has been helping individuals make better wine and beer for over 25 years.

Stirring A Slow Wine Fermentation

Stirring A Slow Wine FermentationI just wanted to ask you if you think stirring or swirling a wine must when it starts to slow down before the first racking, because point zero hasn’t been reached yet, would that help or hurt anything as far as the wine is concerned, or should I just add more nutrient and not stir or swirl at all?
Thanks,
James
—–
Hello James,
The first thing that should be pointed out is that it is not unusual for a fermentation to slow as it reaches the end of fermentation. A lot of it has to do with the viability of the particular wine yeast strain you have chosen. Having said this, there is nothing about a slow wine fermentation that is inherently bad. The wine will turn out the same. Just think of it as the wine getting a little aging time in during the fermentation.
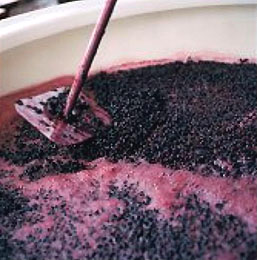
If you are making your wine from fresh fruit or fresh grapes, you should be stirring the wine once or twice a day while the pulp is the wine must, but it as nothing to do with the fermentation being slow or sluggish. The reason the stirring is done is to make sure that the wine fermentation does not form a dried floating cap of pulp. If this happens the oxygen is cut off from the wine yeast at a time with the it needs the oxygen the most.
Air or oxygen is what allows a wine yeast to grow into a colony large enough to ferment all the sugars in your wine must. If the air is limited, the colony will not grow successfully. The result is a slow wine fermentation, which by the way, is what you are experiencing right now.
Here’s what you can do for a slow wine fermentation…
If it has been going for at least 4 days in the primary, with the fruit pulp, I would go ahead and rack the wine into a secondary fermenter. Do it in a splashing manner so as to introduce oxygen into the wine must. This should help to invigorate the wine yeast.
Also, add a dose of yeast nutrient. If you already added yeast nutrient at the beginning of the fermentation, then go ahead and add another half-dose. This would be a 1/2 teaspoon per gallon. The yeast nutrient will add nitrogen to the wine must which can help the yeast in some of the same ways oxygen will.
Even though this is a slow wine fermentation, I would still put an air-lock on the secondary fermenter. The fermentation is coming towards a time when it will be susceptible to spoilage, so the air-lock is a necessity once racked. By the way, if you had the primary under air-lock, this can contribute to a sluggish wine fermentation with or without a dried cap.
Hope this information helps you out a little.
Best Wishes,
Ed Kraus
———————————————————————————————————
Ed Kraus is a 3rd generation home brewer/winemaker and has been an owner of E. C. Kraus since 1999. He has been helping individuals make better wine and beer for over 25 years.

I Added Too Much Wine Tannin Powder To My Wine

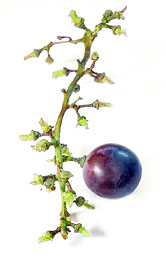
Wine Tannin From Grape StemsWhat happens when you add too much tannin? I’ve been making wine for about 5 yrs now and have had good results for each of the many fruit wines that I’ve made…I was always very careful to make sure measurements were accurate…this time making a pear wine, I made the mistake of picking up wine tannin powder and added 2 tbls…I was suppose to be adding pectic (which is what I thought I was holding)….when I realized what I had done, I was able to pull some of the tannin out, since I hadn’t mixed the must…though I’m sure I didn’t take enough of it back out…can this be fixed or do I need to trash this wine…
Name: Lu
State: NY
—–
Hello Lu,
Wine tannin powder adds a dry, puckering zest to the wine. It is the zest, literally. It comes from the stems and outer skin of the grapes. Think of what it would taste like to chew on a grape stem or some grape skins, and that’s the flavor we are dealing with in this situation.
It is possible that that you added enough wine tannin powder to make your pear wine permanently unpleasant to drink, but there is hope. Much of the wine tannin you added will simply drop out of the wine. Any wine is only able to saturate so much tannin. The excess will never dissolve, or only temporarily dissolve, and drop out as sediment during the fermentation.
One thing you can do to help drop out excess wine tannin is to warm up the wine. As the temperature goes up the wine’s ability to hold tannin goes down. It drops out as more sediment. The problem with doing this is that heat also promotes oxidation. This is where a white wine will turn amber, or in the case of a red wine, it will turn orange or brown. Pear wines are very susceptible to oxidation, so this make this a very delicate situation.
Here’s What I Would Suggest
Once the wine is done fermenting and has cleared the best it can on its own, gently warm the wine up to 85°F. This can be done with a heat source as mild as a 100 watt light bulb. It may take a day or better for the temperature to rise.
Once up to 85°F. add a dose of bentonite to the wine. Bentonite is great for dropping our excess proteins — tannin being one of them. It is the closest thing to a wine tannin remover as you will find. Keep the wine at 85°F until it becomes clear again, usually 2 to 4 days. Then rack the wine off the sediment and allow to cool back down to normal temperatures.
Three things that would be helpful in reducing the affects of oxidation from this process would be:

  1. Add ascorbic acid to the wine, now. Ascorbic acid will help to limit the oxidative reactions throughout the wine making process and from heat. The dosage should be 1/8 teaspoon per gallon.
  2. Keep the wine vessels topped-up. Don’t allow air-space to be in with the wine.
  3. Keep the wine sulfited. You should add a dose right after the fermentation has completed and again, after adding the bentonite. This could be either: Campden tablets, sodium metabisulfite or potassium metabisulfite.

Some additional thoughts: Wines with too much wine tannin powder tend to need more aging, but once aged out they tend to taste better than the same wine low in tannin. This is all subjective, of course, but it is a general consensus among winemakers. So you have that going for you. Also, wine tannin lowers the pH of a wine. Low pH is deterrent to oxidation, so this is a good thing for your pear wine, as well.
It sums up to this: the fact that you added too much wine tannin powder does not necessarily mean your wine is ruined. There are ways of reducing it. Both heat and bentonite act in concert as a wine tannin remover to some degree. Time can also help to reduce any astringent effects the wine tannin powder that may still be left in the wine, so there are a lot of reasons not to give up on your pear wine.
Best Wishes,
Ed Kraus
———————————————————————————————————
Ed Kraus is a 3rd generation home brewer/winemaker and has been an owner of E. C. Kraus since 1999. He has been helping individuals make better wine and beer for over 25 years.

Preparing Corks For Bottling Wine

Just made a bottle of peach wine. This is my first batch and I’m getting ready to bottle it. What is the best way to prepare the corks for bottling?
Thanks,
Chris
—–
Hello Chris,
There are a couple of methods for preparing corks for bottling wine. The way I personally like to do it is to take a container that has a lid that is large enough to hold all the corks you will need — something like an old tin coffee can, or I have a old instant Lipton tea jar I use. One or two Mason jars would work as well. Put all the wine corks in the container. Then fill it up with a water/sulfite solution.
This solution should consist of 1 teaspoon of either sodium metabisulfite or potassium metabisulfite for each gallon of water. If you are using Campden tablets, add at the rate of 16, crushed, per gallon.
As you fill up the container with this sulfite solution the wine corks will want to float out, so you will need to use your spare hand to corral them back down into the water. Once the container is completely full, put the lid on and let them sit over night. When you are ready to use the corks, dump them out into a colander and let them drain for 20 minutes or so, and they’ll be ready to go, no reason to rinse.
The second method for preparing corks for bottling wine is to steam them. The advantage to this is that the wine corks will be ready sooner. The disadvantage is that if you over-steam the corks you can activate the natural enzymes within them, causing the corks to bread down and become brittle over time. The result is crumbling corks that are difficult and unattractive to remove from your wine bottle.
If you decide to steam the corks you do not want to do it for any longer that 5 minutes — 3 would be better. Take a pot of water, and bring it to a boil. Then move off the burner; throw the corks on top; and cover with a lid. After the 3 to 5 minutes, take the corks off the water. You can just pour it through a colander. But whatever you do, don’t leave them on the heated water.
The method I prefer the most for preparing corks is the first one. Submerging the corks in a sulfite is affective and will not compromise the cork in anyway. The only downfall is that you will need to plan a day ahead. No big deal.
Anyone else have any ideas they’d like to share for preparing corks for bottling wine?
Happy Winemaking,
Ed Kraus

———————————————————————————————————
Ed Kraus is a 3rd generation home brewer/winemaker and has been an owner of E. C. Kraus since 1999. He has been helping individuals make better wine and beer for over 25 years.