 Hi everyone! Leigh here!
I’m so excited to report to you all today as I’ve finally started batch #3 of my very own homemade wine! In case you didn’t read previous entries of mine, I’ll just remind you that several weeks ago I purchased a new home winemaking kit from ECKraus. Specifically, I purchased the Cellar Craft Showcase Red Wine – Chilean Carmenere. This is my first red wine I’ve tried to make in my new home winemaking practice! I’m glad I decided to go with a kit on this one and not try to figure out how to do it myself—there are a lot more steps needed during red winemaking, and since I have never made a red wine before, I wanted to make things as easy for me as possible. Having all the necessary wine making ingredients all in one place and detailed point-by-point instructions sounds pretty easy to me!
One thing I did a little differently this time compared to my previous two batches of wine was that instead of using bottled water, I used previously boiled tap water. I checked the water quality report of my city’s water, and it appeared as though chlorine levels were within the acceptable range. Even though these levels were “normal” and I could not smell any chlorine in the water, I decided to boil it just to be extra certain. Before I used the water, I let it cool down to an appropriate temperature so as to not kill the yeasts, so hopefully that’ll all work out for me.
Another thing I did differently in terms of what was recommended in the wine making instructions for the winemaking kit, was that I used my 6 gallon primary fermenter instead of the recommended 8 gallon fermenter. Based on the final level of the must after adding the crushed grape packet, my wine was still technically below the top of the fermenter, and in fact was only slightly higher than it had been for my previous batches of wine. I only hope that fermentation doesn’t go completely crazy and overflow with foam in the tight quarters, but I was willing to take that risk instead of buying another fermenter. Recall, I plan to purchase glass fermenters in the future, but space is extremely limited in my place right now, so I want to avoid purchasing new (large) items until that situation changes.
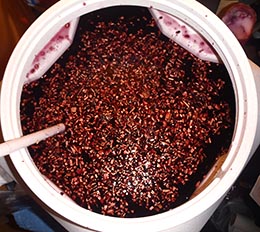
In regards to the crushed grape pack, the instructions said to put the pack into the supplied mesh bag, though a side note mentioned that some customers liked to put the pack directly into the fermenter without the protection of the bag. Putting the pack directly into the fermenter instead of into a mesh bag first may improve the color and flavor extraction of the grapes into the must and ultimately the finished wine. I decided to take this approach, and I did NOT put the grape pack in a mesh bag but instead squeezed it all in loosely. Side note: does this crushed grape pack remind anyone else of jelly? Because that’s all I could think about when squeezing out the contents into the fermenter!
Finally, I measured the specific gravity when it was instructed, and it turned out to be 1.098 (without temperature correction). I also measured the specific gravity 24 hours later, as the instructions mentioned this may be a more accurate reading, and it turned out to be 1.100 (without temperature correction). Looks like I’m off to a good start! Now I just need to stir the must at least once per day until Day 10 (secondary fermentation) and I should be good to go!
————————————————————————————————————-
 My name is Leigh Erwin, and I am a brand-spankin’ new home winemaker! E. C. Kraus has asked me to share with you my journey from a first-time dabbler to an accomplished home winemaker. From time to time I’ll be checking in with this blog and reporting my experience with you: the good, bad — and the ugly.
