 Having an infected homebrew beer happens to the best of us homebrewers at least once. In the interest of time or effort, you start cutting corners on your cleaning and sanitation regime. Maybe you notice a strange white film growing on the surface of your beer. Maybe something tastes sour or just plain “off.” It’s time to take a close look at your equipment and procedures to make sure everything is properly cleaned and sanitized before brewing another batch.
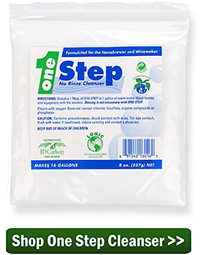
1. Check your bottles. A telltale sign that you’re experiencing some kind of infection is a ring of scum that forms in the neck of the beer bottle. This is a classic symptom of an infected homebrew beer. If you’ve had problems with back-to-back batches it’s possible that this is the source of the contamination. Soak the beer bottles in a hot water bath of One Step, then scrub them with a bottle brush to remove the deposits. Rinse well. Just to be sure, give them a nice long soak in a solution of bleach and water. Use unscented bleach, cold water, and a ratio of 1 ounce bleach per gallon of water. Give them at least 20-30 minutes to soak. (Note: Do not soak stainless steel in bleach.) Rinse well with hot water to drive off any residual chlorine. Follow this with a soak in your regular sanitizer before bottling your next batch.
2. Check your fermenters. If you’ve seen scum or mold on the surface of your beer while it’s in the bucket or carboy, you can be sure the source of the contamination is further up the line. Try the cleaning regimen above on your fermenter. If there is one, pay special attention to the spigot, taking it apart to scrub it inside and out.
 3. Check your racking equipment. Another possible cause of an infected homebrew beer is your racking equipment. Your auto-siphon, tubing, and bottling wand are a little more difficult to clean, so it’s important to clean them immediately after using them. If you suspect that your racking equipment is the source of your contamination, you may want to consider replacing them. Luckily these items are relatively inexpensive. It’s much better to replace a few feet of tubing rather than dump a batch.
4. Avoid aeration and too much headspace. Infection often comes from air being introduced to your homebrew after fermentation. After primary fermentation, a nice blanket of CO2 covers the beer, but you may lose that protective blanket if you move your homebrew to secondary fermentation. Minimize headspace in the secondary fermentation to avoid contact with air. Also, do your best to avoid splashing during racking from one fermenter to another or into your bottling bucket.
Making sure you don’t have infected homebrew beers isn’t difficult once you identify the common contamination points. Scrub well, use bleach when necessary, and replace equipment that’s past it’s prime to keep your beer fresh and tasting great!
—————————————————————————————————————–
David Ackley is a beer writer, brewer, and self-described “craft beer crusader.” He holds a General Certificate in Brewing from the Institute of Brewing and Distilling and is founder of the Local Beer Blog.
