Chris
Ed Kraus
———————————————————————————————————
Ed Kraus is a 3rd generation home brewer/winemaker and has been an owner of E. C. Kraus since 1999. He has been helping individuals make better wine and beer for over 25 years.
———————————————————————————————————
Ed Kraus is a 3rd generation home brewer/winemaker and has been an owner of E. C. Kraus since 1999. He has been helping individuals make better wine and beer for over 25 years.
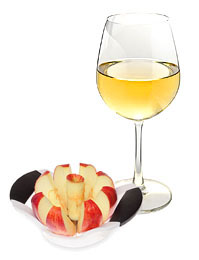
Can you make wine from cut up apples instead of using only juice. I found recipes for all kinds of whole fruit, but not apples. I have made several batches of wine with your products and they have all turned out well. I have a large apple tree and would like to make apple wine, but don’t want to squeeze the juice. I have made chokecherry and blueberry that are wonderful.
Name: Jerry S.
State: Nebraska
—–
Hello Jerry,
It is possible to make wine apple without a press and use cut up apples, instead. The issue is that water needs to be added along with the chopped apples to make it a fermentable must. The result is a weaker flavored apple wine than what you would get with straight apple juice. This is not a particularly good thing when you consider that fact that apples do not have that much flavor to begin with as compared to chokecherries and blueberries.
So you have to ask yourself if you would be happy making an apple wine that was a little lighter in body and with a little less flavor. If you’ve got the time and the apples would be going to waste anyway, I say go for it. If you have limited time and you’d eat the apples anyway, then I might reconsider, but of course, it’s up to you.
If you do decide on making apple wine without a press the first thing that should be realized is that if you are making 5 gallons, you will need about 10 gallons of fermenter volume. This is to make room for all the apples and water needed. By the time you remove all the apple solids during the fermentation you will be left with about 5 gallons.
To start out you will need to decide how you are going to chop the apples. I would suggest focusing on making slices of apples instead of cubes. This will allow more flavor to be extracted more easily during the fermentation. An apple coring/slicing knife would not be a bad option for this. You nee to be chopping about 80 pounds of apples to end up with 5 gallons of apple wine.
Dump all the sliced apples in the fermenter(s). Add a sugar/water mixture to fermenters until the apples are covered. This sugar/water mixture is made by dissolving 1-1/2 pounds of sugar to each gallon of water.
You will need to add acid blend to the apple must. For now, add 2 tablespoons to entire 5 gallon batch. If the batch is divided into two fermenters, put 1 tablespoon in each. This is just to get the acidity close enough for a proper, safe fermentation. Once the fermentation is complete and the apple wine has cleared and it is ready to be bottled, you will want to test the acidity with an acid test kit to make a final acidity adjustment.
You will also want to add yeast nutrient at the rate of 1 teaspoon per gallon of actual must. You will also need to add wine tannin — 1 teaspoon over the entire 5 gallon batch is plenty.
The final steps for preparing the apple wine must is to add 1 crushed Campden tablet per each gallon of wine must. If you have 10 gallons of actual must, add 10 tablets. Wait 24 hours for the Campden tablets to do their thing, then add a packet of Red Star Pasteur Champagne Wine Yeast. During this 24 hour period you want to leave the fermenter(s) uncovered, or covered with a very thin towel, at most.
From the point of adding the wine yeast on, the wine making process is like making any other wine. After 5 days or so you will want to remove the apple pulp and then get the wine must under air-lock. You may want to consider using a fermentation bag in the fermenter. This will make pulp removal a breeze. And, you will have a lot of it.
So there it is, all the steps for making apple wine without a press. Just understand that the flavor will be a little weaker, but it will most certainly taste like an apple wine.
Happy Winemaking,
Ed Kraus
———————————————————————————————————
Ed Kraus is a 3rd generation home brewer/winemaker and has been an owner of E. C. Kraus since 1999. He has been helping individuals make better wine and beer for over 25 years.
In several earlier posts, we introduced a few home winemaking terms that you may or may not be familiar with. There are many terms to learn in home winemaking, and this post, like all the previous posts, gives you a short introduction to a few of those terms to help you get started in home winemaking, or perhaps brush up on some of the terms you may not have seen in a while.
— Other Winemaking Terms You Should Know:
Part 4
Part 3
Part 2
Part 1
———————————————————————————————————
Ed Kraus is a 3rd generation home brewer/winemaker and has been an owner of E. C. Kraus since 1999. He has been helping individuals make better wine and beer for over 25 years.
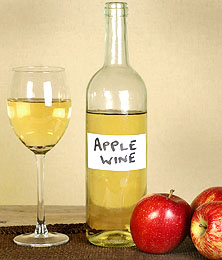
I am into the 5th day of the 2nd fermentation of my apple cider. I took a sample of the cider yesterday and found it to be very dry and cloudy. I have two questions. 1) Can I add sugar at this point to sweeten or will this just increase the alcohol content? 2) Can I add pectin at this time or is that only mixed with the must? Or is there a better fining additive? Thank you.
Name: Chuck F.
State: NY
—–
Hello Chuck,
You are correct in thinking that more sugar will only contribute to more alcohol. If you want to sweeten the wine you want to do it right before bottling, not day 5 of the fermentation.
Once the cider has come to a point that it is ready to bottle, add sugar to taste. The sugar should be in a simple syrup form made by heating up equal parts of sugar and water in a sauce pan. Add the sugar syrup to get the sweetness you like.
You will also need to add potassium sorbate at the same time to keep the fermentation from restarting. Potassium sorbate will keep a wine that is still and clear from starting a renewed fermentation. You may want to read more on sweetening your wine before actually doing it.
Most of the cloudy stuff you are seeing in the wine at this stage is yeast. A little packet of wine yeast will typically grow to 100 to 150 times what you put in. It is finer than flour, so it does take time for it to settle out.
It is completely normal for the cider to be cloudy at this stage. Once the fermentation stops, you will slowly see the cider begin to clear. It may take a week or two to completely clear, but it will clear. You can add bentonite to help speed up the clearing process, but do not add it before the fermentation has completely finished.
Now for your second question about adding pectic enzyme. If you have not added pectic enzyme to the cider, you should go ahead and do it now. We recommend adding double the recommended dosage. This is because you are adding it after the fermentation has started. You need more enzymatic power to get it up to speed.
Pectic enzyme does two things: 1) it helps to break down the pulp so that you can get more juice and flavor from it; 2) it breaks down pectin that can cause cloudy haze in the cider. You can read more about using pectic enzyme, as well.
I hope this helps you out. Just be a little patient. Give the wine some time and things should come together like they should.
Happy Winemaking,
Ed Kraus
———————————————————————————————————
Ed Kraus is a 3rd generation home brewer/winemaker and has been an owner of E. C. Kraus since 1999. He has been helping individuals make better wine and beer for over 25 years.
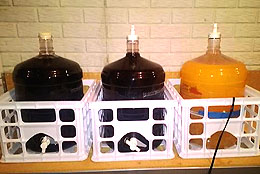
I’ve recently started making wine again after about ten years away and, of course, the changes in wine kits over that time are striking! Specifically, I’ve started three different kits from different manufacturers and followed each set of instructions accurately. All three completed fermentation (as measured by hydrometer), but the first one was visibly vigorous with a lot of foaming, the second just bubbled a bit and completed in only three days, and I had to look carefully at the third to see the tiny bubbles rising up the sides of the carboy. Why did these fermentations look so different, was one “better” than the others, and were these differences intentional by the manufacturers?
Name: Dave S.
State: Ohio
—–
Hello Dave,
Fermentations will more often then not will vary in both their appearance and speed, even when they are sitting side by side. Some of the reason for this is that there are just so many variables involved with a wine fermentation.
From the set of nutrients in one fermentation verses another, to the fact that one is slightly closer to the basement window than the other — all of these little things can make a difference in the way a wine ferments. And, the list of these little things (variables) goes on and on… They affect the fermentation time, and they effect the bubble rate.
But having said this there are two factors that trump all these variables: 1) what is being fermented, and 2) the type of wine yeast being used.
Different juices foam differently. They also vary in the set of nutrients they provide for the fermentation. These nutrients can directly affect the wine yeast’s ability to ferment. Some wine yeast will foam more than others. It just part of their character. Some yeast will also ferment harder than others, given the same set of fermentation variables.
Now for a final word. None of this matters. How much the fermentation foams or how quickly it finishes will have no direct effect on the final outcome of the wine. Whether it is 3 days or 10 days, it will result in the same wine when matured 6 months down the road.
What does matter is that the best wine yeast for the particular job at hand is used. That is why these kit manufactures will use an array of different yeast strains across their line of wine kits. Some work better with certain wine juices then others. Some of it is because of the flavor nuances the wine yeast provides. Some of it is because it is better at fermenting the situation at hand. Here is a yeast profile chart that may help you to understand this a little more clearly.
Thanks for the great question and happy wine making,
Customer Service at E. C. Kraus
———————————————————————————————————
Ed Kraus is a 3rd generation home brewer/winemaker and has been an owner of E. C. Kraus since 1999. He has been helping individuals make better wine and beer for over 25 years.
In several earlier posts, we introduced a few home wine making terms that you may or may not be familiar with. There are many terms to learn in home winemaking, and this post, like all the previous posts, gives you a short introduction to a few of those terms to help you get started in home winemaking, or perhaps brush up on some of the terms you may not have seen in a while.
———————————————————————————————————
Ed Kraus is a 3rd generation home brewer/winemaker and has been an owner of E. C. Kraus since 1999. He has been helping individuals make better wine and beer for over 25 years.
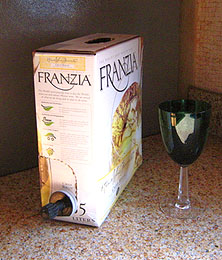
Is it ok to use boxed wine containers for my homemade wine, after removing spigot, and using Camden tabs to clean container? Spigot is easily removed and replaced. I make 15 gal every run, bottles get expensive. Thanks
Name: Dale
State: TN
—–
Hello Dale,
No one here has any specific experience with reusing box wine container bags for homemade wine. I haven’t heard of any of our customer doing this either, so I don’t have any direct experience with using them. But knowing what I do know about wine and storage, I see know reason why you couldn’t reuse the bag-in-a-box container.
The biggest concern is sanitation. If remnants of the original wine has been sitting in the bag for some time, weeks maybe, and has become dried, it could be hard to get the box wine container bag completely sanitized. But on the other hand, if you rinse the original wine out as soon as you empty the box bag, it should be fairly easy to sanitize.
As far as sanitizers go, I would suggest using CleanPro SDH in the bag. Realize that the only way you are going to get it completely sanitize is to fill the box bag completely up to maximum capacity. The sanitizing solution needs to come in contact with all surfaces. This will not happen unless the bag is fully expanded and wrinkles eliminated.
Also, you will want to add sulfites to the wine just before putting the homemade wine in the box wine bag. This can be in the form of either: Campden tablets, potassium metabisulfite or sodium metabisulfite. It doesn’t’ matter. This suggestion is no different than if you where putting your homemade wine up in wine bottles.
When actually sealing the wine bag shut, you will want to eliminate any air pockets in the wine bag. Any air in the bag will only contribute to oxidation.
My personal thought is that reusing box wine containers bags for homemade wine does have potential, but there may be some problems to look out for as well, particularly when it comes to long-term storage and aging. Will the wine age well? Will the bag’s plastic allow too much air to permeate and facilitate oxidation?
I would like to also point out that there is a similar product that can be used for this purpose. We have been selling Reliance containers for over 30 years for both fermenting and dispensing. Like the bag-in-a-box containers, they collapse as the wine is decanted.
Happy Winemaking,
Ed Kraus
———————————————————————————————————
Ed Kraus is a 3rd generation home brewer/winemaker and has been an owner of E. C. Kraus since 1999. He has been helping individuals make better wine and beer for over 25 years.
The wine kits I use come with Bentonite. I am preparing to start my first batch of hard cider, from scratch. Should I use Bentonite in that also?
Name: Betsy L
State: WI
—–
Hello Betsy,
Thanks for the great question about using bentonite! Before I answer your question I would like to go over some things about how bentonite is used in winemaking.
The reason bentonite is used in the wine with the wine ingredient kits is so that the wine will clear up more quickly and be ready to bottle in the 28 days, as these kits promise. The bentonite is put in the wine at the beginning of fermentation.
This is somewhat unusual in winemaking since fining agents are typically added after the fermentation, not before. But you can get away with it if you know the dosage to add and have bench-tested this amount such as the wine ingredient kit producers have done.
The amount of bentonite used in a wine is critical when added before the fermentation. Use too much and you will drag out all the wine yeast and stop the fermentation; don’t use enough and there’s no early clearing of the wine/cider.
To answer your question, yes, go ahead and put bentonite in the wine, but do not use it before the fermentation, but rather, after the fermentation has completed. The dosage listed on the container will be intended for use at this time. It is a much larger dose than what would be used before the fermentation.
Also realize that if you didn’t use any bentonite in the wine at all, it would more than likely clear up on its own just fine anyway. Just not as quickly. Bentonite is generally used in wine right after to the fermentation to speed up the process and make it more stable sooner, not necessarily to make the wine better.
Thanks again for such a great question about bentonite and its use in winemaking. We have more information on using bentonite before the fermentation if you are interested.
Happy Winemaking,
Ed Kraus
———————————————————————————————————
Ed Kraus is a 3rd generation home brewer/winemaker and has been an owner of E. C. Kraus since 1999. He has been helping individuals make better wine and beer for over 25 years.
In some earlier posts, we introduced a few home winemaking terms that you may or may not be familiar with. There are many terms to learn in home winemaking, and this post, like the previous posts, will give you a short introduction to a few of those terms to help you get started in home winemaking, or perhaps brush up on some of the terms you may not have seen in a while.
———————————————————————————————————
Ed Kraus is a 3rd generation home brewer/winemaker and has been an owner of E. C. Kraus since 1999. He has been helping individuals make better wine and beer for over 25 years.
When making my wine I have never topped up on the first or second racking. I have had great results but a few people tell me I need to be topping up the wine. I could see topping up the wine if I was batch aging, but for the 4 weeks I hold and rack after primary fermentation I am no so sure. It should be mentioned I am usually only down much less than a liter. Your thoughts?
Name: Mike in B’ville
State: NY
—–
Hello MIke,
If you are making wine from a box wine ingredient kit topping up the wine is not recommend. Partially for the reasons you gave about it not being that long of time, but also because these kit manufacturers produce the wine in such a way that they do not oxidize very easily. This is just one of the many advantages of using a wine ingredient kit.
However, if you are making a wine from fresh fruit or fresh juice the story is a little different.
First off, you don’t need to be topping up the wine while the fermentation is occurring. This is because the CO2 gas (carbon dioxide) coming off the fermentation keeps the air away and protects it from oxidation. The CO2 is slightly heavier than air, so it wants to create a protective blanket across the surface of the wine.
Even when the fermentation has completely stopped, as long as you have not taken the air-lock off the fermenter, there is no reason to be topping up the wine. The CO2 gasses from the fermentation are still trapped in the head-space of the fermenter. No air is in the head-space.
But the moment you remove the air-lock or take the lid off the fermenter, all the rules change. You are then in a situation where not only is topping up important but vital to the color and flavor of the wine.
What is topping up a wine?
What is meant by topping up a wine is increasing the volume of the wine so as to reduce the amount of head-space in the vessel. To be more specific, the exact goal here is to eliminate as much surface contact between the wine and the air. You want this contact to be as minimal as possible.
In the case of a carboy, when you increase the volume of the wine you push the surface of the wine from the shoulders into the neck. It goes from maybe a square foot of surface contact area to maybe 2 square inches.
Hope this info helps you out,
Ed Kraus
———————————————————————————————————
Ed Kraus is a 3rd generation home brewer/winemaker and has been an owner of E. C. Kraus since 1999. He has been helping individuals make better wine and beer for over 25 years.