Darn It! My Mead Won’t Ferment!

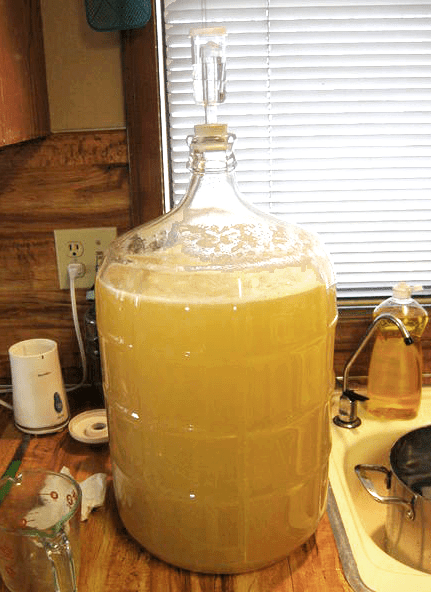
This is the mead that won't ferment.I seem to have a problem making mead. It starts off with an SG [specific gravity] of 1.100 and over a period of 3 days, during primary fermentation it drops to 1.060 and seems to stop. I think that the fermentation has just slowed down and rack it into a secondary fermenter and install an air lock. I rack it a month later and the SG is 1.040. Now it has been three months and the SG is 1.030. Is this normal? Why is it my mead will not ferment?

Thanks Sam
—–
Hello Sam,

Turning honey into alcohol can sometimes be a difficult task for a wine yeast. This is due mostly to the complexity of some of the sugars contained within the honey, but some of it is also due to the set of nutrients that the honey provides to the wine yeast. Both are issues as to why your mead will not ferment, and both need to be addressed.

Honey has simple sugars as well as complex sugars and everything in between. This is true with all fruits as well, but typically not to the degree as with honey. Simple sugars are easily metabolized by the yeast into alcohol, but complex sugars are not so easily fermented. A complex sugar is a chain of simple sugars that are bound together on a molecular level. These long chains must first be broken apart before they can be metabolized into alcohol by the wine yeast.

Enzymes are produced by the yeast during a fermentation that will help to break down the complex sugars, but often in the case of honey, it is not enough enzyme to keep the fermentation going in a timely manner.
Shop Yeast EnergizerHoney has all different lengths (complexities) of sugar chains. So what happens as the fermentation begins, the wine yeast start off by consuming the simplest sugars first — the lowest hanging fruit — so to speak. As the simple sugars are depleted the yeast move on to the next easiest sugars and so on until there is nothing left but the most complex, longest chains of sugars.

This is what has happened with your fermentation. It started off just fine as it began its way metabolizing the simplest sugars, but when the remaining sugars became nothing but the most complex it became too much of a burden for the wine yeast. The enzymes that the yeast were able to produce were not enough to keep the fermentation going at a reasonable rate. All the yeast was able to do was nibble at the remaining long chains of sugar as it slowly produced the enzymes.

So what can you do? Your only defense is to make sure your yeast stays as healthy as possible by providing it with all the nutrients it needs. This will help the yeast to more readily produce enzymes. Many mead recipes will call for nutrients at the beginning of the fermentation. The trouble is that these nutrients will have long been consumed by the time the yeast get to the difficult part of the fermentation.Shop Magnesium Sulfate
At this point, I would recommend adding 1/2 teaspoon of Yeast Energizer for each gallon of mead. This should give the yeast a kick-start. If magnesium sulfate was not called for by the mead recipe, then I would recommend adding it as well at the rate of 1/4 teaspoon per 5 gallons.

Sam, in the future I would make sure that you add both of these at the beginning of the fermentation – regardless of what the recipes says. And if the fermentation starts to slow down at some point, be prepared to add a second dose of yeast energizer.

I hope this have given you some insight as to why sometimes a mead will not ferment. If you would like more information about making mead, you may want to take a look at the article, Making Wine With Honey that is listed on our website. It has some more insights to fermenting honey along with a few mead recipes.Shop Wine Making Kits
Best Wishes,
Ed Kraus
—–
Ed Kraus is a 3rd generation home brewer/winemaker and has been an owner of E. C. Kraus since 1999. He has been helping individuals make better wine and beer for over 25 years.

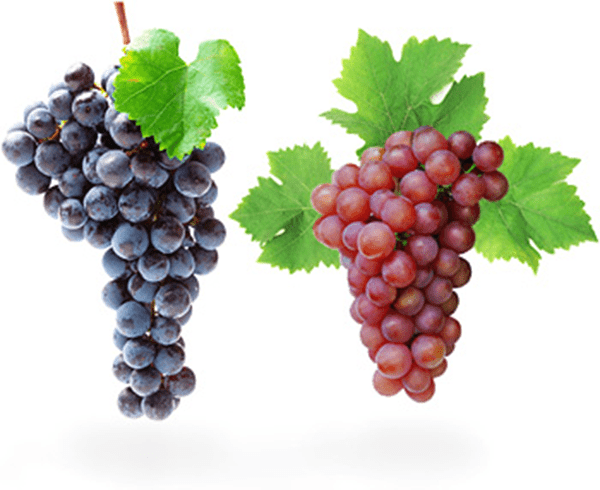
Table Grapes Vs. Wine Grapes For Wine Making

Table Grapes vs Wine GrapesHello Kraus,
Please explain to me what is the difference between wine grapes and table grapes.
Thank you,
Mert B.
—–
Hello Mert,
This is a great question and one that gets down to the basics of learning how to make your own wine.
There are many significant differences between wine making grapes and table grapes – eating grapes as you called them:
Table grapes are crunchy-er with a stronger skin and firmer pulp than wine grapes. This not only makes them more pleasant and appealing to eat, but it also makes them hold up to the rigors of being transported long distances to your local market. As a consequence, grape you buy at the store tend to have less juice in relation to the amount of pulp.
The juice you get from the eating grapes is also not as sweet as the juice from wine grapes. A typical brix reading for table grapes is 17 to 19, whereas wine grapes are around 24 to 26 brix. This is important because it is the sugar that gets turned into alcohol during a fermentation — less sugar, less alcohol.
*Brix is a scale that represents the amount of sugar in a liquid as a percentage. It is the standard scale used by refractometers which are used to take these readings in the vineyard.
Another significant difference is that the acidity level of table grapes tend to be slightly lower that the average wine grape. This is to increase the grapes impression of sweetness while on the market. Buy Wine Kits
Having said all this, you can learn how to make your own wine using grapes you buy from the grocery store. You can run them through grape presses to get all the pulp out of the way. You can add extra sugar to bring the brix level up to that of a wine grape juice. And, you can adjust the acidity of the juice by adding acid blend to raise the acid level to what’s need for wine.
But all of this will not change the leading factor that makes a table grape far different from a wine grape… and that is flavor. While table grapes taste fine for popping into your mouth as a snack, once fermented, the flavor of the resulting wine is fairly uneventful and could also be described as non-existent.
While table grapes could be used for learning how to make your own wine – as a practice run, so to speak – do not expect this wine to bring any enthusiastic raves from family, friends and neighbors. The wine will be drinkable and may even be pleasant, but it will not be stellar.
Mert, I hope this answers your question about table grapes and wine grapes. It is a question that we get fairly often, so I plan on posting it on our wine making blog.  If you have anymore questions, just let us know. We want to do everything we can to help you become a successful home winemaker.
Happy Wine Making
Ed Kraus
—–
Ed Kraus is a 3rd generation home brewer/winemaker and has been an owner of E. C. Kraus since 1999. He has been helping individuals make better wine and beer for over 25 years.

Champagne Celebration: Make your Next Party Sparkle

champagne2Making your own Champagne (*cough* sparkling wine for us home wine-makers) is not much different from the traditional home wine-making process. By simply substituting your yeast and adding more sugar, you can add bubbles to your favorite wine recipe or concoct a brand new favorite that is best suited as a sparkling wine. Champagnes and sparkling wines can be expensive and we want to help you get the best bubbles for your buck.
We know you’ve heard this 1,000 times before, but we are obligated to say it again – most Champagnes available are not truly champagne, but are actually sparkling wines. True Champagne must be produced in the legally identified northern region in France and have the fermentation process (giving the wine its bubbles) occur in the bottle. The Champagne Bureau in Washington, D.C. works to educate U.S. consumers about the uniqueness of the wines of the Champagne region in France and expand their understanding of the importance that location plays in the creation of all wines. You can find out more about the Bureau Du Champagne, USA on their website.
Now that formalities have been established and expectations are set, making your own Champagne (but actually sparkling wine) is an easy addition to the wine-making process and can be done so for a relatively inexpensive cost. Of course, this will be far from the authentic method for making Champagne, but you will get a similar desired effect. Adding a dry white/sparkling yeast will ferment crisp and dry, as well as low in foam, to make your favorite wine recipe bubbly!
Whether the occasion is New Year’s Eve, celebrating a birthday, or just relaxing after a long day, here are two recipes that will be sure to hitch your taste buds on the bubbly bandwagon.
Pro tip: You’re going to need a hydrometer for this champagne recipe.
Essential tools for the job:
Dry White/Sparkling Yeast
Bottles (need 6 per gallon)
YOU MUST USE CHAMPAGNE BOTTLES. Regular wine bottles will not even begin to hold the pressure that will be produced.
Wire Hoods
Champagne Stoppers
Champagne Foil Capsules (optional)
Directions:
Step One: Start with your favorite base wine, Follow the The 7 Easy Steps to Make Wine all the way through fermentation. Be sure to use your Dry White/Sparkling Yeast.
Step Two: Siphon the wine into an open bucket after fermentation. The wine should be a little cloudy at this point, add some yeast sediment to the bucket from the bottom of the fermentation bottles if it is not.
Step Three: Make and add simple sugar syrup (ratio: 100 grams of cane sugar per gallon of wine). Simply heat to boil a mixture of two parts sugar to one part water to make the syrup. Stir the syrup while adding to the wine and be gentle!
NOTE: You must confirm with a hydrometer that the original fermentation has completed before adding the sugar syrup. Otherwise, too much carbonization will occur in the bottle. This can be done by making sure the hydrometer reads .998 or less on the specific gravity scale.
Step Four: Immediately siphon the wine champagne bottles and add their caps. Again, you MUST use champagne bottles as regular wine bottles will NOT be able to handle the pressure.
Step Five: Store the bottles upright and in a cool place for at least three months. Let the wine stand until it is crystal clear (this may take an additional month or two). After this standing period, refrigerate and store the bottles at 32 °F
Step Six: Open, pour, and enjoy!!
For our ambitious wine-makers, you can also follow the full process as done in the Champagne region of France to make your home wine as authentic as possible. Though don’t despair about getting your homebrew exactly right, they’ve had centuries to perfect the recipe and process. Pressing, first fermentation, assemblage, second fermentation, remuage, aging (for a least 15 months), disgorgement, dosage, and the finishing touch of corking and consuming have all been dialed-in to a science for creating the perfect Champagne. You can read more on this traditional methode Champenoise or methode traditionelle process from Fine Wine Concierge.
You can also try adding fruit to your champagne or sparkling wine recipe to enhance the flavors and add a new layer of fun to your wine making process. Enjoy your bubbles!
Happy Wine Making,
Ed Kraus
—–
Ed Kraus is a 3rd generation home brewer/winemaker and has been an owner of E. C. Kraus since 1999. He has been helping individuals make better wine and beer for over 25 years.
Featured Product
[bigpres skus=”GL310″ overlay=”no” animation=”fade” direction=”top” show_img=”yes” show_name=”yes” show_price=”yes” show_arrow=”no” hide_button=”no” link_to=”product” per_row=”4″ size=”medium” type=”card” show_content=”no” drop_shadow=”yes” /]

Controlling Your Wine's Acidity With An Acid Testing Kit

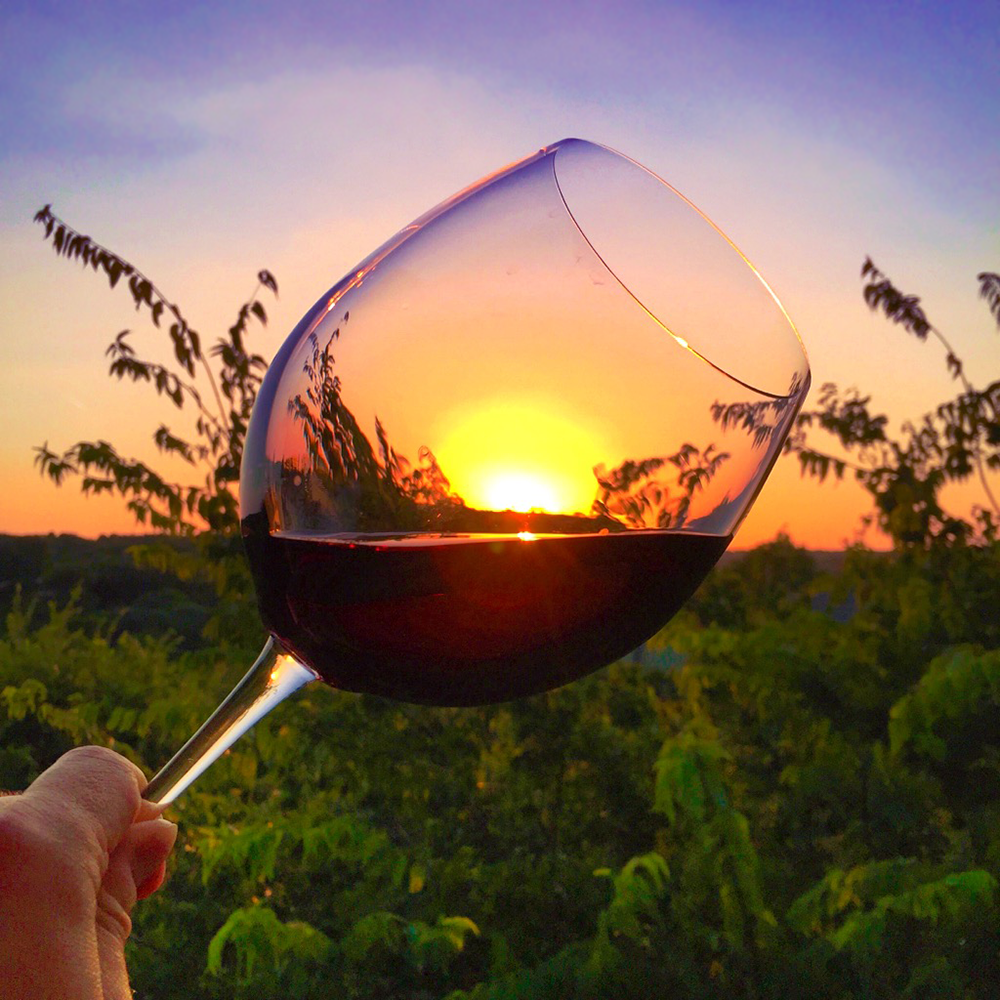
Holding Glass Of WineOne of a wine’s primary flavor elements is acidity. Wines that are high in acid will taste sharp or sour, while wines low in acid will taste lifeless or flabby. Without a doubt, having the proper amount of acid is crucial to the flavor of your wine.
In many fruit wine recipes, the amount of acid or acid blend that should be added to the wine must is listed right along with the other wine making ingredients. By adding the acid blend called for, you are bringing the acid level of the wine up to a normal flavor range.
The reason you are able to get your wine into a proper range using these wine recipes with no issue is primarily because they are made up of a significant amount of water. This makes the amount of acid blend needed very predictable since a only a fraction of the total acidity is coming from the fruit itself.
But there are situations where acidity is not so predicable and acid readings need to be taken to know how much acid blend, if any, needs to be added. Such is usually the case when making wine from actual wine grapes, where the wine is made up of 100% grape juice with no water. If the acidity of the grapes are unusually high or low in a particular year, the flavor of the resulting wine will be negatively affected. In this scenario, taking an acid reading with an acid testing kit can be just as critical as taking a sugar level reading with a wine hydrometer.
Acid readings are normally taken right before fermentation, or right after the grapes have been ran through the grape crusher. Adjustments may be made at this time based on the reading given.
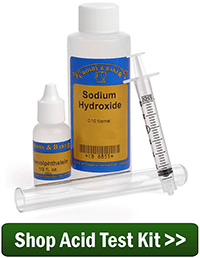
Buy Acid Test KitTaking readings with an acid testing kit is very straight-forward. Essentially, what you are doing is preforming a titration. A drop or two of activator is added to a measured sample of the wine. Then measured amounts of a reagent are added to the wine until you detect a permanent color change in the wine sample. By knowing how much reagent it took to change the wine’s color, you can accurately calculate the wine’s acid level. You can read more about this in the blog post Use an Acid Test Kit.
If the acidity is too low you add acid blend; if the acidity is too high you can dilute with water. We also have wine making products such as acid reducing crystals that are designed to reduce the acidity of the wine. The acid reducing crystals come with directions that will tell you how much to add to reduce the acidity by a specific amount.
—————
Ed Kraus is a 3rd generation home brewer/winemaker and has been an owner of E. C. Kraus since 1999. He has been helping individuals make better wine and beer for over 25 years.

Wine of the Month: Apple Wine

Apple wine, also commonly referred to hard cider, is one of the oldest fermented beverages in the United States. This crisp, sweet wine can be made from fresh apples, apple concentrate, or even apple cider. Even better, October is the perfect time to pick apples from your local orchard. Fall is a great time to make this wine. Read on to find out more about apple wine, along with our exclusive recipe and wine pairing tips.
Continue reading

Wine of the Month: Pear Wine

Our wine of the month is pear wine. This lightly colored, sweet wine packs in the nutrients given the healthful properties of its main ingredient: pears. In addition to a delicious recipe, we’ve got some useful tips so you get the most flavor out of your wine.
Why should I make pear wine?
Pears are a member of the rose family of plants and are chockfull of antioxidants, dietary fiber, and flavonoids. In fact, about half of the fiber found in the pear can be found in its skin. The phylonutrients contained in this delicious fruit not only contain antioxidants and anti-inflammatory flavonoids, but also contain cinnamic acids that can help prevent cancer and decrease the risk for Type 2 Diabetes. Pears, along with apples, are known to have the second highest number of flavonols among all fruits and veggies.
Now let’s get to the wine part. Due to the fact that pear wine is a fruit wine rather than a grape wine, it has a higher ORAC content. In short, this means that it’s winning the antioxidant game. We’ll cheers to that!
Recipe:
Makes about 5 gallons
20lbs of Pears
10 lbs. of Sugar
1 tbsp. of Yeast Energizer
1/2 tsp. of Pectic Enzyme
3 tbsp. of Acid Blend
1/2 tsp. Wine Tannin
Yeast EC-1118
There are a few things to keep in mind while you’re making your pear wine. For the best results, you should slightly over ripen the pears. This is key, because they aren’t an extremely flavorful fruit by nature. If you don’t let them ripen, the wine will have more of an apple flavor. Let them get extremely soft (without rotting) and you’ll set yourself up for success. Also ensure that you rinse your pears before you crush them.
Where and how can I find pears?
The state of Washington is the largest grower of pears in the United States. It accounts for half of all of the pears distributed in the country, followed by California and Oregon. Most of the pears found in US grocery stores fall into the European Pear category. They can be found in green, yellow, red, gold, and brown. Once you find them at the grocery store, you’ll need to give them a few days to ripen. Just make sure you watch them carefully, because once they ripen, they tend to perish quickly. It can be hard to determine ripeness because many pears do not change color as they ripen.
What foods does pear wine pair best with?
Given pear wine’s light and refreshing taste, it pairs well with bold and flavorful cheeses like blue cheese and goat cheese. Spread some cheese on a cracker and sip some pear wine in between for the perfect pre-dinner snack. As for main courses, pear wine tastes great with white meats, either baked or roasted. Finish off the meal with a fruit or nut-based dessert and you’ve successfully and deliciously paired your pear wine!

Ready to Make Your Own Wine? Make Sure You Do These 3 Things Before You Start

Making wine for the first time can often make you feel like a mad scientist. Even when following a recipe step-by-step, uncertainty about the finished product remains. Will it taste good? Did I add enough yeast? How long is too long for fermentation? These are all questions you may ask yourself the first time you make wine.
Perfecting the art of making wine takes practice and several batches. However, there are a few things you can do to make sure your first batch doesn’t leave you with a bad taste in your mouth. Continue reading

Other Ways To Seal Wine Bottles

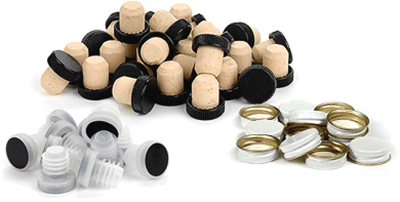
Closures that provide other ways to seal wine bottles.Many beginning winemakers will be happy to know that you do not have to buy a corker to seal your wine bottles. We have other ways to seal wine bottles during the wine making process. Consider the alternatives listed below for your next batch!
When you go to buy wine corks for your wine bottles you will find that most of them require a corker to press the cork into the wine bottle. This is because a new cork starts out much fatter than what you are used to seeing coming out of the wine bottle when decanting.
These are the type of wine corks we recommend using, particularly if you know you’re going to continue to make more wine into the future. But, if you are not sure if you’ll be making more wine, or you just don’t feel like buying a corker, just yet, there are other ways to seal your wine bottles.
Mushroom corks are an easy way to seal your wine bottles without using a corker. They are basically a cork with a plastic grip top. They come both in natural cork and synthetic cork. With some force they can be pushed in by hand to create a tight seal. While they do not seal quite as tight as traditional corks being pressed in, they are more than sufficient for any wine that will be consumed within 12 months.
Another way to seal your wine bottles that does not require a corker is our reusable wine bottle stoppers. Just like the mushroom corks, these stoppers can be put in by hand as well. Their unique design of ridges creates a series of chambers to produce a seal. While these stoppers are not all that attractive for passing out as wine making gifts, they can be covered up with decorative heat shrink capsules to give them a professional look.Shop Heat Shrink Capsules
And yes, you can always use screw cap wine bottles. By using screw caps you will be sealing the wine bottle air-tight, however you must have the right screw cap on the right bottle. Not any wine bottle can take a screw cap; it must specifically be a screw cap wine bottle. And, the screw caps you are using must be the correct size with matching threads. Not all threads are the same.
In summary, you do not have to buy a corker. There are other ways to seal a wine bottle. But, if you plan to continue making wine corks and a corker are your best long-term option.
Happy Wine Making,
Ed Kraus
———————————–
Ed Kraus is a 3rd generation home brewer/winemaker and has been an owner of E. C. Kraus since 1999. He has been helping individuals make better wine and beer for over 25 years.