As a result of homebrewing gaining popularity across the country, homebrewing competitions are cropping up more often. These contests are a great way to meet other local homebrewers, develop bonds and perhaps, most importantly, sample some high-quality beers. When an experienced homebrewer invests in the high quality ingredients for a homebrew, the results can surpass anything you’ll find in a grocery store.
Although the sense of community is one of the greatest draws of a homebrewing competition, everyone is there for the same reason: to have their beer sampled and judged by professionals, as well as by fellow brewers. Everyone wants to do his or her best, but a homebrewer’s first foray into competitive homebrewing can be intimidating, and there are some traps that you’re likely to fall into if you aren’t properly prepared.
Fortunately, you can improve your initial performance at a homebrewing contest by embracing a few tips and tricks.
Make entries based on the end result, not the intention.
Not every homebrew turns out according to plan. Some might be pleasant surprises while others fall short of your mark. While you might appreciate the craftsmanship and artistry employed in a specific homebrew, it’s irrelevant if that work doesn’t come through in the finished product. Ultimately, you want to choose the beer that will perform best in a blind taste test among judges who know nothing about how the beer was produced.
You should also be mindful of the flexibility in how you enter a beer. If you attempted to make an IPA but failed to reach the desired original gravity during production, you could always enter the beer as a pale ale – since it won’t have those distinctive IPA characteristics, it might score better as a result.
Respect the qualities of your beer’s category.
You might be attracted to the idea of making a stout that defies the characteristics of a traditional stout, but that’s likely to not go over well at a homebrew competition. When judges sample flights, they’re not only looking for good beer; they also want brews that embody the characteristics of their category. Rather than defy these qualities, make sure they’re present in your homebrew and then use additional flavors, aromas and techniques to make the beer stand out.
Start out small and work your way up.
A big competition may be tempting, but smaller homebrew contests might be a better place to start. Many smaller homebrew competitions are better about providing comments attached to scores. These insights can help guide your future brewing and ultimately make you a better craftsman.
Of course, if you’re eager to test your brew on the biggest stage, there’s the National Homebrew Competition, which takes place annually in April. You could also submit your brew to the Great American Brew Festival Pro-Am — this competition requires that each entry be based on past award-winning homebrew recipes. Otherwise, check with your local clubs and breweries to learn more about options in your area.
You might not experience overnight success at your first homebrew competition, but you’re sure to gain valuable experience while meeting other passionate practitioners. Once you’re comfortable with the homebrewing process, find a contest and put you and your brews in the spotlight.
Category Archives: Home Beer Brewing
A History of Home Brewing: Colonial Crafting
Though it has enjoyed a recent run of popularity, the hobby of home brewing has quite a pedigree – one that stretches back over three centuries in America.
New Beer for a New World
Home brewing was once a matter of survival – when the Pilgrims arrived in the 1620s, they built the nation’s first brewery to start setting up their new home. The process of brewing killed the pathogens and bacteria that lurked in regular drinking water, making a safe liquid for the intrepid new-worlders to use for slaking their thirst.
One Nation, Drinking Beer
Home brewing became such an everyday occurrence in colonial times that several of America’s first presidents indulged in their own brews – most notably Thomas Jefferson and George Washington. Like tending fields or keeping the pantry stocked, brewing was simply another chore to be done around the house – albeit a delicious one.
Banned Brews
The Prohibition Act of 1919 didn’t simply put an end to bars and public establishments serving up suds, it also dropped the hammer on home brewing efforts. Beer, wine, and other liquors were no longer allowed to be created in the home until 1933, when the 21st Amendment made at least some home-brewed products legal once more. To every beer enthusiast’s sadness, however, a clerical error left off that pair of very important words – “and beer.” This meant that home beer brewers would have to wait until President Carter set things right in 1978 through the passage of H.R. 1377.
Brewing Up the Future
Today, home brewers enjoy unprecedented access to specialty equipment, such as the bottles and kits offered on the web by home brew supplier Adventures in Homebrewing. By using these tools, any beer enthusiast can now create their very own ales, stouts, and lagers in the privacy of their own backyard or basement. Everyone, that is, except for Alabamians – Alabama is the last state in the United States that still considers brewing beer at home an illegal activity. While this is unfortunate for residents of the southern state, the rest of the nation is busily crafting their own beer while simultaneously honoring the efforts of their pilgrim predecessors.
Tips and Tricks to Home Brewing in the Summer
No home brewer wants to take summers off, but the high heats brought on by this season create some challenges. When homebrew temperatures increase beyond their ideal zones, it can ruin a batch of beer. Summer then becomes a serious threat to your brew if you’re unable to regulate the temperature in your storage area, such as an unfinished basement.
Despite this complication, there’s no reason to hold off on home brewing when the summer heat strikes. Take advantage of the following tips and tricks to preserve the quality of your homebrew throughout the warm season.
Lower wort temperatures quickly
Chilling wort in short order is key to the quality of the finished product. An immersion wort chiller is less effective in the summer because the water running into the lines is warmer than what you get in the winter — summer water is usually above 60 degrees. One easy tip for cooling wort is to freeze plastic jugs of water and to then set them into a water bath that half submerges the fermenter. This water bath works well in conjunction with an immersion wort chiller.
Choose brews ideal for warmer temperatures
Every beer has its ideal fermenting temperature. In the summer, it’s easiest to simply choose beer types that are best in warm weather. According to HomebrewJunkie.com, Belgian Saisons usually start the fermenting process at 75 degrees, and some home brewers have successfully allowed fermentation temperatures to increase to 90 degrees. A beer that accommodates a warmer fermentation temperature will be much easier to manage as outdoor temperatures increase.
Use fans and cool wraps to keep down temperature
One simple trick is to place cool towels over the carboy, and/or to keep a fan blowing onto the container at all times. This will help reduce heat during fermentation. The use of a fan can drop fermenting temperatures by as much as 10 degrees. You’ll want to keep an eye on water levels, though, because this method of cooling can cause some evaporation.
Buy or build a temperature-controlled container
It’s not the preferred method of temperature regulation because it can get costly, but if other cooling methods fail, it’s about your only option.
Keep a close eye on fermenting temperatures at the start of this process and be prepared to make adjustments. It may take a little trial and error, but you should be able to find ways to overcome the challenge of summer’s heat wave.
Why is Sugar Necessary in My Home Brew Process?
Quick – name something intriguing and sweet that also produces beer and liquor. No, not your favorite bartender – it’s sugar. This complex ingredient is not only a vital component in the creation of home brew products, it’s also a large part of the taste profile that gives various liquids their drinkable personalities. While some sugars are simply added during the initial brewing process, others contribute simply by existing in ingredients such as fruits for wines. Sugar isn’t simply a one-note contributor, either; while the overall level of sugar used in a home brew needs to be monitored, blends of different types of sugars can produce a full-bodied and delicious spirit.
Feeding The Yeast
For something so small, yeast packs a big punch. This one-celled organism is responsible for the fermentation, otherwise known as breaking down sugars to turn them into alcohol, process of home brewing. According to popular how-to site HowStuffWorks, “yeasts obtain food from fructose, glucose, and other monosaccharaides (simple sugars), which are found in most fruits.” This means that without the addition of some sort of sugar in sufficient quantities during the brewing process, you’ll end up with an old bottle of yeast-filled grape juice instead of a smooth wine. Feeding yeast sugar also produces carbonation, a necessary component to satisfying home-brewed beers.
Adjusting To Your Taste
When it comes to sugar, these sweet powerhouses aren’t just workhorses. Beyond the fermentation process, sugar also makes a finished spirit palatable, helping to balance stronger flavors like hops or slightly bitter flavors like herbal additives. Sugar can also be a final flourish during bottling, as well. A recent article from the San Antonio Current follows home brewer Jerry Lockey as he adds extra sugar prior to siphoning his latest project into bottles. In the article, Lockey explains to the Current that this last dash of sugar helps further ferment the new beer as it ages.
Sugar comes in several different varieties for home brewing projects, such as corn sugar and light and dark candied sugar for brewing various types of ales. Stumped for what sugars will work best with your brew? With a full range of articles, advice, and helpful customer service agents, the Adventures in Homebrewing website has all the “sweet” knowledge you’ll need to bottle a sensational spirit. Once you find the right sugars for your project, ferment something fantastic and you’ll discover just how impressive a single home brewing ingredient can be.
What Should I Know About Home Brewing with Raw Honey?
When making alcoholic beverages using honey, mead is generally the go-to by-product. In fact, you can find a wide variety of meads on the market that blend honey with inventive ingredients and flavor profiles into their drink. However, that’s far from the end of the line when it comes to brewing and fermenting with honey. Whether you homebrew wine, beer, or cider, you can incorporate honey for a fun, exciting twist in your brew.
Honey is highly fermentable, which makes it a great ingredient in alcoholic beverages. When you’re using raw honey though, you need to be mindful of a few variables and considerations that could affect your end product. Here’s a quick guide to help you make the most of this fantastic ingredient.
Honey’s flavor ferments out if you aren’t careful.
Honey is composed of dense carbohydrates, but the fermentation process can eat up its character. If you simply add honey to the fermentation process you’ll likely end up with very little honey character, if it’s noticeable at all. That’s fine if you simply want a lighter body and higher alcohol content, but raw honey typically isn’t used for that purpose. To retain the character of the honey you need to add diluted, heat-treated honey to the primary fermenter.
Enzymes and wild yeast need to be taken care of.
According to Brew Your Own, raw honey features wild yeast and other enzymes that could negatively affect the quality of your fermented beverage. There are two ways to handle these organisms before they have a chance to ruin your brew. The simplest method is adding honey into a long, roiling boil right at the start of the cooking process. This will denature enzymes, kill any yeast, and remove any beeswax still present in the honey. The downside to this harsh process is that the high, immediate heat can hurt the natural smells and flavors of the honey, impacting the end product.
By contrast, you could attempt home pasteurization. This process will preserve the qualities of the honey character, but it’s a fairly involved process that only experienced brewers should attempt.
Add honey based on your desired end product.
It comes as no surprise that different amounts of raw honey produce different results. When deciding how much to add, measure your honey as a percentage of total fermentables in the brew. Anything below 10 percent is intended to provide light notes and flavors of honey to the brew. If your brew is between 11 and 30 percent you should expect a strong honey flavor. This can be balanced out by stronger flavors in other ingredients, as well as dark specialty malts.
It may take a little trial and error, but raw honey can be a fantastic addition to your brewing arsenal, whether it’s cider, beer or wine. Try out some different recipes and see what works best for you.
10 Things to Know Before Brewing Your Own Hard Cider
If you’ve made hot apple cider on the stove, you’ve had a simple introduction to the cider-making process. However, hard cider is a different animal. There are a lot of variables that can affect the quality of the beverage.
Before you dive into your first batch of hard cider, read these 10 tips on how to brew a great batch. Continue reading
How Will I Know When to Use Stabilizer?
Brewing wine or beer at home requires some basic knowledge about the different stabilizers that are used. Although the stabilizers for wine and beer differ, determining when to use the stabilizing agent has certain similarities.
Increasing the Shelf-Life
The most common use of a stabilizer for beer or wine is related to the shelf life of the final product. A stabilizing agent is added after brewing the beer or wine to keep the final product good for a longer period of time.
In the case of beer, stabilizing agents are used to slow the development of haziness. When haziness develops, beer is no longer good. A stabilizing agent for beer can work in one of two ways: it will either degrade the proteins that cause haziness or it will bond to the proteins so that the beer lasts longer in storage.
When it comes to wine, stabilizing agents are added to increase the shelf life and prevent re-fermentation from occurring. When a stabilizer is added to wine, it will last longer even if it is not possible to store it in a cellar or fridge.
Adding for Flavor Maintenance
Although the primary purpose of a stabilizer for both wine and beer is increasing the shelf life of the brew, it can also help maintain flavor in particular situations.
A stabilizer is always added to sweet wines because it is possible for re-fermentation to occur. The stabilizer maintains the flavor of the wine by preventing it from starting to ferment a second time. Although it is appropriate to prevent re-fermentation in sweet wines, it is not necessary to add the stabilizer to a dry wine. Dry wines do not have room for more fermentation.
Stabilizers do not have much impact on the flavor of beers except as it relates to shelf life. If a beer does not have excellent taste before adding a stabilizer, it will not improve when the stabilizer is added.
Equipment Considerations
A stabilizing agent is not useful when the wine or beer has a poor flavor. When brews are consistently coming out with a poor flavor, it is best to look at the cleanliness and sanitation of the equipment or the filtration system. Poor taste is more often the result of equipment problems or minerals in the water than the wine or beer going bad in a short period of time.
The decision to add a stabilizer to wine or beer is a personal choice. Stabilizers can help increase the shelf life and maintain a good flavor, but it does not help if the original flavor was not good. Deciding when to add stabilizers will depend on personal goals and the type of brew.
Best Way to Clean my Homebrew Kit and Other Equipment
Although a homebrew kit and other brewing equipment will have some basic instructions for sanitation, it is not always enough to simply clean off all of the minerals on the equipment. When minerals or organic materials used in brewing are left behind, the next batch of beer will not come out the way it is expected. Fortunately, cleaning the homebrew kit and equipment properly is not a hard process.
Scrub the Equipment
The best way to clean any kit and equipment used in brewing is by scrubbing away the visible dirt, debris, materials and stains. Start the process by rinsing off as much large debris or items as possible.
After rinsing, apply an appropriate cleaner to the equipment. The best cleaner is a powdered brewery wash, or PBW, which is designed specifically for cleaning the kit and equipment. If the brewery wash is not available, then a powdered oxy cleaner, liquid dish soap, or baking soda is also appropriate.
Remove any dirt, stains, or debris with a small amount of water with a cleaner and a scrub pad or brush. If the equipment is plastic, then use a terry cloth to avoid leaving behind scratches. Rinse the equipment until the cleaner is completely removed.
Sanitize the Equipment
Cleaning and sanitizing are not the same process. Sanitizing is only performed after the cleaning is complete because it is not possible to sanitize the debris left behind. Sanitation is the process of killing any microscopic organisms that are left behind after cleaning.
Sanitizing your homebrew equipment is a simple process. A sanitizing chemical, such as One Step No Rinse Cleanser or sodium metabisulphate, is dissolved in water and allowed to sit on the equipment and kit for the duration of time specified in the directions. In most cases, sanitizers will sit for roughly five minutes to bring the level of yeast, bacteria, and other microscopic concerns to a minimum. Don’t worry about knowing specifics; these sanitizers will have specific instructions on how to determine the amount of time and ingredients required.
Similar to wine, there are so many types of cleaners on the market you probably won’t know what is going to work best for you until you try them. If One Step and sodium metabisulphate don’t do the trick you can always try B-Bright Cleaner, Cleanpro SDH or campden tablets. Check out our full line of home wine making cleaning supplies and homebrew cleaning supplies for your system today. Cleaning is not only vital to getting the best taste; it is also a simple process.
How Can One Organize Your Own Brew Fest?
Forget Octoberfest–this is your fest.
If you’re passionate about beer, home brewing, and everything that has to do with beer sampling and know of others that share the same interests, why not take a shot at organizing and starting your own brew festival tradition? There’s a lot that you’ll need to do and a lot of duties to assign, but if it all comes together, your own brew fest can be a fun, rewarding experience.
So what exactly do you need to do to plan your own beer festival? Here’s a look:
Gauge Interest: The first step in planning any festival– especially if it’s a first festival–is to gauge interest. Do this by putting out feelers to local breweries and pubs in your area to see if they would be interested in attending and maybe even in helping you promote it. Talk with the owners about this. As people who deal with a clientele of beer enthusiasts on a daily basis, they’ll be able to give you a better idea of how successful–from a participation standpoint–a brew fest might be.
Set a Date, Venue, and Logistics: If you’re confident a brew fest will be well attended, then the next step is setting a date, selecting a venue, and working out other various logistics. For instance, if your brew fest is taking place outside, you’ll likely need to look into tents, porta potty rentals, security, and maybe even a rain contingency plan. In line with other logistics you’ll need to work out, consider planning special events and competitions for your brew fest. Taste tests, home brewing competitions and beer pong all make for good events at beer brew festivals. Don’t forget to check for any necessary permits you might need!
Seek Sponsorship: If you can secure any sponsorships for your brew fest you can save organizational costs, and can charge cheaper admission prices. Circle back to the local breweries and pubs you visited when seeing whether or not your brew fest was feasible and ask if they’d be willing to sponsor the event.
Market and Advertise: The final step is to market and advertise your brew fest. See if local businesses will hang flyers in their windows to help spread the word and consider buying ad space in your local newspaper. Create a press release and send it to local media outlets to see if they’ll add the brew fest to their event calendars. Also encourage any sponsors to help promote the event.
It’s a lot of work planning and organizing your own brew fest and a lot more work on the day-of to ensure it goes off successfully. But doing so can be a fun, rewarding experience that may spur a new tradition. Make it even more fun and try to promote your home brewed beer to promote at the festival! You can get everything you’ll need right from our website.
Are Older Wines Better Wines?
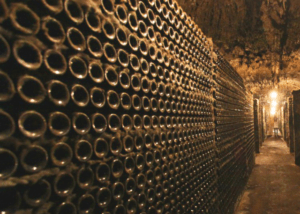 When you see pictures of French wine caves and elaborate wine cellars in the homes of movie stars, it’s easy to get the impression that old wines are better than wines that have been recently bottled. But the truth isn’t nearly so cut and dry. In fact, many wines are at their best in their first few years, and even the best-aged wines reach a point where time diminishes their flavor rather than enhancing it. The secret to an ideal experience is knowing which types of wine actually do taste better with age and how long to leave them in the bottle.
Wines That Get Better with Age
For some wines, aging in the bottle softens them and allows their full complexity to be enjoyed. Most, but not all, of these are full-bodied reds. According to Better Tasting Wine, the following wines should be allowed to age in the bottle for maximum enjoyment:
- Old World Cabernet Sauvignon (Bordeaux, Meritage, California wines made in the French style) — 20+ years
- French Merlot (St. Emilion, Pomerol) — 15 to 20 years
- Syrah (Shiraz) — 5 to 15 years
- Riesling — up to 15 years
- White Bordeaux (made from Semillon) — 20+ years
- Champagne (top quality) — 20+ years
- Sauterne — up to 100 years
Wines to Drink Young
For purposes of wine, young is generally defined as five years old and younger. One of the most notable wines that are at its best as soon as it is bottled is the French Beaujolais Nouveau. The new vintage of this product of Burgundy, made with Gamay grapes, is released each year on the third Thursday of November to much excitement and headlines. However, Beaujolais isn’t the only wine that can be enjoyed to its fullest while young. Better Tasting Wine lists several types that are best when consumed in less than five years:
- Pinot Noir
- Red Zinfandel
- Chardonnay
- Sauvignon Blanc
So don’t worry if you don’t have the time or the space to age wines for decades. You can enjoy plenty of quality wines right out of the wine store. Salut!